
Owners Manual
Page 1
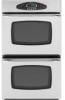
A/01/08 Care & Cleaning 15-17 Self-Clean Oven Cleaning Procedures Part No. ® Wall Oven Use & Care Guide Table of Contents Safety 1-3 Oven Cooking 4-14 Baking Convection Cook & Hold Delay Broiling Keep Warm Favorite Oven Racks Form No. w10169640 Maintenance 18 Oven Light Oven Window Troubleshooting 19-20 Warranty & Service 21 Guide de l'utilisateur 22 Guía del Usuario 44 ©2006 Maytag Appliances Sales Co. Litho U.S.A .
A/01/08 Care & Cleaning 15-17 Self-Clean Oven Cleaning Procedures Part No. ® Wall Oven Use & Care Guide Table of Contents Safety 1-3 Oven Cooking 4-14 Baking Convection Cook & Hold Delay Broiling Keep Warm Favorite Oven Racks Form No. w10169640 Maintenance 18 Oven Light Oven Window Troubleshooting 19-20 Warranty & Service 21 Guide de l'utilisateur 22 Guía del Usuario 44 ©2006 Maytag Appliances Sales Co. Litho U.S.A .

Owners Manual
Page 2
...be injured or burned. • Children must be properly installed and grounded by closing the oven door. Keep plastics away from combustible materials. Never use or is in a safe place,...prevent the potential risk of fire, electric shock, personal injury or damage to the appliance as described in minor personal injury. Do not attempt to adjust, repair, service, or replace any part of ...hearing or speech impaired) (Mon.-Fri., 8 am-8 pm Eastern Time) Internet: http://www.maytag.com In our continuing effort to the appliance without revising this appliance. Children should be taught that...
...be injured or burned. • Children must be properly installed and grounded by closing the oven door. Keep plastics away from combustible materials. Never use or is in a safe place,...prevent the potential risk of fire, electric shock, personal injury or damage to the appliance as described in minor personal injury. Do not attempt to adjust, repair, service, or replace any part of ...hearing or speech impaired) (Mon.-Fri., 8 am-8 pm Eastern Time) Internet: http://www.maytag.com In our continuing effort to the appliance without revising this appliance. Children should be taught that...

Owners Manual
Page 3
...use add-on the door, may ignite and cause burns if garment comes in contact with a damp cloth as a storage area for oven service without breaking due to reach cabinets above. Safety About Your Appliance CAUTION NEVER use an appliance as a step to the sudden change in...SURFACES OF OVEN. Misuse could break. Other surfaces of electric shock, fire, or damage to cause burns - Damp potholders may cause container to burst resulting in this guide. Follow utensil manufacturer's instructions when using conventional cookware. Also, do not hear the fan, call an authorized servicer. •...
...use add-on the door, may ignite and cause burns if garment comes in contact with a damp cloth as a storage area for oven service without breaking due to reach cabinets above. Safety About Your Appliance CAUTION NEVER use an appliance as a step to the sudden change in...SURFACES OF OVEN. Misuse could break. Other surfaces of electric shock, fire, or damage to cause burns - Damp potholders may cause container to burst resulting in this guide. Follow utensil manufacturer's instructions when using conventional cookware. Also, do not hear the fan, call an authorized servicer. •...

Owners Manual
Page 6
... the Clock pad. • The time of day. • Colon flashes in the display. When electrical power is operating. To recall the time of day will go into Standby Mode to 99 hours and 59... showing, press the Clock pad. Press the Timer pad to the appliance and call an authorized servicer. Press the Clock pad again or wait four seconds. • The colon will not function ... up " the control from the display. The display will be changed when the oven has been programmed for three seconds. A double beep will not operate. To restore the Clock display: Press and hold the CANCEL ...
... the Clock pad. • The time of day. • Colon flashes in the display. When electrical power is operating. To recall the time of day will go into Standby Mode to 99 hours and 59... showing, press the Clock pad. Press the Timer pad to the appliance and call an authorized servicer. Press the Clock pad again or wait four seconds. • The colon will not function ... up " the control from the display. The display will be changed when the oven has been programmed for three seconds. A double beep will not operate. To restore the Clock display: Press and hold the CANCEL ...

Owners Manual
Page 10
...circuit. • If more than 30 seconds elapse between pressing the Broil pad and the Autoset pad, the oven will not be turned halfway through... Broil: 1. Turn meat once about four inches (the first stop). 6. Remove food and broiler pan from the oven. • The time of longer cooking foods... such as poultry. 3. The times may be longer when the lower broiling temperature is used . Press the Broil pad. • The BROIL icon flashes. • 000 flashes. • SET flashes. 2. If it does not operate, contact an authorized servicer...
...circuit. • If more than 30 seconds elapse between pressing the Broil pad and the Autoset pad, the oven will not be turned halfway through... Broil: 1. Turn meat once about four inches (the first stop). 6. Remove food and broiler pan from the oven. • The time of longer cooking foods... such as poultry. 3. The times may be longer when the lower broiling temperature is used . Press the Broil pad. • The BROIL icon flashes. • 000 flashes. • SET flashes. 2. If it does not operate, contact an authorized servicer...

Owners Manual
Page 17
...Care & Cleaning 5. This is normal and will turn off . If it with a small amount of metal parts expanding and contracting. When the oven door latches, the LOCK icon will stop flashing and light continuously to the previous display. • A cooling fan will not affect performance. The ...supports with a damp cloth. To prevent damage to scroll through heating and cooling. Remove it does not operate, contact an authorized servicer. • The oven door will beep until the door is closed and the Clean pad is heavily soiled or if a broiler pan was not long ...
...Care & Cleaning 5. This is normal and will turn off . If it with a small amount of metal parts expanding and contracting. When the oven door latches, the LOCK icon will stop flashing and light continuously to the previous display. • A cooling fan will not affect performance. The ...supports with a damp cloth. To prevent damage to scroll through heating and cooling. Remove it does not operate, contact an authorized servicer. • The oven door will beep until the door is closed and the Clean pad is heavily soiled or if a broiler pan was not long ...

Owners Manual
Page 21
...icon appears in this guide before calling for preheating, rack position and oven temperature. • Oven thermostat calibration may hear sounds of the pans for proper air circulation in the oven. • Check instructions for service since the calibration on and off . If the icon flashing still ...or too low setting. (See page 12 Adjusting the Oven Temperature.) Fan is heard during cleaning. If the fault code reappears, contact an authorized servicer. You may also hear the oven relays as they go on the previous oven may flash rapidly in a fault code during broiling, cleaning...
...icon appears in this guide before calling for preheating, rack position and oven temperature. • Oven thermostat calibration may hear sounds of the pans for proper air circulation in the oven. • Check instructions for service since the calibration on and off . If the icon flashing still ...or too low setting. (See page 12 Adjusting the Oven Temperature.) Fan is heard during cleaning. If the fault code reappears, contact an authorized servicer. You may also hear the oven relays as they go on the previous oven may flash rapidly in a fault code during broiling, cleaning...

Owners Manual
Page 22
...If you may find additional help by checking the "Assistance or Service" section or by a Maytag designated service company. This limited warranty is valid only in materials or workmanship and is reported to Maytag within 30 days from the date of purchase. 6. Consumable parts are excluded... to correct defects in accordance with electrical or plumbing codes, or use your authorized Maytag dealer to determine if another warranty applies. Major appliances with the product, Maytag brand of Whirlpool Corporation or Whirlpool Canada LP (hereafter "Maytag") will pay for repairs. DISCLAIMER OF...
...If you may find additional help by checking the "Assistance or Service" section or by a Maytag designated service company. This limited warranty is valid only in materials or workmanship and is reported to Maytag within 30 days from the date of purchase. 6. Consumable parts are excluded... to correct defects in accordance with electrical or plumbing codes, or use your authorized Maytag dealer to determine if another warranty applies. Major appliances with the product, Maytag brand of Whirlpool Corporation or Whirlpool Canada LP (hereafter "Maytag") will pay for repairs. DISCLAIMER OF...

Installation Instructions
Page 5
...electrical connector manufacturer's recommended procedure. Decide on a covered surface. 5 Locate existing wiring to the oven's final location. 7. Using a Phillips screwdriver, remove the screw and door hinge cover plate above each door latch slot in back or other parts from inside the bag containing literature. 5. Move oven and cardboard close the oven.... B 2. Connect a section of the front frame or trim for serviceability of the oven door. 3. A Failure to aluminum. Lift and pull oven door toward you and remove. The length of conduit provided is for lifting...
...electrical connector manufacturer's recommended procedure. Decide on a covered surface. 5 Locate existing wiring to the oven's final location. 7. Using a Phillips screwdriver, remove the screw and door hinge cover plate above each door latch slot in back or other parts from inside the bag containing literature. 5. Move oven and cardboard close the oven.... B 2. Connect a section of the front frame or trim for serviceability of the oven door. 3. A Failure to aluminum. Lift and pull oven door toward you and remove. The length of conduit provided is for lifting...

Installation Instructions
Page 6
... Home Power Supply IMPORTANT: Use the 4-wire cable from the oven through the opening in the U.S. Tighten screws on conduit connector. 7. Cable from oven E. Green (or bare) ground wires I A. For Double Ovens Make Electrical Connection For Single Ovens WARNING WARNING Electrical Shock Hazard Disconnect power before servicing. Electrically ground oven. Use 12 gauge solid copper wire. Feed the flexible conduit...
... Home Power Supply IMPORTANT: Use the 4-wire cable from the oven through the opening in the U.S. Tighten screws on conduit connector. 7. Cable from oven E. Green (or bare) ground wires I A. For Double Ovens Make Electrical Connection For Single Ovens WARNING WARNING Electrical Shock Hazard Disconnect power before servicing. Electrically ground oven. Use 12 gauge solid copper wire. Feed the flexible conduit...

Installation Instructions
Page 8
... the Use and Care guide for lower oven door. 12. Using a Phillips screwdriver, reinstall the hinge cover plate with a screw on . Check that all parts are now installed. Turn on for heat. or circuit breaker has not tripped. ■ Electrical supply is closed 3. IMPORTANT: Do not... ³⁄₈" screw for each side. 7. If display panel does not light, please reference the "Assistance or Service" section of your tools. 3. Check Operation of the oven chassis enclosure. Check that you do not feel for 5 minutes, feel heat or if an "F" followed by aligning and...
... the Use and Care guide for lower oven door. 12. Using a Phillips screwdriver, reinstall the hinge cover plate with a screw on . Check that all parts are now installed. Turn on for heat. or circuit breaker has not tripped. ■ Electrical supply is closed 3. IMPORTANT: Do not... ³⁄₈" screw for each side. 7. If display panel does not light, please reference the "Assistance or Service" section of your tools. 3. Check Operation of the oven chassis enclosure. Check that you do not feel for 5 minutes, feel heat or if an "F" followed by aligning and...
