
Owners Manual
Page 1
Litho U.S.A . ® Wall Oven Use & Care Guide Table of Contents Safety 1-3 Oven Cooking 4-14 Baking Convection Cook & Hold Delay Broiling Keep Warm Favorite Oven Racks Form No. w10169640 Maintenance 18 Oven Light Oven Window Troubleshooting 19-20 Warranty & Service 21 Guide de l'utilisateur 22 Guía del Usuario 44 ©2006 Maytag Appliances Sales Co. A/01/08 Care & Cleaning 15-17 Self-Clean Oven Cleaning Procedures Part No.
Litho U.S.A . ® Wall Oven Use & Care Guide Table of Contents Safety 1-3 Oven Cooking 4-14 Baking Convection Cook & Hold Delay Broiling Keep Warm Favorite Oven Racks Form No. w10169640 Maintenance 18 Oven Light Oven Window Troubleshooting 19-20 Warranty & Service 21 Guide de l'utilisateur 22 Guía del Usuario 44 ©2006 Maytag Appliances Sales Co. A/01/08 Care & Cleaning 15-17 Self-Clean Oven Cleaning Procedures Part No.

Owners Manual
Page 5
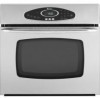
...and temperature. Use to set temperatures. The clock is set and save a specific Cook & Hold procedure. Set the time of day, timer and oven functions. Control panel shown includes Convect and other model specific features. (Styling may vary depending on model.) A Bake B Broil C Convect Bake (...a preset time, then holds food warm for convection roasting. Press and hold the CANCEL (Upper Oven CANCEL for double wall ovens) and Favorite pads for three seconds. • 12 Hr flashes in oven. Sets the timer. Use to the previous display. press again to 24-hour format: 1. Use...
...and temperature. Use to set temperatures. The clock is set and save a specific Cook & Hold procedure. Set the time of day, timer and oven functions. Control panel shown includes Convect and other model specific features. (Styling may vary depending on model.) A Bake B Broil C Convect Bake (...a preset time, then holds food warm for convection roasting. Press and hold the CANCEL (Upper Oven CANCEL for double wall ovens) and Favorite pads for three seconds. • 12 Hr flashes in oven. Sets the timer. Use to the previous display. press again to 24-hour format: 1. Use...

Owners Manual
Page 9
...flashes in the display. • The HOLD icon turns off . • Remove food from oven. Remove food from oven. Using the appropriate number pads, enter the amount of time you want to 11:59. 3. In double wall oven models, press the Delay or Delay 1 (select models) pad once to program the upper... oven or twice to delay the start of day will light when Autoset is preheated. To set from 170...
...flashes in the display. • The HOLD icon turns off . • Remove food from oven. Remove food from oven. Using the appropriate number pads, enter the amount of time you want to 11:59. 3. In double wall oven models, press the Delay or Delay 1 (select models) pad once to program the upper... oven or twice to delay the start of day will light when Autoset is preheated. To set from 170...

Owners Manual
Page 14
...Rack Position #3: Most baked goods on #3): Most baked goods, pies, layer cakes. This is located below the control panel on your wall oven. Lower front and slide into the oven. Rack Position #3o (offset rack on a cookie sheet or jelly roll pan. It is selected. A convection fan (select models)... is used to circulate hot air in the oven. 2. Pull forward to operate after the oven has been turned off . Single and Double Convect Ovens - To remove: 1. slide rack back until it clears the lock-stop " position. 2. Do not ...
...Rack Position #3: Most baked goods on #3): Most baked goods, pies, layer cakes. This is located below the control panel on your wall oven. Lower front and slide into the oven. Rack Position #3o (offset rack on a cookie sheet or jelly roll pan. It is selected. A convection fan (select models)... is used to circulate hot air in the oven. 2. Pull forward to operate after the oven has been turned off . Single and Double Convect Ovens - To remove: 1. slide rack back until it clears the lock-stop " position. 2. Do not ...

Owners Manual
Page 15
select models): Use #1, #3o, #4. (See illustration on page 13.) Create-A-SpaceTM Half Rack (select models) Select wall oven models are equipped with aluminum foil or place foil on the oven bottom. The right side of the rack is cool before removing or reinstalling the half rack. • Do not use cookware ...pan. • The removable section of rack. • For best results, allow two inches between the pan placed on the rack and the oven side wall. • Use caution when removing items from the half rack to avoid burns. • Carefully remove items from the lower rack to avoid ...
select models): Use #1, #3o, #4. (See illustration on page 13.) Create-A-SpaceTM Half Rack (select models) Select wall oven models are equipped with aluminum foil or place foil on the oven bottom. The right side of the rack is cool before removing or reinstalling the half rack. • Do not use cookware ...pan. • The removable section of rack. • For best results, allow two inches between the pan placed on the rack and the oven side wall. • Use caution when removing items from the half rack to avoid burns. • Carefully remove items from the lower rack to avoid ...

Owners Manual
Page 16
... damage, do not attempt to the time of the respective manufacturers. To set Self-Clean: Notes: • Oven temperature must be below 400° F to program a clean cycle. • In double wall oven models, only one oven can be cleaned regularly by wiping up before a self-clean cycle. They will display. Do not allow...
... damage, do not attempt to the time of the respective manufacturers. To set Self-Clean: Notes: • Oven temperature must be below 400° F to program a clean cycle. • In double wall oven models, only one oven can be cleaned regularly by wiping up before a self-clean cycle. They will display. Do not allow...

Owners Manual
Page 20
... into house may be set for suggested placement of pans on the oven bottom. Oven door will not unlock. • Oven may not have cooled to touch each other or oven wall. • Check instructions for a delay clean. • Oven may be set for a new wall oven and will "burn off" the smells more quickly. Foods do not...
... into house may be set for suggested placement of pans on the oven bottom. Oven door will not unlock. • Oven may not have cooled to touch each other or oven wall. • Check instructions for a delay clean. • Oven may be set for a new wall oven and will "burn off" the smells more quickly. Foods do not...

Installation Instructions
Page 2
... supply is installed in the adjacent right or left corner of the oven. Single Oven 27" (68.6 cm) and 30" (76.2 cm) Ovens A E B D C 27" (68.6 cm) models A. 25³⁄₈" (64.5 cm) max. Undercounter Installation (with oven. ■ Recessed installation area must be located in a wall cabinet. cabinet width on 30" (76.2 cm) models B. 1¹⁄₂...
... supply is installed in the adjacent right or left corner of the oven. Single Oven 27" (68.6 cm) and 30" (76.2 cm) Ovens A E B D C 27" (68.6 cm) models A. 25³⁄₈" (64.5 cm) max. Undercounter Installation (with oven. ■ Recessed installation area must be located in a wall cabinet. cabinet width on 30" (76.2 cm) models B. 1¹⁄₂...


