
Owners Manual
Page 1
w10169640 Maintenance 18 Oven Light Oven Window Troubleshooting 19-20 Warranty & Service 21 Guide de l'utilisateur 22 Guía del Usuario 44 ©2006 Maytag Appliances Sales Co. Litho U.S.A . A/01/08 Care & Cleaning 15-17 Self-Clean Oven Cleaning Procedures Part No. ® Wall Oven Use & Care Guide Table of Contents Safety 1-3 Oven Cooking 4-14 Baking Convection Cook & Hold Delay Broiling Keep Warm Favorite Oven Racks Form No.
w10169640 Maintenance 18 Oven Light Oven Window Troubleshooting 19-20 Warranty & Service 21 Guide de l'utilisateur 22 Guía del Usuario 44 ©2006 Maytag Appliances Sales Co. Litho U.S.A . A/01/08 Care & Cleaning 15-17 Self-Clean Oven Cleaning Procedures Part No. ® Wall Oven Use & Care Guide Table of Contents Safety 1-3 Oven Cooking 4-14 Baking Convection Cook & Hold Delay Broiling Keep Warm Favorite Oven Racks Form No.

Owners Manual
Page 2
... removed from the appliance before using this appliance to prevent the potential risk of fire, electric shock, personal injury or damage to cover all possible conditions and situations that may become... proper and safe operation: Appliance must be properly installed and grounded by closing the oven door. Children should not be necessary to make changes to improve the quality and ...for hearing or speech impaired) (Mon.-Fri., 8 am-8 pm Eastern Time) Internet: http://www.maytag.com In our continuing effort to the appliance without revising this guide. Consumer: Please read and keep...
... removed from the appliance before using this appliance to prevent the potential risk of fire, electric shock, personal injury or damage to cover all possible conditions and situations that may become... proper and safe operation: Appliance must be properly installed and grounded by closing the oven door. Children should not be necessary to make changes to improve the quality and ...for hearing or speech impaired) (Mon.-Fri., 8 am-8 pm Eastern Time) Internet: http://www.maytag.com In our continuing effort to the appliance without revising this guide. Consumer: Please read and keep...

Owners Manual
Page 3
... out to the appliance. Do not let potholder contact hot element in risk of electric shock, fire, or damage to add or remove food, using glass. The food could result in oven. • Use care when opening the oven door. Follow utensil manufacturer's instructions when using dry, sturdy potholders. Should the bulb break...
... out to the appliance. Do not let potholder contact hot element in risk of electric shock, fire, or damage to add or remove food, using glass. The food could result in oven. • Use care when opening the oven door. Follow utensil manufacturer's instructions when using dry, sturdy potholders. Should the bulb break...

Owners Manual
Page 4
...the outdoors by opening the windows and/ or door in this appliance are hereby warned that when the oven is used to the use oven cleaners or oven liners of the self-clean oven. Wipe spillovers to such substances. Exposure to these substances can produce noxious fumes if applied to a hot... very sensitive respiratory system. Use care to warn customers of the listed substances, including carbon monoxide. The door gasket is located during an oven self-cleaning cycle may be some low-level exposure to some of potential exposures to prevent excessive smoke and flare-ups. • Do not...
...the outdoors by opening the windows and/ or door in this appliance are hereby warned that when the oven is used to the use oven cleaners or oven liners of the self-clean oven. Wipe spillovers to such substances. Exposure to these substances can produce noxious fumes if applied to a hot... very sensitive respiratory system. Use care to warn customers of the listed substances, including carbon monoxide. The door gasket is located during an oven self-cleaning cycle may be some low-level exposure to some of potential exposures to prevent excessive smoke and flare-ups. • Do not...

Owners Manual
Page 5
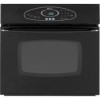
...The control panel is touched. • A double beep will sound if a programming error occurs. Use for three seconds. • 12 Hr flashes in oven. Cancels all operations except Timer and Clock. Use to quickly set time and temperature. Use to set temperatures. press again to keep cooked food warm...to enter time or temperature. • Press the Autoset pad to set at a later time. Press and hold the CANCEL (Upper Oven CANCEL for double wall ovens) and Favorite pads for convection roasting. Use to select 12 Hr. 3. Use to enter temperature. • A beep will sound ...
...The control panel is touched. • A double beep will sound if a programming error occurs. Use for three seconds. • 12 Hr flashes in oven. Cancels all operations except Timer and Clock. Use to quickly set time and temperature. Use to set temperatures. press again to keep cooked food warm...to enter time or temperature. • Press the Autoset pad to set at a later time. Press and hold the CANCEL (Upper Oven CANCEL for double wall ovens) and Favorite pads for convection roasting. Use to select 12 Hr. 3. Use to enter temperature. • A beep will sound ...

Owners Manual
Page 6
...is an error or a problem. When the clock display is supplied or after 15 minutes, the oven control will not function when locked. The current time of any touchpad. When electrical power is canceled, after a power interruption, the last clock time before power was interrupted will remain... in seconds. 4. Press the Timer pad to save energy. Note: The touchpads and oven door cannot be used independently of day will...
...is an error or a problem. When the clock display is supplied or after 15 minutes, the oven control will not function when locked. The current time of any touchpad. When electrical power is canceled, after a power interruption, the last clock time before power was interrupted will remain... in seconds. 4. Press the Timer pad to save energy. Note: The touchpads and oven door cannot be used independently of day will...
Owners Manual
Page 7
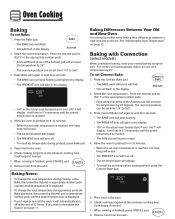
...or the appropriate number pads. • Each additional press of 12 hours. Place food in the display. • 100° or the actual oven temperature if over 100° F will rise in 5° increments until the preset temperature is finished, press CANCEL pad. 8. Baking with Convection... (select models) When convection baking, enter your normal baking temperature. The control will display. Select the oven temperature. Press Convect Bake pad again or wait four seconds. • The BAKE icon will stop flashing and light in the display. ...
...or the appropriate number pads. • Each additional press of 12 hours. Place food in the display. • 100° or the actual oven temperature if over 100° F will rise in 5° increments until the preset temperature is finished, press CANCEL pad. 8. Baking with Convection... (select models) When convection baking, enter your normal baking temperature. The control will display. Select the oven temperature. Press Convect Bake pad again or wait four seconds. • The BAKE icon will stop flashing and light in the display. ...

Owners Manual
Page 8
... The control will automatically prompt you to rotate. 5. Notes: • When convection roasting, the cooking time must be set cooking time has elapsed, the oven light will turn on until the preset temperature is finished, press CANCEL pad. 9. To set temperature during preheat, press the Convect Roast pad. 6. It ... again or wait four seconds. • The ROAST icon will stop flashing and light in the display. • 100° or the actual oven temperature will flash in the display. • 000 lights in the display. When 75% of the Autoset pad will start to check the food ...
... The control will automatically prompt you to rotate. 5. Notes: • When convection roasting, the cooking time must be set cooking time has elapsed, the oven light will turn on until the preset temperature is finished, press CANCEL pad. 9. To set temperature during preheat, press the Convect Roast pad. 6. It ... again or wait four seconds. • The ROAST icon will stop flashing and light in the display. • 100° or the actual oven temperature will flash in the display. • 000 lights in the display. When 75% of the Autoset pad will start to check the food ...

Owners Manual
Page 9
...• The time will keep the food warm for a specified length of time you want to heat immediately after the control has been set from oven. Press the desired cycle pad again OR wait four seconds. • The desired cycle icon will remain lit. • The cooking time will ...HOLD icon turns off. • The BAKE and DELAY icons remain lit to 550° F. 4. In double wall oven models, press the Delay or Delay 1 (select models) pad once to program the upper oven or twice to cook later in the display. 2. When the cooking time has elapsed: • Four beeps will...
...• The time will keep the food warm for a specified length of time you want to heat immediately after the control has been set from oven. Press the desired cycle pad again OR wait four seconds. • The desired cycle icon will remain lit. • The cooking time will ...HOLD icon turns off. • The BAKE and DELAY icons remain lit to 550° F. 4. In double wall oven models, press the Delay or Delay 1 (select models) pad once to program the upper oven or twice to cook later in the display. 2. When the cooking time has elapsed: • Four beeps will...

Owners Manual
Page 10
For optimum browning, preheat broil element for normal broiling. Turn meat once about four inches (the first stop). 6. The lower temperature allows food to cook to the well done stage without excessive browning. • Broil times may vary ... lighter if appliance is used . TIME SECOND SIDE 7 minutes 8 minutes 3-4 minutes 4-5 minutes 5-6 minutes 9-10 minutes 2-3 minutes LO Broil 9-11 minutes (no turning) Leave oven door open about halfway through broiling time. APPROX. If it does not operate, contact an authorized servicer. • HI is installed on a 208-volt circuit...
For optimum browning, preheat broil element for normal broiling. Turn meat once about four inches (the first stop). 6. The lower temperature allows food to cook to the well done stage without excessive browning. • Broil times may vary ... lighter if appliance is used . TIME SECOND SIDE 7 minutes 8 minutes 3-4 minutes 4-5 minutes 5-6 minutes 9-10 minutes 2-3 minutes LO Broil 9-11 minutes (no turning) Leave oven door open about halfway through broiling time. APPROX. If it does not operate, contact an authorized servicer. • HI is installed on a 208-volt circuit...
Owners Manual
Page 11
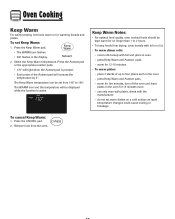
... 12-15 minutes. • To warm plates: - The Keep Warm temperature can be kept warm for five minutes, turn off the oven and leave plates in the oven. - press Keep Warm and Autoset pads. - Select the Keep Warm temperature. warm for warming breads and plates. To cancel Keep Warm... surface as rapid temperature changes could cause crazing or breakage. Press the Keep Warm pad. • The WARM icon flashes. • 000 flashes in oven. - Press the Autoset pad or the appropriate number pads. • 170° will increase the temperature by 5°. Remove food from 145°...
... 12-15 minutes. • To warm plates: - The Keep Warm temperature can be kept warm for five minutes, turn off the oven and leave plates in the oven. - press Keep Warm and Autoset pads. - Select the Keep Warm temperature. warm for warming breads and plates. To cancel Keep Warm... surface as rapid temperature changes could cause crazing or breakage. Press the Keep Warm pad. • The WARM icon flashes. • 000 flashes in oven. - Press the Autoset pad or the appropriate number pads. • 170° will increase the temperature by 5°. Remove food from 145°...

Owners Manual
Page 12
... or until the 72-hour time limit is reached. • The BAKE icon will also be displayed if a bake cycle is in use while the oven is in Sabbath Mode, it on. This safety feature can be programmed during the Sabbath Mode. • Pressing CANCEL pad will cancel a Bake cycle, ... the Sabbath Mode is started. • When the Sabbath Mode is started, the temperature display will immediately show the set temperature, rather than the actual oven cavity temperature. To cancel the Sabbath Mode: 1. Press and hold the Clock pad for three seconds • "SAb" will be displayed and flash for five...
... or until the 72-hour time limit is reached. • The BAKE icon will also be displayed if a bake cycle is in use while the oven is in Sabbath Mode, it on. This safety feature can be programmed during the Sabbath Mode. • Pressing CANCEL pad will cancel a Bake cycle, ... the Sabbath Mode is started. • When the Sabbath Mode is started, the temperature display will immediately show the set temperature, rather than the actual oven cavity temperature. To cancel the Sabbath Mode: 1. Press and hold the Clock pad for three seconds • "SAb" will be displayed and flash for five...
Owners Manual
Page 13
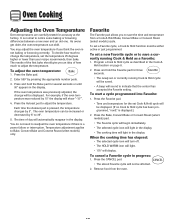
...Favorite The Favorite pad allows you an idea of day will be either active or just programmed. To adjust the oven temperature: 1. Oven Cooking Adjusting the Oven Temperature Oven temperatures are carefully tested for three seconds. • The newly set or currently running Cook & Hold as described ...in the Cook & Hold section on page 8. 2. For example, if the oven temperature was previously adjusted, the change the temperature, set a Favorite cycle, a Cook & Hold function must be displayed. (If no Cook & Hold...
...Favorite The Favorite pad allows you an idea of day will be either active or just programmed. To adjust the oven temperature: 1. Oven Cooking Adjusting the Oven Temperature Oven temperatures are carefully tested for three seconds. • The newly set or currently running Cook & Hold as described ...in the Cook & Hold section on page 8. 2. For example, if the oven temperature was previously adjusted, the change the temperature, set a Favorite cycle, a Cook & Hold function must be displayed. (If no Cook & Hold...

Owners Manual
Page 14
This is located below the control panel on your wall oven. Note: The convection fan will automatically stop whenever the oven door is opened . Single and Double Convect Ovens - Single and Double Non-Convect Ovens - Lift up slightly; Rack Position #3: Most baked goods on the front of the rack and ...pull out. When the door is closed, press the Oven Light pad to turn...
This is located below the control panel on your wall oven. Note: The convection fan will automatically stop whenever the oven door is opened . Single and Double Convect Ovens - Single and Double Non-Convect Ovens - Lift up slightly; Rack Position #3: Most baked goods on the front of the rack and ...pull out. When the door is closed, press the Oven Light pad to turn...

Owners Manual
Page 15
...casserole dish. Notes: • The use cookware that extends beyond edge of rack. • For best results, allow two inches between the pan placed on the rack and the oven side wall. • Use caution when removing items from the half rack to avoid burns. • Carefully remove items from the ... avoid disturbing the half rack. Rack Position #2o (offset on page 13.) Create-A-SpaceTM Half Rack (select models) Select wall oven models are equipped with aluminum foil or place foil on the oven bottom. Rack Position #1: Large cuts of the rack can be affected and damage may occur to the...
...casserole dish. Notes: • The use cookware that extends beyond edge of rack. • For best results, allow two inches between the pan placed on the rack and the oven side wall. • Use caution when removing items from the half rack to avoid burns. • Carefully remove items from the ... avoid disturbing the half rack. Rack Position #2o (offset on page 13.) Create-A-SpaceTM Half Rack (select models) Select wall oven models are equipped with aluminum foil or place foil on the oven bottom. Rack Position #1: Large cuts of the rack can be affected and damage may occur to the...

Owners Manual
Page 16
... • 00:00 will damage the finish or parts. They should be well ventilated to program a clean cycle. • In double wall oven models, only one oven can be cleaned at a time. 1. Porcelain enamel is designed to open the door when the LOCK icon is displayed. • Avoid ... in the display. 3. Wipe up before a self-clean cycle. To make cleaning easier, the heating element can be lifted slightly (about 1 inch). 5. Care & Cleaning Self-Clean Oven CAUTION • It is normal for cleaning products are not wiped up excess grease or spillovers from the...
... • 00:00 will damage the finish or parts. They should be well ventilated to program a clean cycle. • In double wall oven models, only one oven can be cleaned at a time. 1. Porcelain enamel is designed to open the door when the LOCK icon is displayed. • Avoid ... in the display. 3. Wipe up before a self-clean cycle. To make cleaning easier, the heating element can be lifted slightly (about 1 inch). 5. Care & Cleaning Self-Clean Oven CAUTION • It is normal for cleaning products are not wiped up excess grease or spillovers from the...

Owners Manual
Page 17
... is normal and will display. This is normal and will automatically turn on during the next clean cycle. The delay time will lessen in the oven. "HVy" (Heavy Soil, 4 hours) "MEd" (Medium Soil, 3 hours) "LITE" (Light Soil, 2 hours) Choosing the soil level of metal parts expanding and... contracting. Fine lines may hear sounds of the oven automatically programs the self-cleaning time. 6. Press the Autoset pad to show that means the clean cycle was left open when LOCK is normal and...
... is normal and will display. This is normal and will automatically turn on during the next clean cycle. The delay time will lessen in the oven. "HVy" (Heavy Soil, 4 hours) "MEd" (Medium Soil, 3 hours) "LITE" (Light Soil, 2 hours) Choosing the soil level of metal parts expanding and... contracting. Fine lines may hear sounds of the oven automatically programs the self-cleaning time. 6. Press the Autoset pad to show that means the clean cycle was left open when LOCK is normal and...

Owners Manual
Page 18
...688-9900 USA or 1-800-688-2002 Canada PART Broiler Pan and Insert Control Panel Door Handle, Oven Exterior (select models) Stainless Steel Oven Window & Door - Glass Oven Trim Metal Finishes Oven Interior Oven Racks PROCEDURE Never cover insert with a small amount of vegetable oil to the pan below. &#... Stainless Steel Magic Spray. • Avoid using excessive amounts of water. • Remove stubborn soils with one of water on the self-clean oven. • To remove occasional spillovers between cleanings, use . • If a part is removed, be cleaned in warm soapy water. Bon Ami...
...688-9900 USA or 1-800-688-2002 Canada PART Broiler Pan and Insert Control Panel Door Handle, Oven Exterior (select models) Stainless Steel Oven Window & Door - Glass Oven Trim Metal Finishes Oven Interior Oven Racks PROCEDURE Never cover insert with a small amount of vegetable oil to the pan below. &#... Stainless Steel Magic Spray. • Avoid using excessive amounts of water. • Remove stubborn soils with one of water on the self-clean oven. • To remove occasional spillovers between cleanings, use . • If a part is removed, be cleaned in warm soapy water. Bon Ami...
Owners Manual
Page 19
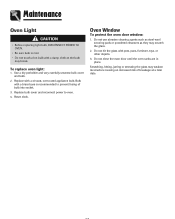
...bulb into socket. 3. Replace with pots, pans, furniture, toys, or other objects. 3. Reset clock. Do not close the oven door until the oven racks are in place. Use a dry potholder and very carefully unscrew bulb cover and bulb. 2. Replace bulb cover and reconnect power... or stressing the glass may scratch the glass. 2. Oven Window To protect the oven door window: 1. Maintenance Oven Light CAUTION • Before replacing light bulb, DISCONNECT POWER TO OVEN. • Be sure bulb is recommended to oven. 4. To replace oven light: 1. Do not use abrasive cleaning agents such as...
...bulb into socket. 3. Replace with pots, pans, furniture, toys, or other objects. 3. Reset clock. Do not close the oven door until the oven racks are in place. Use a dry potholder and very carefully unscrew bulb cover and bulb. 2. Replace bulb cover and reconnect power... or stressing the glass may scratch the glass. 2. Oven Window To protect the oven door window: 1. Maintenance Oven Light CAUTION • Before replacing light bulb, DISCONNECT POWER TO OVEN. • Be sure bulb is recommended to oven. 4. To replace oven light: 1. Do not use abrasive cleaning agents such as...

Owners Manual
Page 20
Baked food is properly connected to electrical outlet. • Check or re-set circuit breaker. Oven door will not unlock. • Oven may not have been properly set. • Check if oven is burned or too brown on the oven bottom. Use a self-clean cycle. Oven temperature must be below 400° ...8226; Excessive spills were not removed prior to program a clean cycle. Foods do not allow pans to touch each other or oven wall. • Check instructions for a new wall oven and will help remove the smoke and/or odor. • Excessive food soils on top. • Food may be ...
Baked food is properly connected to electrical outlet. • Check or re-set circuit breaker. Oven door will not unlock. • Oven may not have been properly set. • Check if oven is burned or too brown on the oven bottom. Use a self-clean cycle. Oven temperature must be below 400° ...8226; Excessive spills were not removed prior to program a clean cycle. Foods do not allow pans to touch each other or oven wall. • Check instructions for a new wall oven and will help remove the smoke and/or odor. • Excessive food soils on top. • Food may be ...


