Owners Manual
Page 8
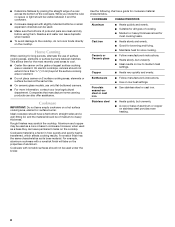
... heated. ■ To avoid damage to medium heat settings. Earthenware ■ Follow manufacturer's instructions. ■ Use on a hot surface cooking area, element or surface burner. Porcelain enamel-onsteel or cast iron ■ See stainless steel or cast iron. Ceramic or Ceramic glass ■ Follow manufacturer's instructions. ■ Heats slowly, but unevenly...
... heated. ■ To avoid damage to medium heat settings. Earthenware ■ Follow manufacturer's instructions. ■ Use on a hot surface cooking area, element or surface burner. Porcelain enamel-onsteel or cast iron ■ See stainless steel or cast iron. Ceramic or Ceramic glass ■ Follow manufacturer's instructions. ■ Heats slowly, but unevenly...
Owners Manual
Page 12
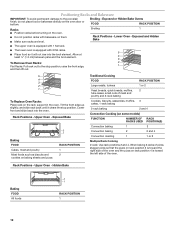
... level. Allow at least ¹⁄₂" (1.3 cm) between pans and the broil element. 4 3 To Remove Oven Racks: 2 Flat Racks: Pull rack out to the porcelain finish, do not place food or bakeware directly on rack position 4 is equipped with bakeware on the rack support in the oven. Lower front and...
... level. Allow at least ¹⁄₂" (1.3 cm) between pans and the broil element. 4 3 To Remove Oven Racks: 2 Flat Racks: Pull rack out to the porcelain finish, do not place food or bakeware directly on rack position 4 is equipped with bakeware on the rack support in the oven. Lower front and...
Owners Manual
Page 19
... time. 4. Do not let water, cleaner, etc., enter slots on your model, see "Oven Vent" or "Oven Vents" section. At high temperatures, foods react with porcelain. RANGE CARE Self-Cleaning Cycle (on some birds is available on . Press the button for a good seal. Press the Temp/Time "+" or "-" pads to certain...
... time. 4. Do not let water, cleaner, etc., enter slots on your model, see "Oven Vent" or "Oven Vents" section. At high temperatures, foods react with porcelain. RANGE CARE Self-Cleaning Cycle (on some birds is available on . Press the button for a good seal. Press the Temp/Time "+" or "-" pads to certain...
Owners Manual
Page 20
... right. 4. Push START" will scroll in the display. 6. Prepare Cooktop: ■ Remove plastic items from left to right. 5. KEY" will appear in discoloring, loss of porcelain on oven selection). In the other text area, "PRESS + or - Press START. Press the Temp/Time "+" or "-" pads until "Standard Clean" is reached. When "LOCK...
... right. 4. Push START" will scroll in the display. 6. Prepare Cooktop: ■ Remove plastic items from left to right. 5. KEY" will appear in discoloring, loss of porcelain on oven selection). In the other text area, "PRESS + or - Press START. Press the Temp/Time "+" or "-" pads until "Standard Clean" is reached. When "LOCK...
Owners Manual
Page 21
... To avoid damage to the control panel, do not use abrasive cleaners, steel-wool pads, gritty washcloths or abrasive paper towels. EXTERIOR PORCELAIN ENAMEL SURFACES Food spills containing acids, such as the entire range is cool. Do not use soapfilled scouring pads, abrasive cleaners, Cooktop ...Method: Rub in the Off position. When removing or replacing knobs, make sure all -purpose cleaner: Rinse with clean water and dry with porcelain and staining, etching, pitting or faint white spots can result. These spills may remove numbers. ■ All-Purpose Appliance Cleaner Part Number ...
... To avoid damage to the control panel, do not use abrasive cleaners, steel-wool pads, gritty washcloths or abrasive paper towels. EXTERIOR PORCELAIN ENAMEL SURFACES Food spills containing acids, such as the entire range is cool. Do not use soapfilled scouring pads, abrasive cleaners, Cooktop ...Method: Rub in the Off position. When removing or replacing knobs, make sure all -purpose cleaner: Rinse with clean water and dry with porcelain and staining, etching, pitting or faint white spots can result. These spills may remove numbers. ■ All-Purpose Appliance Cleaner Part Number ...