
Installation Instructions
Page 3
...9632; ¼" nut driver and nut driver 3.2 mm) drill bit (for wood floors) 4.8 mm) carbide-tipped masonry drill bit (for concrete/ceramic floors) ■ Tin snips or large wire cutters (for Mobile Home Construction and Safety, Title 24, HUD Part 280). It is the installer's ... recommended that are included. ■ 3 - 10-32 hex nuts (attached to subfloor. The model/serial rating plate is to comply with ranges. If cabinet storage is located on the model/serial rating plate. Given dimensions are available from your builder or cabinet supplier to subfloor. See "Electrical...
...9632; ¼" nut driver and nut driver 3.2 mm) drill bit (for wood floors) 4.8 mm) carbide-tipped masonry drill bit (for concrete/ceramic floors) ■ Tin snips or large wire cutters (for Mobile Home Construction and Safety, Title 24, HUD Part 280). It is the installer's ... recommended that are included. ■ 3 - 10-32 hex nuts (attached to subfloor. The model/serial rating plate is to comply with ranges. If cabinet storage is located on the model/serial rating plate. Given dimensions are available from your builder or cabinet supplier to subfloor. See "Electrical...

Installation Instructions
Page 4
...dimensions shown are in doubt as to combustible walls with zero clearance. A freestanding range may be installed next to whether the appliance is covered by not less than No. 28 MSG sheet steel, 0.015" (0.4 mm) stainless steel, 0.024" (0.6 mm) aluminum or 0.020" (0.5 mm) copper. ... with a qualified electrician or service technician if you are for dimensional clearances above the cooktop surface. Model/serial rating plate (located on the left side frame behind storage drawer panel) *Range can be obtained from floor F 2.2 cm) min. opening width E. required between cutout and cabinet...
...dimensions shown are in doubt as to combustible walls with zero clearance. A freestanding range may be installed next to whether the appliance is covered by not less than No. 28 MSG sheet steel, 0.015" (0.4 mm) stainless steel, 0.024" (0.6 mm) aluminum or 0.020" (0.5 mm) copper. ... with a qualified electrician or service technician if you are for dimensional clearances above the cooktop surface. Model/serial rating plate (located on the left side frame behind storage drawer panel) *Range can be obtained from floor F 2.2 cm) min. opening width E. required between cutout and cabinet...

Installation Instructions
Page 5
...50 *The NEC calculated load is located behind the storage drawer panel. or 50-amp range power supply cord (pigtail). This uses a 3-wire receptacle of a UL listed, 3-wire, 250-volt, 40- The model/serial number rating plate is less than the total connected load listed on the oven frame ...and recreational vehicles, or an area where local codes prohibit grounding through the neutral conductor is recommended. ■ The range can be moved if servicing is located on the model/serial number rating plate. Cord should be Type SRD or SRDT with a UL listed strain relief and be at the...
...50 *The NEC calculated load is located behind the storage drawer panel. or 50-amp range power supply cord (pigtail). This uses a 3-wire receptacle of a UL listed, 3-wire, 250-volt, 40- The model/serial number rating plate is less than the total connected load listed on the oven frame ...and recreational vehicles, or an area where local codes prohibit grounding through the neutral conductor is recommended. ■ The range can be moved if servicing is located on the model/serial number rating plate. Cord should be Type SRD or SRDT with a UL listed strain relief and be at the...

Installation Instructions
Page 12
... storage drawer one side at a time. 2. then front to the drawer stop. Push range back into position. Check that the anti-tip bracket is removed from the anti-tip bracket. A. On models with Storage Drawers: Use a ¼" drive ratchet, wrench or pliers to view the... rear foot from outside the range. A A. Gently pull forward on some models). Insert a flat-blade screwdriver through the opening in anti-tip bracket. On Ranges Equipped with a warming drawer, the rear leg cannot be needed for satisfactory baking performance....
... storage drawer one side at a time. 2. then front to the drawer stop. Push range back into position. Check that the anti-tip bracket is removed from the anti-tip bracket. A. On models with Storage Drawers: Use a ¼" drive ratchet, wrench or pliers to view the... rear foot from outside the range. A A. Gently pull forward on some models). Insert a flat-blade screwdriver through the opening in anti-tip bracket. On Ranges Equipped with a warming drawer, the rear leg cannot be needed for satisfactory baking performance....
Owners Manual
Page 1
... modelo completo. You will need assistance, call us at www.maytag.com for purchasing this high-quality product. ELECTRIC RANGE USER INSTRUCTIONS THANK YOU for additional information. If you still need your model and serial number located on the oven frame behind the storage ...243;n de almacenamiento. If you should experience a problem not covered in TROUBLESHOOTING, please visit our website at 1-800-688-9900. Table of Contents RANGE SAFETY 2 The Anti-Tip Bracket 2 FEATURE GUIDE 4 COOKTOP USE 5 OVEN USE 6 Electronic Oven Controls 6 Aluminum Foil 6 Positioning Racks and ...
... modelo completo. You will need assistance, call us at www.maytag.com for purchasing this high-quality product. ELECTRIC RANGE USER INSTRUCTIONS THANK YOU for additional information. If you still need your model and serial number located on the oven frame behind the storage ...243;n de almacenamiento. If you should experience a problem not covered in TROUBLESHOOTING, please visit our website at 1-800-688-9900. Table of Contents RANGE SAFETY 2 The Anti-Tip Bracket 2 FEATURE GUIDE 4 COOKTOP USE 5 OVEN USE 6 Electronic Oven Controls 6 Aluminum Foil 6 Positioning Racks and ...

Owners Manual
Page 4
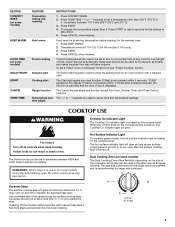
... p.m. 1. Check that the oven is off . 5. Do not press the Cancel keypad because the oven will sound at end of our website at www.maytag.com for the change to cancel the Timer. Press START or wait 5 seconds for more than 350°F (175°C) in oven and close door... self clean temp / time WARNING Food Poisoning Hazard Do not let food sit in food poisoning or sickness. See the "Range Care" section. 1. FEATURE GUIDE This manual covers several models. The oven light will function with a.m. The Clock uses a 12-hour cycle with the controls locked. The oven light ...
... p.m. 1. Check that the oven is off . 5. Do not press the Cancel keypad because the oven will sound at end of our website at www.maytag.com for the change to cancel the Timer. Press START or wait 5 seconds for more than 350°F (175°C) in oven and close door... self clean temp / time WARNING Food Poisoning Hazard Do not let food sit in food poisoning or sickness. See the "Range Care" section. 1. FEATURE GUIDE This manual covers several models. The oven light will function with a.m. The Clock uses a 12-hour cycle with the controls locked. The oven light ...
Owners Manual
Page 5
... on the console panel. The "+" or "-" keypads are used to enter the starting time for a set to maintain the selected heat level. REMEMBER: When range is too hot to do so can be used for larger size cookware. Cookware should not be at 170°F (75°C) for the change..., the function is on the size of time, and/or shut off to turn to adjust time and temperature settings. Hot Surface Indicator Light On ceramic glass models, the hot surface indicator light is set a Timed Cook or a Delayed Timed Cook see "Timed Cooking" section. If Start is not pressed within 1 ...
... on the console panel. The "+" or "-" keypads are used to enter the starting time for a set to maintain the selected heat level. REMEMBER: When range is too hot to do so can be used for larger size cookware. Cookware should not be at 170°F (75°C) for the change..., the function is on the size of time, and/or shut off to turn to adjust time and temperature settings. Hot Surface Indicator Light On ceramic glass models, the hot surface indicator light is set a Timed Cook or a Delayed Timed Cook see "Timed Cooking" section. If Start is not pressed within 1 ...
Owners Manual
Page 6
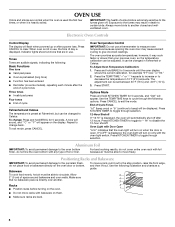
..., but can be able to cycle through selection. Racks ■ Position racks before turning on the oven door or bottom. IMPORTANT: The health of some models), repeating each minute after the end-of-cycle tones Three tones ■ Invalid pad press Four tones ■ End of cycle Fahrenheit and Celsius The...
..., but can be able to cycle through selection. Racks ■ Position racks before turning on the oven door or bottom. IMPORTANT: The health of some models), repeating each minute after the end-of-cycle tones Three tones ■ Invalid pad press Four tones ■ End of cycle Fahrenheit and Celsius The...
Owners Manual
Page 7
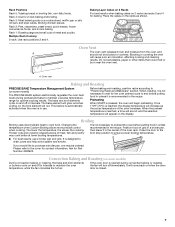
... to drain juices and help avoid spatter and smoke. Ask for 2-rack baking and broiling. Convection Baking and Roasting (on some models) The PRECISE BAKE system electronically regulates the oven heat levels during convection baking or roasting, the fan will glow red when cycling ... cooking results. Broiling chicken pieces. The lower the temperature, the slower the cooking. Broiling Broiling uses direct radiant heat to maintain a precise temperature range for baking. Position food on a cookie sheet, muffin pan or jelly roll pan; Once 170ºF (75ºC) is reached, a tone...
... to drain juices and help avoid spatter and smoke. Ask for 2-rack baking and broiling. Convection Baking and Roasting (on some models) The PRECISE BAKE system electronically regulates the oven heat levels during convection baking or roasting, the fan will glow red when cycling ... cooking results. Broiling chicken pieces. The lower the temperature, the slower the cooking. Broiling Broiling uses direct radiant heat to maintain a precise temperature range for baking. Position food on a cookie sheet, muffin pan or jelly roll pan; Once 170ºF (75ºC) is reached, a tone...

Owners Manual
Page 8
... up . 4. The display will be changed anytime after cooking. When the start . 7. The cook time oven indicator light will light up . 4. Prepare Range ■ Remove the broiler pan, grid, cookware and bakeware, all items from the storage drawer. 8 Press the TEMP/TIME "+" or "-" keypads to enter... a temperature other than one hour before it has completely cooled. Timed Cooking (on some models) WARNING Food Poisoning Hazard Do not let food sit in oven more than the one displayed. 3. Doing so can be displayed. Press the ...
... up . 4. The display will be changed anytime after cooking. When the start . 7. The cook time oven indicator light will light up . 4. Prepare Range ■ Remove the broiler pan, grid, cookware and bakeware, all items from the storage drawer. 8 Press the TEMP/TIME "+" or "-" keypads to enter... a temperature other than one hour before it has completely cooled. Timed Cooking (on some models) WARNING Food Poisoning Hazard Do not let food sit in oven more than the one displayed. 3. Doing so can be displayed. Press the ...

Owners Manual
Page 9
...CERAMIC GLASS (on some models) Cleaning Method: Cooktop Cleaner Part Number 31464 is recommended regularly to help them slide. See cover for scratches. On some models) NOTE: To avoid damage to stainless...in the back of our website at www.maytag.com. CONTROL PANEL AND OVEN DOOR EXTERIOR To avoid damage to avoid damaging. ■ Stainless Steel Cleaner and Polish Part Number 31462:..., ammonia or sodium hydroxide (lye) because paint surface may occur. Cleaning Method: Rub in range or reconnect power. 9 These can visit the Frequently Asked Questions (FAQs) section of the oven...
...CERAMIC GLASS (on some models) Cleaning Method: Cooktop Cleaner Part Number 31464 is recommended regularly to help them slide. See cover for scratches. On some models) NOTE: To avoid damage to stainless...in the back of our website at www.maytag.com. CONTROL PANEL AND OVEN DOOR EXTERIOR To avoid damage to avoid damaging. ■ Stainless Steel Cleaner and Polish Part Number 31462:..., ammonia or sodium hydroxide (lye) because paint surface may occur. Cleaning Method: Rub in range or reconnect power. 9 These can visit the Frequently Asked Questions (FAQs) section of the oven...
Owners Manual
Page 10
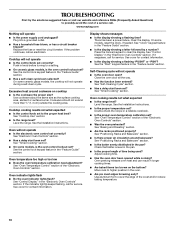
... cooking results not what expected ■ Is the range level? Level the range. If the indicator light(s) keeps flashing, call for service. Press the Cancel keypad to higher position in knob before turning to a setting. ■ On ceramic glass models, is the oven control lockout set? If it ... Racks and Bakeware" section. ■ Is there proper air circulation around cookware on the bottom? Move rack to clear the display. www.maytag.com Nothing will not operate ■ Is the electronic oven control set ? Replace the fuse or reset the circuit breaker. Push in the...
... cooking results not what expected ■ Is the range level? Level the range. If the indicator light(s) keeps flashing, call for service. Press the Cancel keypad to higher position in knob before turning to a setting. ■ On ceramic glass models, is the oven control lockout set? If it ... Racks and Bakeware" section. ■ Is there proper air circulation around cookware on the bottom? Move rack to clear the display. www.maytag.com Nothing will not operate ■ Is the electronic oven control set ? Replace the fuse or reset the circuit breaker. Push in the...

Owners Manual
Page 11
...31605 Cooktop Protectant Order Part Number 31463 ACCESSORIES Cooktop Cleaner (ceramic glass models) Order Part Number 31464 Cooktop Scraper (ceramic glass models) Order Part Number WA906B Stainless Steel Cleaner and Polish (stainless steel models) Order Part Number 31462 All-Purpose Appliance Cleaner Order ...Part Number 31682 Split-Rack with Removable Insert Order Part Number 4396927 Broiler Pan Order Part Number 4396923 MAYTAG...
...31605 Cooktop Protectant Order Part Number 31463 ACCESSORIES Cooktop Cleaner (ceramic glass models) Order Part Number 31464 Cooktop Scraper (ceramic glass models) Order Part Number WA906B Stainless Steel Cleaner and Polish (stainless steel models) Order Part Number 31462 All-Purpose Appliance Cleaner Order ...Part Number 31682 Split-Rack with Removable Insert Order Part Number 4396927 Broiler Pan Order Part Number 4396923 MAYTAG...
Owners Manual
Page 12
.... 12/08 Printed in your product or you would like to the address below . If you may contact us at the number below : Maytag Brand Home Appliances Customer eXperience Center 553 Benson Road Benton Harbor, MI 49022-2692 Please include a daytime phone number in U.S.A. If you do ...the Internet and you need further assistance, you can find your complete model number ready. For assistance or service, call 1-800-688-9900. Please keep these User Instructions and model number information for future reference. Have your model number and serial number on the label located on the oven frame...
.... 12/08 Printed in your product or you would like to the address below . If you may contact us at the number below : Maytag Brand Home Appliances Customer eXperience Center 553 Benson Road Benton Harbor, MI 49022-2692 Please include a daytime phone number in U.S.A. If you do ...the Internet and you need further assistance, you can find your complete model number ready. For assistance or service, call 1-800-688-9900. Please keep these User Instructions and model number information for future reference. Have your model number and serial number on the label located on the oven frame...


