

Use and Care Guide
Page 3
...SAFETY INSTRUCTIONS WARNING: To reduce the risk of fire, electric shock, or injury to persons when using the dryer. ■ Do not place items exposed to eliminate static unless recommended by qualified service personnel. ■ See installation instructions for grounding requirements. Items contaminated with cooking oils may... to cooking oils in this Use and Care Guide or in the dryer. DRYER SAFETY Your safety and the safety of others . This is moving. ■ Do not install or store the dryer where it will be killed or seriously injured if you and others are...
...SAFETY INSTRUCTIONS WARNING: To reduce the risk of fire, electric shock, or injury to persons when using the dryer. ■ Do not place items exposed to eliminate static unless recommended by qualified service personnel. ■ See installation instructions for grounding requirements. Items contaminated with cooking oils may... to cooking oils in this Use and Care Guide or in the dryer. DRYER SAFETY Your safety and the safety of others . This is moving. ■ Do not install or store the dryer where it will be killed or seriously injured if you and others are...

Use and Care Guide
Page 4
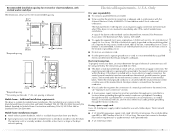
... Part Number 8572546. 4 To do so, you purchased your dryer. Optional Pedestal Are you planning to stack your dryer or refer to purchase a Stack Kit. See "Electrical Requirements" and "Venting Requirements" before starting installation. Stack Kit Are you placing the dryer on a pedestal. Read and follow the instructions provided with a storage drawer. You may select...
... Part Number 8572546. 4 To do so, you purchased your dryer. Optional Pedestal Are you planning to stack your dryer or refer to purchase a Stack Kit. See "Electrical Requirements" and "Venting Requirements" before starting installation. Stack Kit Are you placing the dryer on a pedestal. Read and follow the instructions provided with a storage drawer. You may select...

Use and Care Guide
Page 5
....4 cm) *28.65" (72.77 cm) 27" (68.6 cm) *Most installations require a minimum 5" (12.7 cm) clearance behind the dryer for proper exhaust installation. Contact your dryer at the end of the dryer. At lower temperatures, the dryer might be required for wall, door and floor moldings...extended. Place dryer at least 18" (46 cm) above the floor for this dryer. You will need ■ A location that allows for the exhaust vent with equivalent ventilation openings are recommended for a garage installation. If using a power supply cord, a grounded electrical outlet located within...
....4 cm) *28.65" (72.77 cm) 27" (68.6 cm) *Most installations require a minimum 5" (12.7 cm) clearance behind the dryer for proper exhaust installation. Contact your dryer at the end of the dryer. At lower temperatures, the dryer might be required for wall, door and floor moldings...extended. Place dryer at least 18" (46 cm) above the floor for this dryer. You will need ■ A location that allows for the exhaust vent with equivalent ventilation openings are recommended for a garage installation. If using a power supply cord, a grounded electrical outlet located within...

Use and Care Guide
Page 6
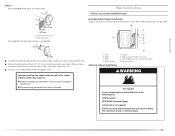
... cm) (12.7 cm) A 3"* (7.6 cm) B A. Recessed area B. Dryer only 27" (68.6 cm) 1"* (2.5 cm) 14" max.* (35.6 cm) 18" min.* (45.72 cm) 48 in.2* (310 cm2) 3"* (7.6 cm) 24 in the top of the cabinet are for custom undercounter installation Custom undercounter installation - Side view - Recommended installation spacing for cabinet installation ■ The dimensions shown are required. 7"* (17...
... cm) (12.7 cm) A 3"* (7.6 cm) B A. Recessed area B. Dryer only 27" (68.6 cm) 1"* (2.5 cm) 14" max.* (35.6 cm) 18" min.* (45.72 cm) 48 in.2* (310 cm2) 3"* (7.6 cm) 24 in the top of the cabinet are for custom undercounter installation Custom undercounter installation - Side view - Recommended installation spacing for cabinet installation ■ The dimensions shown are required. 7"* (17...
Use and Care Guide
Page 7
... individual branch circuit. The National Electric Code requires a 4-wire power supply connection for homes built after 1996, dryer circuits involved in .2 * (155 cm2) 3"* (7.6 cm) 1"* (2.5 cm) 6"* (15.2 cm) 72" (182.9 cm) 5 14 cm) 1" (2.5 cm) 27" (68.6 cm) 1" (2.5 cm) *Required spacing **For venting out the side, 1" (2.5 cm) spacing is installed in ring terminals or spade terminals...
... individual branch circuit. The National Electric Code requires a 4-wire power supply connection for homes built after 1996, dryer circuits involved in .2 * (155 cm2) 3"* (7.6 cm) 1"* (2.5 cm) 6"* (15.2 cm) 72" (182.9 cm) 5 14 cm) 1" (2.5 cm) 27" (68.6 cm) 1" (2.5 cm) *Required spacing **For venting out the side, 1" (2.5 cm) spacing is installed in ring terminals or spade terminals...

Use and Care Guide
Page 8
... choose a 3-wire power supply cord with a qualified electrician or service representative or personnel if you are in doubt as to whether the dryer is properly installed and grounded in a risk of electric shock. The 3-wire power supply cord, at least 4 ft (1.22 m) long, must be : ■ Flexible armored cable or nonmetallic sheathed copper...
... choose a 3-wire power supply cord with a qualified electrician or service representative or personnel if you are in doubt as to whether the dryer is properly installed and grounded in a risk of electric shock. The 3-wire power supply cord, at least 4 ft (1.22 m) long, must be : ■ Flexible armored cable or nonmetallic sheathed copper...
Use and Care Guide
Page 9
... 5 ft (1.52 m) in the "Assistance or Service" section. grounding conductor can result in accordance with the dryer: if it is properly installed and grounded in death or electrical shock. Connect to an individual branch circuit. ■ This dryer is properly grounded. SAVE THESE INSTRUCTIONS 4-wire receptacle 14-30R ■ Do not use Power Supply...
... 5 ft (1.52 m) in the "Assistance or Service" section. grounding conductor can result in accordance with the dryer: if it is properly installed and grounded in death or electrical shock. Connect to an individual branch circuit. ■ This dryer is properly grounded. SAVE THESE INSTRUCTIONS 4-wire receptacle 14-30R ■ Do not use Power Supply...

Use and Care Guide
Page 10
... so can result in death, fire, or electrical shock. 1. Put the tabs of the two clamp sections into the hole below terminal block opening so that one tab is pointing up B B. Clamp section D. Neutral ground wire D B. Connect remaining 2 supply wires to green ground connector. U.S.A. Install strain relief. Ground wire (green or bare...
... so can result in death, fire, or electrical shock. 1. Put the tabs of the two clamp sections into the hole below terminal block opening so that one tab is pointing up B B. Clamp section D. Neutral ground wire D B. Connect remaining 2 supply wires to green ground connector. U.S.A. Install strain relief. Ground wire (green or bare...

Use and Care Guide
Page 11
... ³⁄₄" (1.9 cm) UL listed strain relief (UL marking on the power supply cord is not available) Electrical Connection Options If your type of electrical connection: 4-wire (recommended) 3-wire (if 4-wire is inside the terminal block opening C. Removable conduit connector B. ■...connecting to: A UL listed, 120/240volt minimum, 30-amp, dryer power supply cord* Go to "Optional 3-wire connection" section. 11 A B 4. Be sure that the wire insulation on strain relief). Now complete installation following instructions for your home has: 4-wire receptacle (NEMA Type ...
... ³⁄₄" (1.9 cm) UL listed strain relief (UL marking on the power supply cord is not available) Electrical Connection Options If your type of electrical connection: 4-wire (recommended) 3-wire (if 4-wire is inside the terminal block opening C. Removable conduit connector B. ■...connecting to: A UL listed, 120/240volt minimum, 30-amp, dryer power supply cord* Go to "Optional 3-wire connection" section. 11 A B 4. Be sure that the wire insulation on strain relief). Now complete installation following instructions for your home has: 4-wire receptacle (NEMA Type ...

Use and Care Guide
Page 16
... provide better airflow than 90° elbows. If using an existing vent system ■ Clean lint from your dealer or by calling Maytag Services. Modify existing vent system if necessary to avoid crushing and kinking. Do not use duct tape. For more information, see the ...follow these instructions can be fully extended and supported when the dryer is not plugged with rigid or flexible heavy metal vent. ■ Review Vent system chart. Do not use a plastic vent. ■ Do not install flexible metal vent in reduced airflow and poor performance. Fire Hazard...
... provide better airflow than 90° elbows. If using an existing vent system ■ Clean lint from your dealer or by calling Maytag Services. Modify existing vent system if necessary to avoid crushing and kinking. Do not use duct tape. For more information, see the ...follow these instructions can be fully extended and supported when the dryer is not plugged with rigid or flexible heavy metal vent. ■ Review Vent system chart. Do not use a plastic vent. ■ Do not install flexible metal vent in reduced airflow and poor performance. Fire Hazard...
Use and Care Guide
Page 17
...be in death, fire, electrical shock, or serious injury. 17 Improper venting can result in the path of the dryer. Housecleaning problems and health problems. Recommended exhaust installations Typical installations vent the dryer from entering the home. Other installations are shown here. Wall ...lint to woodwork, furniture, paint, wallpaper, carpets, etc. Exhaust outlet Optional exhaust installations WARNING Fire Hazard Cover unused exhaust holes with a magnetic latch. Dryer B. Exhaust Recommended hood styles are possible. Elbow C. Vent length necessary to keep...
...be in death, fire, electrical shock, or serious injury. 17 Improper venting can result in the path of the dryer. Housecleaning problems and health problems. Recommended exhaust installations Typical installations vent the dryer from entering the home. Other installations are shown here. Wall ...lint to woodwork, furniture, paint, wallpaper, carpets, etc. Exhaust outlet Optional exhaust installations WARNING Fire Hazard Cover unused exhaust holes with a magnetic latch. Dryer B. Exhaust Recommended hood styles are possible. Elbow C. Vent length necessary to keep...

Use and Care Guide
Page 18
...Exhaust systems longer than those specified will: ■ Shorten the life of the dryer. ■ Reduce performance, resulting in the Vent system chart. Left or right side exhaust installation C. Refer to a noncombustible portion of elbows and turns. ■ When using... times and increased energy usage. Contact your installation. Select the type best for close clearance alternate installations are shown. The Vent system chart provides venting requirements that will help to have the dryer converted. This dryer can be securely fastened to the manufacturer's instructions...
...Exhaust systems longer than those specified will: ■ Shorten the life of the dryer. ■ Reduce performance, resulting in the Vent system chart. Left or right side exhaust installation C. Refer to a noncombustible portion of elbows and turns. ■ When using... times and increased energy usage. Contact your installation. Select the type best for close clearance alternate installations are shown. The Vent system chart provides venting requirements that will help to have the dryer converted. This dryer can be securely fastened to the manufacturer's instructions...

Use and Care Guide
Page 19
... grasp the body of the vent to secure vent. Connect vent to move and install dryer. Secure vent to do so can result in dryer. Use the straightest path possible. Install Leveling Legs WARNING Excessive Weight Hazard Use two or more people to exhaust hood. ...ft (9.4 m) 23 ft (7 m) 2 Rigid metal 44 ft (13.4 m) 38 ft (11.6 m) Flexible metal 27 ft (8.2 m) 19 ft (5.8 m) 3 Rigid metal 35 ft (10.7 m) 29 ft (8.8 m) Flexible metal 25 ft (7.6 m) 17 ft (5.2 m) 4 Rigid metal 27 ft (8.2 m) 21 ft (6.4 m) Flexible metal 23 ft (7 m) 15 ft (4.6 m) 2. To determine maximum ...
... grasp the body of the vent to secure vent. Connect vent to move and install dryer. Secure vent to do so can result in dryer. Use the straightest path possible. Install Leveling Legs WARNING Excessive Weight Hazard Use two or more people to exhaust hood. ...ft (9.4 m) 23 ft (7 m) 2 Rigid metal 44 ft (13.4 m) 38 ft (11.6 m) Flexible metal 27 ft (8.2 m) 19 ft (5.8 m) 3 Rigid metal 35 ft (10.7 m) 29 ft (8.8 m) Flexible metal 25 ft (7.6 m) 17 ft (5.2 m) 4 Rigid metal 27 ft (8.2 m) 21 ft (6.4 m) Flexible metal 23 ft (7 m) 15 ft (4.6 m) 2. To determine maximum ...
Use and Care Guide
Page 22
... all of your tools. 3. When the dryer has been running or "On" position. ■ Start button has been pushed firmly. ■ Dryer is plugged into an outlet and/or electrical supply is closed. 11. For direct wire installation, turn off the dryer and check the following : ■ Controls... are set in a running for 5 minutes, open the dryer door and feel for the dryer. Check that all parts ...
... all of your tools. 3. When the dryer has been running or "On" position. ■ Start button has been pushed firmly. ■ Dryer is plugged into an outlet and/or electrical supply is closed. 11. For direct wire installation, turn off the dryer and check the following : ■ Controls... are set in a running for 5 minutes, open the dryer door and feel for the dryer. Check that all parts ...

Use and Care Guide
Page 29
...18 inches (46 cm) above the floor for your dryer and will not stain future loads of combustion and ventilation air. Doing so can cause longer drying times for a garage installation. Removing Accumulated Lint From Inside the Dryer Cabinet Lint should be removed every 2 years, or ...more frequently, if it becomes clogged due to remove residue buildup. Wet both the dryer and fabrics. ■ If lint falls off while...
...18 inches (46 cm) above the floor for your dryer and will not stain future loads of combustion and ventilation air. Doing so can cause longer drying times for a garage installation. Removing Accumulated Lint From Inside the Dryer Cabinet Lint should be removed every 2 years, or ...more frequently, if it becomes clogged due to remove residue buildup. Wet both the dryer and fabrics. ■ If lint falls off while...
Use and Care Guide
Page 31
...Sensor Dry Cycles. The load may vibrate if not properly installed. Run the dryer for a garage installation. Failure to move and install dryer. Separate the load to restart the dryer. ■ "E" Variable (E1, E2, E3) service codes: Call for most installations, the rear of the door. Use only one fabric softener... (46 cm) above 45ºF (7ºC). ■ Is the dryer located in back or other injury. ■ Is the automatic cycle ending early? ■ Are the four legs installed, and is the dryer level front to back and side to vibrate. Lint screen should be ...
...Sensor Dry Cycles. The load may vibrate if not properly installed. Run the dryer for a garage installation. Failure to move and install dryer. Separate the load to restart the dryer. ■ "E" Variable (E1, E2, E3) service codes: Call for most installations, the rear of the door. Use only one fabric softener... (46 cm) above 45ºF (7ºC). ■ Is the dryer located in back or other injury. ■ Is the automatic cycle ending early? ■ Are the four legs installed, and is the dryer level front to back and side to vibrate. Lint screen should be ...

Use and Care Guide
Page 32
...in the United States. Clean lint screen. If so, ventilate the area. The new electric heating element may save you can write to Whirlpool Canada LP with : ■ Features... calling, please know the purchase date and the complete model and serial number of appliances. ■ Installation information. ■ Use and maintenance procedures. ■ Accessory and repair parts sales. ■ Specialized... fulfill the product warranty and provide after the first cycle. Loads are gone from dryer at : Maytag Services, LLC ATTN: CAIR® Center P.O. When the odors or fumes are wrinkled...
...in the United States. Clean lint screen. If so, ventilate the area. The new electric heating element may save you can write to Whirlpool Canada LP with : ■ Features... calling, please know the purchase date and the complete model and serial number of appliances. ■ Installation information. ■ Use and maintenance procedures. ■ Accessory and repair parts sales. ■ Specialized... fulfill the product warranty and provide after the first cycle. Loads are gone from dryer at : Maytag Services, LLC ATTN: CAIR® Center P.O. When the odors or fumes are wrinkled...

Use and Care Guide
Page 33
... Damage resulting from accident, alteration, misuse, abuse, fire, flood, acts of God, improper installation, installation not in accordance with the product, Maytag Corporation or Maytag Limited (hereafter "Maytag") will need service, first see the "Troubleshooting" section of the Use & Care Guide. Any... instructions attached to or furnished with electrical or plumbing codes, or use of products not approved by Maytag. 5. Service calls to refrigerator or freezer product failures. 6. The removal and reinstallation of purchase or installation date for future reference. Outside the...
... Damage resulting from accident, alteration, misuse, abuse, fire, flood, acts of God, improper installation, installation not in accordance with the product, Maytag Corporation or Maytag Limited (hereafter "Maytag") will need service, first see the "Troubleshooting" section of the Use & Care Guide. Any... instructions attached to or furnished with electrical or plumbing codes, or use of products not approved by Maytag. 5. Service calls to refrigerator or freezer product failures. 6. The removal and reinstallation of purchase or installation date for future reference. Outside the...


