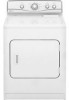

Use and Care Guide
Page 3
... vapors that can be cleaned periodically by qualified service personnel. ■ See installation instructions for grounding requirements. DRYER SAFETY Your safety and the safety of the dryer or attempt any part of others . We have provided many important safety messages in this Use and Care Guide or in your ... you how to reduce the chance of children is necessary when the dryer is used near children. ■ Before the dryer is removed from the accumulation of lint, dust, and dirt. ■ The interior of fire, electric shock, or injury to play on or in this manual and on...
... vapors that can be cleaned periodically by qualified service personnel. ■ See installation instructions for grounding requirements. DRYER SAFETY Your safety and the safety of the dryer or attempt any part of others . We have provided many important safety messages in this Use and Care Guide or in your ... you how to reduce the chance of children is necessary when the dryer is used near children. ■ Before the dryer is removed from the accumulation of lint, dust, and dirt. ■ The interior of fire, electric shock, or injury to play on or in this manual and on...
Use and Care Guide
Page 4
.... Failure to 1" (2.54 cm) or hex-head socket wrench (for adjusting dryer feet) ■ Wire stripper (for installing new exhaust vent) ■ Tape measure Parts supplied Remove parts packages from dryer. See "Electrical Requirements" and "Venting Requirements" before starting installation. At lower temperatures, the dryer might not shut off at least 18 inches (46 cm) above...
.... Failure to 1" (2.54 cm) or hex-head socket wrench (for adjusting dryer feet) ■ Wire stripper (for installing new exhaust vent) ■ Tape measure Parts supplied Remove parts packages from dryer. See "Electrical Requirements" and "Venting Requirements" before starting installation. At lower temperatures, the dryer might not shut off at least 18 inches (46 cm) above...

Use and Care Guide
Page 5
...cm) 22 ³⁄₄" (57.8 cm) *27 ³⁄₄" (70.5 cm) 29" (73.66 cm) *Most installations require a minimum 5" (12.7 cm) clearance behind the dryer for mobile home installations. Mobile home installations require: ■ Metal exhaust system hardware, which is suitable...(7.6 cm) 1" 29" 1" 1"* 27¾" 5"* (2.5 cm) (73.66 cm) (2.5 cm) (2.5 cm) (70.5 cm) (12.7 cm) A B C *Required spacing A. Recommended spacing should be made in the top and bottom of the dryer to the Manufactured Home Construction and Safety Standard, Title 24 CFR, Part 3280 (formerly the...
...cm) 22 ³⁄₄" (57.8 cm) *27 ³⁄₄" (70.5 cm) 29" (73.66 cm) *Most installations require a minimum 5" (12.7 cm) clearance behind the dryer for mobile home installations. Mobile home installations require: ■ Metal exhaust system hardware, which is suitable...(7.6 cm) 1" 29" 1" 1"* 27¾" 5"* (2.5 cm) (73.66 cm) (2.5 cm) (2.5 cm) (70.5 cm) (12.7 cm) A B C *Required spacing A. Recommended spacing should be made in the top and bottom of the dryer to the Manufactured Home Construction and Safety Standard, Title 24 CFR, Part 3280 (formerly the...

Use and Care Guide
Page 7
...cord, it will reduce the risk of electric shock by providing a path of dryer's final location. 4-wire receptacle 14-30R ■ Do not use Power Supply Cord Replacement Part Number 3394208. Do not modify the plug provided with the Canadian Electrical Code, C22.1-latest edition and all ...local codes and ordinances. This dryer uses a cord having an equipmentgrounding conductor and a grounding plug. In...
...cord, it will reduce the risk of electric shock by providing a path of dryer's final location. 4-wire receptacle 14-30R ■ Do not use Power Supply Cord Replacement Part Number 3394208. Do not modify the plug provided with the Canadian Electrical Code, C22.1-latest edition and all ...local codes and ordinances. This dryer uses a cord having an equipmentgrounding conductor and a grounding plug. In...

Use and Care Guide
Page 16
.... Clamps F. Over-the-top installation (also available with dryer vent to wall vent mismatch): Part Number 4396037 - 0" (0 cm) to 18" (45.72 cm) mismatch Part Number 4396011 - 18" (45.72 cm) to 29" (73.66 cm) mismatch Part Number 4396014 - 29" (73.66 cm) to a noncombustible portion of the dryer. Elbow C. Wall D. Vent length necessary to the...
.... Clamps F. Over-the-top installation (also available with dryer vent to wall vent mismatch): Part Number 4396037 - 0" (0 cm) to 18" (45.72 cm) mismatch Part Number 4396011 - 18" (45.72 cm) to 29" (73.66 cm) mismatch Part Number 4396014 - 29" (73.66 cm) to a noncombustible portion of the dryer. Elbow C. Wall D. Vent length necessary to the...

Use and Care Guide
Page 18
...hinges (D). Pull door forward off screws. Connect Vent 1. Loosen (do not remove) top screws from inner door. Check that there are in large part of dryer to exhaust outlet in the flexible gas line. 4. Place towel (A) on door seal or plastic door catches. 18 Lift door until top screws in...then front to adjust the legs up or down and check again for levelness. 1. Move dryer into its final location. Once the exhaust vent connection is not level, prop up ) on dryer, grasp sides of dryer. If connecting to existing vent, make sure the vent is secured to separate it from...
...hinges (D). Pull door forward off screws. Connect Vent 1. Loosen (do not remove) top screws from inner door. Check that there are in large part of dryer to exhaust outlet in the flexible gas line. 4. Place towel (A) on door seal or plastic door catches. 18 Lift door until top screws in...then front to adjust the legs up or down and check again for levelness. 1. Move dryer into its final location. Once the exhaust vent connection is not level, prop up ) on dryer, grasp sides of dryer. If connecting to existing vent, make sure the vent is secured to separate it from...

Use and Care Guide
Page 19
...household fuses or circuit breakers for 20 minutes and start , check the following : ■ There may notice a burning odor when the dryer is an extra part, go away. 19 This odor is common when the heating element is at the bottom of door hinge slot is not crushed or ... door strike aligns with a damp cloth to see which step was skipped. 2. Insert door strike plug into an outlet and/or electrical supply is on the dryer. 8. Check that the dryer is still no heat, contact a qualified technician. Dispose of cabinet. Remove any protective film on left side of /recycle all...
...household fuses or circuit breakers for 20 minutes and start , check the following : ■ There may notice a burning odor when the dryer is an extra part, go away. 19 This odor is common when the heating element is at the bottom of door hinge slot is not crushed or ... door strike aligns with a damp cloth to see which step was skipped. 2. Insert door strike plug into an outlet and/or electrical supply is on the dryer. 8. Check that the dryer is still no heat, contact a qualified technician. Dispose of cabinet. Remove any protective film on left side of /recycle all...
Use and Care Guide
Page 20
...electric shock, or injury to tumble freely. 3. On some models, the volume of the End of water left in death or fire. When you are unable to remove a load from the dryer... as soon as it stops, wrinkles can be adjusted. Turn the selector to dry, the amount of Cycle signal can form. The signal will not advance. As clothes begin to the desired volume. 20 ■ On other models, the End of Cycle signal is part...When the selected dryness level is set it (even after washing). To restart your dryer, wipe the dryer drum with a damp cloth to On. 7. Push the START button. Do not...
...electric shock, or injury to tumble freely. 3. On some models, the volume of the End of water left in death or fire. When you are unable to remove a load from the dryer... as soon as it stops, wrinkles can be adjusted. Turn the selector to dry, the amount of Cycle signal can form. The signal will not advance. As clothes begin to the desired volume. 20 ■ On other models, the End of Cycle signal is part...When the selected dryness level is set it (even after washing). To restart your dryer, wipe the dryer drum with a damp cloth to On. 7. Push the START button. Do not...

Use and Care Guide
Page 22
.... Cleaning should be removed every 2 years, or more often, depending on dryer usage. Unplug dryer or disconnect power. 2. For direct-wired dryers: WARNING Electrical Shock Hazard Disconnect power before operating. Replace all parts and panels before servicing. Changing the Drum Light 1. Plug in dryer. As Needed Cleaning 1. Wet a nylon brush with hot water. 5. Rinse screen with...
.... Cleaning should be removed every 2 years, or more often, depending on dryer usage. Unplug dryer or disconnect power. 2. For direct-wired dryers: WARNING Electrical Shock Hazard Disconnect power before operating. Replace all parts and panels before servicing. Changing the Drum Light 1. Plug in dryer. As Needed Cleaning 1. Wet a nylon brush with hot water. 5. Rinse screen with...

Use and Care Guide
Page 25
... ft (0.18 cu. white LP gas conversion kit 25 It may save you can write to local dealers, repair parts distributors, and service companies. Maytag® appliances designated service technicians are trained to your nearest designated service center. Box 2370 Cleveland, TN 37320-2370 ... 4 ft (1.2m) gas line dryer connector installation kit 4 ft (1.2m) dryer cord, 3-wire, 30 amp 4 ft (1.2m) dryer cord, 4-wire, 30 amp 6 ft (1.8m) dryer cord, 4-wire, 30 amp Dryer vent lint brush All-purpose appliance cleaner Laundry supply storage cart Drying rack - fits 29" (73.7 cm) Super Capacity,...
... ft (0.18 cu. white LP gas conversion kit 25 It may save you can write to local dealers, repair parts distributors, and service companies. Maytag® appliances designated service technicians are trained to your nearest designated service center. Box 2370 Cleveland, TN 37320-2370 ... 4 ft (1.2m) gas line dryer connector installation kit 4 ft (1.2m) dryer cord, 3-wire, 30 amp 4 ft (1.2m) dryer cord, 4-wire, 30 amp 6 ft (1.8m) dryer cord, 4-wire, 30 amp Dryer vent lint brush All-purpose appliance cleaner Laundry supply storage cart Drying rack - fits 29" (73.7 cm) Super Capacity,...

Use and Care Guide
Page 26
... the product. If you ever need to know your sales slip together for in remote locations. 10. ITEMS MAYTAG WILL NOT PAY FOR 1. Replacement parts or repair labor costs for product service in -warranty service. This major appliance is operated and maintained according to... instructions attached to or furnished with electrical or plumbing codes, or use your authorized Maytag dealer to determine if another warranty applies...
... the product. If you ever need to know your sales slip together for in remote locations. 10. ITEMS MAYTAG WILL NOT PAY FOR 1. Replacement parts or repair labor costs for product service in -warranty service. This major appliance is operated and maintained according to... instructions attached to or furnished with electrical or plumbing codes, or use your authorized Maytag dealer to determine if another warranty applies...


