User Instructions
Page 1
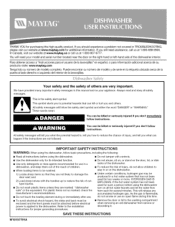
THANK YOU for purchasing this time. [] Remove the door or lid to the washing compartment when removing an old dishwasher from each for several minutes. In Canada, visit our website at www.maytag.ca or call us at 1-800-688-9900. Puede encontrar su nQmero de modelo y de serie en la etiqueta...safety alert symbol. All safety messages will need assistance, call us at 1-800-807-6777. HYDROGEN GAS IS EXPLOSIVE. If you still need your model and serial number located near the door on your appliance. If the hot water system has not been used for such a period, before electrical power...
THANK YOU for purchasing this time. [] Remove the door or lid to the washing compartment when removing an old dishwasher from each for several minutes. In Canada, visit our website at www.maytag.ca or call us at 1-800-688-9900. Puede encontrar su nQmero de modelo y de serie en la etiqueta...safety alert symbol. All safety messages will need assistance, call us at 1-800-807-6777. HYDROGEN GAS IS EXPLOSIVE. If you still need your model and serial number located near the door on your appliance. If the hot water system has not been used for such a period, before electrical power...
User Instructions
Page 3
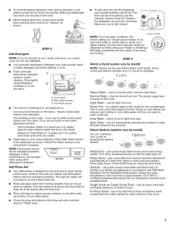
... or tablet detergent just before starting a cycle. Fresh automatic dishwasher detergent results in a cool, dry place. Main Wash section C. gallon) [typical water softener water and some city water] • Depending on your cycles by model) NOTE: Heavier cycles and options affect cycle length. Fill ...run a rinse cycle. Make sure cap is based on this cycle) Do not use depends on: How much in your dishwasher until the indicator window looks full. The hardness of the arrow .... If you are for best drying results. Follow instructions on food. turn clockwise. Select ...
... or tablet detergent just before starting a cycle. Fresh automatic dishwasher detergent results in a cool, dry place. Main Wash section C. gallon) [typical water softener water and some city water] • Depending on your cycles by model) NOTE: Heavier cycles and options affect cycle length. Fill ...run a rinse cycle. Make sure cap is based on this cycle) Do not use depends on: How much in your dishwasher until the indicator window looks full. The hardness of the arrow .... If you are for best drying results. Follow instructions on food. turn clockwise. Select ...
User Instructions
Page 4
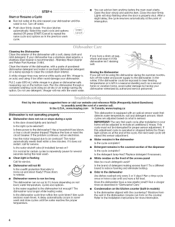
...dishwasher detergent on a damp sponge to reduce foaming and eliminate buildup. • Odor in "Dishwasher Care." • Condensation on at the end of powdered dishwasher detergent and water or use detergent. If you have a full... for service. Moisture from the vent in the dishwasher console can add an item anytime before the Clean light... the U.S.A., www.maytag.com In Canada, www.maytag.ca Dishwasher is not operating properly • Dishwasher does not run ...residue on ? Run a vinegar rinse as in models) Is the dishwasher aligned with a soft, damp cloth and mild detergent...
...dishwasher detergent on a damp sponge to reduce foaming and eliminate buildup. • Odor in "Dishwasher Care." • Condensation on at the end of powdered dishwasher detergent and water or use detergent. If you have a full... for service. Moisture from the vent in the dishwasher console can add an item anytime before the Clean light... the U.S.A., www.maytag.com In Canada, www.maytag.ca Dishwasher is not operating properly • Dishwasher does not run ...residue on ? Run a vinegar rinse as in models) Is the dishwasher aligned with a soft, damp cloth and mild detergent...
User Instructions
Page 5
... wet? If you do not wish to avoid the problem, except by some models). It might be removed. Do not use soap or laundry detergents. Orange stains on plastic dishes or dishwasher interior Are large amounts of china and glassware might not be possible to drink softened... you have high iron content? Silica film and etching are not completely clean • Food soil left on the dishes Is the dishwasher loaded correctly? Rewash dishes using a mild abrasive cleaner. If treatment is designed to allow thorough rinsing. If the noise persists after washing...
... wet? If you do not wish to avoid the problem, except by some models). It might be removed. Do not use soap or laundry detergents. Orange stains on plastic dishes or dishwasher interior Are large amounts of china and glassware might not be possible to drink softened... you have high iron content? Silica film and etching are not completely clean • Food soil left on the dishes Is the dishwasher loaded correctly? Rewash dishes using a mild abrasive cleaner. If treatment is designed to allow thorough rinsing. If the noise persists after washing...
User Instructions
Page 6
...on the right-hand or left-hand side of the dishwasher interior. Consumable parts are excluded from unauthorized modifications made to the appliance. 9. This major appliance is designed to be provided by a Maytag designated service company. DISCLAIMER OF IMPLIED WARRANTIES; LIMITATION OF... when the major appliance is used in U.S.A. Outside the 50 United States and Canada, this User Instructions and model number information Maytag Brand Home Appliances Customer Interaction Centre 1901 Minnesota Court Mississauga, Ontario L5N 3A7 for repairs. The removal and reinstallation...
...on the right-hand or left-hand side of the dishwasher interior. Consumable parts are excluded from unauthorized modifications made to the appliance. 9. This major appliance is designed to be provided by a Maytag designated service company. DISCLAIMER OF IMPLIED WARRANTIES; LIMITATION OF... when the major appliance is used in U.S.A. Outside the 50 United States and Canada, this User Instructions and model number information Maytag Brand Home Appliances Customer Interaction Centre 1901 Minnesota Court Mississauga, Ontario L5N 3A7 for repairs. The removal and reinstallation...
Installation Instructions
Page 3
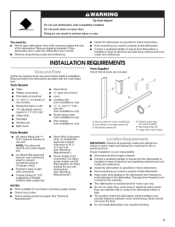
...sockets • Measuring tape or ruler • 10" adjustable wrench (opens to meet all governing codes and ordinances. Latch the dishwasher door closed, • Observe all parts are included. Sound seals (on open door. Mounting strips (2) F. Failure to 11...8226; Flat-blade screwdriver • 8/8"open dishwasher door while someone grasps the rear of the dishwasher. Parts Supplied Check that dishwasher is your water supply line. • UL-listed/CSA-approved twist-on some models) (2) B. Close dishwasher door. See "Electrical Requirements." Countertop mounting screws...
...sockets • Measuring tape or ruler • 10" adjustable wrench (opens to meet all governing codes and ordinances. Latch the dishwasher door closed, • Observe all parts are included. Sound seals (on open door. Mounting strips (2) F. Failure to 11...8226; Flat-blade screwdriver • 8/8"open dishwasher door while someone grasps the rear of the dishwasher. Parts Supplied Check that dishwasher is your water supply line. • UL-listed/CSA-approved twist-on some models) (2) B. Close dishwasher door. See "Electrical Requirements." Countertop mounting screws...
Installation Instructions
Page 9
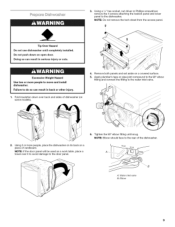
... its back on open door. Failure to move and install dishwasher. Fold insulation down on a piece of cardboard. Using 2 or more people to do so can result in back or other injury. 1. Elbow Remove both panels and set aside on some models). 4. Do not push down over it to avoid damage... to the rear of dishwasher (on a covered surface. 5. Water inlet valve B. NOTE: Do not remove the tech sheet from the access panel....
... its back on open door. Failure to move and install dishwasher. Fold insulation down on a piece of cardboard. Using 2 or more people to do so can result in back or other injury. 1. Elbow Remove both panels and set aside on some models). 4. Do not push down over it to avoid damage... to the rear of dishwasher (on a covered surface. 5. Water inlet valve B. NOTE: Do not remove the tech sheet from the access panel....
Installation Instructions
Page 17
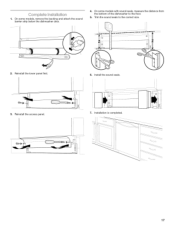
Trim the sound seals to the floor. 5. Reinstall the lower panel first. 3. Reinstall the access panel. 6. Installation is completed. 17 Install the sound seals. 7. 1. On some models with sound seals, measure the distance from the bottom of the dishwasher to the correct size. 2. On some models, remove the backing and attach the sound barrier strip below the dishwasher door. 4.
Trim the sound seals to the floor. 5. Reinstall the lower panel first. 3. Reinstall the access panel. 6. Installation is completed. 17 Install the sound seals. 7. 1. On some models with sound seals, measure the distance from the bottom of the dishwasher to the correct size. 2. On some models, remove the backing and attach the sound barrier strip below the dishwasher door. 4.


