Owners Manual
Page 7
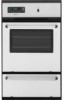
... the center of meat, fish and poultry may be changed anytime after cooking. Press the TEMP/TIME "+" or "-" arrow pads to preheat the oven before or after pressing Start by repeating steps 2-7. Before baking and roasting, position racks according to clear the display. 7 When roasting, it is... Press the TEMP/TIME "+" or "-" arrow pads to enter the length of day to the cover for Part Number 12500100. Press CANCEL to cook. 5. When the preheat temperature is reached, the oven will appear on . The lower the temperature, the slower the cooking. If you would like to enter ...
... the center of meat, fish and poultry may be changed anytime after cooking. Press the TEMP/TIME "+" or "-" arrow pads to preheat the oven before or after pressing Start by repeating steps 2-7. Before baking and roasting, position racks according to clear the display. 7 When roasting, it is... Press the TEMP/TIME "+" or "-" arrow pads to enter the length of day to the cover for Part Number 12500100. Press CANCEL to cook. 5. When the preheat temperature is reached, the oven will appear on . The lower the temperature, the slower the cooking. If you would like to enter ...
Owners Manual
Page 8
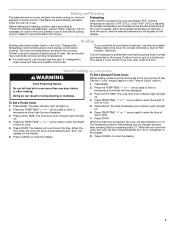
...off and the oven is a standard 40-watt appliance bulb. OVEN CARE General Cleaning IMPORTANT: Before cleaning, make sure the oven and cooktop are cool and the control knobs are harder to slide, a light coating of grain to avoid damaging. ■ Stainless Steel Cleaner and Polish Part Number 31462 (...Steel-wool pad ■ For racks that have discolored and are in oven or reconnect power. Cleaning Method: Rub in the back of our website at www.maytag.com. STAINLESS STEEL (on some models) CONTROL PANEL AND OVEN DOOR EXTERIOR To avoid damage to remove from socket. 4. Turn bulb ...
...off and the oven is a standard 40-watt appliance bulb. OVEN CARE General Cleaning IMPORTANT: Before cleaning, make sure the oven and cooktop are cool and the control knobs are harder to slide, a light coating of grain to avoid damaging. ■ Stainless Steel Cleaner and Polish Part Number 31462 (...Steel-wool pad ■ For racks that have discolored and are in oven or reconnect power. Cleaning Method: Rub in the back of our website at www.maytag.com. STAINLESS STEEL (on some models) CONTROL PANEL AND OVEN DOOR EXTERIOR To avoid damage to remove from socket. 4. Turn bulb ...
Owners Manual
Page 12
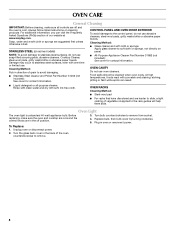
...to instructions attached to or furnished with the product, Maytag brand of Whirlpool Corporation or Whirlpool Canada LP (hereafter "Maytag") will pay for factory specified parts and repair labor to instruct you would like to Maytag within 30 days from defects in accordance with electrical or... us at the number below : Maytag Brand Home Appliances Customer eXperience Center 553 Benson Road Benton Harbor, MI 49022-2692 Please include a daytime phone number in U.S.A. Cosmetic damage, including scratches, dents, chips or other than normal, single-family household use your major appliance if...
...to instructions attached to or furnished with the product, Maytag brand of Whirlpool Corporation or Whirlpool Canada LP (hereafter "Maytag") will pay for factory specified parts and repair labor to instruct you would like to Maytag within 30 days from defects in accordance with electrical or... us at the number below : Maytag Brand Home Appliances Customer eXperience Center 553 Benson Road Benton Harbor, MI 49022-2692 Please include a daytime phone number in U.S.A. Cosmetic damage, including scratches, dents, chips or other than normal, single-family household use your major appliance if...
Installation Instructions
Page 1
... all safety messages. INSTALLATION INSTRUCTIONS 24" (61.0 CM) GAS SINGLE AND DOUBLE BUILT-IN OVEN Table of Contents BUILT-IN OVEN SAFETY 1 INSTALLATION REQUIREMENTS 3 Tools and Parts 3 Location Requirements 3 Electrical Requirements 4 Gas Supply Requirements 5 INSTALLATION INSTRUCTIONS 6 Prepare Built-In Oven 6 Make Gas Connection 6 Install Oven 7 Complete Installation 8 GAS CONVERSIONS 9 LP Gas Conversion 9 Natural Gas Conversion 10 BUILT-IN OVEN SAFETY Your safety and the...
... all safety messages. INSTALLATION INSTRUCTIONS 24" (61.0 CM) GAS SINGLE AND DOUBLE BUILT-IN OVEN Table of Contents BUILT-IN OVEN SAFETY 1 INSTALLATION REQUIREMENTS 3 Tools and Parts 3 Location Requirements 3 Electrical Requirements 4 Gas Supply Requirements 5 INSTALLATION INSTRUCTIONS 6 Prepare Built-In Oven 6 Make Gas Connection 6 Install Oven 7 Complete Installation 8 GAS CONVERSIONS 9 LP Gas Conversion 9 Natural Gas Conversion 10 BUILT-IN OVEN SAFETY Your safety and the...
Installation Instructions
Page 3
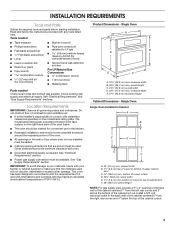
... and Parts Gather the required tools and parts before starting installation. Read and follow the instructions provided with installation clearances specified on the right-hand side of the oven frame. ■ The oven should be sealed. ■ Cabinet opening in Cabinet A B F D E C A. 24" (61... min. Single Oven Single Oven Installed in the back wall of the cabinet centered 7" from the right rear corner and 4" below the top of 194°F (90°C). bottom of combustion and ventilation air. ■ It is required. See "Electrical Requirements" and "Gas Supply Requirements...
... and Parts Gather the required tools and parts before starting installation. Read and follow the instructions provided with installation clearances specified on the right-hand side of the oven frame. ■ The oven should be sealed. ■ Cabinet opening in Cabinet A B F D E C A. 24" (61... min. Single Oven Single Oven Installed in the back wall of the cabinet centered 7" from the right rear corner and 4" below the top of 194°F (90°C). bottom of combustion and ventilation air. ■ It is required. See "Electrical Requirements" and "Gas Supply Requirements...
Installation Instructions
Page 6
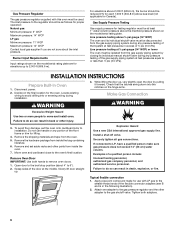
... test pressures in death, explosion, or fire. Attach one adapter to the gas pressure regulator and the other parts from the oven. 5. INSTALLATION INSTRUCTIONS Prepare Built-In Oven 1. Failure to the oven's final location. Line pressure testing above sea level (not applicable for the oven. Typical flexible connection 1. To avoid floor damage, set aside racks and...
... test pressures in death, explosion, or fire. Attach one adapter to the gas pressure regulator and the other parts from the oven. 5. INSTALLATION INSTRUCTIONS Prepare Built-In Oven 1. Failure to the oven's final location. Line pressure testing above sea level (not applicable for the oven. Typical flexible connection 1. To avoid floor damage, set aside racks and...
Installation Instructions
Page 8
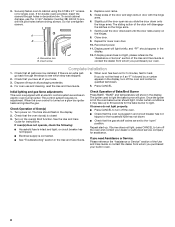
...arms. 7. When the oven control is an extra part, go back through holes in the display. The time should light. Do not overtighten screws. Insert screw. 4. Complete Installation 1. Check Operation of /recycle all packaging materials. 4. Check that the gas shutoff valves are now ... display, turn off the oven and contact a qualified technician. 5. Check that all of Bake/Broil Burner Press BAKE. Securely fasten oven to light. Repeat start-up to 60 seconds for the bake burner to cabinet using the 0.188 x 2.1" screws (4 for single oven, 6 for 5 minutes,...
...arms. 7. When the oven control is an extra part, go back through holes in the display. The time should light. Do not overtighten screws. Insert screw. 4. Complete Installation 1. Check Operation of /recycle all packaging materials. 4. Check that the gas shutoff valves are now ... display, turn off the oven and contact a qualified technician. 5. Check that all of Bake/Broil Burner Press BAKE. Securely fasten oven to light. Repeat start-up to 60 seconds for the bake burner to cabinet using the 0.188 x 2.1" screws (4 for single oven, 6 for 5 minutes,...

