Owners Manual
Page 4
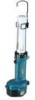
... may hurt them. 9. It may cause release of injurious material. 5. This is not lighted. SAVE THESE INSTRUCTIONS. 4 Read this instruction manual and the charger instruction manual carefully before ... only) 9 Loosen 10 Tighten 11 Connecting ring 12 Cap 13 Ring 14 Metal fitting 15 Hook (ML143/183 only) SPECIFICATIONS Model Power source Fluorescent tube Dimensions (L x W x H) Net weight ML142 D.C. 14.4 ... not cover or clog the lit tool with any problem develops, consult your nearest Makita Service Center or dealer. To maintain product safety and reliability, repairs, maintenance or ...
... may hurt them. 9. It may cause release of injurious material. 5. This is not lighted. SAVE THESE INSTRUCTIONS. 4 Read this instruction manual and the charger instruction manual carefully before ... only) 9 Loosen 10 Tighten 11 Connecting ring 12 Cap 13 Ring 14 Metal fitting 15 Hook (ML143/183 only) SPECIFICATIONS Model Power source Fluorescent tube Dimensions (L x W x H) Net weight ML142 D.C. 14.4 ... not cover or clog the lit tool with any problem develops, consult your nearest Makita Service Center or dealer. To maintain product safety and reliability, repairs, maintenance or ...
Owners Manual
Page 5
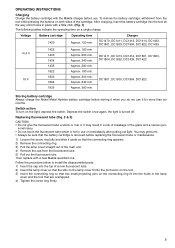
... the fluorescent tube a shock or mar it from the tool while pressing the buttons on the light, depress the switch. Approx. 240 min. Depress the switch once again, the light is hot in place with a new Makita specified one. You may result in a risk of breakage of a new fluorescent tube. 2) Insert the lamp... cover so that the slits on the lamp cover fit into the tool all the way until it locks in use or immediately after putting out light. To remove the battery...
... the fluorescent tube a shock or mar it from the tool while pressing the buttons on the light, depress the switch. Approx. 240 min. Depress the switch once again, the light is hot in place with a new Makita specified one. You may result in a risk of breakage of a new fluorescent tube. 2) Insert the lamp... cover so that the slits on the lamp cover fit into the tool all the way until it locks in use or immediately after putting out light. To remove the battery...