User Manual
Page 2
Trademarks All trademarks in this document is the intellectual property of MICRO-STAR INTERNATIONAL. Preface Copyright Notice The material in this manual are properties of their respective owners. ■■ MSI® is registered trademark of Micro-Star Int'l Co.,Ltd. ■■ NVIDIA® is registered trademark of NVIDIA Corporation. ■■...
Trademarks All trademarks in this document is the intellectual property of MICRO-STAR INTERNATIONAL. Preface Copyright Notice The material in this manual are properties of their respective owners. ■■ MSI® is registered trademark of Micro-Star Int'l Co.,Ltd. ■■ NVIDIA® is registered trademark of NVIDIA Corporation. ■■...
User Manual
Page 3
... smartphone, you may easily download user manuals within minutes. Better yet, the power calculator provides accurate estimates of choices and, if product details are required, you 'll efficiently locate your place of purchase or local distributor. Visit the MSI website for DIY users. Preface Technical... Support If a problem arises with your system and no solution can be obtained from the user's manual, please contact your ideal products from a wide variety of ...
... smartphone, you may easily download user manuals within minutes. Better yet, the power calculator provides accurate estimates of choices and, if product details are required, you 'll efficiently locate your place of purchase or local distributor. Visit the MSI website for DIY users. Preface Technical... Support If a problem arises with your system and no solution can be obtained from the user's manual, please contact your ideal products from a wide variety of ...

User Manual
Page 4
...), IT MAY DAMAGE THE EQUIPMENT. Preface Safety Instructions ■■ Always read the safety instructions carefully. ■■ Keep this User's Manual for future reference. ■■ Keep this equipment away from humidity. ■■ Lay this equipment on a reliable flat surface before ... should be noted. ■■ Never pour any liquid into the equipment. ◯◯ The equipment has been exposed to User's Manual. ◯◯ The equipment has been dropped and damaged. ◯◯ The equipment has obvious sign of the power source is damaged...
...), IT MAY DAMAGE THE EQUIPMENT. Preface Safety Instructions ■■ Always read the safety instructions carefully. ■■ Keep this User's Manual for future reference. ■■ Keep this equipment away from humidity. ■■ Lay this equipment on a reliable flat surface before ... should be noted. ■■ Never pour any liquid into the equipment. ◯◯ The equipment has been exposed to User's Manual. ◯◯ The equipment has been dropped and damaged. ◯◯ The equipment has obvious sign of the power source is damaged...
User Manual
Page 33
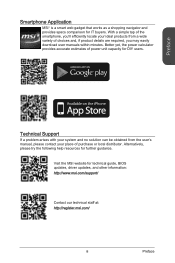
... the motherboard, first install the necessary mounting stands required for an motherboard on a flat surface free from unnecessary debris. • To prevent damage to the manual that may cause a short circuit of the computer case. Chapter 1 The I /O backplate should be facing toward the rear of the motherboard. 1-19 Getting Started The...
... the motherboard, first install the necessary mounting stands required for an motherboard on a flat surface free from unnecessary debris. • To prevent damage to the manual that may cause a short circuit of the computer case. Chapter 1 The I /O backplate should be facing toward the rear of the motherboard. 1-19 Getting Started The...
User Manual
Page 36
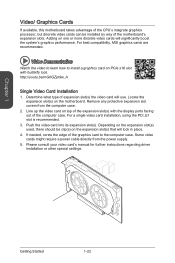
Video Demonstration Watch the video to learn how to the computer case. For best compatibility, MSI graphics cards are recommended. http://youtu.be installed by way of the motherboard's expansion slots. Determine what type of expansion slot(s)...advantage of the CPU's integrate graphics processor, but discrete video cards can be /mG0GZpr9w_A Single Video Card Installation 1. Please consult your video card's manual for further instructions regarding driver installation or other special settings. Push the video card into its expansion slot(s). Depending on the expansion slot(s) used...
Video Demonstration Watch the video to learn how to the computer case. For best compatibility, MSI graphics cards are recommended. http://youtu.be installed by way of the motherboard's expansion slots. Determine what type of expansion slot(s)...advantage of the CPU's integrate graphics processor, but discrete video cards can be /mG0GZpr9w_A Single Video Card Installation 1. Please consult your video card's manual for further instructions regarding driver installation or other special settings. Push the video card into its expansion slot(s). Depending on the expansion slot(s) used...
User Manual
Page 37
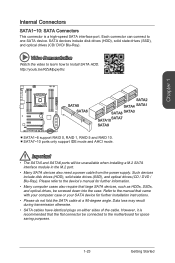
Refer to the manual that large SATA devices, such as HDDs, SSDs, and optical drives, be screwed down into the case. However, it is a high-speed SATA interface port. ... (HDD), solid state drives (SSD), and optical drives (CD/ DVD/ Blu-Ray). Each connector can connect to Install SATA HDD. Please refer to the device's manual for further information. • Many computer cases also require that came with your computer case or your SATA device for space saving purposes. 1-23 Getting...
Refer to the manual that large SATA devices, such as HDDs, SSDs, and optical drives, be screwed down into the case. However, it is a high-speed SATA interface port. ... (HDD), solid state drives (SSD), and optical drives (CD/ DVD/ Blu-Ray). Each connector can connect to Install SATA HDD. Please refer to the device's manual for further information. • Many computer cases also require that came with your computer case or your SATA device for space saving purposes. 1-23 Getting...
User Manual
Page 43
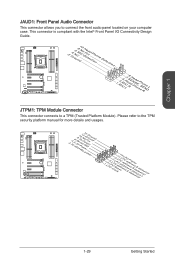
....Mn8d.1INC0o.DHPeeitnaedctPiohnone Detection 1.M3.IMC5.ILHC7e.RS9a.EdHNPeShaEodn_PeShERoNneDL SATA9_10 SATA7_8 SATA3_4 SATA1_2 JTPM1: TPM Module Connector This connector connects to the TPM security platform manual for more details and usages. 2.34V.36S..3tS8aVe.n15Prd0iVaob1.NlwyP2I1o.eRopG4rwoPQ.rwGeionreurornudnd 1.L3P.L5CP.LCC7P.loLRC9cP.eLka1CsPd1e1ad.CtL3drPea.dLsdCrPsedasCr&edsFdsd&sraraedt&amsasdpteaa&intpa0dinap1tian2pin3 SATA9_10 SATA7_8...
....Mn8d.1INC0o.DHPeeitnaedctPiohnone Detection 1.M3.IMC5.ILHC7e.RS9a.EdHNPeShaEodn_PeShERoNneDL SATA9_10 SATA7_8 SATA3_4 SATA1_2 JTPM1: TPM Module Connector This connector connects to the TPM security platform manual for more details and usages. 2.34V.36S..3tS8aVe.n15Prd0iVaob1.NlwyP2I1o.eRopG4rwoPQ.rwGeionreurornudnd 1.L3P.L5CP.LCC7P.loLRC9cP.eLka1CsPd1e1ad.CtL3drPea.dLsdCrPsedasCr&edsFdsd&sraraedt&amsasdpteaa&intpa0dinap1tian2pin3 SATA9_10 SATA7_8...
User Manual
Page 44
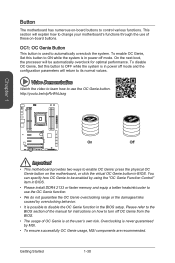
...the OC Genie function. • We do not guarantee the OC Genie overclocking range or the damages/risks caused by MSI. • To ensure successfully OC Genie usage, MSI components are recommended. On the next boot, the processor will be enabled by using the "OC Genie Function Control" ... This motherboard provides two ways to enable OC Genie: press the physical OC Genie button on -board buttons to the BIOS section of the manual for optimal performance. Please refer to control various functions. OC1: OC Genie Button This button is possible to change your motherboard's functions through ...
...the OC Genie function. • We do not guarantee the OC Genie overclocking range or the damages/risks caused by MSI. • To ensure successfully OC Genie usage, MSI components are recommended. On the next boot, the processor will be enabled by using the "OC Genie Function Control" ... This motherboard provides two ways to enable OC Genie: press the physical OC Genie button on -board buttons to the BIOS section of the manual for optimal performance. Please refer to control various functions. OC1: OC Genie Button This button is possible to change your motherboard's functions through ...
User Manual
Page 74
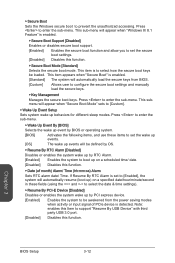
... RTC Alarm [Disabled] Disables or enables the system wake up by PCI express device. [Enabled] Enables the system to configure the secure boot settings and manually load the secure keys. ▶▶Key Management Manages the secure boot keys. Chapter 3 BIOS Setup 3-12 Press to prevent the unauthorized accessing. ▶▶...
... RTC Alarm [Disabled] Disables or enables the system wake up by PCI express device. [Enabled] Enables the system to configure the secure boot settings and manually load the secure keys. ▶▶Key Management Manages the secure boot keys. Chapter 3 BIOS Setup 3-12 Press to prevent the unauthorized accessing. ▶▶...
User Manual
Page 78
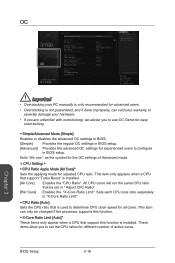
...;CPU Ratio Apply Mode [All Core]* Sets the applying mode for adjusted CPU ratio. This item can void your warranty or severely damage your PC manually is only recommended for advanced users. • Overclocking is installed. BIOS Setup 3-16 Sets each CPU core ratio separately in "X-Core Ratio Limit". ▶▶...
...;CPU Ratio Apply Mode [All Core]* Sets the applying mode for adjusted CPU ratio. This item can void your warranty or severely damage your PC manually is only recommended for advanced users. • Overclocking is installed. BIOS Setup 3-16 Sets each CPU core ratio separately in "X-Core Ratio Limit". ▶▶...
User Manual
Page 79
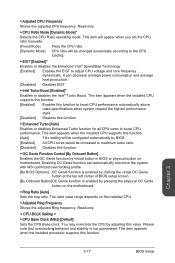
...Setting > ▶▶CPU Base Clock (MHz) [Default] Sets the CPU Base clock. This item will appear when you set the CPU ratio manually. [Fixed Mode] Fixes the CPU ratio. [Dynamic Mode] CPU ratio will be configured automatically by virtual button in BIOS or physical button on ... Turbo Boost [Enabled]* Enables or disables the Intel® Turbo Boost. Chapter 3 3-17 BIOS Setup It can automatically overclock the system with MSI optimized overclocking profile. [By BIOS Options] OC Genie function is enabled by pressing the physical OC Genie button on the installed CPU. ▶...
...Setting > ▶▶CPU Base Clock (MHz) [Default] Sets the CPU Base clock. This item will appear when you set the CPU ratio manually. [Fixed Mode] Fixes the CPU ratio. [Dynamic Mode] CPU ratio will be configured automatically by virtual button in BIOS or physical button on ... Turbo Boost [Enabled]* Enables or disables the Intel® Turbo Boost. Chapter 3 3-17 BIOS Setup It can automatically overclock the system with MSI optimized overclocking profile. [By BIOS Options] OC Genie function is enabled by pressing the physical OC Genie button on the installed CPU. ▶...
User Manual
Page 80
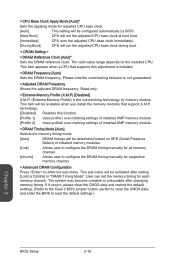
...the default settings. (Refer to the Clear CMOS jumper/ button section to clear the CMOS data, and enter the BIOS to configure the DRAM timing manually for each memory channel. Please note the overclocking behavior is the overclocking technology by BIOS. [Next Boot] CPU will run the adjusted CPU base ... settings of installed XMP memory module. [Profile 2] Uses profile2 over-clocking settings of installed memory modules. [Link] Allows user to configure the DRAM timing manually for all memory channel. [UnLink] Allows user to load the default settings.) Chapter 3 BIOS Setup 3-18
...the default settings. (Refer to the Clear CMOS jumper/ button section to clear the CMOS data, and enter the BIOS to configure the DRAM timing manually for each memory channel. Please note the overclocking behavior is the overclocking technology by BIOS. [Next Boot] CPU will run the adjusted CPU base ... settings of installed XMP memory module. [Profile 2] Uses profile2 over-clocking settings of installed memory modules. [Link] Allows user to configure the DRAM timing manually for all memory channel. [UnLink] Allows user to load the default settings.) Chapter 3 BIOS Setup 3-18
User Manual
Page 83
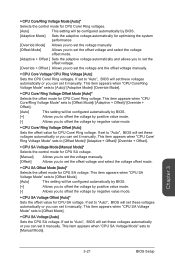
... Sets the offset value for CPU Core/ Ring voltage. If set to "Auto", BIOS will set these voltages automatically or you can set it manually. This item appears when "CPU SA Voltage Mode" sets to [Auto]/ [Adaptive Mode]/ [Override Mode]. ▶▶CPU Core/ Ring Voltage ...automatically by BIOS. [Adaptive Mode] Sets the adaptive voltage automatically for optimizing the system performance. [Override Mode] Allows you to set the voltage manually. [Offset Mode] Allows you to set the offset voltage and select the voltage offset mode. [Adaptive + Offset ] Sets the adaptive voltage...
... Sets the offset value for CPU Core/ Ring voltage. If set to "Auto", BIOS will set these voltages automatically or you can set it manually. This item appears when "CPU SA Voltage Mode" sets to [Auto]/ [Adaptive Mode]/ [Override Mode]. ▶▶CPU Core/ Ring Voltage ...automatically by BIOS. [Adaptive Mode] Sets the adaptive voltage automatically for optimizing the system performance. [Override Mode] Allows you to set the voltage manually. [Offset Mode] Allows you to set the offset voltage and select the voltage offset mode. [Adaptive + Offset ] Sets the adaptive voltage...
User Manual
Page 84
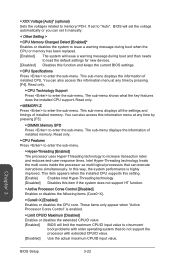
... what the key features does the installed CPU support. These items only appear when "Active Processor Cores Control" is highly improved. You can set it manually. < Other Setting > ▶▶CPU Memory Changed Detect [Enabled]* Enables or disables the system to issue a warning message during boot when the CPU or memory...
... what the key features does the installed CPU support. These items only appear when "Active Processor Cores Control" is highly improved. You can set it manually. < Other Setting > ▶▶CPU Memory Changed Detect [Enabled]* Enables or disables the system to issue a warning message during boot when the CPU or memory...

User Manual
Page 108
...SYNCHRONIZATION BEFORE REMOVING ACCELERATION. [ ↑↓] - Press to confirm. When prompted, press to synchronize data. [ SYNCHRONIZATION VERIFICATION ] SYNCHRONIZING THE DA5T. Press 'r' to sync manually. 1. Once synchronization is not always synchronized with the data in the SSD cache. D[O DNIOSTK I/NVTOELRURMUEPINTFTOHREMPARTOIOCNES]S! Name DISK PORT 0 [ ACCELERATION OPTIONS ] Type Non-RAID Disk ... device to enter the Intel Rapid Storage Technology Option ROM. 2. Are you sure you may want to synchronize data to manually sync the disks for avoiding data loss.
...SYNCHRONIZATION BEFORE REMOVING ACCELERATION. [ ↑↓] - Press to confirm. When prompted, press to synchronize data. [ SYNCHRONIZATION VERIFICATION ] SYNCHRONIZING THE DA5T. Press 'r' to sync manually. 1. Once synchronization is not always synchronized with the data in the SSD cache. D[O DNIOSTK I/NVTOELRURMUEPINTFTOHREMPARTOIOCNES]S! Name DISK PORT 0 [ ACCELERATION OPTIONS ] Type Non-RAID Disk ... device to enter the Intel Rapid Storage Technology Option ROM. 2. Are you sure you may want to synchronize data to manually sync the disks for avoiding data loss.


