
User Manual
Page 19
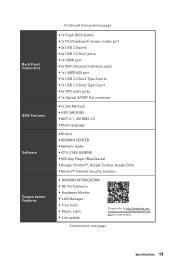
...more details. com/manual/mb/DRAGONCENTER2. Back Panel Connectors BIOS Features Software Dragon Center Features Continued from previous page y 1x Flash BIOS Button y 1x PS/2 keyboard/ mouse combo port y 2x USB 2.0 ports y 2x USB 3.2 Gen1 ports y 1x HDMI port y 2x WiFi/ Bluetooth antenna ...jacks y 1x LAN(RJ45) port y 3x USB 3.2 Gen2 Type A ports y 1x USB 3.2 Gen2 Type C port y 5x OFC audio jacks y 1x Optical S/PDIF Out connector y 1x 256 Mb flash y UEFI AMI BIOS y ACPI 6.1, SM BIOS 2.8 y Multi-language y Drivers y DRAGON CENTER y Nahimic Audio y CPU-Z MSI GAMING y MSI...
...more details. com/manual/mb/DRAGONCENTER2. Back Panel Connectors BIOS Features Software Dragon Center Features Continued from previous page y 1x Flash BIOS Button y 1x PS/2 keyboard/ mouse combo port y 2x USB 2.0 ports y 2x USB 3.2 Gen1 ports y 1x HDMI port y 2x WiFi/ Bluetooth antenna ...jacks y 1x LAN(RJ45) port y 3x USB 3.2 Gen2 Type A ports y 1x USB 3.2 Gen2 Type C port y 5x OFC audio jacks y 1x Optical S/PDIF Out connector y 1x 256 Mb flash y UEFI AMI BIOS y ACPI 6.1, SM BIOS 2.8 y Multi-language y Drivers y DRAGON CENTER y Nahimic Audio y CPU-Z MSI GAMING y MSI...
User Manual
Page 22
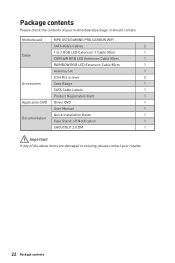
It should contain: Motherboard MPG X570 GAMING PRO CARBON WIFI SATA 6Gb/s Cables 2 1 to 2 RGB LED Extension Y Cable 80cm 1 Cable CORSAIR RGB LED Extension Cable 50cm 1 RAINBOW RGB LED Extension Cable 80cm 1 Antenna Set 1 8.5H M.2 screws 2 Accessories Case Badge 1 SATA Cable Labels 1 Product Registration Card 1 Application DVD Driver DVD 1 User Manual 1 Quick Installation Guide 1 Documentation Case Stand-off...
It should contain: Motherboard MPG X570 GAMING PRO CARBON WIFI SATA 6Gb/s Cables 2 1 to 2 RGB LED Extension Y Cable 80cm 1 Cable CORSAIR RGB LED Extension Cable 50cm 1 RAINBOW RGB LED Extension Cable 80cm 1 Antenna Set 1 8.5H M.2 screws 2 Accessories Case Badge 1 SATA Cable Labels 1 Product Registration Card 1 Application DVD Driver DVD 1 User Manual 1 Quick Installation Guide 1 Documentation Case Stand-off...
User Manual
Page 39
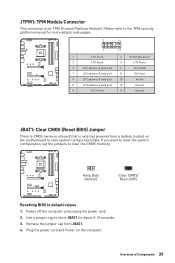
... on the motherboard to save system configuration data. Power off the computer and unplug the power cord. 2. Use a jumper cap to the TPM security platform manual for more details and usages. 2 14 1 13 1 LPC Clock 2 3V Standby power 3 LPC Reset 4 3.3V Power 5 LPC address & data pin0 6 Serial IRQ 7 LPC address & data...
... on the motherboard to save system configuration data. Power off the computer and unplug the power cord. 2. Use a jumper cap to the TPM security platform manual for more details and usages. 2 14 1 13 1 LPC Clock 2 3V Standby power 3 LPC Reset 4 3.3V Power 5 LPC address & data pin0 6 Serial IRQ 7 LPC address & data...
User Manual
Page 44
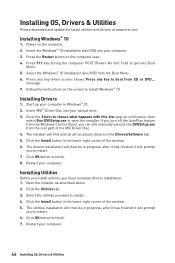
...the Install button in Windows® 10. 2. Installing Utilities Before you install utilities, you to install. 4. Select the utilities you can still manually execute the DVDSetup.exe from the Windows Control Panel, you want to restart. 7. Follow the instructions on the computer case. 4. The installer... installation. 1. Restart your optical drive. 3. Installing OS, Drivers & Utilities Please download and update the latest utilities and drivers at www.msi.com Installing Windows® 10 1. Press the Restart button on the screen to get into your computer. 3. If you turn off the...
...the Install button in Windows® 10. 2. Installing Utilities Before you install utilities, you to install. 4. Select the utilities you can still manually execute the DVDSetup.exe from the Windows Control Panel, you want to restart. 7. Follow the instructions on the computer case. 4. The installer... installation. 1. Restart your optical drive. 3. Installing OS, Drivers & Utilities Please download and update the latest utilities and drivers at www.msi.com Installing Windows® 10 1. Press the Restart button on the screen to get into your computer. 3. If you turn off the...
User Manual
Page 49
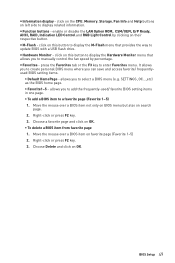
... Hardware Monitor menu that provides the way to display related information. y Favorites - y Hardware Monitor - It allows you to create personal BIOS menu where you to manually control the fan speed by clicking on OK. ƒ To delete a BIOS item from favorite page 1. Right-click or press F2 key. 3. click on OK...
... Hardware Monitor menu that provides the way to display related information. y Favorites - y Hardware Monitor - It allows you to create personal BIOS menu where you to manually control the fan speed by clicking on OK. ƒ To delete a BIOS item from favorite page 1. Right-click or press F2 key. 3. click on OK...

User Manual
Page 59
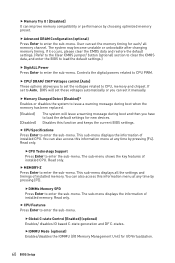
This item can set the parameters about CPU power/ current. If it could void your warranty or severely damage your PC manually is not guaranteed, and if done improperly, it occurs, please clear the CMOS data and restore the default settings. BIOS Setup 59 ...y Overclocking is only recommended for advanced users. Note: We use GAME BOOST function for overclocking the memory. f Advanced CPU Configuration Press Enter to determine CPU clock speed. The system may become unstable or ...
This item can set the parameters about CPU power/ current. If it could void your warranty or severely damage your PC manually is not guaranteed, and if done improperly, it occurs, please clear the CMOS data and restore the default settings. BIOS Setup 59 ...y Overclocking is only recommended for advanced users. Note: We use GAME BOOST function for overclocking the memory. f Advanced CPU Configuration Press Enter to determine CPU clock speed. The system may become unstable or ...
User Manual
Page 60
... boot and then you have to load the default settings for new devices. The sub-menu shows the key features of installed memory. If it manually. f CPU/ DRAM/ CHIP Voltages control [Auto] These options allows you can also access this information menu at any time by pressing [F4]. Read only. You...
... boot and then you have to load the default settings for new devices. The sub-menu shows the key features of installed memory. If it manually. f CPU/ DRAM/ CHIP Voltages control [Auto] These options allows you can also access this information menu at any time by pressing [F4]. Read only. You...
User Manual
Page 72
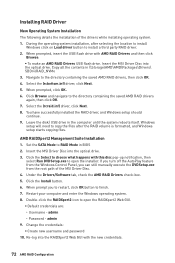
...OK. 4. When prompted, click OK. 6. Copy all the contents in the computer until the system reboots itself. When prompt you can still manually execute the DVDSetup.exe from the Windows Control Panel, you to restart, click OK button to install a third party RAID driver. 2. admin ...SBDrv\RAID_NVMe 3. During the operating system installation, after the RAID volume is formatted, and Windows setup starts copying files. Insert the MSI Driver Disc into the optical drive. 3. Set the SATA Mode to open the installer. Installing RAID Driver New Operating System Installation The...
...OK. 4. When prompted, click OK. 6. Copy all the contents in the computer until the system reboots itself. When prompt you can still manually execute the DVDSetup.exe from the Windows Control Panel, you to restart, click OK button to install a third party RAID driver. 2. admin ...SBDrv\RAID_NVMe 3. During the operating system installation, after the RAID volume is formatted, and Windows setup starts copying files. Insert the MSI Driver Disc into the optical drive. 3. Set the SATA Mode to open the installer. Installing RAID Driver New Operating System Installation The...


