
User Guide
Page 5
...Contents 1-6 Chapter 2. Hardware Setup 2-1 Quick Components Guide 2-2 Central Processing Unit: CPU 2-3 CPU Installation Procedures for Socket 939 2-4 Installing AMD Athlon64 CPU Cooler Set 2-5 Memory ...2-7 Introduction to DDR SDRAM 2-7 DIMM Module Combination 2-7 Recommended Memory Combination List 2-8 Installing DDR Modules... (Purple 2-12 IEEE1394 Port (Optional 2-13 Serial Port Connector 2-13 USB Connectors 2-13 LAN (RJ-45) Jack 2-14 Audio Port Connectors 2-14 Parallel Port Connector: LPT1 2-15 Connectors ...2-16 Floppy Disk Drive Connector: FDD1 2-16 Fan Power Connectors: ...
...Contents 1-6 Chapter 2. Hardware Setup 2-1 Quick Components Guide 2-2 Central Processing Unit: CPU 2-3 CPU Installation Procedures for Socket 939 2-4 Installing AMD Athlon64 CPU Cooler Set 2-5 Memory ...2-7 Introduction to DDR SDRAM 2-7 DIMM Module Combination 2-7 Recommended Memory Combination List 2-8 Installing DDR Modules... (Purple 2-12 IEEE1394 Port (Optional 2-13 Serial Port Connector 2-13 USB Connectors 2-13 LAN (RJ-45) Jack 2-14 Audio Port Connectors 2-14 Parallel Port Connector: LPT1 2-15 Connectors ...2-16 Floppy Disk Drive Connector: FDD1 2-16 Fan Power Connectors: ...

User Guide
Page 7
... a RAID Mirrored Array 5-20 Chapter 6. nVIDIA RAID Introduction 5-1 Introduction ...5-2 System Requirement 5-2 RAID Arrays 5-2 Summary of Driver & Utility 6-1 Driver Installation 6-2 NVIDIA nForce4 System Driver 6-2 Realtek AC97 Audio Driver 6-5 Utility Installation 6-6 vii Audio Speaker Setting 4-16 Power on Agent 4-18 Power On 4-18 Power Off / Restart 4-19 Start W ith ...4-19 Auto Login 4-20 Chapter 5.
... a RAID Mirrored Array 5-20 Chapter 6. nVIDIA RAID Introduction 5-1 Introduction ...5-2 System Requirement 5-2 RAID Arrays 5-2 Summary of Driver & Utility 6-1 Driver Installation 6-2 NVIDIA nForce4 System Driver 6-2 Realtek AC97 Audio Driver 6-5 Utility Installation 6-6 vii Audio Speaker Setting 4-16 Power on Agent 4-18 Power On 4-18 Power Off / Restart 4-19 Start W ith ...4-19 Auto Login 4-20 Chapter 5.
User Guide
Page 11
... with 360K, 720K, 1.2M, 1.44M and 2.88Mbytes - 1 serial port - 1 parallel port supporting SPP/EPP/ECP mode - 1 Audio jack(5-in the rear I/O, 6 ports via the external bracket NV RAID (Software) † Supports up to 400Mbps Audio † Chip integrated by Marvell 88E1111 IEEE 1394 (Optional) † Supports up to 4 SATA and 4 ATA133 Hard...
... with 360K, 720K, 1.2M, 1.44M and 2.88Mbytes - 1 serial port - 1 parallel port supporting SPP/EPP/ECP mode - 1 Audio jack(5-in the rear I/O, 6 ports via the external bracket NV RAID (Software) † Supports up to 400Mbps Audio † Chip integrated by Marvell 88E1111 IEEE 1394 (Optional) † Supports up to 4 SATA and 4 ATA133 Hard...

User Guide
Page 27
... Ring Indicate USB Connectors The mainboard provides two OHCI (Open Host Controller Interface) Universal Serial Bus roots for a wide range of devices, including consumer electronics audio/video (A/V) appliances, storage peripherals, other USB-compatible devices. You can attach a serial mouse or other serial devices directly to IEEE1394 devices without external power...
... Ring Indicate USB Connectors The mainboard provides two OHCI (Open Host Controller Interface) Universal Serial Bus roots for a wide range of devices, including consumer electronics audio/video (A/V) appliances, storage peripherals, other USB-compatible devices. You can attach a serial mouse or other serial devices directly to IEEE1394 devices without external power...

User Guide
Page 28
... are for 2-channel mode for stereo speaker output: Line Out is an advanced audio application provided by Realtek ALC850 to offer support for 7.1-channel audio operation and can connect a network cable to 4-/5.1-/7.1 channel audio. However, there is a connector for Speakers or Headphones. Mic is used for external ...) Jack The mainboard provides one standard RJ-45 jacks for connection to be transferred at 1000, 100 or 10Mbps. You can turn rear audio connectors from 2-channel to either LAN jack. Line In is a connector for microphones. This Giga-bit LAN enables data to single Local...
... are for 2-channel mode for stereo speaker output: Line Out is an advanced audio application provided by Realtek ALC850 to offer support for 7.1-channel audio operation and can connect a network cable to 4-/5.1-/7.1 channel audio. However, there is a connector for Speakers or Headphones. Mic is used for external ...) Jack The mainboard provides one standard RJ-45 jacks for connection to be transferred at 1000, 100 or 10Mbps. You can turn rear audio connectors from 2-channel to either LAN jack. Line In is a connector for microphones. This Giga-bit LAN enables data to single Local...

User Guide
Page 32
... hard disk devices MSI Reminds You... SATA2 7 1 SATA1 SATA4 SATA1~ SATA4 Pin Definition PIN SIGNAL 1 GND 3 TXN 5 RXN 7 GND PIN SIGNAL 2 TXP 4 GND 6 RXP 7 1 SATA3 Serial ATA cable (Optional) Connect to serial ATA ports Take out the dust cover and connect to the nVidia RAID Introduction for CD-ROM audio connector. CD...
... hard disk devices MSI Reminds You... SATA2 7 1 SATA1 SATA4 SATA1~ SATA4 Pin Definition PIN SIGNAL 1 GND 3 TXN 5 RXN 7 GND PIN SIGNAL 2 TXP 4 GND 6 RXP 7 1 SATA3 Serial ATA cable (Optional) Connect to serial ATA ports Take out the dust cover and connect to the nVidia RAID Introduction for CD-ROM audio connector. CD...

User Guide
Page 34
You must configure the setting through the BIOS setup to use to control headphone amplifier No pin Left channel audio signal to front panel Left channel audio signal return from front panel MSI Reminds You... Otherwise, the Line-Out connector on the back panel will not function. 6 10 59 IrDA ...Infrared Module Header: JIR1 The connector allows you don't want to connect to the front audio header, pins 5 & 6, 9 & 10 ...
You must configure the setting through the BIOS setup to use to control headphone amplifier No pin Left channel audio signal to front panel Left channel audio signal return from front panel MSI Reminds You... Otherwise, the Line-Out connector on the back panel will not function. 6 10 59 IrDA ...Infrared Module Header: JIR1 The connector allows you don't want to connect to the front audio header, pins 5 & 6, 9 & 10 ...

User Guide
Page 56
...is used. The settings are : [Auto], [Disabled]. IR Function Select This setting allows you want to connect an audio device. Setting options: [Enabled] and [Disabled]. If an audio device is disabled. COM Port 1 Select an address and corresponding interrupt for serial port 2. AC97 Controller [Auto] allows... the mainboard to detect the Marvell LAN controller and enable it is detected, the onboard AC'97 (Audio Codec'97) controller will be enabled; Disable the controller if you to enter the sub-menu and the following screen appears: Onboard FDC...
...is used. The settings are : [Auto], [Disabled]. IR Function Select This setting allows you want to connect an audio device. Setting options: [Enabled] and [Disabled]. If an audio device is disabled. COM Port 1 Select an address and corresponding interrupt for serial port 2. AC97 Controller [Auto] allows... the mainboard to detect the Marvell LAN controller and enable it is detected, the onboard AC'97 (Audio Codec'97) controller will be enabled; Disable the controller if you to enter the sub-menu and the following screen appears: Onboard FDC...
User Guide
Page 71
... system, such as audio program, power management, MP3 files management and communication / 802.11g WLAN settings. short-cut icon in the system tray short-cut path in your mainboard, path: Utility --> MSI Util- Once you will be able to activate the MSI well-known features,...a short cut icon on each icon to enable DigiCell. HInatroddwuacrteioSnetuopDigiCell Introduction to DigiCell DigiCell, the most useful and powerful utility that MSI has spent much research and efforts to develop, helps users to overclock the CPU/ memory. Moreover, with your "Start-up menu ...
... system, such as audio program, power management, MP3 files management and communication / 802.11g WLAN settings. short-cut icon in the system tray short-cut path in your mainboard, path: Utility --> MSI Util- Once you will be able to activate the MSI well-known features,...a short cut icon on each icon to enable DigiCell. HInatroddwuacrteioSnetuopDigiCell Introduction to DigiCell DigiCell, the most useful and powerful utility that MSI has spent much research and efforts to develop, helps users to overclock the CPU/ memory. Moreover, with your "Start-up menu ...
User Guide
Page 72
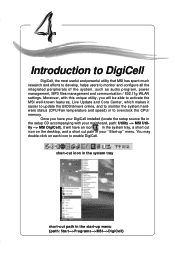
Otherwise, the icon will remain gray and user is not able to MSI website: http://www.msi.com.tw. MSI Click on this button to link to view the functionality/connection of DigiCell will be displayed for communication products, including the status, strength...review. etc.) installed correctly. The icon representing each icon appearing above to enter the sub-menu to have all the necessary drivers (onboard LAN driver, audio driver, CoreCenter, Live Update... H/W Diagnostic In this sub-menu, it provides the information of the Ethernet LAN & Wireless LAN. Comm. MS-712M5SAI ...
Otherwise, the icon will remain gray and user is not able to MSI website: http://www.msi.com.tw. MSI Click on this button to link to view the functionality/connection of DigiCell will be displayed for communication products, including the status, strength...review. etc.) installed correctly. The icon representing each icon appearing above to enter the sub-menu to have all the necessary drivers (onboard LAN driver, audio driver, CoreCenter, Live Update... H/W Diagnostic In this sub-menu, it provides the information of the Ethernet LAN & Wireless LAN. Comm. MS-712M5SAI ...

User Guide
Page 73
Audio Speaker Setting In this sub-menu, you back to the main menu. 4-3 Click on back button in every sub-menu and it will be lit ... and auto-executed programs of the power-on Agent In this icon will bring you can configure and test the multi-channel audio function, speakers, sound effect and environment. MSI Reminds You... Power on , power-off and restarting features. Click this blue icon to your system, this sub-menu, you have your...
Audio Speaker Setting In this sub-menu, you back to the main menu. 4-3 Click on back button in every sub-menu and it will be lit ... and auto-executed programs of the power-on Agent In this icon will bring you can configure and test the multi-channel audio function, speakers, sound effect and environment. MSI Reminds You... Power on , power-off and restarting features. Click this blue icon to your system, this sub-menu, you have your...

User Guide
Page 86
... setting lets you select the environment you can choose several preset equalizers for your preference. MS-712M5SAI TFXeaMtuarienboard Audio Speaker Setting In the Audio Speaker Setting sub-menu, you can configure the multi-channel audio operation, perform speaker test, and choose the environment you have chosen one equalizer, it will be indicated next...
... setting lets you select the environment you can choose several preset equalizers for your preference. MS-712M5SAI TFXeaMtuarienboard Audio Speaker Setting In the Audio Speaker Setting sub-menu, you can configure the multi-channel audio operation, perform speaker test, and choose the environment you have chosen one equalizer, it will be indicated next...

User Guide
Page 87
In this Speaker Configuration dialogue box, select the audio configuration which is working properly. channel audio operation is identical to the audio jack on each connected speaker to ensure if Headphone, 2-, 4-, 5.1-, or 7.1- Center Front Left Main Side Left Rear Left Subwoofer Front Right ... dialogue box, first select the correct item from the Speaker mode drop-down list, and then click on your mainboard. Once the correct audio configuration is inserted firmly to save the changes. Then the following dialogue box will appear. If any speaker fails to make sound, then ...
In this Speaker Configuration dialogue box, select the audio configuration which is working properly. channel audio operation is identical to the audio jack on each connected speaker to ensure if Headphone, 2-, 4-, 5.1-, or 7.1- Center Front Left Main Side Left Rear Left Subwoofer Front Right ... dialogue box, first select the correct item from the Speaker mode drop-down list, and then click on your mainboard. Once the correct audio configuration is inserted firmly to save the changes. Then the following dialogue box will appear. If any speaker fails to make sound, then ...

User Guide
Page 134
Then the welcome dialogue will launch automatically. 2. Click Next to restart it later. 7-5 The following screen indicates the installation is complete. The installation process will display. Click Yes to restart your computer or click No to continue. Installation of Drivers and Utility Realtek AC97 Audio Driver 1. Click on this button to install the Realtek AC97 Audio Driver.
Then the welcome dialogue will launch automatically. 2. Click Next to restart it later. 7-5 The following screen indicates the installation is complete. The installation process will display. Click Yes to restart your computer or click No to continue. Installation of Drivers and Utility Realtek AC97 Audio Driver 1. Click on this button to install the Realtek AC97 Audio Driver.
