
User's Guide
Page 21
... Size menu, select the correct size. Step 3: Print your cards Click OK. Step 1: Load the envelopes Note: Do not use envelopes with holes, windows, deep embossing, metal clasps, string ties, or folding bars. • Load the envelopes vertically against the right side of the photo you . • Make sure... support. • Make sure the print side is facing you want to print a borderless photo. Printing envelopes 21 Paper if you want the printer to print to 10 envelopes at a time, depending on custom size paper, see page 41. 4 Click OK. Borderless if you do not want to print must ...
... Size menu, select the correct size. Step 3: Print your cards Click OK. Step 1: Load the envelopes Note: Do not use envelopes with holes, windows, deep embossing, metal clasps, string ties, or folding bars. • Load the envelopes vertically against the right side of the photo you . • Make sure... support. • Make sure the print side is facing you want to print a borderless photo. Printing envelopes 21 Paper if you want the printer to print to 10 envelopes at a time, depending on custom size paper, see page 41. 4 Click OK. Borderless if you do not want to print must ...
User's Guide for Mac OS X
Page 23
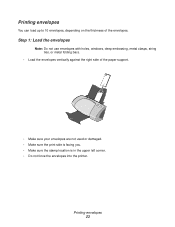
Printing envelopes 23 Step 1: Load the envelopes Note: Do not use envelopes with holes, windows, deep embossing, metal clasps, string ties, or metal folding bars. • Load the envelopes vertically against the right side of the envelopes. Printing envelopes You can load up to 10 envelopes, depending on the thickness of the paper support. • Make sure your envelopes are not used or damaged. • Make sure the print side is facing you. • Make sure the stamp location is in the upper left corner. • Do not force the envelopes into the printer.
Printing envelopes 23 Step 1: Load the envelopes Note: Do not use envelopes with holes, windows, deep embossing, metal clasps, string ties, or metal folding bars. • Load the envelopes vertically against the right side of the envelopes. Printing envelopes You can load up to 10 envelopes, depending on the thickness of the paper support. • Make sure your envelopes are not used or damaged. • Make sure the print side is facing you. • Make sure the stamp location is in the upper left corner. • Do not force the envelopes into the printer.
User's Guide for Mac OS X
Page 54
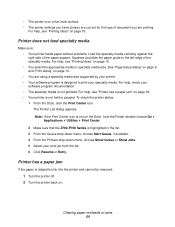
... the Dock, from the Finder window choose Go Applications Utilities Print Center. 2 Make sure that the Z700-P700 Series is designed to the left edge of the specialty media. To check the printer status: 1 From the Dock, click the Print Center icon. Printer does not feed specialty media Make..."Printing ideas" on . For help , see "Printing ideas" on page 54. • Your printer is not on page 10. • You are correct for the type of the paper support. The Printer List dialog appears. Squeeze and slide the paper guide to print your software program documentation. • The...
... the Dock, from the Finder window choose Go Applications Utilities Print Center. 2 Make sure that the Z700-P700 Series is designed to the left edge of the specialty media. To check the printer status: 1 From the Dock, click the Print Center icon. Printer does not feed specialty media Make..."Printing ideas" on . For help , see "Printing ideas" on page 54. • Your printer is not on page 10. • You are correct for the type of the paper support. The Printer List dialog appears. Squeeze and slide the paper guide to print your software program documentation. • The...


