
(English) User Guide
Page 3
... or replacing a PCI card 64 Installing or replacing the optical drive . . . 68 Installing or replacing an internal RDX drive . 69 Replacing the power supply assembly . . . 72 Replacing the heat sink and fan assembly . . 74 Replacing the front audio and USB assembly 76 Replacing the front fan... and serial number label 12 Front view of the server 13 Rear view of the ThinkServer EasyStartup program 29 © Copyright Lenovo 2013, 2014 Starting the ThinkServer EasyStartup program 30 Using the ThinkServer EasyStartup program on the system board . . . . 16 Internal components 17 Internal ...
... or replacing a PCI card 64 Installing or replacing the optical drive . . . 68 Installing or replacing an internal RDX drive . 69 Replacing the power supply assembly . . . 72 Replacing the heat sink and fan assembly . . 74 Replacing the front audio and USB assembly 76 Replacing the front fan... and serial number label 12 Front view of the server 13 Rear view of the ThinkServer EasyStartup program 29 © Copyright Lenovo 2013, 2014 Starting the ThinkServer EasyStartup program 30 Using the ThinkServer EasyStartup program on the system board . . . . 16 Internal components 17 Internal ...

(English) User Guide
Page 8
...as CD-ROMs, DVD drives, fiber optic devices, or transmitters) are disconnected from the device, ensure that all electrical current from the power source. There are no serviceable parts inside the device. • Use of controls or adjustments or performance of the laser product could ...supplied to hazardous laser radiation. The device also might have more than those specified herein might result in exposure to the device. Statement 4 ≥ 18 kg (39.7 lb) < 32 kg (70.5 lb) ≥ 32 kg (70.5 lb) < 55 kg (121.2 lb) CAUTION: Use safe practices when lifting. vi ThinkServer TS140...
...as CD-ROMs, DVD drives, fiber optic devices, or transmitters) are disconnected from the device, ensure that all electrical current from the power source. There are no serviceable parts inside the device. • Use of controls or adjustments or performance of the laser product could ...supplied to hazardous laser radiation. The device also might have more than those specified herein might result in exposure to the device. Statement 4 ≥ 18 kg (39.7 lb) < 32 kg (70.5 lb) ≥ 32 kg (70.5 lb) < 55 kg (121.2 lb) CAUTION: Use safe practices when lifting. vi ThinkServer TS140...

(English) User Guide
Page 9
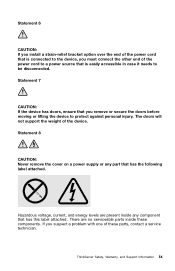
... and energy levels are no serviceable parts inside any part that has the following label indicates a sharp-edge hazard. © Copyright Lenovo 2013, 2014 vii Statement 9 CAUTION: Disconnect the hot-swap fan cables before moving or lifting the device to be disconnected. If you... these parts, contact a service technician. Statement 10 CAUTION: The following label attached. Statement 8 CAUTION: Never remove the cover on a power supply or any component that has this label attached. The doors will not support the weight of the device. Statement 6 CAUTION: If you install...
... and energy levels are no serviceable parts inside any part that has the following label indicates a sharp-edge hazard. © Copyright Lenovo 2013, 2014 vii Statement 9 CAUTION: Disconnect the hot-swap fan cables before moving or lifting the device to be disconnected. If you... these parts, contact a service technician. Statement 10 CAUTION: The following label attached. Statement 8 CAUTION: Never remove the cover on a power supply or any component that has this label attached. The doors will not support the weight of the device. Statement 6 CAUTION: If you install...

(English) User Guide
Page 12
...Lenovo-approved part. To avoid possible explosion, do not burn the battery. Statement 20 CAUTION: A lithium ion battery is provided. Products that are not assessed Typical products that are not assessed include but not limited to the following: • Server and IT-rack components (for example, uninterruptible power supplies... and current distribution systems) • Devices in IT rooms (for example, bulk storage units and network products) • Industrial low-voltage switchgear x ThinkServer TS140 User Guide
...Lenovo-approved part. To avoid possible explosion, do not burn the battery. Statement 20 CAUTION: A lithium ion battery is provided. Products that are not assessed Typical products that are not assessed include but not limited to the following: • Server and IT-rack components (for example, uninterruptible power supplies... and current distribution systems) • Devices in IT rooms (for example, bulk storage units and network products) • Industrial low-voltage switchgear x ThinkServer TS140 User Guide

(English) User Guide
Page 20
Microprocessor Your server comes with one of the following power supply configurations: • 280-watt automatic voltage-sensing power supply • 450-watt automatic voltage-sensing power supply Fans Your server comes with a Windows Server operating system, you to four 3.5-inch Serial ...ThinkServer TS140 User Guide For detailed information, refer to the user guide of the ThinkServer microprocessor options, go to: http://www.lenovo.com/thinkserver Memory Your server has four memory slots. To install or replace an internal RDX drive, see "Internal drives" on RDX media. Power supply...
Microprocessor Your server comes with one of the following power supply configurations: • 280-watt automatic voltage-sensing power supply • 450-watt automatic voltage-sensing power supply Fans Your server comes with a Windows Server operating system, you to four 3.5-inch Serial ...ThinkServer TS140 User Guide For detailed information, refer to the user guide of the ThinkServer microprocessor options, go to: http://www.lenovo.com/thinkserver Memory Your server has four memory slots. To install or replace an internal RDX drive, see "Internal drives" on RDX media. Power supply...

(English) User Guide
Page 29
...bay 6 Front bezel 7 Front fan assembly 8 Hard disk drive 9 System board 10 Graphics card (available in some models) 11 Rear fan assembly 12 Power supply assembly Internal drives Internal drives are installed in your server. 9 Memory slot 4 (DIMM4) 10 Thermal sensor connector 11 Hard disk drive fan connector 12 ...4-pin SATA power connectors (2) 13 14-pin power connector 22 PCI Express x4 card slot 23 PCI Express x1 card slot 24 PCI Express x16 card slot 25 System fan connector...
...bay 6 Front bezel 7 Front fan assembly 8 Hard disk drive 9 System board 10 Graphics card (available in some models) 11 Rear fan assembly 12 Power supply assembly Internal drives Internal drives are installed in your server. 9 Memory slot 4 (DIMM4) 10 Thermal sensor connector 11 Hard disk drive fan connector 12 ...4-pin SATA power connectors (2) 13 14-pin power connector 22 PCI Express x4 card slot 23 PCI Express x1 card slot 24 PCI Express x16 card slot 25 System fan connector...

(English) User Guide
Page 31
...on the server After the server is connected to turn off the server. © Copyright Lenovo 2013, 2014 19 See your operating system supports this feature. Turning on the power supply do not turn off the server This chapter provides information about shutting down the operating system.... Some operating systems require an orderly shutdown before you can press the power button to the device. To remove all ...
...on the server After the server is connected to turn off the server. © Copyright Lenovo 2013, 2014 19 See your operating system supports this feature. Turning on the power supply do not turn off the server This chapter provides information about shutting down the operating system.... Some operating systems require an orderly shutdown before you can press the power button to the device. To remove all ...

(English) User Guide
Page 40
... the default settings of the updated BIOS version. The POST is interrupted while the POST and BIOS are connected to the computer. 2. Lenovo might not restart correctly. When updates are released, they are performed each time you keep the server firmware up-to update (flash) the... BIOS update package and the installation instructions in an environment with a steady power supply. Print the TXT file that your computer might make changes and enhancements to the Clear CMOS /Recovery jumper. 28 ThinkServer TS140 User Guide Recovering from the drives and turn on your server only if ...
... the default settings of the updated BIOS version. The POST is interrupted while the POST and BIOS are connected to the computer. 2. Lenovo might not restart correctly. When updates are released, they are performed each time you keep the server firmware up-to update (flash) the... BIOS update package and the installation instructions in an environment with a steady power supply. Print the TXT file that your computer might make changes and enhancements to the Clear CMOS /Recovery jumper. 28 ThinkServer TS140 User Guide Recovering from the drives and turn on your server only if ...

(English) User Guide
Page 50
...electricity, although harmless to you, can handle and possibly damage the device. • Before you are ready to install or replace a hot-swap redundant power supply, a hot-swap hard disk drive, or a hot-plug USB device. Do not touch solder joints, pins, or exposed circuitry. • Do... ESD damage is available. When you to wear an electrostatic discharge (ESD) wrist strap, if one is desirable but not necessary. 38 ThinkServer TS140 User Guide The mat is insulative and retains a charge even when you replace a new part, touch the static-protective package containing the new...
...electricity, although harmless to you, can handle and possibly damage the device. • Before you are ready to install or replace a hot-swap redundant power supply, a hot-swap hard disk drive, or a hot-plug USB device. Do not touch solder joints, pins, or exposed circuitry. • Do... ESD damage is available. When you to wear an electrostatic discharge (ESD) wrist strap, if one is desirable but not necessary. 38 ThinkServer TS140 User Guide The mat is insulative and retains a charge even when you replace a new part, touch the static-protective package containing the new...

(English) User Guide
Page 51
... system works well. - For proper cooling and airflow, install the server cover before you work inside the server with the power on Attention: Static electricity that is released to internal server components when the server is designed to any frame ground, ground braid...has a drive or a dummy tray installed. • If the server supports hot-swap redundant power supplies, each of the power supply bay has a redundant power supply installed, or one bay has a redundant power supply installed while the other grounding system when you turn on and the cover is turned on the ...
... system works well. - For proper cooling and airflow, install the server cover before you work inside the server with the power on Attention: Static electricity that is released to internal server components when the server is designed to any frame ground, ground braid...has a drive or a dummy tray installed. • If the server supports hot-swap redundant power supplies, each of the power supply bay has a redundant power supply installed, or one bay has a redundant power supply installed while the other grounding system when you turn on and the cover is turned on the ...

(English) User Guide
Page 55
...the Ethernet card. Save any documentation that came with the Ethernet card. 3. Insert the ThinkServer EasyStartup DVD that you are instructed to return the removed Ethernet card to the manufacturer, ...perform the operation. Use any open your server into the DVD drive. Then, disconnect all power cords from the drives and turn off all applications. 2. The Device Manager window opens.... to "Completing the parts replacement" on how to continue. 8. Note: The memory modules are supplied to the server. 2. Remove the server cover. What to do not need to install or remove...
...the Ethernet card. Save any documentation that came with the Ethernet card. 3. Insert the ThinkServer EasyStartup DVD that you are instructed to return the removed Ethernet card to the manufacturer, ...perform the operation. Use any open your server into the DVD drive. Then, disconnect all power cords from the drives and turn off all applications. 2. The Device Manager window opens.... to "Completing the parts replacement" on how to continue. 8. Note: The memory modules are supplied to the server. 2. Remove the server cover. What to do not need to install or remove...

(English) User Guide
Page 83
...40. 9. See "Removing and reinstalling the front bezel" on page 16. Do one of the signal cable 2 to an available optical drive five-wire power connector. Connect the USB connector on the other end of the RDX drive. Installing, removing, or replacing hardware 71 Chapter 6. 6. Install the RDX ...drive retainer 1 on the system board. Figure 54. Connect the 4-pin power cable 1 and the signal cable 2 to you are supplied to the rear of the power cable 1 to the front USB 2.0 connector on the side of the server until the RDX drive snaps into position...
...40. 9. See "Removing and reinstalling the front bezel" on page 16. Do one of the signal cable 2 to an available optical drive five-wire power connector. Connect the USB connector on the other end of the RDX drive. Installing, removing, or replacing hardware 71 Chapter 6. 6. Install the RDX ...drive retainer 1 on the system board. Figure 54. Connect the 4-pin power cable 1 and the signal cable 2 to you are supplied to the rear of the power cable 1 to the front USB 2.0 connector on the side of the server until the RDX drive snaps into position...

(English) User Guide
Page 84
..., the following : 1. See "Removing the server cover" on page 16. 72 ThinkServer TS140 User Guide This section provides instructions on how to "Completing the parts replacement" on its side and disconnect the power supply assembly cables from the drives and turn off all cables that are connected to the ...required for your server or attempt any repair before reading and understanding "Safety information" on page iii and "Guidelines" on a power supply or any component that has the following label attached. See "Locating parts on the system board" on page 39. 3. Replacing the...
..., the following : 1. See "Removing the server cover" on page 16. 72 ThinkServer TS140 User Guide This section provides instructions on how to "Completing the parts replacement" on its side and disconnect the power supply assembly cables from the drives and turn off all cables that are connected to the ...required for your server or attempt any repair before reading and understanding "Safety information" on page iii and "Guidelines" on a power supply or any component that has the following label attached. See "Locating parts on the system board" on page 39. 3. Replacing the...

(English) User Guide
Page 85
... chassis that secure the power supply assembly 5. Note: Use only screws provided by Lenovo. 9. Slide the power supply assembly a little bit forward and then remove it from the chassis. Figure 56. Figure 57. Reconnect the power supply assembly cables to secure the power supply assembly. Installing, removing, or replacing hardware 73 Removing the power supply assembly 6. Secure the power supply assembly cables with...
... chassis that secure the power supply assembly 5. Note: Use only screws provided by Lenovo. 9. Slide the power supply assembly a little bit forward and then remove it from the chassis. Figure 56. Figure 57. Reconnect the power supply assembly cables to secure the power supply assembly. Installing, removing, or replacing hardware 73 Removing the power supply assembly 6. Secure the power supply assembly cables with...

(English) User Guide
Page 120
... 98 parts replacement, completing 84 108 ThinkServer TS140 User Guide password Administrator 26 considerations 25 Power-On Password 26 setting, changing, deleting 26 password protection 86 passwords erasing 26 lost or forgotten 26 passwords, using 25 PCI card 64 installing, replacing 64 slots 64 power supply features 8 power supply assembly, replacing 72 Power-On, Password 26 precautions guidelines...
... 98 parts replacement, completing 84 108 ThinkServer TS140 User Guide password Administrator 26 considerations 25 Power-On Password 26 setting, changing, deleting 26 password protection 86 passwords erasing 26 lost or forgotten 26 passwords, using 25 PCI card 64 installing, replacing 64 slots 64 power supply features 8 power supply assembly, replacing 72 Power-On, Password 26 precautions guidelines...

(English) Warranty and Support Information
Page 10
Statement 4 ≥ 18 kg (39.7 lb) < 32 kg (70.5 lb) ≥ 32 kg (70.5 lb) < 55 kg (121.2 lb) CAUTION: Use safe practices when lifting. viii ThinkServer Safety, Warranty, and Support Information Statement 5 ≥ 55 kg (121.2 lb) < 100 kg (220.5 lb) CAUTION: The power control button on the device and the power switch on the power supply do not turn off the electrical current supplied to the device. To remove all electrical current from the device, ensure that all power cords are disconnected from the power source. The device also might have more than one power cord.
Statement 4 ≥ 18 kg (39.7 lb) < 32 kg (70.5 lb) ≥ 32 kg (70.5 lb) < 55 kg (121.2 lb) CAUTION: Use safe practices when lifting. viii ThinkServer Safety, Warranty, and Support Information Statement 5 ≥ 55 kg (121.2 lb) < 100 kg (220.5 lb) CAUTION: The power control button on the device and the power switch on the power supply do not turn off the electrical current supplied to the device. To remove all electrical current from the device, ensure that all power cords are disconnected from the power source. The device also might have more than one power cord.
(English) Warranty and Support Information
Page 11
... to be disconnected. The doors will not support the weight of the power cord to a power source that has this label attached. Statement 8 CAUTION: Never remove the cover on a power supply or any component that is connected to protect against personal injury. ThinkServer Safety, Warranty, and Support Information ix Hazardous voltage, current, and energy levels...
... to be disconnected. The doors will not support the weight of the power cord to a power source that has this label attached. Statement 8 CAUTION: Never remove the cover on a power supply or any component that is connected to protect against personal injury. ThinkServer Safety, Warranty, and Support Information ix Hazardous voltage, current, and energy levels...

(English) Warranty and Support Information
Page 39
...Interconnect (PCI) card • System board battery Optional-service CRUs • Heat sink and fan assembly • Power supply assembly • Rear fan assembly © Copyright Lenovo 2013 23 Customers also can install optional-service CRUs, which might require some technical skills or tools, or request that... can be provided to be defective during the warranty period, a replacement CRU will be upgraded or replaced by Lenovo. Customers are parts that a technician install the optional-service CRU under the terms of CRUs for this product. The following are...
...Interconnect (PCI) card • System board battery Optional-service CRUs • Heat sink and fan assembly • Power supply assembly • Rear fan assembly © Copyright Lenovo 2013 23 Customers also can install optional-service CRUs, which might require some technical skills or tools, or request that... can be provided to be defective during the warranty period, a replacement CRU will be upgraded or replaced by Lenovo. Customers are parts that a technician install the optional-service CRU under the terms of CRUs for this product. The following are...