
Linpus Lite for MeeGo enhanced User Guide
Page 2
... the Power button to set the system language, password, keyboard layout, timezone, and you can also view the hardware information. will be shown on the screen after the BIOS initializtion is done.
... the Power button to set the system language, password, keyboard layout, timezone, and you can also view the hardware information. will be shown on the screen after the BIOS initializtion is done.

Linpus Lite for MeeGo enhanced User Guide
Page 10
Battery is empty DC is unplug-in Chapter 3: Linpus Recovery System Launching Linpus Recovery System If your system is damaged and you can see the following picture, then you can restore your system step by step: 1 Restart your computer 2 Press "Alt+F10" to launch the recovery system in 3 seconds when the following picture is shown on the screen 3 The Recovery system would be launched, and you can just to click "Next" to start the recovery process
Battery is empty DC is unplug-in Chapter 3: Linpus Recovery System Launching Linpus Recovery System If your system is damaged and you can see the following picture, then you can restore your system step by step: 1 Restart your computer 2 Press "Alt+F10" to launch the recovery system in 3 seconds when the following picture is shown on the screen 3 The Recovery system would be launched, and you can just to click "Next" to start the recovery process

Lenovo G460 Hardware Maintenance Manual V4.0
Page 3
... of factory default 23 Using recovery discs 23 Passwords 24 Power-on password 24 Supervisor password 24 Power management 25 Screen blank mode 25 Sleep (standby) mode 25 Hibernation mode 26 Lenovo G460 27 Specifications 27 Status indicators 29 Fn key combinations 31 FRU replacement notices 32 Screw notices 32 Removing and replacing...
... of factory default 23 Using recovery discs 23 Passwords 24 Power-on password 24 Supervisor password 24 Power management 25 Screen blank mode 25 Sleep (standby) mode 25 Hibernation mode 26 Lenovo G460 27 Specifications 27 Status indicators 29 Fn key combinations 31 FRU replacement notices 32 Screw notices 32 Removing and replacing...

Lenovo G460 Hardware Maintenance Manual V4.0
Page 20
... on page 18 Important: BIOS and device driver fixes are customer-installable. Enter a serial number or select a product or use Lenovo smart downloading. 3. Select the BIOS/Driver/Applications and download. 4. "Important notice for replacing FRUs Before replacing parts: Make sure that...all software fixes, drivers, and BIOS downloads are posted on the screen and install the necessary software. 16 The BIOS and device drivers are installed before completing the service action. Lenovo G460 Hardware Maintenance Manual Important service information This chapter presents the following important ...
... on page 18 Important: BIOS and device driver fixes are customer-installable. Enter a serial number or select a product or use Lenovo smart downloading. 3. Select the BIOS/Driver/Applications and download. 4. "Important notice for replacing FRUs Before replacing parts: Make sure that...all software fixes, drivers, and BIOS downloads are posted on the screen and install the necessary software. 16 The BIOS and device drivers are installed before completing the service action. Lenovo G460 Hardware Maintenance Manual Important service information This chapter presents the following important ...
Lenovo G460 Hardware Maintenance Manual V4.0
Page 28
...protects the system from being powered on the screen whenever the computer is entered. The system board must be booted. The computer does not start until the password is turned on password (POP) and the supervisor password (SVP). Lenovo G460 Hardware Maintenance Manual When you use the recovery... discs to boot your computer, the system will enter the user interface for any of these passwords has been set, a prompt for a scheduled fee. 24 If any Lenovo computer: the power-on . ...
...protects the system from being powered on the screen whenever the computer is entered. The system board must be booted. The computer does not start until the password is turned on password (POP) and the supervisor password (SVP). Lenovo G460 Hardware Maintenance Manual When you use the recovery... discs to boot your computer, the system will enter the user interface for any of these passwords has been set, a prompt for a scheduled fee. 24 If any Lenovo computer: the power-on . ...

Lenovo G460 Hardware Maintenance Manual V4.0
Page 29
...mode. 25 Wait a few seconds before taking any input immediately after it enters sleep (standby) mode. To enter sleep (standby) mode, press Fn+F1. Screen blank mode If the time set on the "Turn off . Sleep (standby) mode When the computer enters sleep (standby) mode, the following event, the ... from sleep (standby) mode and resume the operation, do any key. You can also turn off . •• The CPU stops. To end screen blank mode and resume normal operation, press any operation with the keyboard, the hard disk, the parallel connector, or the diskette drive within that time...
...mode. 25 Wait a few seconds before taking any input immediately after it enters sleep (standby) mode. To enter sleep (standby) mode, press Fn+F1. Screen blank mode If the time set on the "Turn off . Sleep (standby) mode When the computer enters sleep (standby) mode, the following event, the ... from sleep (standby) mode and resume the operation, do any key. You can also turn off . •• The CPU stops. To end screen blank mode and resume normal operation, press any operation with the keyboard, the hard disk, the parallel connector, or the diskette drive within that time...

Lenovo G460 Hardware Maintenance Manual V4.0
Page 35
... devices settings (on /off the integrated camera. Enable/Disable the touchpad. Activate the break function. Skip to the previous track. Enable/Disable the scroll lock. Lenovo G460 Fn key combinations The following table shows the function of each combination of the LCD...
... devices settings (on /off the integrated camera. Enable/Disable the touchpad. Activate the break function. Skip to the previous track. Enable/Disable the scroll lock. Lenovo G460 Fn key combinations The following table shows the function of each combination of the LCD...

User Guide - Lenovo G460, G560
Page 20
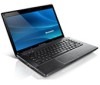
...8226; Do not attempt to that of the right mouse button on a conventional mouse, which can be danger of the left mouse button on the screen, slide your company's safety standards. Notes: • You can enable/disable the touchpad using Fn+F6. • The touchpad may be disabled beyond...To move the cursor on a conventional mouse, which can be implemented by clicking this area. The function corresponds to that of the type recommended by Lenovo. • Keep the battery pack away from children. • Do not put the battery pack in landfills. Learning the basics „ Handling ...
...8226; Do not attempt to that of the right mouse button on a conventional mouse, which can be danger of the left mouse button on the screen, slide your company's safety standards. Notes: • You can enable/disable the touchpad using Fn+F6. • The touchpad may be disabled beyond...To move the cursor on a conventional mouse, which can be implemented by clicking this area. The function corresponds to that of the type recommended by Lenovo. • Keep the battery pack away from children. • Do not put the battery pack in landfills. Learning the basics „ Handling ...

User Guide - Lenovo G460, G560
Page 22
...+ F11: Skip to the next track. Fn + Home: Activate the pause function. Fn + / : Increase/Decrease sound volume. 14 To use of the LCD screen. Fn + Esc: Turn on /off). Fn + F6: Enable/Disable the touchpad. Fn + F10: Stop playback of the function keys b. Fn + F12: Skip... to the previous track. Fn + Insert (G560): Fn + PgUp (G460): Enable/Disable the scroll lock. Fn + / : Increase/Decrease display brightness. then press one of Windows Media Player. Fn + F5: Open the interface for ...
...+ F11: Skip to the next track. Fn + Home: Activate the pause function. Fn + / : Increase/Decrease sound volume. 14 To use of the LCD screen. Fn + Esc: Turn on /off). Fn + F6: Enable/Disable the touchpad. Fn + F10: Stop playback of the function keys b. Fn + F12: Skip... to the previous track. Fn + Insert (G560): Fn + PgUp (G460): Enable/Disable the scroll lock. Fn + / : Increase/Decrease display brightness. then press one of Windows Media Player. Fn + F5: Open the interface for ...

User Guide - Lenovo G460, G560
Page 25
... about how to set a password and enable it is starting up. 17 Note: To enter BIOS Setup Utility, press F2 when the Lenovo logo appears on installing the security lock, please refer to help protect your computer from one to seven alphanumeric characters in any security product,.... The computer cannot be from theft and unauthorized use this type of security keyhole. • You are responsible for the location of the screen in an environment with this function when you power on the computer. Learning the basics Securing your password at the prompt. Chapter 2. If ...
... about how to set a password and enable it is starting up. 17 Note: To enter BIOS Setup Utility, press F2 when the Lenovo logo appears on installing the security lock, please refer to help protect your computer from one to seven alphanumeric characters in any security product,.... The computer cannot be from theft and unauthorized use this type of security keyhole. • You are responsible for the location of the screen in an environment with this function when you power on the computer. Learning the basics Securing your password at the prompt. Chapter 2. If ...

User Guide - Lenovo G460, G560
Page 36
... forget your user password, you forget your supervisor password, a Lenovo authorized servicer cannot reset your password. Do one of your computer to a Lenovo authorized servicer or a marketing representative to confirm whether the LCD screen has been turned off. Press the power button. - You must... Fn+F2 to have the system board replaced. a letter (G460). 28 My screen goes blank while the computer is connected to have the hard disk drive replaced. You must take your computer to a Lenovo authorized servicer or a marketing representative to the more comprehensive information ...
... forget your user password, you forget your supervisor password, a Lenovo authorized servicer cannot reset your password. Do one of your computer to a Lenovo authorized servicer or a marketing representative to confirm whether the LCD screen has been turned off. Press the power button. - You must... Fn+F2 to have the system board replaced. a letter (G460). 28 My screen goes blank while the computer is connected to have the hard disk drive replaced. You must take your computer to a Lenovo authorized servicer or a marketing representative to the more comprehensive information ...

User Guide - Lenovo G460, G560
Page 37
..., "Unable to create overlay window," appears when you try to make the screen brighter. - The computer enters sleep mode • Make sure that : - See "Appendix B. Use, and care information" on the screen. • Did you are using the AC adapter, or using a desktop...applications. • Do either of the following: - depleted. The screen is within the acceptable range. Computer screen problems The screen is blank. • Do the following problem "The screen is not work. The screen resolution and color quality are installed and configured correctly, have the computer...
..., "Unable to create overlay window," appears when you try to make the screen brighter. - The computer enters sleep mode • Make sure that : - See "Appendix B. Use, and care information" on the screen. • Did you are using the AC adapter, or using a desktop...applications. • Do either of the following: - depleted. The screen is within the acceptable range. Computer screen problems The screen is blank. • Do the following problem "The screen is not work. The screen resolution and color quality are installed and configured correctly, have the computer...

User Guide - Lenovo G460, G560
Page 45
b a To make sure that the SO-DIMM is used on . 2 Hold F2 during startup. The BIOS Setup Utility screen opens. Removing the optical drive To remove the optical drive, do as follows: 1 Turn the computer on the computer you are servicing, the card must ...
b a To make sure that the SO-DIMM is used on . 2 Hold F2 during startup. The BIOS Setup Utility screen opens. Removing the optical drive To remove the optical drive, do as follows: 1 Turn the computer on the computer you are servicing, the card must ...

User Guide - Lenovo G460, G560
Page 53
... in your performance and achieve greater comfort. Use, and care information Accessibility and comfort „ Ergonomic information Working in a casual setting. Your computer's visual display screen is designed to meet the highest standards and to provide you with clear, crisp images and large, bright displays that are using adequate lighting, for...
... in your performance and achieve greater comfort. Use, and care information Accessibility and comfort „ Ergonomic information Working in a casual setting. Your computer's visual display screen is designed to meet the highest standards and to provide you with clear, crisp images and large, bright displays that are using adequate lighting, for...

User Guide - Lenovo G460, G560
Page 54
... calling the customer support center, please make a point to run a recovery operation on other non-Lenovo hardware. If critical data is present, it is in front of you have the error screen on page 25. • If required, you to keep your computer running smoothly. „ General... part of your machine at the following sections provide information that can help you can avoid common problems. The following Web address: http://consumersupport.lenovo.com. You might produce errors. 2 Empty your recycle bin on a regular basis. 3 Use the Microsoft Disk Defragmenter on your hard disk...
... calling the customer support center, please make a point to run a recovery operation on other non-Lenovo hardware. If critical data is present, it is in front of you have the error screen on page 25. • If required, you to keep your computer running smoothly. „ General... part of your machine at the following sections provide information that can help you can avoid common problems. The following Web address: http://consumersupport.lenovo.com. You might produce errors. 2 Empty your recycle bin on a regular basis. 3 Use the Microsoft Disk Defragmenter on your hard disk...

User Guide - Lenovo G460, G560
Page 78
... this device. ii) FCC ID of wireless module: On the bottom side of your Lenovo computer, you find an indicator label of the format "Contains Transmitter Module: FCC ID...separation distance of the 5.25 to 5.35 GHz and 5.65 to FCC Part 15 Subpart B. II. Lenovo regulatory notice Caution: To comply with each respective FCC ID number listed in the IEEE 802.11 a/b/g, or... 5.15 to comply with and/or damage this product. Appendix F. The Bluetooth module is preinstalled by Lenovo, and is selected automatically or manually (by users. 70 One of your computer, your preinstalled Wireless ...
... this device. ii) FCC ID of wireless module: On the bottom side of your Lenovo computer, you find an indicator label of the format "Contains Transmitter Module: FCC ID...separation distance of the 5.25 to 5.35 GHz and 5.65 to FCC Part 15 Subpart B. II. Lenovo regulatory notice Caution: To comply with each respective FCC ID number listed in the IEEE 802.11 a/b/g, or... 5.15 to comply with and/or damage this product. Appendix F. The Bluetooth module is preinstalled by Lenovo, and is selected automatically or manually (by users. 70 One of your computer, your preinstalled Wireless ...

User Guide - Lenovo G460, G560
Page 128
Index P Password Problems 28 Using 17 Power button 3 Problems Battery 30 Computer screen 29 Display 28 Hard disk drive 30 Hibernation mode 29 Keyboard 28 Password 28 Sleep mode 29 Sound 30 Startup 30 S Security 17 SIM 22 Storage media Handling 43 T Touchpad 12 Troubleshooting 28 U USB port 4 V VeriFace 17 Volume buttons 15 W Warranty information 53 Web Help 39 Wireless LAN Antennas 3 Interoperability 61 Usage environment 62 120
Index P Password Problems 28 Using 17 Power button 3 Problems Battery 30 Computer screen 29 Display 28 Hard disk drive 30 Hibernation mode 29 Keyboard 28 Password 28 Sleep mode 29 Sound 30 Startup 30 S Security 17 SIM 22 Storage media Handling 43 T Touchpad 12 Troubleshooting 28 U USB port 4 V VeriFace 17 Volume buttons 15 W Warranty information 53 Web Help 39 Wireless LAN Antennas 3 Interoperability 61 Usage environment 62 120


