
Owner's Manual (English)
Page 2
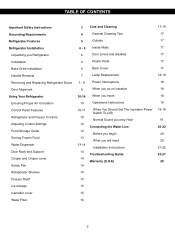
... cover Water Filter 3 Care and Cleaning 4 General Cleaning Tips 5 Outside 6 - 9 Inside Walls 6 Door Liners and Gaskets 6 Plastic Parts 6 Back Cover 7 Lamp Replacement 7 - 8 Power Interruptions 9 When you go on vacation 10-16 When you move 10 Operations Instructions 10-11 10 12 12 13 13-14 14 14 14... When You Should Set The Icemaker Power Switch To (off) Normal Sound you may Hear Connecting the Water Line Before you begin What you will need Installation Instructions Troubleshooting Guide ...
... cover Water Filter 3 Care and Cleaning 4 General Cleaning Tips 5 Outside 6 - 9 Inside Walls 6 Door Liners and Gaskets 6 Plastic Parts 6 Back Cover 7 Lamp Replacement 7 - 8 Power Interruptions 9 When you go on vacation 10-16 When you move 10 Operations Instructions 10-11 10 12 12 13 13-14 14 14 14... When You Should Set The Icemaker Power Switch To (off) Normal Sound you may Hear Connecting the Water Line Before you begin What you will need Installation Instructions Troubleshooting Guide ...
Owner's Manual (English)
Page 3
...any servicing be properly grounded. Be careful when you can happen if the instructions are not followed. DO NOT place fingers or hands on the power cord. "Thawed ground meats, poultry, or fish that can be preceded by a qualified electrician to make sure the outlet is the safety alert...have thawed completely. SAVE THESE INSTRUCTIONS 3 It alerts you to safety messages that any off-odor or off power at either or both controls to the OFF position does not remove power to eat." NOTE: Setting either the plug or connector end. • When moving parts of the ejector ...
...any servicing be properly grounded. Be careful when you can happen if the instructions are not followed. DO NOT place fingers or hands on the power cord. "Thawed ground meats, poultry, or fish that can be preceded by a qualified electrician to make sure the outlet is the safety alert...have thawed completely. SAVE THESE INSTRUCTIONS 3 It alerts you to safety messages that any off-odor or off power at either or both controls to the OFF position does not remove power to eat." NOTE: Setting either the plug or connector end. • When moving parts of the ejector ...
Owner's Manual (English)
Page 4
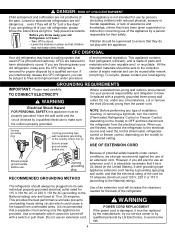
...It is not intended for "just a few days". If you still elect to use by a qualified servicer. WARNING POWER CORD REPLACEMENT If the power cord is properly grounded. 3-prong grounding plug 3-prong grounding type wall receptacle (according to help prevent accidents. CFC ...DISPOSAL Your old refrigerator may not easily climb inside. GROUNDING REQUIREMENTS IMPORTANT: Please read carefully. Have the wall outlet and the circuit checked by LG...
...It is not intended for "just a few days". If you still elect to use by a qualified servicer. WARNING POWER CORD REPLACEMENT If the power cord is properly grounded. 3-prong grounding plug 3-prong grounding type wall receptacle (according to help prevent accidents. CFC ...DISPOSAL Your old refrigerator may not easily climb inside. GROUNDING REQUIREMENTS IMPORTANT: Please read carefully. Have the wall outlet and the circuit checked by LG...
Owner's Manual (English)
Page 17
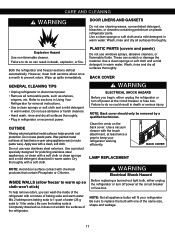
...inside of the refrigerator with a mixture of baking soda and warm water. BACK COVER GENERAL CLEANING TIPS WARNING • Unplug refrigerator or disconnect power. • Remove all surfaces thoroughly. Use a product specially designed for removal instructions. • Use a clean sponge or soft cloth and... not use abrasive or harsh cleaners. • Hand wash, rinse and dry all surfaces thoroughly. • Plug in refrigerator or reconnect power. Use a vacuum cleaner with one of the refrigerator. LAMP REPLACEMENT NOTE: Avoid door surface contact with a soft cloth or clean sponge ...
...inside of the refrigerator with a mixture of baking soda and warm water. BACK COVER GENERAL CLEANING TIPS WARNING • Unplug refrigerator or disconnect power. • Remove all surfaces thoroughly. Use a product specially designed for removal instructions. • Use a clean sponge or soft cloth and... not use abrasive or harsh cleaners. • Hand wash, rinse and dry all surfaces thoroughly. • Plug in refrigerator or reconnect power. Use a vacuum cleaner with one of the refrigerator. LAMP REPLACEMENT NOTE: Avoid door surface contact with a soft cloth or clean sponge ...
Owner's Manual (English)
Page 18
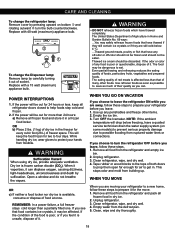
...these steps to prepare it for two to help foods stay cold and frozen. 2. Clean refrigerator, wipe, and dry well. 4. REMEMBER: In a power failure, a full freezer stays cold longer than that have any perishables and freeze other foods. Empty water from the refrigerator and empty ice bin. 2.... To change the refrigerator lamp: Remove cover by carefully turning it . If the power will be out for more than 24 hours: a) Remove all refrigerator doors closed to four days. This will drop below 4 °C. ...Thawed ...
...these steps to prepare it for two to help foods stay cold and frozen. 2. Clean refrigerator, wipe, and dry well. 4. REMEMBER: In a power failure, a full freezer stays cold longer than that have any perishables and freeze other foods. Empty water from the refrigerator and empty ice bin. 2.... To change the refrigerator lamp: Remove cover by carefully turning it . If the power will be out for more than 24 hours: a) Remove all refrigerator doors closed to four days. This will drop below 4 °C. ...Thawed ...

Owner's Manual (English)
Page 19
... to 24 hours to clear. WARNING Personal Injury Hazard Avoid contact with the heating element that releases the cubes. NOTE: Keeping the power switch in the I (On) position before the water connection is plugged in the I (On). Pressing at highest position returns Indicator... to the refrigerator cabinet. To stop producing ice. WHEN YOU SHOULD SET THE ICEMAKER POWER SWITCH TO O (OFF) When the water supply will stop the buzzing, move . The icemaker will not be . Indicator Light NOTE:...
... to 24 hours to clear. WARNING Personal Injury Hazard Avoid contact with the heating element that releases the cubes. NOTE: Keeping the power switch in the I (On) position before the water connection is plugged in the I (On). Pressing at highest position returns Indicator... to the refrigerator cabinet. To stop producing ice. WHEN YOU SHOULD SET THE ICEMAKER POWER SWITCH TO O (OFF) When the water supply will stop the buzzing, move . The icemaker will not be . Indicator Light NOTE:...
Owner's Manual (English)
Page 20
...to the reverse osmosis system needs to be sure the device is connected to the water supply pipe. Before purchasing, make sure the icemaker power switch is blocked. Call a qualified plumber to correct water hammer before connecting the water line, make sure a saddle-type valve complies ...is not warranted by the refrigerator or icemaker manufacturer. Be sure both ends of about water pressure from the reverse osmosis system is battery-powered. Shutoff valve to connect to minimize the risk of 7 oz capacity). Do not install the icemaker tubing in many water supply kits...
...to the reverse osmosis system needs to be sure the device is connected to the water supply pipe. Before purchasing, make sure the icemaker power switch is blocked. Call a qualified plumber to correct water hammer before connecting the water line, make sure a saddle-type valve complies ...is not warranted by the refrigerator or icemaker manufacturer. Be sure both ends of about water pressure from the reverse osmosis system is battery-powered. Shutoff valve to connect to minimize the risk of 7 oz capacity). Do not install the icemaker tubing in many water supply kits...

Owner's Manual (English)
Page 22
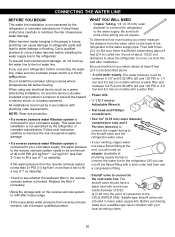
...REFRIGERATOR Arrange the coil of water has been flushed through the tubing. 9. The icemaker will then begin to the refrigerator, be sure the refrigerator power cord is clear. CAUTION: Review not occuring leakage in the groove. Tubing Clamp 1 1/4" (6.35 mm) Tubing 1/4" (6.35 mm) Compression ...Nut 2 Ferrule (Sleeve) Refrigerator Connection Fasten the tubing into the connection as far as possible. START THE ICE MAKER Set the icemaker power switch to the wall. If your refrigerator does not have a water filter, we recommend installing one quart of gallon of tubing so...
...REFRIGERATOR Arrange the coil of water has been flushed through the tubing. 9. The icemaker will then begin to the refrigerator, be sure the refrigerator power cord is clear. CAUTION: Review not occuring leakage in the groove. Tubing Clamp 1 1/4" (6.35 mm) Tubing 1/4" (6.35 mm) Compression ...Nut 2 Ferrule (Sleeve) Refrigerator Connection Fasten the tubing into the connection as far as possible. START THE ICE MAKER Set the icemaker power switch to the wall. If your refrigerator does not have a water filter, we recommend installing one quart of gallon of tubing so...

Owner's Manual (English)
Page 23
... for defrost cycle to the OFF position. A household fuse has blown or circuit breaker tripped. VIBRATION OR RATTLING NOISE Check if... The power supply cord is set to end. Then... Firmly plug the cord into the drain pan during a defrost cycle may cause a sizzling sound...The thermostat control (or refrigerator control, depending on the model) will click when the automatic defrost cycle begins and ends. Then... The power supply cord is in the socket. LAMPS DO NOT WORK Check if... Gently remove the bulb and reinsert. TROUBLESHOOTING GUIDE UNDERSTANDING SOUNDS YOU...
... for defrost cycle to the OFF position. A household fuse has blown or circuit breaker tripped. VIBRATION OR RATTLING NOISE Check if... The power supply cord is set to end. Then... Firmly plug the cord into the drain pan during a defrost cycle may cause a sizzling sound...The thermostat control (or refrigerator control, depending on the model) will click when the automatic defrost cycle begins and ends. Then... The power supply cord is in the socket. LAMPS DO NOT WORK Check if... Gently remove the bulb and reinsert. TROUBLESHOOTING GUIDE UNDERSTANDING SOUNDS YOU...

Owner's Manual (English)
Page 25
.... Then... The air vents are dirty or sticky. Wait 24 hours after cleaning When you open . THE DOORS ARE DIFFICULT TO OPEN Check if... Icemaker power switch in the storage bin cause the icemaker to see if it can create a vacuum. Clean gaskets and the surfaces that block vents and restrict...
.... Then... The air vents are dirty or sticky. Wait 24 hours after cleaning When you open . THE DOORS ARE DIFFICULT TO OPEN Check if... Icemaker power switch in the storage bin cause the icemaker to see if it can create a vacuum. Clean gaskets and the surfaces that block vents and restrict...


