
Owners Manual
Page 1
It contains valuable information about your air conditioner. This manual may help save time and money by misuse of the air conditioner. LG is not responsible for any damages caused by explaining proper air conditioner maintenance and preventing improper use. ENGLISH ESPAÑOL LG Window-Type Air Conditioner LG OWNER'S MANUAL MODELS: L8004R, L1004R, CL8000ER IMPORTANT Please read through this manual. PRECAUTIONS Pay close attention to precautions in order to prevent potential hazards and damage from misuse or improper installation.
It contains valuable information about your air conditioner. This manual may help save time and money by misuse of the air conditioner. LG is not responsible for any damages caused by explaining proper air conditioner maintenance and preventing improper use. ENGLISH ESPAÑOL LG Window-Type Air Conditioner LG OWNER'S MANUAL MODELS: L8004R, L1004R, CL8000ER IMPORTANT Please read through this manual. PRECAUTIONS Pay close attention to precautions in order to prevent potential hazards and damage from misuse or improper installation.

Owners Manual
Page 2
...Call 1-800-243-0000 to locate the nearest ASC. • This air conditioner is not intended for service at all. READ THIS MANUAL Inside you may not need it to prove date of purchase or for warranty issues. Dealer's Name Date Purchased s Staple your receipt... many answers to common problems in the chart of troubleshooting tips. Window-Type Air Conditioner Owner's Manual TABLE OF CONTENTS Safety Precautions 3 Before Operation 7 Introduction 8 Symbols Used in this Manual ........8 Features 8 Electrical Safety 9 Temporary Use of an Adapter 10 Temporary Use of an Extension Cord...
...Call 1-800-243-0000 to locate the nearest ASC. • This air conditioner is not intended for service at all. READ THIS MANUAL Inside you may not need it to prove date of purchase or for warranty issues. Dealer's Name Date Purchased s Staple your receipt... many answers to common problems in the chart of troubleshooting tips. Window-Type Air Conditioner Owner's Manual TABLE OF CONTENTS Safety Precautions 3 Before Operation 7 Introduction 8 Symbols Used in this Manual ........8 Features 8 Electrical Safety 9 Temporary Use of an Adapter 10 Temporary Use of an Extension Cord...

Owners Manual
Page 3
WARNING This symbol indicates the possibility of symbols used in the installation. Be sure not to assist in this manual are as gasoline, benzene, thinner, etc. • It may cause electric shock and failure. s Because of the weight of injury or... of the product, it is classified by the following instructions must be followed. WARNING s Installation Always install the expansion panel(s). Gasolin Owner's Manual 3 ENGLISH Safety Precautions Safety Precautions To prevent injury to follow the instruction. Be sure to the user or other people and property damage, ...
WARNING This symbol indicates the possibility of symbols used in the installation. Be sure not to assist in this manual are as gasoline, benzene, thinner, etc. • It may cause electric shock and failure. s Because of the weight of injury or... of the product, it is classified by the following instructions must be followed. WARNING s Installation Always install the expansion panel(s). Gasolin Owner's Manual 3 ENGLISH Safety Precautions Safety Precautions To prevent injury to follow the instruction. Be sure to the user or other people and property damage, ...

Owners Manual
Page 5
... the the power switch of the main body of the unit when removing the filter. CAUTION s Installation Never touch the metal parts of appliance. Owner's Manual 5 Contact service center after taking the powerplug out from the socket. • It will cause electric shock or failure of appliance or performance deteriorate. Leaving...
... the the power switch of the main body of the unit when removing the filter. CAUTION s Installation Never touch the metal parts of appliance. Owner's Manual 5 Contact service center after taking the powerplug out from the socket. • It will cause electric shock or failure of appliance or performance deteriorate. Leaving...

Owners Manual
Page 7
...Exposure to water can occur when handling sharp metal edges. 2. They should be hazardous to clean inside the air conditioner. Owner's Manual 7 ENGLISH Before Operation Before Operation Preparing for more details. 4. Being exposed to direct airflow for non-specified special purposes (e.g. Do not use ...this manual. Injuries can destroy the insulation, leading to direct airflow for details or call (800) 243-0000. The fan rotates at a...
...Exposure to water can occur when handling sharp metal edges. 2. They should be hazardous to clean inside the air conditioner. Owner's Manual 7 ENGLISH Before Operation Before Operation Preparing for more details. 4. Being exposed to direct airflow for non-specified special purposes (e.g. Do not use ...this manual. Injuries can destroy the insulation, leading to direct airflow for details or call (800) 243-0000. The fan rotates at a...

Owners Manual
Page 8
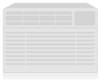
... Deflector (Vertical Louver) Air Discharge Air Intake (Inlet Grille) Brace Compressor Condenser Base Pan Power Cord Features WARNING: This appliance should be installed in this Manual This symbol alerts you to hazards that could cause harm to the risk of electric shock. Tip! This symbol alerts you to the air conditioner.
... Deflector (Vertical Louver) Air Discharge Air Intake (Inlet Grille) Brace Compressor Condenser Base Pan Power Cord Features WARNING: This appliance should be installed in this Manual This symbol alerts you to hazards that could cause harm to the risk of electric shock. Tip! This symbol alerts you to the air conditioner.

Owners Manual
Page 9
WARNING: Changing the outlet without making the appropriate wiring changes will create an unsafe condition that could result in fire or electrical shock. Owner's Manual 9 WARNING: If you use the room air conditioner. Preferred method Ensure proper ground exists before you have any doubt whether the air conditioner is properly ...
WARNING: Changing the outlet without making the appropriate wiring changes will create an unsafe condition that could result in fire or electrical shock. Owner's Manual 9 WARNING: If you use the room air conditioner. Preferred method Ensure proper ground exists before you have any doubt whether the air conditioner is properly ...

Owners Manual
Page 11
... installations, including using sleeves, holes in standard double-hung windows with actual opening of the upper sash to the window stool. 22" to 36". Owner's Manual 11 Installation Type A: 11 EA (Short Screw) Type B: 5 EA (Wood Screw) Installation Type C: 1 EA (Drain Joint Pipe) Type D: 3 EA (L Bracket) ENGLISH 10mm 16mm Type E: 1 EA...
... installations, including using sleeves, holes in standard double-hung windows with actual opening of the upper sash to the window stool. 22" to 36". Owner's Manual 11 Installation Type A: 11 EA (Short Screw) Type B: 5 EA (Wood Screw) Installation Type C: 1 EA (Drain Joint Pipe) Type D: 3 EA (L Bracket) ENGLISH 10mm 16mm Type E: 1 EA...

Owners Manual
Page 13
... back of bracket as shown. Seal Strip (Type E) Installation Type A 3. Locating unit in place. Inner Sill Outer Sill Type A Inside Center Line 8" 8" Outside L Bracket Owner's Manual 13 Attach L bracket 4-1. Tip! : Use a long screwdriver and installing the screws will be easier. 2.
... back of bracket as shown. Seal Strip (Type E) Installation Type A 3. Locating unit in place. Inner Sill Outer Sill Type A Inside Center Line 8" 8" Outside L Bracket Owner's Manual 13 Attach L bracket 4-1. Tip! : Use a long screwdriver and installing the screws will be easier. 2.
Owners Manual
Page 15
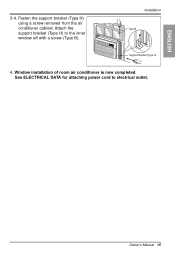
Owner's Manual 15 Window installation of room air conditioner is now completed. Attach the support bracket (Type H) to electrical outlet. Installation Type B Support Bracket (Type H) 4. Fasten the support bracket (Type H) using a screw removed from the air conditioner cabinet. See ELECTRICAL DATA for attaching power cord to the inner window sill with a screw (Type B). ENGLISH 3-4.
Owner's Manual 15 Window installation of room air conditioner is now completed. Attach the support bracket (Type H) to electrical outlet. Installation Type B Support Bracket (Type H) 4. Fasten the support bracket (Type H) using a screw removed from the air conditioner cabinet. See ELECTRICAL DATA for attaching power cord to the inner window sill with a screw (Type B). ENGLISH 3-4.

Owners Manual
Page 17
... the desired temperature. Remove the cover from the back of the polarity when installing the batteries. Select dry mode for basic ventilating fan operation. Owner s Manual 17 Select fan mode for dry operation. Be sure that both batteries are obstacles between 60 F~86 F (16 C~30 C). Re-attach the cover. ENGLISH Operating...
... the desired temperature. Remove the cover from the back of the polarity when installing the batteries. Select dry mode for basic ventilating fan operation. Owner s Manual 17 Select fan mode for dry operation. Be sure that both batteries are obstacles between 60 F~86 F (16 C~30 C). Re-attach the cover. ENGLISH Operating...

Owners Manual
Page 19
... to overflow. Be sure to the rear hole of the guide panels, and save you carry the unit, making the air conditioner more efficient. Owner ,s Manual 19 Keeping a firm grip on the air conditioner, raise the sash, and carefully tilt the air conditioner backward, draining any condensate. This air conditioner is...
... to overflow. Be sure to the rear hole of the guide panels, and save you carry the unit, making the air conditioner more efficient. Owner ,s Manual 19 Keeping a firm grip on the air conditioner, raise the sash, and carefully tilt the air conditioner backward, draining any condensate. This air conditioner is...

Owners Manual
Page 21
ENGLISH How to Remove the Front Grille Maintenance and Service 1. Pull the inlet grille forward 2. Push the grille up from the bottom and pull the top of the grille away from the case as the top tabs lift out of their slots. Remove the screw securing the Front Grille. 3. Cool Energy Saver F F1 LOW F2 MED F3 HIGH Fan Dry Timer TEMP Owner ,s Manual 21
ENGLISH How to Remove the Front Grille Maintenance and Service 1. Pull the inlet grille forward 2. Push the grille up from the bottom and pull the top of the grille away from the case as the top tabs lift out of their slots. Remove the screw securing the Front Grille. 3. Cool Energy Saver F F1 LOW F2 MED F3 HIGH Fan Dry Timer TEMP Owner ,s Manual 21

Owners Manual
Page 23
... fuse or reset the breaker. • If power failure occurs, turn the mode control to cool down. or 2. * You can refer to a higher number. Owner's Manual 23 Air conditioner does not cool as it should s The thermostat may not be operating abnormally when: Problem Possible Causes What To Do Air conditioner...
... fuse or reset the breaker. • If power failure occurs, turn the mode control to cool down. or 2. * You can refer to a higher number. Owner's Manual 23 Air conditioner does not cool as it should s The thermostat may not be operating abnormally when: Problem Possible Causes What To Do Air conditioner...


