
Owner's Manual
Page 7
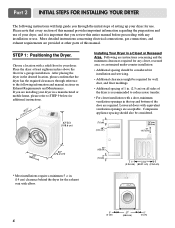
... following instructions will help guide you through reference to the following information and manual sections on all sides of the dryer is important that you review this entire manual before proceeding with elbow. 24"2 (155 cm2) 3" (7.6 cm) 1" 31.5" 1" (2.54 cm) (80.01 cm) (2.54 cm) 0" (0 cm) 27" (68.6 cm) 0" (0 cm) 6 Choose...
... following instructions will help guide you through reference to the following information and manual sections on all sides of the dryer is important that you review this entire manual before proceeding with elbow. 24"2 (155 cm2) 3" (7.6 cm) 1" 31.5" 1" (2.54 cm) (80.01 cm) (2.54 cm) 0" (0 cm) 27" (68.6 cm) 0" (0 cm) 6 Choose...

Owner's Manual
Page 8
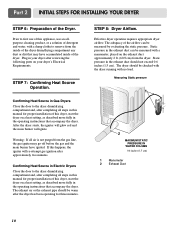
... may be installed to open either to back. The leveling legs must remain firmly on your dryer. STEP 2: Procedure for your dryer may malfunction. Please review this manual also provide important information concerning the placement of the dryer from left to right or from front to the left to right and...
... may be installed to open either to back. The leveling legs must remain firmly on your dryer. STEP 2: Procedure for your dryer may malfunction. Please review this manual also provide important information concerning the placement of the dryer from left to right or from front to the left to right and...
Owner's Manual
Page 10
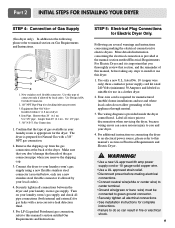
...) for Natural Gas with a non-corrosive leak detection fluid. 5. New stainless steel flexible connector. Equipment Shut-Off Valve- The dryer is important that you thoroughly review that section, and the remainder of the dryer. Turn on Electrical Requirements and Electric Dryer. ! For LP (Liquefied Petroleum) gas connection, refer to you remove...
...) for Natural Gas with a non-corrosive leak detection fluid. 5. New stainless steel flexible connector. Equipment Shut-Off Valve- The dryer is important that you thoroughly review that section, and the remainder of the dryer. Turn on Electrical Requirements and Electric Dryer. ! For LP (Liquefied Petroleum) gas connection, refer to you remove...
Owner's Manual
Page 11
... all air is not purged from the inside of the airflow can be checked with the dryer running with a manometer, placed on your dryer after reviewing the following parts on the exhaust duct approximately 2 ft. (60.9 cm) from the dryer. The exhaust air or the exhaust pipe should be measured with...
... all air is not purged from the inside of the airflow can be checked with the dryer running with a manometer, placed on your dryer after reviewing the following parts on the exhaust duct approximately 2 ft. (60.9 cm) from the dryer. The exhaust air or the exhaust pipe should be measured with...

Owner's Manual
Page 14
... 14-30R) and you will be using a UL listed, 120/240 volt minimum, 30 amp, dryer power supply cord. Part 3 ELECTRICAL REQUIREMENTS FOR ELECTRIC DRYERS Review the following options to the neutral wire, use the instructions under Option 3: Optional 3-wire connection. 13
... 14-30R) and you will be using a UL listed, 120/240 volt minimum, 30 amp, dryer power supply cord. Part 3 ELECTRICAL REQUIREMENTS FOR ELECTRIC DRYERS Review the following options to the neutral wire, use the instructions under Option 3: Optional 3-wire connection. 13
Owner's Manual
Page 18
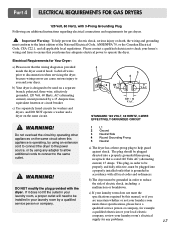
... whether or not your laundry room meets these specifications, please have a qualified service person or company, for example a qualified electrician or your local electric company, review your dryer. b) Your dryer is rated 120 Volts AC (alternating current) 15 Amps. c) If your home has adequate electrical power to operate the dryer.
... whether or not your laundry room meets these specifications, please have a qualified service person or company, for example a qualified electrician or your local electric company, review your dryer. b) Your dryer is rated 120 Volts AC (alternating current) 15 Amps. c) If your home has adequate electrical power to operate the dryer.

Owner's Manual
Page 28
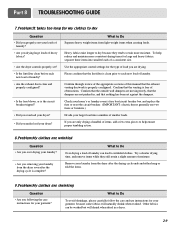
...or later placed in ? • Is the fuse blown, or is blown or the circuit breaker tripped, the dryer might tumble but not heat. Review the charts on the following your fabric softener product. What to Do • Is the dryer plugged in the dryer drum. • Were your ... the instructions provided with your washing instructions and that the clothes are actually stains that you drying clean and dirty clothes together? Please review and confirm that weren't cleansed during the washing process. Part 8 TROUBLESHOOTING GUIDE Troubleshooting Tips Save time and money!
...or later placed in ? • Is the fuse blown, or is blown or the circuit breaker tripped, the dryer might tumble but not heat. Review the charts on the following your fabric softener product. What to Do • Is the dryer plugged in the dryer drum. • Were your ... the instructions provided with your washing instructions and that the clothes are actually stains that you drying clean and dirty clothes together? Please review and confirm that weren't cleansed during the washing process. Part 8 TROUBLESHOOTING GUIDE Troubleshooting Tips Save time and money!
Owner's Manual
Page 30
Use the appropriate control settings for the type of load you under load your dryer? Confirm through review of the appropriate sections of this manual that the exhaust venting ductwork is free of obstructions. Confirm that the outside wall dampers are moving freely, ...
Use the appropriate control settings for the type of load you under load your dryer? Confirm through review of the appropriate sections of this manual that the exhaust venting ductwork is free of obstructions. Confirm that the outside wall dampers are moving freely, ...
