
Owner's Manual
Page 12
... the new locations, remount the inner door frame onto the outer door frame with the screws removed in property damage, damage to the dryer, or personal injury. 4 Remove the 4 screws securing the hinges to make sure the hinges and latch are properly aligned and that the door closes and latches correctly. 12 CAUTION Support the weight...
... the new locations, remount the inner door frame onto the outer door frame with the screws removed in property damage, damage to the dryer, or personal injury. 4 Remove the 4 screws securing the hinges to make sure the hinges and latch are properly aligned and that the door closes and latches correctly. 12 CAUTION Support the weight...

Owner's Manual
Page 12
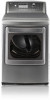
... securing the hinges to the door or the work surface. Set the door aside face down on a protected surface to prevent damage to the door frame. Remove the two plastic cover caps. Failure to properly support the weight of the door to the dryer, or personal injury. Reinstall ... make sure the hinges and latch are properly aligned and that the door closes and latches correctly. Save these for step 6. inner door frame latch hook 6 Reinstall the door with a flat blade screwdriver. REVERSING THE DOOR Hole cap Hinge assembly Cover cap 1 Open the door and remove the two plastic ...
... securing the hinges to the door or the work surface. Set the door aside face down on a protected surface to prevent damage to the door frame. Remove the two plastic cover caps. Failure to properly support the weight of the door to the dryer, or personal injury. Reinstall ... make sure the hinges and latch are properly aligned and that the door closes and latches correctly. Save these for step 6. inner door frame latch hook 6 Reinstall the door with a flat blade screwdriver. REVERSING THE DOOR Hole cap Hinge assembly Cover cap 1 Open the door and remove the two plastic ...


