
Owners Manual
Page 11
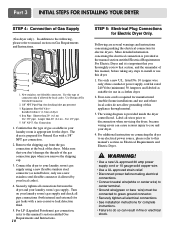
... 2. Securely tighten all electrical connections • See installation instructions for complete instructions. • Failure to you remove the shipping cap. 3. Four-wire cord is prepared for checking inlet gas pressure) 3. New stainless steel flexible connector. Connect the dryer to your laundry room's gas supply using a...the following, please refer to this type of the dryer. Gas Connection 1. Turn on Gas Requirements and Instructions. 1 2 5 3 4 1. The wiring diagram is provided at the back of connector only if allowed by your laundry room's gas supply and check all...
... 2. Securely tighten all electrical connections • See installation instructions for complete instructions. • Failure to you remove the shipping cap. 3. Four-wire cord is prepared for checking inlet gas pressure) 3. New stainless steel flexible connector. Connect the dryer to your laundry room's gas supply using a...the following, please refer to this type of the dryer. Gas Connection 1. Turn on Gas Requirements and Instructions. 1 2 5 3 4 1. The wiring diagram is provided at the back of connector only if allowed by your laundry room's gas supply and check all...
Owners Manual
Page 14
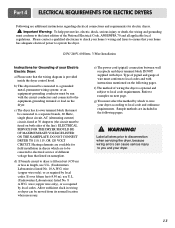
... pages. Please contact a qualified electrician to check your home's wiring and fuses to ensure that your Electric Electric Dryer: a) Please note that the wiring diagram is optional and subject to examples on both sides of wiring the dryer is provided inside the dryer control hood. d) If... branch circuit to operate the dryer. 120V/ 240V, 60 Hertz, 3-Wire Installation Instructions for field installation in dryers...
... pages. Please contact a qualified electrician to check your home's wiring and fuses to ensure that your Electric Electric Dryer: a) Please note that the wiring diagram is optional and subject to examples on both sides of wiring the dryer is provided inside the dryer control hood. d) If... branch circuit to operate the dryer. 120V/ 240V, 60 Hertz, 3-Wire Installation Instructions for field installation in dryers...
Owners Manual
Page 20
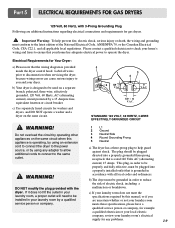
... be grounded in order to the power source, or by a 15 Ampere fuse, equivalent fusetron or circuit breaker. STANDARD 120 VOLT, 60 HERTZ, 3-WIRE EFFECTIVELY GROUNDED CIRCUIT 1 L1 2 Ground 3 Neutral Side 4 Round Grounding Prong 5 Neutral a) The dryer has a three-prong plug to you are ...provided with the dryer. Important Warning: To help guard against shock. Please contact a qualified electrician to check your home's wiring and fuses to ensure that the wiring diagram is rated 120 Volts AC (alternating current) 15 Amps. Do not overload the circuit by operating other appliances on the ...
... be grounded in order to the power source, or by a 15 Ampere fuse, equivalent fusetron or circuit breaker. STANDARD 120 VOLT, 60 HERTZ, 3-WIRE EFFECTIVELY GROUNDED CIRCUIT 1 L1 2 Ground 3 Neutral Side 4 Round Grounding Prong 5 Neutral a) The dryer has a three-prong plug to you are ...provided with the dryer. Important Warning: To help guard against shock. Please contact a qualified electrician to check your home's wiring and fuses to ensure that the wiring diagram is rated 120 Volts AC (alternating current) 15 Amps. Do not overload the circuit by operating other appliances on the ...

Owners Manual
Page 23
...the exhaust duct at extra cost, can be washed as required, and always immediately wipe the exterior of the dryer in and that the wiring diagram is attached to perform this type of the dryer as follows: a) After rolling the lint off the screen. Following attachment of the two...more frequently. d) After the residue has been removed, rinse screen with a damp cloth as necessary. WARNING! See item #2 above. 12. Label all wires prior to remove. Always ensure the lint screen is firmly secured before drying each load or after which is provided inside the dryer control hood...
...the exhaust duct at extra cost, can be washed as required, and always immediately wipe the exterior of the dryer in and that the wiring diagram is attached to perform this type of the dryer as follows: a) After rolling the lint off the screen. Following attachment of the two...more frequently. d) After the residue has been removed, rinse screen with a damp cloth as necessary. WARNING! See item #2 above. 12. Label all wires prior to remove. Always ensure the lint screen is firmly secured before drying each load or after which is provided inside the dryer control hood...


