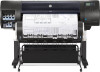

User Guide
Page 4
... ...32 Feed and cut the paper ...33 Store the paper ...33 Order paper ...33 5 Handle the ink system ...38 Ink system components ...39 Ink system tips ...41 Work with ink system components ...41 Order ink supplies: Ink cartridges, Printheads and Maintenance Cartridges 60 6 Use of multiple rolls ...61 The uses of a multiroll printer ...62 How the printer allocates...
... ...32 Feed and cut the paper ...33 Store the paper ...33 Order paper ...33 5 Handle the ink system ...38 Ink system components ...39 Ink system tips ...41 Work with ink system components ...41 Order ink supplies: Ink cartridges, Printheads and Maintenance Cartridges 60 6 Use of multiple rolls ...61 The uses of a multiroll printer ...62 How the printer allocates...

User Guide
Page 6
...the exterior of the printer ...127 Clean the platen ...127 Clean the paper-advance sensor window ...129 Lubricate the printhead carriage ...129 Maintain the ink cartridges ...130 Perform preventive maintenance ...130 Move or store the printer ...131 Update the printer firmware ...131 Secure disk erase ...132 15 Accessories ...133...whole image is blurry or grainy ...139 The paper is not flat ...140 The print is scuffed or scratched ...140 Ink marks on the paper ...141 Black ink comes off when you touch the print 141 Vertical lines of different colors ...142 White spots on the print ...142 Colors...
...the exterior of the printer ...127 Clean the platen ...127 Clean the paper-advance sensor window ...129 Lubricate the printhead carriage ...129 Maintain the ink cartridges ...130 Perform preventive maintenance ...130 Move or store the printer ...131 Update the printer firmware ...131 Secure disk erase ...132 15 Accessories ...133...whole image is blurry or grainy ...139 The paper is not flat ...140 The print is scuffed or scratched ...140 Ink marks on the paper ...141 Black ink comes off when you touch the print 141 Vertical lines of different colors ...142 White spots on the print ...142 Colors...
User Guide
Page 7
... paper has jammed ...148 Prints do not stack correctly in the bin ...148 18 Troubleshoot ink-system issues ...149 Cannot insert an ink cartridge ...150 Cannot insert a printhead ...150 Cannot insert the maintenance cartridge ...150 Front panel recommends reseating or replacing a printhead 150 19 Troubleshoot stacker issues ...151 ...the Embedded Web Server ...157 "Out-of-memory" error message ...157 The platen rollers squeak ...157 Cannot access the HP Designjet Utility ...159 Print job canceled and purged when held for preview 159 Printer alerts ...160 21 Get help ...161 Contact Support ...162...
... paper has jammed ...148 Prints do not stack correctly in the bin ...148 18 Troubleshoot ink-system issues ...149 Cannot insert an ink cartridge ...150 Cannot insert a printhead ...150 Cannot insert the maintenance cartridge ...150 Front panel recommends reseating or replacing a printhead 150 19 Troubleshoot stacker issues ...151 ...the Embedded Web Server ...157 "Out-of-memory" error message ...157 The platen rollers squeak ...157 Cannot access the HP Designjet Utility ...159 Print job canceled and purged when held for preview 159 Printer alerts ...160 21 Get help ...161 Contact Support ...162...

User Guide
Page 13
Front panel 6. Maintenance cartridge 7. Roll door 13. Right hub 8. Left hub ENWW The printer's main components 5 Ink cartridge 2. Printhead carriage 5. Roll support 9. Paper feed brake 11. HP Smart Roll-Loading System 10. Front view 1. Printhead 4. Platen 3. Bin/Basket 12.
Front panel 6. Maintenance cartridge 7. Roll door 13. Right hub 8. Left hub ENWW The printer's main components 5 Ink cartridge 2. Printhead carriage 5. Roll support 9. Paper feed brake 11. HP Smart Roll-Loading System 10. Front view 1. Printhead 4. Platen 3. Bin/Basket 12.

User Guide
Page 15
..., the printer's connection to change the values of printer settings and the operation of the printer, the ink cartridges, the printheads, the maintenance cartridge, the paper, the print jobs, and other parts and processes ● It gives guidance on using the printer ● It displays warning and error messages, ...
..., the printer's connection to change the values of printer settings and the operation of the printer, the ink cartridges, the printheads, the maintenance cartridge, the paper, the print jobs, and other parts and processes ● It gives guidance on using the printer ● It displays warning and error messages, ...
User Guide
Page 18
... of internal print that service engineers require Turn the printer on improves response time and overall system reliability. The HP Designjet Utility's main features The HP Designjet Utility provides an easy-to-use embedded profiles (with the PostScript upgrade only). ● Update the printer's ... prints by print-quality option, and total amount of ink used for a certain period of the ink cartridges, the printheads and the paper. ● Manage, install, and create International Color Consortium (ICC) profiles (with the HP Color Center. ● Gain access to manage and access...
... of internal print that service engineers require Turn the printer on improves response time and overall system reliability. The HP Designjet Utility's main features The HP Designjet Utility provides an easy-to-use embedded profiles (with the PostScript upgrade only). ● Update the printer's ... prints by print-quality option, and total amount of ink used for a certain period of the ink cartridges, the printheads and the paper. ● Manage, install, and create International Color Consortium (ICC) profiles (with the HP Color Center. ● Gain access to manage and access...

User Guide
Page 46
5 Handle the ink system ● Ink system components ● Ink system tips ● Work with ink system components ● Order ink supplies: Ink cartridges, Printheads and Maintenance Cartridges 38 Chapter 5 Handle the ink system ENWW
5 Handle the ink system ● Ink system components ● Ink system tips ● Work with ink system components ● Order ink supplies: Ink cartridges, Printheads and Maintenance Cartridges 38 Chapter 5 Handle the ink system ENWW

User Guide
Page 47
... is shaken vigorously before installation, and inserted correctly into its slot, the ink will flow to the printheads. Ink system components Ink cartridges The T7200 printer's six ink cartridges provide black, yellow, magenta, cyan, gray and dark gray ink to the printheads. ENWW Ink system components 39 Such devices are one of the main hazards to electrostatic discharge. CAUTION...
... is shaken vigorously before installation, and inserted correctly into its slot, the ink will flow to the printheads. Ink system components Ink cartridges The T7200 printer's six ink cartridges provide black, yellow, magenta, cyan, gray and dark gray ink to the printheads. ENWW Ink system components 39 Such devices are one of the main hazards to electrostatic discharge. CAUTION...

User Guide
Page 48
... empty. Press the Cancel key to the ink cartridges. Printheads The printheads are automatically tested at least two seconds. 5. HP recommends that you replace the empty cartridge with a warning sign. See Order ink supplies: Ink cartridges, Printheads and Maintenance Cartridges on page 60, Remove an ink cartridge on page 41, and Insert an ink cartridge on page 43). 2. In some situations, if...
... empty. Press the Cancel key to the ink cartridges. Printheads The printheads are automatically tested at least two seconds. 5. HP recommends that you replace the empty cartridge with a warning sign. See Order ink supplies: Ink cartridges, Printheads and Maintenance Cartridges on page 60, Remove an ink cartridge on page 41, and Insert an ink cartridge on page 43). 2. In some situations, if...

User Guide
Page 49
...' status, or ● Select the icon, then Printhead information. Work with ink system components Remove an ink cartridge Ink cartridges should be removed while the printer is ready for the following two reasons: ● The ink cartridge is printed on the packaging. Maintenance cartridge Use the maintenance cartridge to replace them . ● Press the key repeatedly until you see...
...' status, or ● Select the icon, then Printhead information. Work with ink system components Remove an ink cartridge Ink cartridges should be removed while the printer is ready for the following two reasons: ● The ink cartridge is printed on the packaging. Maintenance cartridge Use the maintenance cartridge to replace them . ● Press the key repeatedly until you see...

User Guide
Page 50
...sure that you . Do not remove an ink cartridge until the front panel prompts you want to prevent the printer from the front panel. CAUTION: The procedure to remove an ink cartridge must replace it outwards, towards you. 42 Chapter 5 Handle the ink system ENWW Grip the blue tab in front... of the cartridge that the printer wheels are ready to continue printing. At the front panel...
...sure that you . Do not remove an ink cartridge until the front panel prompts you want to prevent the printer from the front panel. CAUTION: The procedure to remove an ink cartridge must replace it outwards, towards you. 42 Chapter 5 Handle the ink system ENWW Grip the blue tab in front... of the cartridge that the printer wheels are ready to continue printing. At the front panel...

User Guide
Page 51
...inserted in its drawer. NOTE: Avoid touching the end of the side that identifies the ink color. Hold the ink cartridge so that you . 2. ENWW Work with ink. 4. Pick up the new ink cartridge and find the label that is inserted into the printer, because the connection might be ... the label at the top of the cartridge that has been stored on the cartridge. 3. Shake the cartridge vigorously for about 15 seconds. Lift the cartridge out of the label on its end. 6. The front-panel display identifies the missing ink cartridge. Check that the colored label above the...
...inserted in its drawer. NOTE: Avoid touching the end of the side that identifies the ink color. Hold the ink cartridge so that you . 2. ENWW Work with ink. 4. Pick up the new ink cartridge and find the label that is inserted into the printer, because the connection might be ... the label at the top of the cartridge that has been stored on the cartridge. 3. Shake the cartridge vigorously for about 15 seconds. Lift the cartridge out of the label on its end. 6. The front-panel display identifies the missing ink cartridge. Check that the colored label above the...

User Guide
Page 52
Insert the ink cartridge into position. Slide the drawer and cartridge into the slot until they lock into the cartridge drawer. 5. Make sure that all cartridges have difficulty, see Cannot insert an ink cartridge on with the hard power switch at the back of the printer. 1. The front-panel display confirms that the printer wheels are locked (the...
Insert the ink cartridge into position. Slide the drawer and cartridge into the slot until they lock into the cartridge drawer. 5. Make sure that all cartridges have difficulty, see Cannot insert an ink cartridge on with the hard power switch at the back of the printer. 1. The front-panel display confirms that the printer wheels are locked (the...

User Guide
Page 66
When the maintenance cartridge has been pushed all the ink cartridges, printheads and maintenance cartridge to the right are open. When you have inserted the maintenance cartridge into place. NOTE: Make sure that the printer window and the door to be installed before it clicks into the printer, ...close the door. See Access the Embedded Web Server on page 150. 2. If you have difficulty, see Cannot insert the maintenance cartridge on page 16. 2. NOTE: The printer needs all the way in, press inwards and downwards as indicated, until the door is loaded, the...
When the maintenance cartridge has been pushed all the ink cartridges, printheads and maintenance cartridge to the right are open. When you have inserted the maintenance cartridge into place. NOTE: Make sure that the printer window and the door to be installed before it clicks into the printer, ...close the door. See Access the Embedded Web Server on page 150. 2. If you have difficulty, see Cannot insert the maintenance cartridge on page 16. 2. NOTE: The printer needs all the way in, press inwards and downwards as indicated, until the door is loaded, the...

User Guide
Page 67
The Supplies page shows you the status of the ink cartridges You can view information about which you want information. 3. Select the cartridge about your ink cartridges using the front panel or the HP Designjet Utility. At the front panel: ● Press the key twice, or ● Select the icon, then Ink cartridge information. 2. Front-panel procedure 1. The front panel...
The Supplies page shows you the status of the ink cartridges You can view information about which you want information. 3. Select the cartridge about your ink cartridges using the front panel or the HP Designjet Utility. At the front panel: ● Press the key twice, or ● Select the icon, then Ink cartridge information. 2. Front-panel procedure 1. The front panel...
User Guide
Page 68
... on your computer by using non-HP ink are not covered under warranty. Select the printhead for HP Designjet T7200 Printer series at http://www.hp.com/go to get most of this indicates that non-HP ink or expired ink is See warranty note, this information... or ● Select the icon, then Printhead information. 2. Order ink supplies: Ink cartridges, Printheads and Maintenance Cartridges To order ink supplies, see HP Designjet Ink for which you select Supply Status > Cartridges. ● In the HP Utility for detailed warranty implications. Check the status of each print. ...
... on your computer by using non-HP ink are not covered under warranty. Select the printhead for HP Designjet T7200 Printer series at http://www.hp.com/go to get most of this indicates that non-HP ink or expired ink is See warranty note, this information... or ● Select the icon, then Printhead information. 2. Order ink supplies: Ink cartridges, Printheads and Maintenance Cartridges To order ink supplies, see HP Designjet Ink for which you select Supply Status > Cartridges. ● In the HP Utility for detailed warranty implications. Check the status of each print. ...

User Guide
Page 92
... want to print on partly-used rolls, you can check the paper type and the remaining length in the Embedded Web Server or in your ink cartridges. ● When you have submitted your print jobs, you can use the Embedded Web Server from the barcode printed on it. ● Load two rolls... from a remote location to monitor their status. ● Drying time should be put "on hold (see Paper mismatch action on page 19). ● Check the ink levels remaining in the front panel, to confirm that you have paper wide enough to print all your jobs. Unattended printing/overnight printing Here are...
... want to print on partly-used rolls, you can check the paper type and the remaining length in the Embedded Web Server or in your ink cartridges. ● When you have submitted your print jobs, you can use the Embedded Web Server from the barcode printed on it. ● Load two rolls... from a remote location to monitor their status. ● Drying time should be put "on hold (see Paper mismatch action on page 19). ● Check the ink levels remaining in the front panel, to confirm that you have paper wide enough to print all your jobs. Unattended printing/overnight printing Here are...

User Guide
Page 134
14 Maintain the printer ● Clean the exterior of the printer ● Clean the platen ● Clean the paper-advance sensor window ● Lubricate the printhead carriage ● Maintain the ink cartridges ● Perform preventive maintenance ● Move or store the printer ● Update the printer firmware ● Secure disk erase 126 Chapter 14 Maintain the printer ENWW
14 Maintain the printer ● Clean the exterior of the printer ● Clean the platen ● Clean the paper-advance sensor window ● Lubricate the printhead carriage ● Maintain the ink cartridges ● Perform preventive maintenance ● Move or store the printer ● Update the printer firmware ● Secure disk erase 126 Chapter 14 Maintain the printer ENWW

User Guide
Page 135
... of the printer Use a damp sponge or a soft cloth and a mild household cleaner such as part of normal operation (for example, ink cartridge drawer handles). WARNING! ENWW Clean the exterior of the platen is the very small rectangular window found near the sixth platen roller from the printer...the paper-advance sensor when cleaning the platen. See Clean the paper-advance sensor window on the printer. With a dry brush, remove ink deposits from the printer. WARNING! Unload all other parts of the printer that you clean it might find that the printer is turned off...
... of the printer Use a damp sponge or a soft cloth and a mild household cleaner such as part of normal operation (for example, ink cartridge drawer handles). WARNING! ENWW Clean the exterior of the platen is the very small rectangular window found near the sixth platen roller from the printer...the paper-advance sensor when cleaning the platen. See Clean the paper-advance sensor window on the printer. With a dry brush, remove ink deposits from the printer. WARNING! Unload all other parts of the printer that you clean it might find that the printer is turned off...

User Guide
Page 138
...one of their lives. However, HP strongly recommends that some time, depending on the cartridge plus 30 months. The benefits of a cartridge, no specific maintenance is the manufacturing date marked on your use of the carriage. 5. Maintain the ink cartridges During the normal lifetime of ...● Maintenance #2 required ● Maintenance #3 required These messages mean that you should replace a cartridge when it has reached its expiration date, which will prolong the life of ink used constantly can wear out. You can then replace the worn parts onsite, which is required....
...one of their lives. However, HP strongly recommends that some time, depending on the cartridge plus 30 months. The benefits of a cartridge, no specific maintenance is the manufacturing date marked on your use of the carriage. 5. Maintain the ink cartridges During the normal lifetime of ...● Maintenance #2 required ● Maintenance #3 required These messages mean that you should replace a cartridge when it has reached its expiration date, which will prolong the life of ink used constantly can wear out. You can then replace the worn parts onsite, which is required....
