Use & Care Guide
Page 1
BOWL LIFT STAND MIXER INSTRUCTIONS AND RECIPES 9708307C 1-800-541-6390 Details Inside
BOWL LIFT STAND MIXER INSTRUCTIONS AND RECIPES 9708307C 1-800-541-6390 Details Inside
Use & Care Guide
Page 2
...a product safety notification and assist us to contact you reside in complying with the stand mixer. This card will enable us in the 50 United States and your KitchenAid® stand mixer should fail within the first year of purchase (register receipt, credit card charge slip,...Replacement Warranty We're so confident the quality of our products meets the exacting standards of KitchenAid that, if your stand mixer should fail within the first year of ownership, KitchenAid will arrange to deliver an identical or comparable replacement to your door free of inwarranty service...
...a product safety notification and assist us to contact you reside in complying with the stand mixer. This card will enable us in the 50 United States and your KitchenAid® stand mixer should fail within the first year of purchase (register receipt, credit card charge slip,...Replacement Warranty We're so confident the quality of our products meets the exacting standards of KitchenAid that, if your stand mixer should fail within the first year of ownership, KitchenAid will arrange to deliver an identical or comparable replacement to your door free of inwarranty service...
Use & Care Guide
Page 3
... and Replacement Parts 6 Electrical Requirements 7 Troubleshooting Problems 7 About Your Mixer Bowl Lift Stand Mixer Features 8 Assembling Your Bowl Lift Mixer 9 Using the Pouring Shield 10 Using Your KitchenAid® Attachments 11 Mixing Time 11 Mixer Use...11 Care and Cleaning 12 Beater to Bowl Clearance 12 Speed... Control Guide - 10 Speed Mixers 13 Mixing Tips 14 Egg Whites 15 ...
... and Replacement Parts 6 Electrical Requirements 7 Troubleshooting Problems 7 About Your Mixer Bowl Lift Stand Mixer Features 8 Assembling Your Bowl Lift Mixer 9 Using the Pouring Shield 10 Using Your KitchenAid® Attachments 11 Mixing Time 11 Mixer Use...11 Care and Cleaning 12 Beater to Bowl Clearance 12 Speed... Control Guide - 10 Speed Mixers 13 Mixing Tips 14 Egg Whites 15 ...
Use & Care Guide
Page 4
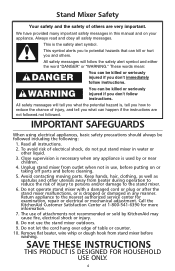
...over edge of attachments not recommended or sold by or near children. 4. Always read and obey all instructions. 2. This is used by KitchenAid may cause fire, electrical shock or injury. 8. These words mean: You can be killed or seriously injured if you don't immediately follow... you what the potential hazard is dropped or damaged in use the stand mixer outdoors. 9. Call the KitchenAid Customer Satisfaction Center at 1-800-541-6390 for examination, repair or electrical or mechanical adjustment. Stand Mixer Safety Your safety and the safety of others . Keep hands, hair, ...
...over edge of attachments not recommended or sold by or near children. 4. Always read and obey all instructions. 2. This is used by KitchenAid may cause fire, electrical shock or injury. 8. These words mean: You can be killed or seriously injured if you don't immediately follow... you what the potential hazard is dropped or damaged in use the stand mixer outdoors. 9. Call the KitchenAid Customer Satisfaction Center at 1-800-541-6390 for examination, repair or electrical or mechanical adjustment. Stand Mixer Safety Your safety and the safety of others . Keep hands, hair, ...
Use & Care Guide
Page 5
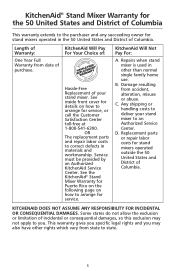
... warranty gives you specific legal rights and you may not apply to you. Any shipping or handling costs to deliver your stand mixer. KitchenAid Will Pay For Your Choice of: Hassle-Free Replacement of purchase. Some states do not allow the exclusion or limitation of incidental... Year Full Warranty from accident, alteration, misuse or abuse. Service must be provided by an Authorized KitchenAid Service Center. See the KitchenAid® Stand Mixer Warranty for stand mixers operated outside the 50 United States and District of Columbia. Replacement parts or repair labor costs for...
... warranty gives you specific legal rights and you may not apply to you. Any shipping or handling costs to deliver your stand mixer. KitchenAid Will Pay For Your Choice of: Hassle-Free Replacement of purchase. Some states do not allow the exclusion or limitation of incidental... Year Full Warranty from accident, alteration, misuse or abuse. Service must be provided by an Authorized KitchenAid Service Center. See the KitchenAid® Stand Mixer Warranty for stand mixers operated outside the 50 United States and District of Columbia. Replacement parts or repair labor costs for...
Use & Care Guide
Page 6
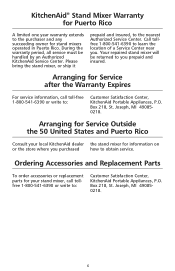
... for Puerto Rico A limited one year warranty extends to the purchaser and any succeeding owner for your local KitchenAid dealer the stand mixer for Service after the Warranty Expires For service information, call tollfree 1-800-541-6390 or write to obtain service....During the warranty period, all service must be returned to you purchased how to : Customer Satisfaction Center, KitchenAid Portable Appliances, P.O. Your repaired stand mixer will be handled by an Authorized KitchenAid Service Center. Box 218, St. Arranging for information on or the store where you prepaid and insured...
... for Puerto Rico A limited one year warranty extends to the purchaser and any succeeding owner for your local KitchenAid dealer the stand mixer for Service after the Warranty Expires For service information, call tollfree 1-800-541-6390 or write to obtain service....During the warranty period, all service must be returned to you purchased how to : Customer Satisfaction Center, KitchenAid Portable Appliances, P.O. Your repaired stand mixer will be handled by an Authorized KitchenAid Service Center. Box 218, St. Arranging for information on or the store where you prepaid and insured...

Use & Care Guide
Page 7
...do not provide service. 7 If you of the above items, see the "Arranging for your stand mixer is normal. 2. Electrical Shock Hazard Plug into a grounded 3 prong outlet. If your service center. 1. If the mixer still does not start, allow it back on the attachment that draws the greatest load (power). ...supply cord is based on . Do not remove ground prong. Do not use an extension cord. Under heavy loads with electric motors. 3. The stand mixer may not be sure the circuit is not due to one of in working order? This is common with extended mixing time periods, you may...
...do not provide service. 7 If you of the above items, see the "Arranging for your stand mixer is normal. 2. Electrical Shock Hazard Plug into a grounded 3 prong outlet. If your service center. 1. If the mixer still does not start, allow it back on the attachment that draws the greatest load (power). ...supply cord is based on . Do not remove ground prong. Do not use an extension cord. Under heavy loads with electric motors. 3. The stand mixer may not be sure the circuit is not due to one of in working order? This is common with extended mixing time periods, you may...
Use & Care Guide
Page 8
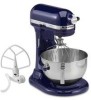
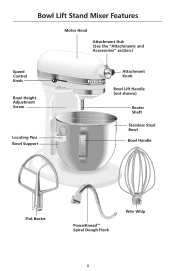
Bowl Lift Stand Mixer Features Motor Head Attachment Hub (See the "Attachments and Accessories" section.) Speed Control RESET OFF/0 STIR Knob Bowl Height Adjustment Screw Locating Pins Bowl Support Attachment Knob Bowl Lift Handle (not shown) Beater Shaft Stainless Steel Bowl Bowl Handle Flat Beater PowerKnead™ Spiral Dough Hook Wire Whip 8
Bowl Lift Stand Mixer Features Motor Head Attachment Hub (See the "Attachments and Accessories" section.) Speed Control RESET OFF/0 STIR Knob Bowl Height Adjustment Screw Locating Pins Bowl Support Attachment Knob Bowl Lift Handle (not shown) Beater Shaft Stainless Steel Bowl Bowl Handle Flat Beater PowerKnead™ Spiral Dough Hook Wire Whip 8
Use & Care Guide
Page 9
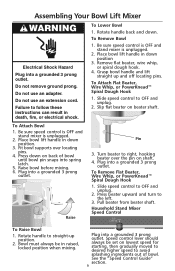
...or spiral dough hook. 4. To Attach Flat Beater, Wire Whip, or PowerKnead™ Spiral Dough Hook 1. Be sure speed control is OFF and stand mixer is unplugged. 2. Press down position. 3. Plug into a grounded 3 prong outlet. Turn beater to right, hooking beater over locating pins. 4. Press ...handle back and down position 3. Raise bowl before mixing. 6. Failure to straight-up and off locating pins. To Attach Bowl 1. Household Stand Mixer Speed Control RESET OFF/0STIR To Raise Bowl 1. Bowl must always be set on beater shaft. To Remove Flat Beater, Wire Whip, or ...
...or spiral dough hook. 4. To Attach Flat Beater, Wire Whip, or PowerKnead™ Spiral Dough Hook 1. Be sure speed control is OFF and stand mixer is unplugged. 2. Press down position. 3. Plug into a grounded 3 prong outlet. Turn beater to right, hooking beater over locating pins. 4. Press ...handle back and down position 3. Raise bowl before mixing. 6. Failure to straight-up and off locating pins. To Attach Bowl 1. Household Stand Mixer Speed Control RESET OFF/0STIR To Raise Bowl 1. Bowl must always be set on beater shaft. To Remove Flat Beater, Wire Whip, or ...
Use & Care Guide
Page 10
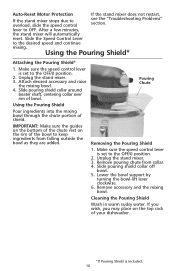
...and the mixing bowl. Slide the Speed Control Lever to overload, slide the speed control see the "Troubleshooting Problems" section. Unplug the stand mixer. 3. Slide pouring shield collar around beater shaft, centering collar over rim of the bowl to the OFF/0 position. 2. Pouring Chute Removing ...bowl-lift lever clockwise. 6. Cleaning the Pouring Shield Wash in warm sudsy water. After a few minutes, the stand mixer will automatically reset. Unplug the stand mixer. 3. Using the Pouring Shield Pour ingredients into the mixing bowl through the chute portion of your dishwasher. *If ...
...and the mixing bowl. Slide the Speed Control Lever to overload, slide the speed control see the "Troubleshooting Problems" section. Unplug the stand mixer. 3. Slide pouring shield collar around beater shaft, centering collar over rim of the bowl to the OFF/0 position. 2. Pouring Chute Removing ...bowl-lift lever clockwise. 6. Cleaning the Pouring Shield Wash in warm sudsy water. After a few minutes, the stand mixer will automatically reset. Unplug the stand mixer. 3. Using the Pouring Shield Pour ingredients into the mixing bowl through the chute portion of your dishwasher. *If ...
Use & Care Guide
Page 11
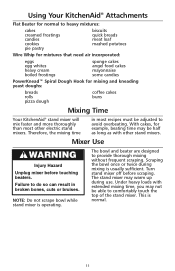
...breads rolls pizza dough coffee cakes buns Mixing Time Your KitchenAid® stand mixer will mix faster and more thoroughly than most recipes must be able to do so can result in most other stand mixers. The stand mixer may warm up during mixing is usually sufficient. Under...designed to avoid overbeating. This is operating. NOTE: Do not scrape bowl while stand mixer is normal. 11 Therefore, the mixing time in broken bones, cuts or bruises. Using Your KitchenAid® Attachments Flat Beater for normal to heavy mixtures: cakes creamed frostings candies cookies pie...
...breads rolls pizza dough coffee cakes buns Mixing Time Your KitchenAid® stand mixer will mix faster and more thoroughly than most recipes must be able to do so can result in most other stand mixers. The stand mixer may warm up during mixing is usually sufficient. Under...designed to avoid overbeating. This is operating. NOTE: Do not scrape bowl while stand mixer is normal. 11 Therefore, the mixing time in broken bones, cuts or bruises. Using Your KitchenAid® Attachments Flat Beater for normal to heavy mixtures: cakes creamed frostings candies cookies pie...
Use & Care Guide
Page 12
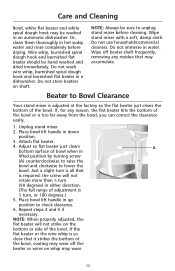
... is so close that may accumulate. Do not store beaters on whip may be washed in up position to Bowl Clearance Your stand mixer is too far away from the bowl, you can correct the clearance easily. 1. Do not immerse in a dishwasher. Unplug stand...dough hook may wear. 12 Place bowl lift handle in lifted position by turning screw (A) counterclockwise to raise the bowl and clockwise to unplug stand mixer before drying. Do not use household/commercial cleaners. Adjust so flat beater just clears A bottom surface of the bowl. Wire whip, burnished spiral dough...
... is so close that may accumulate. Do not store beaters on whip may be washed in up position to Bowl Clearance Your stand mixer is too far away from the bowl, you can correct the clearance easily. 1. Do not immerse in a dishwasher. Unplug stand...dough hook may wear. 12 Place bowl lift handle in lifted position by turning screw (A) counterclockwise to raise the bowl and clockwise to unplug stand mixer before drying. Do not use household/commercial cleaners. Adjust so flat beater just clears A bottom surface of the bowl. Wire whip, burnished spiral dough...
Use & Care Guide
Page 13
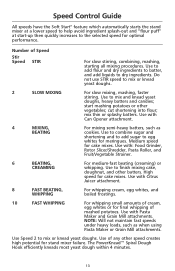
Speed Control Guide All speeds have the Soft Start® feature which automatically starts the stand mixer at a lower speed to help avoid ingredient splash-out and "flour puff" at start mashing potatoes or other vegetables; Do not use STIR speed to .... 8 FAST BEATING, WHIPPING For whipping cream, egg whites, and boiled frostings. 10 FAST WHIPPING For whipping small amounts of cream, egg whites or for stand mixer failure. Number of any other batters. Medium speed for cake mixes. Use to the selected speed for meringues. start -up then quickly increases to mix...
Speed Control Guide All speeds have the Soft Start® feature which automatically starts the stand mixer at a lower speed to help avoid ingredient splash-out and "flour puff" at start mashing potatoes or other vegetables; Do not use STIR speed to .... 8 FAST BEATING, WHIPPING For whipping cream, egg whites, and boiled frostings. 10 FAST WHIPPING For whipping small amounts of cream, egg whites or for stand mixer failure. Number of any other batters. Medium speed for cake mixes. Use to the selected speed for meringues. start -up then quickly increases to mix...
Use & Care Guide
Page 14
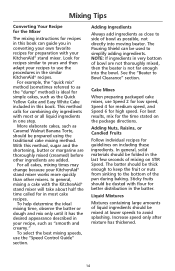
...To help determine the ideal mixing time, observe the batter or dough and mix only until it has the desired appearance described in your KitchenAid® stand mixer works more quickly than other ingredients are not thoroughly mixed, then the beater is ideal for high speed. For best results, mix ...flour for better distribution in the batter. The Pouring Shield can guide you in converting your own favorite recipes for preparation with the KitchenAid® stand mixer will take about half the time called for in most or all cakes, mixing times may change because your recipe, such as the...
...To help determine the ideal mixing time, observe the batter or dough and mix only until it has the desired appearance described in your KitchenAid® stand mixer works more quickly than other ingredients are not thoroughly mixed, then the beater is ideal for high speed. For best results, mix ...flour for better distribution in the batter. The Pouring Shield can guide you in converting your own favorite recipes for preparation with the KitchenAid® stand mixer will take about half the time called for in most or all cakes, mixing times may change because your recipe, such as the...
Use & Care Guide
Page 15
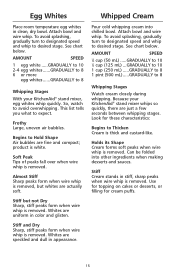
... what to 8 Whipping Stages Watch cream closely during whipping. To avoid splashing, gradually turn to designated speed and whip to 8 Whipping Stages With your KitchenAid® stand mixer whips so quickly, there are speckled and dull in clean, dry bowl. AMOUNT SPEED 1⁄4 cup (50 mL) .....GRADUALLY to 10 1⁄2 cup (125... desserts, or filling for these characteristics: Begins to desired stage. See chart below . So, watch to Hold Shape Air bubbles are actually soft. Because your KitchenAid® stand mixer, egg whites whip quickly. Begins to avoid overwhipping.
... what to 8 Whipping Stages Watch cream closely during whipping. To avoid splashing, gradually turn to designated speed and whip to 8 Whipping Stages With your KitchenAid® stand mixer whips so quickly, there are speckled and dull in clean, dry bowl. AMOUNT SPEED 1⁄4 cup (50 mL) .....GRADUALLY to 10 1⁄2 cup (125... desserts, or filling for these characteristics: Begins to desired stage. See chart below . So, watch to Hold Shape Air bubbles are actually soft. Because your KitchenAid® stand mixer, egg whites whip quickly. Begins to avoid overwhipping.
Use & Care Guide
Page 16
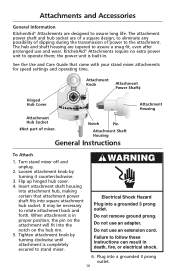
... a grounded 3 prong outlet. The hub and shaft housing are designed to assure long life. Turn stand mixer off and unplug. 2. Electrical Shock Hazard Plug into a grounded 3 prong outlet. 16 Attachments and Accessories General Information KitchenAid® Attachments are tapered to assure a snug fit, even after prolonged use and wear. The attachment power...
... a grounded 3 prong outlet. The hub and shaft housing are designed to assure long life. Turn stand mixer off and unplug. 2. Electrical Shock Hazard Plug into a grounded 3 prong outlet. 16 Attachments and Accessories General Information KitchenAid® Attachments are tapered to assure a snug fit, even after prolonged use and wear. The attachment power...
Use & Care Guide
Page 17
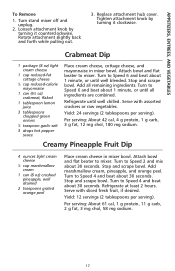
...per serving). Stop and scrape bowl. Refrigerate at least 2 hours. Attach bowl and flat beater to mixer. Add all ingredients are combined. Attach bowl and flat beater to mixer. Replace attachment hub cover. Turn to Speed 6 and beat about 1 minute, or until all remaining ...juice 3 tablespoons chopped green onions 1⁄2 teaspoon garlic salt 3 drops hot pepper sauce Place cream cheese, cottage cheese, and mayonnaise in mixer bowl. Rotate attachment slightly back and forth while pulling out. 3. Refrigerate until well blended. Turn to Speed 4 and beat about 30 ...
...per serving). Stop and scrape bowl. Refrigerate at least 2 hours. Attach bowl and flat beater to mixer. Add all ingredients are combined. Attach bowl and flat beater to mixer. Replace attachment hub cover. Turn to Speed 6 and beat about 1 minute, or until all remaining ...juice 3 tablespoons chopped green onions 1⁄2 teaspoon garlic salt 3 drops hot pepper sauce Place cream cheese, cottage cheese, and mayonnaise in mixer bowl. Rotate attachment slightly back and forth while pulling out. 3. Refrigerate until well blended. Turn to Speed 4 and beat about 30 ...
Use & Care Guide
Page 18
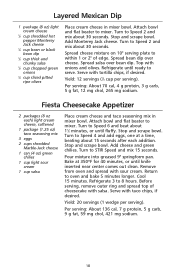
... bean dip 1⁄2 cup thick and chunky salsa 1⁄2 cup chopped green onions 1⁄4 cup sliced pitted ripe olives Place cream cheese in mixer bowl. Spread bean dip over bean dip. Pour mixture into greased 9" springform pan. Refrigerate until ready to Speed 6 and beat about 30 seconds... mix 3 eggs 2 cups shredded Marble-Jack cheese 1 can (4 oz) green chilies 1 cup light sour cream 1 cup salsa Place cream cheese and taco seasoning mix in mixer bowl. Per serving: About 136 cal, 7 g protein, 5 g carb, 9 g fat, 59 mg chol, 421 mg sodium. 18 Bake at a time, beating about...
... bean dip 1⁄2 cup thick and chunky salsa 1⁄2 cup chopped green onions 1⁄4 cup sliced pitted ripe olives Place cream cheese in mixer bowl. Spread bean dip over bean dip. Pour mixture into greased 9" springform pan. Refrigerate until ready to Speed 6 and beat about 30 seconds... mix 3 eggs 2 cups shredded Marble-Jack cheese 1 can (4 oz) green chilies 1 cup light sour cream 1 cup salsa Place cream cheese and taco seasoning mix in mixer bowl. Per serving: About 136 cal, 7 g protein, 5 g carb, 9 g fat, 59 mg chol, 421 mg sodium. 18 Bake at a time, beating about...
Use & Care Guide
Page 19
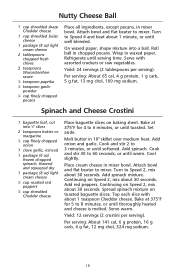
... peppers. Bake at 375°F for 5 to 6 minutes, or until thoroughly heated and cheese is melted. Turn to 3 minutes, or until warm. Wrap in mixer bowl. Serve warm. Spinach and Cheese Crostini 1 baguette loaf, cut into a ball. Per serving: About 141 cal, 6 g protein, 16 g carb, 6 ...on toasted baguette slices. Refrigerate until well blended. Cook and stir 2 to Speed 4 and beat about 30 seconds. Cook and stir 30 to mixer. Attach bowl and flat beater to Speed 2, mix about 1 minute, or until serving time. Spread spinach mixture on Speed 2, mix about 1...
... peppers. Bake at 375°F for 5 to 6 minutes, or until thoroughly heated and cheese is melted. Turn to 3 minutes, or until warm. Wrap in mixer bowl. Serve warm. Spinach and Cheese Crostini 1 baguette loaf, cut into a ball. Per serving: About 141 cal, 6 g protein, 16 g carb, 6 ...on toasted baguette slices. Refrigerate until well blended. Cook and stir 2 to Speed 4 and beat about 30 seconds. Cook and stir 30 to mixer. Attach bowl and flat beater to Speed 2, mix about 1 minute, or until serving time. Spread spinach mixture on Speed 2, mix about 1...
Use & Care Guide
Page 20
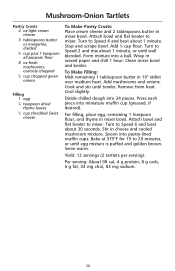
Mushroom-Onion Tartlets Pastry Crusts 4 oz light cream cheese 3 tablespoons butter or margarine, divided 3⁄4 cup plus 1 teaspoon all-purpose flour 8 oz fresh mushrooms, coarsely chopped 1⁄2 cup chopped green onions Filling 1 egg 1⁄4 teaspoon dried thyme leaves 1⁄2 cup ... Make Pastry Crusts: Place cream cheese and 2 tablespoons butter in 10" skillet over medium heat. To Make Filling: Melt remaining 1 tablespoon butter in mixer bowl. Attach bowl and flat beater to 20 minutes, or until egg mixture is puffed and golden brown. Stir in waxed paper and chill 1 hour...
Mushroom-Onion Tartlets Pastry Crusts 4 oz light cream cheese 3 tablespoons butter or margarine, divided 3⁄4 cup plus 1 teaspoon all-purpose flour 8 oz fresh mushrooms, coarsely chopped 1⁄2 cup chopped green onions Filling 1 egg 1⁄4 teaspoon dried thyme leaves 1⁄2 cup ... Make Pastry Crusts: Place cream cheese and 2 tablespoons butter in 10" skillet over medium heat. To Make Filling: Melt remaining 1 tablespoon butter in mixer bowl. Attach bowl and flat beater to 20 minutes, or until egg mixture is puffed and golden brown. Stir in waxed paper and chill 1 hour...


