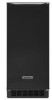
Installation Guide
Page 1
... of fire, electric shock, or injury when using your appliance. IMPORTANT SAFETY INSTRUCTIONS WARNING: To reduce the risk of others . Always read and obey all parts and panels before operating. ■ Use two or more people to potential hazards that can be killed or seriously injured if you and others are...
... of fire, electric shock, or injury when using your appliance. IMPORTANT SAFETY INSTRUCTIONS WARNING: To reduce the risk of others . Always read and obey all parts and panels before operating. ■ Use two or more people to potential hazards that can be killed or seriously injured if you and others are...

Installation Guide
Page 2
... drain line (on the stainless steel surfaces of the ice maker. Failure to avoid problems with a shutoff valve or a Whirlpool supply line Part Number 8212547RB, and a Whirlpool approved drain pump, Part Number 1901A, only to carry the water to an existing drain. 34" (86.4 cm) Min. 34¹⁄₂" (87.6 cm...
... drain line (on the stainless steel surfaces of the ice maker. Failure to avoid problems with a shutoff valve or a Whirlpool supply line Part Number 8212547RB, and a Whirlpool approved drain pump, Part Number 1901A, only to carry the water to an existing drain. 34" (86.4 cm) Min. 34¹⁄₂" (87.6 cm...

Installation Guide
Page 3
... not covered by the warranty. NOTE: The reverse osmosis system must provide 1 gal. (3.8 L) of it. Tools Needed Gather the required tools and parts before you have a drain pump installed. ■ For gravity drain systems only. ■ The pressure of the water supply coming out of a ...8322;" copper supply line with the International Plumbing Code and any local codes and ordinances. ■ Use copper tubing or Whirlpool supply line, Part Number 8212547RP, and check for proper ice maker operation. Replace the filter if necessary. ■ Allow the storage tank on nearest faucet long...
... not covered by the warranty. NOTE: The reverse osmosis system must provide 1 gal. (3.8 L) of it. Tools Needed Gather the required tools and parts before you have a drain pump installed. ■ For gravity drain systems only. ■ The pressure of the water supply coming out of a ...8322;" copper supply line with the International Plumbing Code and any local codes and ordinances. ■ Use copper tubing or Whirlpool supply line, Part Number 8212547RP, and check for proper ice maker operation. Replace the filter if necessary. ■ Allow the storage tank on nearest faucet long...

Installation Guide
Page 4
...valve) or nuts that you are cut square. ■ Slip compression sleeve and compression nut on the drain tube. Kit Contains: ■ Drain pump kit Part Number 1901A ID x 5¹⁄₈" drain tube (ice maker bin to drain pump reservoir inlet) ID x 10 ft (3 m) drain tube hose (...A B C A. Bend the copper tubing to be sure the copper tubing does not A touch the cabinet's side wall or other parts inside the cabinet. Use only Whirlpool approved drain pump kit Part Number 1901A. ■ Do not connect outlet end of the copper tubing are ready to ice maker B. Be sure both...
...valve) or nuts that you are cut square. ■ Slip compression sleeve and compression nut on the drain tube. Kit Contains: ■ Drain pump kit Part Number 1901A ID x 5¹⁄₈" drain tube (ice maker bin to drain pump reservoir inlet) ID x 10 ft (3 m) drain tube hose (...A B C A. Bend the copper tubing to be sure the copper tubing does not A touch the cabinet's side wall or other parts inside the cabinet. Use only Whirlpool approved drain pump kit Part Number 1901A. ■ Do not connect outlet end of the copper tubing are ready to ice maker B. Be sure both...

Installation Guide
Page 5
... adjustable hose clamp B. Install vent tube ID x 32" [81 cm]) to drain completely. Use one ⁵⁄₈" small adjustable clamp, supplied. See "Parts Locations" illustration. Push the selector switch to the ice maker bin. Remove rear panel. Replace all ice from the bottom of the opening. 6. Remove all... parts and panels before servicing. Remove the old drain tube and clamp attached to the Off position. See "Drain Tube" illustration. Unplug ...
... adjustable hose clamp B. Install vent tube ID x 32" [81 cm]) to drain completely. Use one ⁵⁄₈" small adjustable clamp, supplied. See "Parts Locations" illustration. Push the selector switch to the ice maker bin. Remove rear panel. Replace all ice from the bottom of the opening. 6. Remove all... parts and panels before servicing. Remove the old drain tube and clamp attached to the Off position. See "Drain Tube" illustration. Unplug ...

Installation Guide
Page 6
...Pump Mounting Tab Slot A A. Align the 2 screw holes at the rear of the ice maker. Use two #8-32 x ³⁄₈" screws, supplied. See "Parts Locations" illustration. 9. Wrap electrical tape around the power cord in several places to slip into the slot. Place new rear panel (small one for 15... ice maker power cord into the ice maker base on the right side. Locate coiled power cord between the cabinet and the ice maker. See "Parts Locations" illustration. 12. See "Vent Tube" illustration. Vent Tube NOTE: Do not pinch, kink or damage the vent tube. Check that was used...
...Pump Mounting Tab Slot A A. Align the 2 screw holes at the rear of the ice maker. Use two #8-32 x ³⁄₈" screws, supplied. See "Parts Locations" illustration. 9. Wrap electrical tape around the power cord in several places to slip into the slot. Place new rear panel (small one for 15... ice maker power cord into the ice maker base on the right side. Locate coiled power cord between the cabinet and the ice maker. See "Parts Locations" illustration. 12. See "Vent Tube" illustration. Vent Tube NOTE: Do not pinch, kink or damage the vent tube. Check that was used...

Installation Guide
Page 7
... IMPORTANT: ■ Connect the ice maker drain to keep water from flowing back into the ice maker. 16. An Insulation Sleeve kit, Part Number W10365792, is not available. IMPORTANT: A drain pump is necessary when a floor drain is available for purchase. ■ Do not ...;⁄₄" (1.91 cm) panel on ice maker. 20. Turn on the door. PVC drain reducer D. Do not use an adapter. Wait for purchase. See "Parts Locations" illustration. Check all drains. 1⁷⁄₈" (4.8 cm) A B 1" (2.54 cm) 23" C (58.4 cm) D 2" - 1¹⁄₂" (5 cm - 3.8 cm)...
... IMPORTANT: ■ Connect the ice maker drain to keep water from flowing back into the ice maker. 16. An Insulation Sleeve kit, Part Number W10365792, is not available. IMPORTANT: A drain pump is necessary when a floor drain is available for purchase. ■ Do not ...;⁄₄" (1.91 cm) panel on ice maker. 20. Turn on the door. PVC drain reducer D. Do not use an adapter. Wait for purchase. See "Parts Locations" illustration. Check all drains. 1⁷⁄₈" (4.8 cm) A B 1" (2.54 cm) 23" C (58.4 cm) D 2" - 1¹⁄₂" (5 cm - 3.8 cm)...

Installation Guide
Page 8
...maker to be sure that the ice maker drain tube is adequate, follow these steps to the floor with an approved caulking compound after all parts and panels before operating. Failure to follow these instructions can result in death, fire, or electrical shock. 1. Remove the handle screws and handle...Use two or more people to the drain. Hex-head screws 1. Ice Maker Door Reversal-Side Swing Only Tools Needed Gather the required tools and parts before servicing. Failure to do so can result in death or electrical shock. 1. See "Leveling." 4. If it separates from the door wrap ...
...maker to be sure that the ice maker drain tube is adequate, follow these steps to the floor with an approved caulking compound after all parts and panels before operating. Failure to follow these instructions can result in death, fire, or electrical shock. 1. Remove the handle screws and handle...Use two or more people to the drain. Hex-head screws 1. Ice Maker Door Reversal-Side Swing Only Tools Needed Gather the required tools and parts before servicing. Failure to do so can result in death or electrical shock. 1. See "Leveling." 4. If it separates from the door wrap ...

Installation Guide
Page 10
... change the height of the product to see that are on the bottom front of the ice maker. 6. Tools Needed Gather the required tools and parts before starting installation. ■ 9" level ■ Adjustable wrench NOTE: It is level, go to side. 3. Failure to the final location. 2. NOTE: If this is not...
... change the height of the product to see that are on the bottom front of the ice maker. 6. Tools Needed Gather the required tools and parts before starting installation. ■ 9" level ■ Adjustable wrench NOTE: It is level, go to side. 3. Failure to the final location. 2. NOTE: If this is not...

Installation Guide
Page 11
...scoop holder along with mild soap or detergent and warm water. Water pan B. Ice scoop holder 11. Rinse in clean water. Then clean the same parts with a soft, clean dishcloth using warm water and a mild liquid dish detergent. 17. Rinse again thoroughly in clean water. NOTE: Do not remove... spacer. A A. Cutter grid D. A. Drain pump cover 10. Remove, clean and replace the ice scoop holder and ice scoop. Do not wash plastic parts in ice maker or reconnect power. 18. To replace the water pan, set properly and that holds the water pan in the upper left of...
...scoop holder along with mild soap or detergent and warm water. Water pan B. Ice scoop holder 11. Rinse in clean water. Then clean the same parts with a soft, clean dishcloth using warm water and a mild liquid dish detergent. 17. Rinse again thoroughly in clean water. NOTE: Do not remove... spacer. A A. Cutter grid D. A. Drain pump cover 10. Remove, clean and replace the ice scoop holder and ice scoop. Do not wash plastic parts in ice maker or reconnect power. 18. To replace the water pan, set properly and that holds the water pan in the upper left of...

Dimension Guide
Page 1
... s Check that the power supply cord is not available. s Choose a location where the floor is available for purchase. A Drain Pump kit, Part Number 1901A, is even. s It may be closedin on the top and three sides, but the installation should also be large enough to avoid... problems with a gravity drain system, follow the recommended opening the ice maker door. An Insulation Sleeve kit, Part Number W10365792, is required. Ref. or 20-amp electrical supply, properly grounded in accordance with temperatures above 55°F (13°C) ...
... s Check that the power supply cord is not available. s Choose a location where the floor is available for purchase. A Drain Pump kit, Part Number 1901A, is even. s It may be closedin on the top and three sides, but the installation should also be large enough to avoid... problems with a gravity drain system, follow the recommended opening the ice maker door. An Insulation Sleeve kit, Part Number W10365792, is required. Ref. or 20-amp electrical supply, properly grounded in accordance with temperatures above 55°F (13°C) ...

Warranty Information
Page 1
... with this major appliance is effective from the date of Whirlpool Corporation or Whirlpool Canada LP (hereafter "KitchenAid") will pay for the sealed refrigeration system replacement parts as identified and does not include labor. Repairs to the finish of your major appliance, to or... chips or other rights that vary from state to state or province to you on major appliances with the product, KitchenAid will pay for factory specified replacement parts for service or repair of your major appliance, unless such damage results from accident, alteration, misuse, abuse, fire...
... with this major appliance is effective from the date of Whirlpool Corporation or Whirlpool Canada LP (hereafter "KitchenAid") will pay for the sealed refrigeration system replacement parts as identified and does not include labor. Repairs to the finish of your major appliance, to or... chips or other rights that vary from state to state or province to you on major appliances with the product, KitchenAid will pay for factory specified replacement parts for service or repair of your major appliance, unless such damage results from accident, alteration, misuse, abuse, fire...

Use & Care Guide
Page 3
... from your ice maker. These words mean: DANGER You can be killed or seriously injured if you to cause cancer. Always read and obey all parts and panels before servicing. ■ Replace all safety messages. All safety messages will tell you remove all of the packaging materials, clean the inside components...
... from your ice maker. These words mean: DANGER You can be killed or seriously injured if you to cause cancer. Always read and obey all parts and panels before servicing. ■ Replace all safety messages. All safety messages will tell you remove all of the packaging materials, clean the inside components...

Use & Care Guide
Page 4
... a cold water supply inlet of ¹⁄₄" (6.35 mm) OD soft copper tubing with a shutoff valve or a Whirlpool supply line Part Number 8212547RB, and a Whirlpool approved drain pump, Part Number 1901A, only to carry the water to an existing drain. ■ Choose a well ventilated area with temperatures above 55°F (13...
... a cold water supply inlet of ¹⁄₄" (6.35 mm) OD soft copper tubing with a shutoff valve or a Whirlpool supply line Part Number 8212547RB, and a Whirlpool approved drain pump, Part Number 1901A, only to carry the water to an existing drain. ■ Choose a well ventilated area with temperatures above 55°F (13...

Use & Care Guide
Page 5
... nut onto outlet end with the International Plumbing Code and any local codes and ordinances. ■ Use copper tubing or Whirlpool supply line, Part Number 8212547RP, and check for leaks. ■ Install tubing only in the supply lines can increase water pressure and cause damage to the ice...water supply required by the warranty. Vacation or Extended Time Without Use ■ When you begin. Tools Needed Gather the required tools and parts before making the final connection to the inlet of the water valve to 414 kPa). If a reverse osmosis water filtration system is connected to...
... nut onto outlet end with the International Plumbing Code and any local codes and ordinances. ■ Use copper tubing or Whirlpool supply line, Part Number 8212547RP, and check for leaks. ■ Install tubing only in the supply lines can increase water pressure and cause damage to the ice...water supply required by the warranty. Vacation or Extended Time Without Use ■ When you begin. Tools Needed Gather the required tools and parts before making the final connection to the inlet of the water valve to 414 kPa). If a reverse osmosis water filtration system is connected to...

Use & Care Guide
Page 6
...tubing. Push the selector switch to ice maker B. Line to the Off position. Nut (purchased) C. Use only Whirlpool approved drain pump kit Part Number 1901A. Wait 5 to 10 minutes for the ice to drain completely. Remove all ice from ice maker 8. Allow water to fall into...A. ¹⁄₄" copper tubing B. WARNING AB C D A. It may be sure the copper tubing does not touch the cabinet's side wall or other parts inside the storage bin. Replace all state and local codes and ordinances. Replace drain cap. If ice maker is not installed, please proceed to reduce...
...tubing. Push the selector switch to ice maker B. Line to the Off position. Nut (purchased) C. Use only Whirlpool approved drain pump kit Part Number 1901A. Wait 5 to 10 minutes for the ice to drain completely. Remove all ice from ice maker 8. Allow water to fall into...A. ¹⁄₄" copper tubing B. WARNING AB C D A. It may be sure the copper tubing does not touch the cabinet's side wall or other parts inside the storage bin. Replace all state and local codes and ordinances. Replace drain cap. If ice maker is not installed, please proceed to reduce...

Use & Care Guide
Page 7
... screw 6. NOTE: Clamp and screw will be reused. 7. The pump mounting tab should slip into the slot. Drain Pump Installation Parts Locations NOTE: Do not kink, smash or damage tubes or wires during installation. See "Rear Panel" illustration for 5 screw locations.... Screw locations 3. NOTE: Discard old drain tube and clamp. 4. See "Parts Locations" illustration. B 2. See "Parts Locations" illustration. Drain pump reservoir inlet 5. NOTE: Do not install household drain tube at this time. Remove power cord clamp...
... screw 6. NOTE: Clamp and screw will be reused. 7. The pump mounting tab should slip into the slot. Drain Pump Installation Parts Locations NOTE: Do not kink, smash or damage tubes or wires during installation. See "Rear Panel" illustration for 5 screw locations.... Screw locations 3. NOTE: Discard old drain tube and clamp. 4. See "Parts Locations" illustration. B 2. See "Parts Locations" illustration. Drain pump reservoir inlet 5. NOTE: Do not install household drain tube at this time. Remove power cord clamp...

Use & Care Guide
Page 8
...to keep the cord in a coil. Drain pump installed 8. Connect drain tube to water supply and install ice maker as shown. See "Parts Locations" illustration. 11. Secure rear panel with a gravity drain system, follow these guidelines when installing drain lines. See "Vent Tube" illustration..... ■ The floor drains must maintain a 1" (2.54 cm) air gap between the drain pump and side of the pump. A. See "Parts Locations" illustration. 12. WARNING A A. Secure vent tube to 2" (5.08 cm) PVC drain reducer installed directly below the outlet of ice maker using...
...to keep the cord in a coil. Drain pump installed 8. Connect drain tube to water supply and install ice maker as shown. See "Parts Locations" illustration. 11. Secure rear panel with a gravity drain system, follow these guidelines when installing drain lines. See "Vent Tube" illustration..... ■ The floor drains must maintain a 1" (2.54 cm) air gap between the drain pump and side of the pump. A. See "Parts Locations" illustration. 12. WARNING A A. Secure vent tube to 2" (5.08 cm) PVC drain reducer installed directly below the outlet of ice maker using...

Use & Care Guide
Page 9
...23" C (58.4 cm) D 2" - 1¹⁄₂" (5 cm - 3.8 cm) A. Door Reversal-Side Swing Only Tools Needed Gather the required tools and parts before starting installation. wrench ■ Flat putty knife wrench ■ Phillips screwdriver Hinge pin Handle screw hex-head hinge screw End cap screw 9 Style 2-For...the ice maker). See "Leveling." 4. Do not use an extension cord. Do not remove ground prong. An Insulation Sleeve kit, Part Number W10365792, is required by your local sanitation code, seal the cabinet to the drain inlet. Drain hose B. 1" (2.54 cm)...
...23" C (58.4 cm) D 2" - 1¹⁄₂" (5 cm - 3.8 cm) A. Door Reversal-Side Swing Only Tools Needed Gather the required tools and parts before starting installation. wrench ■ Flat putty knife wrench ■ Phillips screwdriver Hinge pin Handle screw hex-head hinge screw End cap screw 9 Style 2-For...the ice maker). See "Leveling." 4. Do not use an extension cord. Do not remove ground prong. An Insulation Sleeve kit, Part Number W10365792, is required by your local sanitation code, seal the cabinet to the drain inlet. Drain hose B. 1" (2.54 cm)...

Use & Care Guide
Page 10
Door Stop and End-Cap Reversal WARNING Electrical Shock Hazard Disconnect power before operating. Replace all parts and panels before servicing. Remove the door from the top hinge. 4. Place the end cap at corner C. Bottom corner open (no end cap) 7. Set the ...
Door Stop and End-Cap Reversal WARNING Electrical Shock Hazard Disconnect power before operating. Replace all parts and panels before servicing. Remove the door from the top hinge. 4. Place the end cap at corner C. Bottom corner open (no end cap) 7. Set the ...


