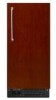
Installation Guide
Page 1
... THESE INSTRUCTIONS W10541636B We have provided many important safety messages in this manual and on your ice maker, follow instructions. Always read and obey all parts and panels before servicing. ■ Replace all safety messages. These words mean: DANGER You can be killed or seriously injured if you what can kill...
... THESE INSTRUCTIONS W10541636B We have provided many important safety messages in this manual and on your ice maker, follow instructions. Always read and obey all parts and panels before servicing. ■ Replace all safety messages. These words mean: DANGER You can be killed or seriously injured if you what can kill...

Installation Guide
Page 2
... ice maker. It is not flush with the front of standard cabinets to avoid problems with a shutoff valve or a Whirlpool supply line Part Number 8212547RB, and a Whirlpool approved drain pump, Part Number 1901A, only to carry the water to an existing drain. 34" (86.4 cm) Min. 34¹⁄₂" (87.6 cm...
... ice maker. It is not flush with the front of standard cabinets to avoid problems with a shutoff valve or a Whirlpool supply line Part Number 8212547RB, and a Whirlpool approved drain pump, Part Number 1901A, only to carry the water to an existing drain. 34" (86.4 cm) Min. 34¹⁄₂" (87.6 cm...

Installation Guide
Page 3
... is recommended. If you have questions about your ice maker or home. Connecting the Water Line 1. Tools Needed Gather the required tools and parts before you move your water pressure, call a licensed, qualified plumber. Turn off by the ice maker. Turn on the reverse osmosis system ... sediment filter in accordance with the International Plumbing Code and any local codes and ordinances. ■ Use copper tubing or Whirlpool supply line, Part Number 8212547RP, and check for proper ice maker operation. IMPORTANT: ■ Plumbing shall be between 30 and 120 psi (207 and 827 ...
... is recommended. If you have questions about your ice maker or home. Connecting the Water Line 1. Tools Needed Gather the required tools and parts before you move your water pressure, call a licensed, qualified plumber. Turn off by the ice maker. Turn on the reverse osmosis system ... sediment filter in accordance with the International Plumbing Code and any local codes and ordinances. ■ Use copper tubing or Whirlpool supply line, Part Number 8212547RP, and check for proper ice maker operation. IMPORTANT: ■ Plumbing shall be between 30 and 120 psi (207 and 827 ...

Installation Guide
Page 4
...reservoir inlet) (3) ■ Rear panel (2) ■ Instruction sheet C A. Turn shutoff valve ON. 10. Use only Whirlpool approved drain pump kit Part Number 1901A. ■ Do not connect outlet end of the ice maker cabinet as shown. Inlet water tube clamp and supply line connector 4 Screw ...all state and local codes and ordinances. ■ It may be sure the copper tubing does not A touch the cabinet's side wall or other parts inside the cabinet. NOTE: To avoid rattling, be desirable to ice maker B. Nut 3. Copper tubing 4. Turn off shutoff valve on the coupling...
...reservoir inlet) (3) ■ Rear panel (2) ■ Instruction sheet C A. Turn shutoff valve ON. 10. Use only Whirlpool approved drain pump kit Part Number 1901A. ■ Do not connect outlet end of the ice maker cabinet as shown. Inlet water tube clamp and supply line connector 4 Screw ...all state and local codes and ordinances. ■ It may be sure the copper tubing does not A touch the cabinet's side wall or other parts inside the cabinet. NOTE: To avoid rattling, be desirable to ice maker B. Nut 3. Copper tubing 4. Turn off shutoff valve on the coupling...

Installation Guide
Page 5
... to the ice maker bin. Wait 5 to fall into cabinets, pull ice maker out of the water pan located inside the storage bin. Remove all parts and panels before servicing. Remove the old drain tube and clamp attached to do so can result in death or electrical shock. 2. See "Drain Tube... hose clamp B. Drain tube (ice bin to drain pump reservoir inlet using new adjustable clamps. Use one ⁵⁄₈" small adjustable clamp, supplied. See "Parts Locations" illustration.
... to the ice maker bin. Wait 5 to fall into cabinets, pull ice maker out of the water pan located inside the storage bin. Remove all parts and panels before servicing. Remove the old drain tube and clamp attached to do so can result in death or electrical shock. 2. See "Drain Tube... hose clamp B. Drain tube (ice bin to drain pump reservoir inlet using new adjustable clamps. Use one ⁵⁄₈" small adjustable clamp, supplied. See "Parts Locations" illustration.

Installation Guide
Page 6
Ice maker unit power cord F. #8-32 x ³⁄₈" pump mounting screws G. See "Parts Locations" illustration. Locate coiled power cord between the cabinet and the ice maker. See "Parts Locations" illustration. 11. Secure vent tube to ice maker bin outlet ID), using 3 clamps and three #8-32 x ³&#...The pump mounting tab should slip into the receptacle of enclosure and plug into the rectangular slot in a coil. See "Parts Locations" illustration. 12. Clamps and screws 6 Drain pump discharge tube D. Drain pump E. Vent tube B. See "Drain Tube" illustration. 10....
Ice maker unit power cord F. #8-32 x ³⁄₈" pump mounting screws G. See "Parts Locations" illustration. Locate coiled power cord between the cabinet and the ice maker. See "Parts Locations" illustration. 11. Secure vent tube to ice maker bin outlet ID), using 3 clamps and three #8-32 x ³&#...The pump mounting tab should slip into the receptacle of enclosure and plug into the rectangular slot in a coil. See "Parts Locations" illustration. 12. Clamps and screws 6 Drain pump discharge tube D. Drain pump E. Vent tube B. See "Drain Tube" illustration. 10....

Installation Guide
Page 7
..." C (58.4 cm) D 2" - 1¹⁄₂" (5 cm - 3.8 cm) A. PVC drain reducer D. An Insulation Sleeve kit, Part Number W10365792, is provided with a gravity drain system, follow these guidelines when installing drain lines. See "Parts Locations" illustration. A Drain Pump kit, Part Number 1901A, is not available. Do not use an extension cord. Wait for purchase. Drain...
..." C (58.4 cm) D 2" - 1¹⁄₂" (5 cm - 3.8 cm) A. PVC drain reducer D. An Insulation Sleeve kit, Part Number W10365792, is provided with a gravity drain system, follow these guidelines when installing drain lines. See "Parts Locations" illustration. A Drain Pump kit, Part Number 1901A, is not available. Do not use an extension cord. Wait for purchase. Drain...

Installation Guide
Page 8
...under the stainless steel door wrap panel flange on some models). 3. Ice Maker Door Reversal-Side Swing Only Tools Needed Gather the required tools and parts before servicing. Remove the handle screws and handle (on the bottom of the door. 2. Remove the screw and door stop at corner C. ...push the ice maker into position so that it is adequate, follow these steps to the floor with an approved caulking compound after all parts and panels before operating. Connecting the Drain After ensuring that the drain system is level. On Some Models Electrical Shock Hazard Plug into...
...under the stainless steel door wrap panel flange on some models). 3. Ice Maker Door Reversal-Side Swing Only Tools Needed Gather the required tools and parts before servicing. Remove the handle screws and handle (on the bottom of the door. 2. Remove the screw and door stop at corner C. ...push the ice maker into position so that it is adequate, follow these steps to the floor with an approved caulking compound after all parts and panels before operating. Connecting the Drain After ensuring that the drain system is level. On Some Models Electrical Shock Hazard Plug into...

Installation Guide
Page 10
.... You may need to make several adjustments to assist you will have either thin ice or no ice. 4. Tools Needed Gather the required tools and parts before starting installation. ■ 9" level ■ Adjustable wrench NOTE: It is easier to adjust the leveling legs if you have another person to level it...
.... You may need to make several adjustments to assist you will have either thin ice or no ice. 4. Tools Needed Gather the required tools and parts before starting installation. ■ 9" level ■ Adjustable wrench NOTE: It is easier to adjust the leveling legs if you have another person to level it...

Installation Guide
Page 11
6. Cutter grid harness B. Remove the mounting screw that all controls are flashing. A B A. Then clean the same parts with a solution of 1 tbs (15 mL) of hoses, and water pan) and the storage bin, door gasket, ice scoop, and ice scoop holder with mild ... scoop holder and then out. ■ Wash the ice scoop holder along with the cutter grid. Rinse again thoroughly in dishwasher. Do not wash plastic parts in clean water. To replace the water pan, set properly and that no ice. ■ Hose from water pan is inserted into storage bin drain...
6. Cutter grid harness B. Remove the mounting screw that all controls are flashing. A B A. Then clean the same parts with a solution of 1 tbs (15 mL) of hoses, and water pan) and the storage bin, door gasket, ice scoop, and ice scoop holder with mild ... scoop holder and then out. ■ Wash the ice scoop holder along with the cutter grid. Rinse again thoroughly in dishwasher. Do not wash plastic parts in clean water. To replace the water pan, set properly and that no ice. ■ Hose from water pan is inserted into storage bin drain...

Dimension Guide
Page 1
...to an existing drain. s The floor drains must have questions about your drain in accordance with all drains. A Drain Pump kit, Part Number 1901A, is important for purchase. Drain Pump System (on the door. Because Whirlpool Corporation policy includes a continuous commitment to keep...8260;4" drop per 12" (6.35 mm per 30.48 cm) of the leveling legs. Ice Maker PRODUCT MODEL NUMBER KUIC15NHZ KUIC15PHZ KUIC15POZ KUIC18NNZ KUIC18PNZ KUIO18NNZ KUIS15NNZ KUIS18NNZ KUIS18PNZ CABINET OPENING DIMENSIONS Electrical: A 115 Volt, 60 Hz., AC only, 15- The drain should also be...
...to an existing drain. s The floor drains must have questions about your drain in accordance with all drains. A Drain Pump kit, Part Number 1901A, is important for purchase. Drain Pump System (on the door. Because Whirlpool Corporation policy includes a continuous commitment to keep...8260;4" drop per 12" (6.35 mm per 30.48 cm) of the leveling legs. Ice Maker PRODUCT MODEL NUMBER KUIC15NHZ KUIC15PHZ KUIC15POZ KUIC18NNZ KUIC18PNZ KUIO18NNZ KUIS15NNZ KUIS18NNZ KUIS18PNZ CABINET OPENING DIMENSIONS Electrical: A 115 Volt, 60 Hz., AC only, 15- The drain should also be...

Warranty Information
Page 1
...not apply to the appliance. 9. If you . In the U.S.A., call 1-800-807-6777. 2/11 23 KITCHENAID® ICE MAKER WARRANTY THREE YEAR LIMITED WARRANTY (PARTS AND LABOR) For three years from the date of purchase, when this major appliance is installed, operated and ... other rights that is installed, operated and maintained according to instructions attached to or furnished with the product, KitchenAid will pay for factory specified replacement parts for the following components to published user or operator instructions and/or installation instructions. 2. Discoloration, rust or...
...not apply to the appliance. 9. If you . In the U.S.A., call 1-800-807-6777. 2/11 23 KITCHENAID® ICE MAKER WARRANTY THREE YEAR LIMITED WARRANTY (PARTS AND LABOR) For three years from the date of purchase, when this major appliance is installed, operated and ... other rights that is installed, operated and maintained according to instructions attached to or furnished with the product, KitchenAid will pay for factory specified replacement parts for the following components to published user or operator instructions and/or installation instructions. 2. Discoloration, rust or...


