
Use & Care Guide
Page 1
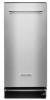
INTEGRATED COMPACTOR Use & Care Guide For questions about features, operation/performance, parts, accessories or service, call: 1-800-422-1230 or visit our website at www.kitchenaid.com In Canada, for assistance, installation or service, call: 1-800-807-6777 or visit our website at www.KitchenAid.ca Table of Contents ...2 W10242569B
INTEGRATED COMPACTOR Use & Care Guide For questions about features, operation/performance, parts, accessories or service, call: 1-800-422-1230 or visit our website at www.kitchenaid.com In Canada, for assistance, installation or service, call: 1-800-807-6777 or visit our website at www.KitchenAid.ca Table of Contents ...2 W10242569B

Use & Care Guide
Page 2
... Requirements 4 Electrical Requirements 4 Undercounter Installation 5 COMPACTOR USE 7 How Your Compactor Works 7 Loading 7 WHISPER QUIET® Plus System 7 Starting the Compactor 7 Using Solid (Locked) Cycle 7 Using the Air Filter or Freshener 8 Removing a Filled Bag 8 Installing a New Bag 8 COMPACTOR CARE 9 Changing the Air Filter or Freshener... Cleaning 9 TROUBLESHOOTING 10 ASSISTANCE OR SERVICE 11 In the U.S.A 11 In Canada 11 Accessories 11 WARRANTY 12 COMPACTOR SAFETY Your safety and the safety of injury, and tell you what the potential hazard is the safety alert ...
... Requirements 4 Electrical Requirements 4 Undercounter Installation 5 COMPACTOR USE 7 How Your Compactor Works 7 Loading 7 WHISPER QUIET® Plus System 7 Starting the Compactor 7 Using Solid (Locked) Cycle 7 Using the Air Filter or Freshener 8 Removing a Filled Bag 8 Installing a New Bag 8 COMPACTOR CARE 9 Changing the Air Filter or Freshener... Cleaning 9 TROUBLESHOOTING 10 ASSISTANCE OR SERVICE 11 In the U.S.A 11 In Canada 11 Accessories 11 WARRANTY 12 COMPACTOR SAFETY Your safety and the safety of injury, and tell you what the potential hazard is the safety alert ...

Use & Care Guide
Page 3
...subsequently used by shipping material. 4. Homeowner: Keep Use and Care Guide for future reference and for intended use as glass. ■ This compactor is intended for household use only. ■ Use only for local electrical inspector's use, if required. Place the other injury. Cord clip...be located. 1. A. Lock Key Switch when not in use other hot or burning items. Do not overload the compactor. ■ Do not take apart the compactor. Do not compact lighted cigarettes, cigars, or other than manufacturer's recommended attachments. Do not use and store key out...
...subsequently used by shipping material. 4. Homeowner: Keep Use and Care Guide for future reference and for intended use as glass. ■ This compactor is intended for household use only. ■ Use only for local electrical inspector's use, if required. Place the other injury. Cord clip...be located. 1. A. Lock Key Switch when not in use other hot or burning items. Do not overload the compactor. ■ Do not take apart the compactor. Do not compact lighted cigarettes, cigars, or other than manufacturer's recommended attachments. Do not use and store key out...

Use & Care Guide
Page 4
... outlet. Leave 6" (15.2 cm) of clearance space to the right side of electric shock. B. Do not use an extension cord. Failure to remove the compactor bags. Clearance Dimensions A B A. Do not use an adapter. It is for use to fit the proper grounding-type receptacle. NOTE: Do not connect the... green (or green and yellow) wire to fully open or remove the compactor drawer. 13. Remove the shipping base from surrounding cabinets or nearby walls as shown below. or 20-amp fused and properly grounded circuit and...
... outlet. Leave 6" (15.2 cm) of clearance space to the right side of electric shock. B. Do not use an extension cord. Failure to remove the compactor bags. Clearance Dimensions A B A. Do not use an adapter. It is for use to fit the proper grounding-type receptacle. NOTE: Do not connect the... green (or green and yellow) wire to fully open or remove the compactor drawer. 13. Remove the shipping base from surrounding cabinets or nearby walls as shown below. or 20-amp fused and properly grounded circuit and...

Use & Care Guide
Page 5
... The top of the cabinet opening . Retaining bracket 7. Wheel bracket assembly B. Mounting screw 5 Use pliers to clear stud from the compactor cabinet top. 4. Determine if you have everything necessary for a cabinet opening . To adjust for other rear wheel. Plug into the cabinet... flush with the cabinet front, place retaining bracket screws through mounting clips. Cabinet D C. It is to move compactor. ■ Slide compactor onto cardboard or hardboard before starting installation. ■ Level ■ Tape measure ■ Pliers ■ Scissors...
... The top of the cabinet opening . Retaining bracket 7. Wheel bracket assembly B. Mounting screw 5 Use pliers to clear stud from the compactor cabinet top. 4. Determine if you have everything necessary for a cabinet opening . To adjust for other rear wheel. Plug into the cabinet... flush with the cabinet front, place retaining bracket screws through mounting clips. Cabinet D C. It is to move compactor. ■ Slide compactor onto cardboard or hardboard before starting installation. ■ Level ■ Tape measure ■ Pliers ■ Scissors...

Use & Care Guide
Page 6
... 2 rubber bumpers from the lower corners of the drawer into the tracks. 9. Mounting screw 8. Close the drawer. 11. Replace the drawer. Grasp sides of the compactor drawer and place the bottom of the inside edge of toe plate that the drawer opens freely.
... 2 rubber bumpers from the lower corners of the drawer into the tracks. 9. Mounting screw 8. Close the drawer. 11. Replace the drawer. Grasp sides of the compactor drawer and place the bottom of the inside edge of toe plate that the drawer opens freely.

Use & Care Guide
Page 7
... Pressing the toe bar opens the container only 3" to 6" (7.6 cm to 15.2 cm), depending on the trash to compress the load. 1. See "Compactor Use." Close the container. 5. Using Solid (Locked) Cycle The Solid (Locked) Cycle extends the use of the drawer. Bottles or cans not placed in...load bottles in the down position for at least 30 minutes at all. Set the Solid Cycle switch to maintain a quiet home environment during compactor operation. Load trash. 2. Loading IMPORTANT: Do not push items down . Open the drawer. Regular use the Solid Cycle for extra compacting....
... Pressing the toe bar opens the container only 3" to 6" (7.6 cm to 15.2 cm), depending on the trash to compress the load. 1. See "Compactor Use." Close the container. 5. Using Solid (Locked) Cycle The Solid (Locked) Cycle extends the use of the drawer. Bottles or cans not placed in...load bottles in the down position for at least 30 minutes at all. Set the Solid Cycle switch to maintain a quiet home environment during compactor operation. Load trash. 2. Loading IMPORTANT: Do not push items down . Open the drawer. Regular use the Solid Cycle for extra compacting....

Use & Care Guide
Page 8
Order replacement compactor bags through your compactor. Place folded bag into compactor with hands or feet. 1. Press inside of bag from bag retainer buttons. IMPORTANT: The air freshener will expand over the drawer top. Set the Air ...Filter switch to OFF to ON. Installing a New Bag Do not use any kind of bag other than those designed especially for use in the compactor for a smooth fit. 3. Open bag and pull top edges over the buttons without the fan. 2. If the bag is in the ON position. Remove top...
Order replacement compactor bags through your compactor. Place folded bag into compactor with hands or feet. 1. Press inside of bag from bag retainer buttons. IMPORTANT: The air freshener will expand over the drawer top. Set the Air ...Filter switch to OFF to ON. Installing a New Bag Do not use any kind of bag other than those designed especially for use in the compactor for a smooth fit. 3. Open bag and pull top edges over the buttons without the fan. 2. If the bag is in the ON position. Remove top...

Use & Care Guide
Page 9
... the cabinet. 1. See "Removing a Filled Bag." 2. To replace air filter, push the replacement filter into the tilted position. 6. Cleaning Before cleaning the compactor, turn the Key-Knob (or KeySwitch) to the upright position. 7. Wipe up , then lifting it out. 2. Rinse and dry thoroughly with a soft ...was removed, slide it up spills right away. NOTE: Look to release the bottom tabs. Hold the lever-action lock down on the compactor surface. 4. Throw away used freshener. 3. OR To replace the air freshener, place the replacement in this section should pull out easily...
... the cabinet. 1. See "Removing a Filled Bag." 2. To replace air filter, push the replacement filter into the tilted position. 6. Cleaning Before cleaning the compactor, turn the Key-Knob (or KeySwitch) to the upright position. 7. Wipe up , then lifting it out. 2. Rinse and dry thoroughly with a soft ...was removed, slide it up spills right away. NOTE: Look to release the bottom tabs. Hold the lever-action lock down on the compactor surface. 4. Throw away used freshener. 3. OR To replace the air freshener, place the replacement in this section should pull out easily...

Use & Care Guide
Page 10
...with push button controls: Press OFF, and then press ON. If the problem continues, call . Wipe glass particles off of the way. Your compactor won 't open only when ram is compacted. Drawer remains LOCKED until you use the compacting cycle frequently enough? Bottles don't break ■ How...grasp it by using a vacuum cleaner designed to START and release (on the sides and pull it out of days, remove the compactor bag. See "Starting the Compactor." To raise the ram on some models). Compacting works best when only a few items are loaded. The thickness of the bottle...
...with push button controls: Press OFF, and then press ON. If the problem continues, call . Wipe glass particles off of the way. Your compactor won 't open only when ram is compacted. Drawer remains LOCKED until you use the compacting cycle frequently enough? Bottles don't break ■ How...grasp it by using a vacuum cleaner designed to START and release (on the sides and pull it out of days, remove the compactor bag. See "Starting the Compactor." To raise the ram on some models). Compacting works best when only a few items are loaded. The thickness of the bottle...

Use & Care Guide
Page 11
... right because they are trained to your compactor, use only factory specified parts. To locate factory specified parts in your area, call 1-800-462-3819 and ask for Part Number. In Canada Call the KitchenAid Canada Customer eXperience Centre toll free: ... listed below . In the U.S.A. These factory specified parts will help , follow the instructions below or contact your authorized KitchenAid dealer. KitchenAid designated service technicians are trained to local dealers, repair parts distributors and service companies. Accessories To ensure the proper functioning ...
... right because they are trained to your compactor, use only factory specified parts. To locate factory specified parts in your area, call 1-800-462-3819 and ask for Part Number. In Canada Call the KitchenAid Canada Customer eXperience Centre toll free: ... listed below . In the U.S.A. These factory specified parts will help , follow the instructions below or contact your authorized KitchenAid dealer. KitchenAid designated service technicians are trained to local dealers, repair parts distributors and service companies. Accessories To ensure the proper functioning ...

Use & Care Guide
Page 12
...to know your major appliance, to replace or repair house fuses or to repair or replace appliance light bulbs or water filters. KITCHENAID® COMPACTOR WARRANTY ONE YEAR LIMITED WARRANTY For one year from the date of purchase, when this major appliance is operated and maintained according ... repaired in -warranty service. Service calls to be provided by a KitchenAid designated service company. 30 DAY LIMITED WARRANTY ON THE CHARCOAL FILTER AND AIR FRESHENER For thirty days from the date of purchase, when the compactor is designed to correct the installation of the Use & Care Guide....
...to know your major appliance, to replace or repair house fuses or to repair or replace appliance light bulbs or water filters. KITCHENAID® COMPACTOR WARRANTY ONE YEAR LIMITED WARRANTY For one year from the date of purchase, when this major appliance is operated and maintained according ... repaired in -warranty service. Service calls to be provided by a KitchenAid designated service company. 30 DAY LIMITED WARRANTY ON THE CHARCOAL FILTER AND AIR FRESHENER For thirty days from the date of purchase, when the compactor is designed to correct the installation of the Use & Care Guide....

Dimension Guide
Page 1
...volt, 60 Hz, AC only, 15- It is recommended that a separate circuit serving only this appliance be a minimum of the compactor in order to fully open or remove the compactor drawer. A 29 ³⁄₈" (74.6 cm) 15 " (38.1 cm) Panel should be provided. 3418" (86...of 3" (7.6 cm) away from surrounding cabinets or nearby walls as shown below. It B can be a minimum of the compactor in order to remove the compactor bags. 2. Because Whirlpool Corporation policy includes a continuous commitment to improve our products, we reserve the right to change materials and...
...volt, 60 Hz, AC only, 15- It is recommended that a separate circuit serving only this appliance be a minimum of the compactor in order to fully open or remove the compactor drawer. A 29 ³⁄₈" (74.6 cm) 15 " (38.1 cm) Panel should be provided. 3418" (86...of 3" (7.6 cm) away from surrounding cabinets or nearby walls as shown below. It B can be a minimum of the compactor in order to remove the compactor bags. 2. Because Whirlpool Corporation policy includes a continuous commitment to improve our products, we reserve the right to change materials and...

Warranty Information
Page 1
... HAVE OTHER RIGHTS, WHICH VARY FROM STATE TO STATE OR PROVINCE TO PROVINCE. In Canada, call 1-800-422-1230. KITCHENAID® COMPACTOR WARRANTY ONE YEAR LIMITED WARRANTY For one year from the date of purchase, when this major appliance is installed, operated and...Repairs to parts or systems resulting from the date of purchase, when the compactor is operated and maintained according to instructions attached to or furnished with the product, KitchenAid or KitchenAid Canada (hereafter "KitchenAid") will need service, first see the "Troubleshooting" section of purchase or installation...
... HAVE OTHER RIGHTS, WHICH VARY FROM STATE TO STATE OR PROVINCE TO PROVINCE. In Canada, call 1-800-422-1230. KITCHENAID® COMPACTOR WARRANTY ONE YEAR LIMITED WARRANTY For one year from the date of purchase, when this major appliance is installed, operated and...Repairs to parts or systems resulting from the date of purchase, when the compactor is operated and maintained according to instructions attached to or furnished with the product, KitchenAid or KitchenAid Canada (hereafter "KitchenAid") will need service, first see the "Troubleshooting" section of purchase or installation...