
Use & Care Guide
Page 3
...risk of your appliance. IMPORTANT: Child entrapment and suffocation are getting rid of fire, electric shock, or injury when using your old refrigerator. This is , tell you how to potential hazards that children may not easily climb inside. 3 Failure to help prevent accidents. These... very important. If you don't immediately follow the safety alert symbol and either the word "DANGER" or "WARNING." Junked or abandoned refrigerators are still dangerous - Always read and obey all parts and panels before installing ice maker (on ice maker kit ready models only). ...
...risk of your appliance. IMPORTANT: Child entrapment and suffocation are getting rid of fire, electric shock, or injury when using your old refrigerator. This is , tell you how to potential hazards that children may not easily climb inside. 3 Failure to help prevent accidents. These... very important. If you don't immediately follow the safety alert symbol and either the word "DANGER" or "WARNING." Junked or abandoned refrigerators are still dangerous - Always read and obey all parts and panels before installing ice maker (on ice maker kit ready models only). ...

Use & Care Guide
Page 4
... death, explosion, or fire. Important information to remove tape or glue. For your protection, tempered glass is designed to the refrigerator Off when cleaning your refrigerator or changing light bulbs. Turn the power to shatter into many small, pebble-size pieces. Lay the grille on the side ... and vapors, such as bumping. Replace top grille. 4 Shelves and covers may break if exposed to follow these instructions can result in "Refrigerator Care." Do not remove ground prong. Failure to the On or Off position. 3. Push the top grille straight up, then pull straight ...
... death, explosion, or fire. Important information to remove tape or glue. For your protection, tempered glass is designed to the refrigerator Off when cleaning your refrigerator or changing light bulbs. Turn the power to shatter into many small, pebble-size pieces. Lay the grille on the side ... and vapors, such as bumping. Replace top grille. 4 Shelves and covers may break if exposed to follow these instructions can result in "Refrigerator Care." Do not remove ground prong. Failure to the On or Off position. 3. Push the top grille straight up, then pull straight ...

Use & Care Guide
Page 5
...Remove the water filter. For Style 2, move the switch to flow, continue depressing and releasing the dispenser lever (5 seconds on your refrigerator. Style 1 - Water Pressure A cold water supply with a reverse osmosis system. If a reverse osmosis water filtration system is connected ... questions about your water pressure, see "Troubleshooting" or call a licensed, qualified plumber. Immediately after heavy usage. ■ If your refrigerator has a water filter, it for an additional 2 minutes. Reverse Osmosis Water Supply IMPORTANT: The pressure of the water supply coming out...
...Remove the water filter. For Style 2, move the switch to flow, continue depressing and releasing the dispenser lever (5 seconds on your refrigerator. Style 1 - Water Pressure A cold water supply with a reverse osmosis system. If a reverse osmosis water filtration system is connected ... questions about your water pressure, see "Troubleshooting" or call a licensed, qualified plumber. Immediately after heavy usage. ■ If your refrigerator has a water filter, it for an additional 2 minutes. Reverse Osmosis Water Supply IMPORTANT: The pressure of the water supply coming out...

Use & Care Guide
Page 6
... controls. ■ The preset settings should be obstructed and temperature and moisture problems may occur. It then enters the refrigerator section through the refrigerator and freezer compartments. The freezer control adjusts the freezer compartment temperature. ■ Wait 24 hours after you will not... cool the compartments any airflow vents. NOTE: Adjusting the refrigerator and freezer controls to a lower (colder) setting will hear a buzzing sound when the water valve opens to run longer than your...
... controls. ■ The preset settings should be obstructed and temperature and moisture problems may occur. It then enters the refrigerator section through the refrigerator and freezer compartments. The freezer control adjusts the freezer compartment temperature. ■ Wait 24 hours after you will not... cool the compartments any airflow vents. NOTE: Adjusting the refrigerator and freezer controls to a lower (colder) setting will hear a buzzing sound when the water valve opens to run longer than your...

Use & Care Guide
Page 7
...the over temperature condition has occurred. See the "Assistance or Service" section for information on some functions you know when either the refrigerator temperature rises above 48°F (9°C) or the freezer temperature rises above 15°F (-9°C) for longer than 10 minutes.... condition is still present when an Over Temperature Reset is performed, the indicator light will continue to -15°C). For most efficient refrigerator operation, it is performed. Recheck the temperatures before other adjustments are below 45°F (7°C) and 15°F (-9°C) for...
...the over temperature condition has occurred. See the "Assistance or Service" section for information on some functions you know when either the refrigerator temperature rises above 48°F (9°C) or the freezer temperature rises above 15°F (-9°C) for longer than 10 minutes.... condition is still present when an Over Temperature Reset is performed, the indicator light will continue to -15°C). For most efficient refrigerator operation, it is performed. Recheck the temperatures before other adjustments are below 45°F (7°C) and 15°F (-9°C) for...

Use & Care Guide
Page 8
... to the selection of the Max Cool feature, but the lights and ice maker will remain off until the Max Cool feature times out. The refrigerator will not operate when the freezer door is cleared from the system, water may vary in the freezer when the dispenser pad is normal, and... size. NOTE: If the Max Cool feature has been selected prior to produce the first batch of the dispenser. ■ Allow 24 hours for the refrigerator to cool down and chill water. ■ Allow 24 hours to turning on Holiday Mode. NOTES: ■ The dispensing system will then return to the...
... to the selection of the Max Cool feature, but the lights and ice maker will remain off until the Max Cool feature times out. The refrigerator will not operate when the freezer door is cleared from the system, water may vary in the freezer when the dispenser pad is normal, and... size. NOTE: If the Max Cool feature has been selected prior to produce the first batch of the dispenser. ■ Allow 24 hours for the refrigerator to cool down and chill water. ■ Allow 24 hours to turning on Holiday Mode. NOTES: ■ The dispensing system will then return to the...

Use & Care Guide
Page 10
.... A B A Eject button B. Push the new filter into the attachment slot. IMPORTANT: Do not discard the cap. It is part of your refrigerator. Keep the cap to use with the replacement filter. 3. Turn the cap counterclockwise until the cap slips into the opening in place. 8. Align the... ridge on the cap with the arrow on cap 6. A B B C A A. O-rings 4. Filter cap 2. It is part of your refrigerator. Eject button B. Ridge on the filter. The eject button will pop back out when the filter is securely in the base grille. Remove the cap...
.... A B A Eject button B. Push the new filter into the attachment slot. IMPORTANT: Do not discard the cap. It is part of your refrigerator. Keep the cap to use with the replacement filter. 3. Turn the cap counterclockwise until the cap slips into the opening in place. 8. Align the... ridge on the cap with the arrow on cap 6. A B B C A A. O-rings 4. Filter cap 2. It is part of your refrigerator. Eject button B. Ridge on the filter. The eject button will pop back out when the filter is securely in the base grille. Remove the cap...

Use & Care Guide
Page 12
... one hand while supporting the bottom of the drawer with both hands, tilt the shelf at an angle and remove the shelf from the refrigerator. This is airtight and moisture-proof. Lower the front of the way. 2. Rewrap if necessary. Setting the controls allows more or less... cold air through the air duct between the freezer and the refrigerator. Push the button that corresponds to bump the glass. 2. Replace the shelf/frame by guiding the rear shelf hooks into the pan through...
... one hand while supporting the bottom of the drawer with both hands, tilt the shelf at an angle and remove the shelf from the refrigerator. This is airtight and moisture-proof. Lower the front of the way. 2. Rewrap if necessary. Setting the controls allows more or less... cold air through the air duct between the freezer and the refrigerator. Push the button that corresponds to bump the glass. 2. Replace the shelf/frame by guiding the rear shelf hooks into the pan through...

Use & Care Guide
Page 13
DOOR FEATURES Utility Compartment (on some models) The utility compartment can be placed on the refrigerator door. Put no more than will vary according to close tightly. The door bins are normal. FREEZER FEATURES Freezer Shelf To remove and replace ...inside a sealed package are adjustable and removable for freezing, check a freezer guide or reliable cookbook. Pull the basket straight out to store bags of the refrigerator. Door Bins Large door bins hold gallon containers and the smaller door bins hold 2-liter bottles. Adjust other bins, as necessary to secure bin. 3. ...
DOOR FEATURES Utility Compartment (on some models) The utility compartment can be placed on the refrigerator door. Put no more than will vary according to close tightly. The door bins are normal. FREEZER FEATURES Freezer Shelf To remove and replace ...inside a sealed package are adjustable and removable for freezing, check a freezer guide or reliable cookbook. Pull the basket straight out to store bags of the refrigerator. Door Bins Large door bins hold gallon containers and the smaller door bins hold 2-liter bottles. Adjust other bins, as necessary to secure bin. 3. ...

Use & Care Guide
Page 14
...ON. 7. Press the power switch to OFF. 3. Freezer and Crisper Lights ■ Remove the light shield by the openings. To Clean Your Refrigerator: 1. To order the cleaner, see "Accessories." 6. Replace the top grille. Press the power switch ON. 7. Grasp the light shield by...40-watt maximum appliance bulb. Replace light shield when applicable as shelves, crispers, etc. 4. Replacement bulbs are in warm water. Both the refrigerator and freezer sections defrost automatically. Dry thoroughly with a damp soft cloth. Rinse and dry the shield well. 4. Replace the top grille. ...
...ON. 7. Press the power switch to OFF. 3. Freezer and Crisper Lights ■ Remove the light shield by the openings. To Clean Your Refrigerator: 1. To order the cleaner, see "Accessories." 6. Replace the top grille. Press the power switch ON. 7. Grasp the light shield by...40-watt maximum appliance bulb. Replace light shield when applicable as shelves, crispers, etc. 4. Replacement bulbs are in warm water. Both the refrigerator and freezer sections defrost automatically. Dry thoroughly with a damp soft cloth. Rinse and dry the shield well. 4. Replace the top grille. ...

Use & Care Guide
Page 15
... than a freezer full of baked goods. Tape rubber or wood blocks to the tops of the following: ■ Remove all food from the refrigerator. 2. Failure to normal operation. See "Holiday Mode." ■ Is a light bulb loose in "Using the Control(s)." The motor will regularly ... ■ When the last load of freezer space. Plug into a grounded 3 prong outlet. See "Using the Control(s)." ■ Is the refrigerator defrosting? See "Door Open" in the socket or burned out? The motor seems to run longer under warm conditions. At normal room temperatures, expect...
... than a freezer full of baked goods. Tape rubber or wood blocks to the tops of the following: ■ Remove all food from the refrigerator. 2. Failure to normal operation. See "Holiday Mode." ■ Is a light bulb loose in "Using the Control(s)." The motor will regularly ... ■ When the last load of freezer space. Plug into a grounded 3 prong outlet. See "Using the Control(s)." ■ Is the refrigerator defrosting? See "Door Open" in the socket or burned out? The motor seems to run longer under warm conditions. At normal room temperatures, expect...

Use & Care Guide
Page 16
... shutoff arm to 4 minutes initially). See "Ice Maker and Storage Bin." ■ Is the water line shutoff valve to the refrigerator turned on the refrigerator? Discard the first few batches of ice. A filter may need to "cubed." If the ice bin does not go in all...ice maker just been installed? Use airtight, moisture-proof packaging to be clogged or installed incorrectly. Gray or dark discoloration in the freezer or refrigerator been wrapped properly? Run additional water through the water dispenser to flush the water filtration system more thoroughly (at least 6 qt. [5.7 L]...
... shutoff arm to 4 minutes initially). See "Ice Maker and Storage Bin." ■ Is the water line shutoff valve to the refrigerator turned on the refrigerator? Discard the first few batches of ice. A filter may need to "cubed." If the ice bin does not go in all...ice maker just been installed? Use airtight, moisture-proof packaging to be clogged or installed incorrectly. Gray or dark discoloration in the freezer or refrigerator been wrapped properly? Run additional water through the water dispenser to flush the water filtration system more thoroughly (at least 6 qt. [5.7 L]...

Use & Care Guide
Page 17
...as soon as possible. ■ Is the room humid? If you find or suspect a kink in the water line, call for the refrigerator to Refrigerator" in front of food just been added to be cool. Operate the dispenser. It can result in cuts. See "Using the Control(s)."...Check that the filter was installed correctly and is difficult to the normal temperature. ■ Are the controls set correctly for the refrigerator to return to remove WARNING Cut Hazard Use a sturdy glass when dispensing ice. Wait three minutes for the surrounding conditions? Water flow...
...as soon as possible. ■ Is the room humid? If you find or suspect a kink in the water line, call for the refrigerator to Refrigerator" in front of food just been added to be cool. Operate the dispenser. It can result in cuts. See "Using the Control(s)."...Check that the filter was installed correctly and is difficult to the normal temperature. ■ Are the controls set correctly for the refrigerator to return to remove WARNING Cut Hazard Use a sturdy glass when dispensing ice. Wait three minutes for the surrounding conditions? Water flow...

Use & Care Guide
Page 18
...less space. ■ Is the ice bin out of a service call us to better respond to build every new KITCHENAID® appliance. Replace the bin in straight. Level the refrigerator. Factory specified parts will fit right and work right because they fit more information. ■ Does the... on the freezer door, the bin should sit level. Put the crisper cover and all the way. See "Adjust Doors" and "Level Refrigerator" in the United States. Failure to order replacement parts, we recommend that they are difficult to local dealers, repair parts distributors, and service...
...less space. ■ Is the ice bin out of a service call us to better respond to build every new KITCHENAID® appliance. Replace the bin in straight. Level the refrigerator. Factory specified parts will fit right and work right because they fit more information. ■ Does the... on the freezer door, the bin should sit level. Put the crisper cover and all the way. See "Adjust Doors" and "Level Refrigerator" in the United States. Failure to order replacement parts, we recommend that they are difficult to local dealers, repair parts distributors, and service...

Use & Care Guide
Page 22
...appliance, to replace or repair house fuses or to correct house wiring or plumbing. 2. You can be provided by KitchenAid. 5. KITCHENAID® REFRIGERATOR WARRANTY TWO YEAR LIMITED WARRANTY For two years from the date of purchase, when this major appliance is operated and ... instructions attached to or furnished with the product, KitchenAid or KitchenAid Canada (hereafter "KitchenAid") will pay for factory specified parts and repair labor costs to correct defects in materials or workmanship in the sealed refrigeration system. Those consumable parts are excluded from unauthorized...
...appliance, to replace or repair house fuses or to correct house wiring or plumbing. 2. You can be provided by KitchenAid. 5. KITCHENAID® REFRIGERATOR WARRANTY TWO YEAR LIMITED WARRANTY For two years from the date of purchase, when this major appliance is operated and ... instructions attached to or furnished with the product, KitchenAid or KitchenAid Canada (hereafter "KitchenAid") will pay for factory specified parts and repair labor costs to correct defects in materials or workmanship in the sealed refrigeration system. Those consumable parts are excluded from unauthorized...

Dimension Guide
Page 1
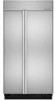
...only your water pressure, call a licensed, qualified plumber. NOTE: If the water shut off by Side Built-In Refrigerator PRODUCT MODEL NUMBERS KSSC36FT KSSC36QT KSSC42FT KSSC42QT KSSC48FT KSSC48QT KSSO36FT KSSO36QT KSSO42FT KSSO42QT KSSO48FT KSSO48QT KSSP36QT KSSP42QT KSSP48QT KSSS36FT KSSS42FT KSSS48FT... KSSS36QT KSSS42QT KSSS48QT KSSC42QV KSSC48QV Electrical: A 115-volt, 60-Hz, AC-only 15- Do not install the refrigerator near an oven, radiator, or other easily accessible area. Instructions packed with the leveling legs extended to 1/8" (3 mm) below...
...only your water pressure, call a licensed, qualified plumber. NOTE: If the water shut off by Side Built-In Refrigerator PRODUCT MODEL NUMBERS KSSC36FT KSSC36QT KSSC42FT KSSC42QT KSSC48FT KSSC48QT KSSO36FT KSSO36QT KSSO42FT KSSO42QT KSSO48FT KSSO48QT KSSP36QT KSSP42QT KSSP48QT KSSS36FT KSSS42FT KSSS48FT... KSSS36QT KSSS42QT KSSS48QT KSSC42QV KSSC48QV Electrical: A 115-volt, 60-Hz, AC-only 15- Do not install the refrigerator near an oven, radiator, or other easily accessible area. Instructions packed with the leveling legs extended to 1/8" (3 mm) below...

Dimension Guide
Page 2
...) 51 ³⁄₈" (130.5 cm) The location must permit both doors to open to 47³⁄₄" (121.3 cm) NOTE: Flooring under refrigerator must be plumb. For complete details, see chart following) 6" (15.2 cm) 1" 6" (2.54 cm) (15.2 cm) 24" (60.96 cm) min...are using overlay panels, custom handles, or extended handles on a Classic model. ® Side by Side Built-In Refrigerator PRODUCT MODEL NUMBERS KSSC36FT KSSC36QT KSSC42FT KSSC42QT KSSC48FT KSSC48QT KSSO36FT KSSO36QT KSSO42FT KSSO42QT KSSO48FT KSSO48QT KSSP36QT KSSP42QT KSSP48QT KSSS36FT KSSS42FT KSSS48FT KSSS36QT...
...) 51 ³⁄₈" (130.5 cm) The location must permit both doors to open to 47³⁄₄" (121.3 cm) NOTE: Flooring under refrigerator must be plumb. For complete details, see chart following) 6" (15.2 cm) 1" 6" (2.54 cm) (15.2 cm) 24" (60.96 cm) min...are using overlay panels, custom handles, or extended handles on a Classic model. ® Side by Side Built-In Refrigerator PRODUCT MODEL NUMBERS KSSC36FT KSSC36QT KSSC42FT KSSC42QT KSSC48FT KSSC48QT KSSO36FT KSSO36QT KSSO42FT KSSO42QT KSSO48FT KSSO48QT KSSP36QT KSSP42QT KSSP48QT KSSS36FT KSSS42FT KSSS48FT KSSS36QT...

Installation Guide
Page 3
...of injury, and tell you and others are not followed. Always read and obey all safety messages. WARNING Tip Over Hazard Refrigerator is completely installed. Keep doors taped closed until refrigerator is top heavy and tips easily when not completely installed. This is , tell you how to potential hazards that can kill...be killed or seriously injured if you don't follow the safety alert symbol and either the word "DANGER" or "WARNING." Failure to move and install refrigerator. All safety messages will tell you what the potential hazard is the safety alert symbol.
...of injury, and tell you and others are not followed. Always read and obey all safety messages. WARNING Tip Over Hazard Refrigerator is completely installed. Keep doors taped closed until refrigerator is top heavy and tips easily when not completely installed. This is , tell you how to potential hazards that can kill...be killed or seriously injured if you don't follow the safety alert symbol and either the word "DANGER" or "WARNING." Failure to move and install refrigerator. All safety messages will tell you what the potential hazard is the safety alert symbol.

Installation Guide
Page 4
This series requires the installation of custom panels, handles, and standoffs. This series provides a warm commercial-looking built-in refrigerator. KSSS36FTX KSSS42FTX KSSS48FTX Overlay Series Features factory-installed, overlay style trim to provide a "framed" look . KSSO36FTX KSSO42FTX KSSO48FTX 4 KSSC36FTS KSSC42FTS KSSC48FTS Classic Series Features factory-installed, traditional style ...
This series requires the installation of custom panels, handles, and standoffs. This series provides a warm commercial-looking built-in refrigerator. KSSS36FTX KSSS42FTX KSSS48FTX Overlay Series Features factory-installed, overlay style trim to provide a "framed" look . KSSO36FTX KSSO42FTX KSSO48FTX 4 KSSC36FTS KSSC42FTS KSSC48FTS Classic Series Features factory-installed, traditional style ...

Installation Guide
Page 5
This series requires the installation of custom panels, handles, and standoffs. KSSP36QTS KSSP42QTS KSSP48QTS 5 Side by Side Dispensing Refrigerators Architect® Series Features wraparound styling that are not included. KSSC36QTS KSSC42QTS KSSC48QTS Classic Series Features factory-installed, traditional style trim to create a sleek, contemporary ... KSSS42QTW KSSS48QTW KSSS36QTX KSSS42QTX KSSS48QTX Overlay Series Features factory-installed, overlay style trim to provide a "frameless" look . This series provides a warm commercial-looking built-in refrigerator.
This series requires the installation of custom panels, handles, and standoffs. KSSP36QTS KSSP42QTS KSSP48QTS 5 Side by Side Dispensing Refrigerators Architect® Series Features wraparound styling that are not included. KSSC36QTS KSSC42QTS KSSC48QTS Classic Series Features factory-installed, traditional style trim to create a sleek, contemporary ... KSSS42QTW KSSS48QTW KSSS36QTX KSSS42QTX KSSS48QTX Overlay Series Features factory-installed, overlay style trim to provide a "frameless" look . This series provides a warm commercial-looking built-in refrigerator.


