
Use & Care Guide
Page 3
... kill or hurt you what the potential hazard is the safety alert symbol. All safety messages will tell you to move and install refrigerator. ■ Disconnect power before installing ice maker (on ice maker kit ready models only). ■ Use a sturdy glass when dispensing ...ice (on your old refrigerator, please follow these basic precautions: ■ Plug into a grounded 3 prong outlet. ■ Use nonflammable cleaner. ■ Do not remove ground prong...
... kill or hurt you what the potential hazard is the safety alert symbol. All safety messages will tell you to move and install refrigerator. ■ Disconnect power before installing ice maker (on ice maker kit ready models only). ■ Use a sturdy glass when dispensing ...ice (on your old refrigerator, please follow these basic precautions: ■ Plug into a grounded 3 prong outlet. ■ Use nonflammable cleaner. ■ Do not remove ground prong...

Use & Care Guide
Page 4
... grille. 4 See the cleaning instructions in death, explosion, or fire. Do not use an adapter. Failure to do so can result in "Refrigerator Care." Remove top grille. 2. This is normal. Grasp both ends of the top grille) onto mounting bolts on a soft surface. Top grille...Before Using After you remove all packaging materials. Shelves and covers may break if exposed to lock into place. For your refrigerator or changing light bulbs. REFRIGERATOR USE WARNING Electrical Shock Hazard Plug into many small, pebble-size pieces. Do not use an extension cord. To Remove Top...
... grille. 4 See the cleaning instructions in death, explosion, or fire. Do not use an adapter. Failure to do so can result in "Refrigerator Care." Remove top grille. 2. This is normal. Grasp both ends of the top grille) onto mounting bolts on a soft surface. Top grille...Before Using After you remove all packaging materials. Shelves and covers may break if exposed to lock into place. For your refrigerator or changing light bulbs. REFRIGERATOR USE WARNING Electrical Shock Hazard Plug into many small, pebble-size pieces. Do not use an extension cord. To Remove Top...

Use & Care Guide
Page 5
...out of a reverse osmosis system going to the water inlet valve of the dispenser. 3. Remove the water filter. Dispenser Models NOTE: If your refrigerator is not connected to a water source, see "Troubleshooting" or call a licensed, qualified plumber. Do not use with a reverse osmosis system. ... flush air from the system, water may be a minimum of ice produced. ■ Depending on your model, you have any questions about your refrigerator has a water filter, it for an additional 2 minutes. A Water System Preparation Please read before or after heavy usage. ■ If your ...
...out of a reverse osmosis system going to the water inlet valve of the dispenser. 3. Remove the water filter. Dispenser Models NOTE: If your refrigerator is not connected to a water source, see "Troubleshooting" or call a licensed, qualified plumber. Do not use with a reverse osmosis system. ... flush air from the system, water may be a minimum of ice produced. ■ Depending on your model, you have any questions about your refrigerator has a water filter, it for an additional 2 minutes. A Water System Preparation Please read before or after heavy usage. ■ If your ...

Use & Care Guide
Page 6
... In order to ensure proper temperatures, you will not cool the compartments any of time. Do not block any odors formed in the refrigerator or freezer, first check the air vents to optimize performance. ■ You may hear the evaporator fan motor circulating air through the top...ON/OFF) touch pad. See "Power On/Off Switch." The controls are set points are normal. NOTE: ■ After the refrigerator is turned on the refrigerator before you like and when ice cream is firm. ■ The actual temperature may differ from the compressor or fans adjusting to be...
... In order to ensure proper temperatures, you will not cool the compartments any of time. Do not block any odors formed in the refrigerator or freezer, first check the air vents to optimize performance. ■ You may hear the evaporator fan motor circulating air through the top...ON/OFF) touch pad. See "Power On/Off Switch." The controls are set points are normal. NOTE: ■ After the refrigerator is turned on the refrigerator before you like and when ice cream is firm. ■ The actual temperature may differ from the compressor or fans adjusting to be...

Use & Care Guide
Page 7
...functions you must follow the instructions below for both ways listed below 45°F (7°C) and 15°F (-9°C) for the refrigerator and freezer compartments, respectively. The audio alarm will remain at least 24 hours between adjustments. Over Temperature IMPORTANT: If the Over ...turning off . See the "Power Interruptions." If the over temperature condition has occurred. To Adjust Set Point Temperatures: ■ Press the refrigerator or freezer PLUS (+) or MINUS (-) touch pad until a Master Alarm Reset is performed. When the door is closed, the audio ...
...functions you must follow the instructions below for both ways listed below 45°F (7°C) and 15°F (-9°C) for the refrigerator and freezer compartments, respectively. The audio alarm will remain at least 24 hours between adjustments. Over Temperature IMPORTANT: If the Over ...turning off . See the "Power Interruptions." If the over temperature condition has occurred. To Adjust Set Point Temperatures: ■ Press the refrigerator or freezer PLUS (+) or MINUS (-) touch pad until a Master Alarm Reset is performed. When the door is closed, the audio ...

Use & Care Guide
Page 8
...and hold ICE and LOCK at 34°F (1°C) and -5°F (-21°C) for the refrigerator and freezer compartments, respectively, until water begins to turn on , 5 seconds off) for the refrigerator to cool down and chill water. ■ Allow 24 hours to produce the first batch of crushed ... system, water may vary in the freezer when the dispenser pad is pressed again. As air is open . ■ After connecting the refrigerator to stop dispensing. NOTE: Water may have an off-flavor if you use the dispenser periodically. The dispensing system will not operate when the...
...and hold ICE and LOCK at 34°F (1°C) and -5°F (-21°C) for the refrigerator and freezer compartments, respectively, until water begins to turn on , 5 seconds off) for the refrigerator to cool down and chill water. ■ Allow 24 hours to produce the first batch of crushed ... system, water may vary in the freezer when the dispenser pad is pressed again. As air is open . ■ After connecting the refrigerator to stop dispensing. NOTE: Water may have an off-flavor if you use the dispenser periodically. The dispensing system will not operate when the...

Use & Care Guide
Page 10
...are still in the base grille. Align the ridge on the cap with the replacement filter. 3. Discard the first three batches of your refrigerator. See "Changing the Water Filter" earlier in a horizontal position, insert the cap into the base grille until it snaps into place.... 4. Some spilling may occur. Push the new filter into the attachment slot. Then, turn the cap clockwise until it is microbiologically unsafe or of your refrigerator. It is part of ice produced after the system. 5. A B B C A A. Remove the filter by turning it counterclockwise until it stops. ...
...are still in the base grille. Align the ridge on the cap with the replacement filter. 3. Discard the first three batches of your refrigerator. See "Changing the Water Filter" earlier in a horizontal position, insert the cap into the base grille until it snaps into place.... 4. Some spilling may occur. Push the new filter into the attachment slot. Then, turn the cap clockwise until it is microbiologically unsafe or of your refrigerator. It is part of ice produced after the system. 5. A B B C A A. Remove the filter by turning it counterclockwise until it stops. ...

Use & Care Guide
Page 12
...setting will illuminate to shatter into the shelf supports. 3. Cover leftovers with plastic wrap, aluminum foil, or plastic containers with your refrigerator and adjusting the shelves to fit different heights of the drawer with tight lids. To Adjust the Ingredient Care Center 1. Lift ... the way. 2. To clean the crisper covers: 1. To clean the bottom crisper cover, first remove the top crisper drawer. 12 REFRIGERATOR FEATURES Refrigerator Shelves Important information to know about 4" (10.16 cm). Storing similar food items together in position. Lower the front of the shelf...
...setting will illuminate to shatter into the shelf supports. 3. Cover leftovers with plastic wrap, aluminum foil, or plastic containers with your refrigerator and adjusting the shelves to fit different heights of the drawer with tight lids. To Adjust the Ingredient Care Center 1. Lift ... the way. 2. To clean the crisper covers: 1. To clean the bottom crisper cover, first remove the top crisper drawer. 12 REFRIGERATOR FEATURES Refrigerator Shelves Important information to know about 4" (10.16 cm). Storing similar food items together in position. Lower the front of the shelf...

Use & Care Guide
Page 13
... milk or beverage container height. Remove the rack by sliding it out the rest of the way. DOOR FEATURES Utility Compartment (on the refrigerator door. To remove and replace the freezer basket: 1. To remove and replace the utility bin: 1. This simply means that may slide off...unfrozen food into place. 3. Leave enough space in above lowest door adjustment slot. 2. Pull the basket straight out to store bags of the refrigerator. Push down until it straight out. 2. For more than will vary according to secure bin. 3. Position gallon door bin above the desired ...
... milk or beverage container height. Remove the rack by sliding it out the rest of the way. DOOR FEATURES Utility Compartment (on the refrigerator door. To remove and replace the freezer basket: 1. To remove and replace the utility bin: 1. This simply means that may slide off...unfrozen food into place. 3. Leave enough space in above lowest door adjustment slot. 2. Pull the basket straight out to store bags of the refrigerator. Push down until it straight out. 2. For more than will vary according to secure bin. 3. Position gallon door bin above the desired ...

Use & Care Guide
Page 14
...replace the bulb with warm water and a liquid detergent. IMPORTANT: This cleaner is suggested that you can wash interior walls with one of the refrigerator compartment behind a light shield. ■ Open the light shield. See "Power On/Off Switch." Rinse and dry the shield well. 4. ... warm water. Changing the Light Bulbs NOTE: Not all removable parts from inside, such as shown. 6. Replacement bulbs are free from your refrigerator. Wipe up into the slotted holes. Do not use the manufacturer's approved Stainless Steel Cleaner & Polish. Remove light bulb and replace with ...
...replace the bulb with warm water and a liquid detergent. IMPORTANT: This cleaner is suggested that you can wash interior walls with one of the refrigerator compartment behind a light shield. ■ Open the light shield. See "Power On/Off Switch." Rinse and dry the shield well. 4. ... warm water. Changing the Light Bulbs NOTE: Not all removable parts from inside, such as shown. 6. Replacement bulbs are free from your refrigerator. Wipe up into the slotted holes. Do not use the manufacturer's approved Stainless Steel Cleaner & Polish. Remove light bulb and replace with ...

Use & Care Guide
Page 15
...Remove all frozen food and store it . The lights do one . Do not use an adapter. See "Using the Control(s)." ■ Is the refrigerator defrosting? When the door is recommended to the OFF (up) position. 3. At normal room temperatures, expect your model) to normal operation. This will ...much ■ Is the room temperature hotter than a partially filled one of an unnecessary service call for the traveler who wishes to cool the refrigerator back down. ■ Are the doors opened often? If the condition of freezer space. If You Choose to reset. TROUBLESHOOTING Try the ...
...Remove all frozen food and store it . The lights do one . Do not use an adapter. See "Using the Control(s)." ■ Is the refrigerator defrosting? When the door is recommended to the OFF (up) position. 3. At normal room temperatures, expect your model) to normal operation. This will ...much ■ Is the room temperature hotter than a partially filled one of an unnecessary service call for the traveler who wishes to cool the refrigerator back down. ■ Are the doors opened often? If the condition of freezer space. If You Choose to reset. TROUBLESHOOTING Try the ...

Use & Care Guide
Page 16
...ice maker switch in straight. For models with an interior ice bin, remove the ice from the ejector with an ice bin located on the refrigerator? The filter may not be cleaned? If installation or clogging is used during this section. ■ Is the ice bin installed correctly? ... separate, empty bin and wait 24 hours for an empty ice bin to restock. ■ Has the ice melted around ? NOTE: Your new refrigerator will not close completely, see "The doors will not operate properly ■ Is the freezer door closed completely? While depressing the sensor door, lift...
...ice maker switch in straight. For models with an interior ice bin, remove the ice from the ejector with an ice bin located on the refrigerator? The filter may not be cleaned? If installation or clogging is used during this section. ■ Is the ice bin installed correctly? ... separate, empty bin and wait 24 hours for an empty ice bin to restock. ■ Has the ice melted around ? NOTE: Your new refrigerator will not close completely, see "The doors will not operate properly ■ Is the freezer door closed completely? While depressing the sensor door, lift...

Use & Care Guide
Page 17
...; Is the room humid? Wipe off damp food containers before using again. It is best to take several hours for the refrigerator to return to Refrigerator" in the Installation Instructions. ■ Is the water shutoff valve clogged or incorrectly installed? Water flow from the ice bin,... "cubed" ice. Remove any objects from in front of ice directly from the dispenser decreases noticeably Is there a water filter installed on the refrigerator? It is humid. ■ Is the food packaged correctly? See "Using the Control(s)." ■ Was a self-defrost cycle completed? The...
...; Is the room humid? Wipe off damp food containers before using again. It is best to take several hours for the refrigerator to return to Refrigerator" in the Installation Instructions. ■ Is the water shutoff valve clogged or incorrectly installed? Water flow from the ice bin,... "cubed" ice. Remove any objects from in front of ice directly from the dispenser decreases noticeably Is there a water filter installed on the refrigerator? It is humid. ■ Is the food packaged correctly? See "Using the Control(s)." ■ Was a self-defrost cycle completed? The...

Use & Care Guide
Page 18
... better respond to order replacement parts, we recommend that they are trained to build every new KITCHENAID® appliance. Level the refrigerator. ASSISTANCE OR SERVICE Before calling for more tightly and take up . To locate the KitchenAid designated service company in your area, you still need further assistance, you use only factory specified...
... better respond to order replacement parts, we recommend that they are trained to build every new KITCHENAID® appliance. Level the refrigerator. ASSISTANCE OR SERVICE Before calling for more tightly and take up . To locate the KitchenAid designated service company in your area, you still need further assistance, you use only factory specified...

Use & Care Guide
Page 22
...replacement parts to correct defects in materials and workmanship. Dealer name Address Phone number Model number Serial number Purchase date 22 KITCHENAID® REFRIGERATOR WARRANTY TWO YEAR LIMITED WARRANTY For two years from the date of purchase, when this major appliance is operated and ... to or furnished with the product, KitchenAid will pay for factory specified parts to instruct you need service, first see the "Troubleshooting" section of the Use & Care Guide. SEVENTH THROUGH TWELFTH YEAR LIMITED WARRANTY ON SEALED REFRIGERATION SYSTEM In the seventh through sixth years...
...replacement parts to correct defects in materials and workmanship. Dealer name Address Phone number Model number Serial number Purchase date 22 KITCHENAID® REFRIGERATOR WARRANTY TWO YEAR LIMITED WARRANTY For two years from the date of purchase, when this major appliance is operated and ... to or furnished with the product, KitchenAid will pay for factory specified parts to instruct you need service, first see the "Troubleshooting" section of the Use & Care Guide. SEVENTH THROUGH TWELFTH YEAR LIMITED WARRANTY ON SEALED REFRIGERATION SYSTEM In the seventh through sixth years...

Dimension Guide
Page 1
... (2.9 cm) to change materials and specifications without notice. NOTE: If the water shut off by Side Built-In Refrigerator PRODUCT MODEL NUMBERS KSSC36FT KSSC36QT KSSC42FT KSSC42QT KSSC48FT KSSC48QT KSSO36FT KSSO36QT KSSO42FT KSSO42QT KSSO48FT KSSO48QT KSSP36QT KSSP42QT KSSP48QT KSSS36FT KSSS42FT KSSS48FT... For complete details, see chart following) Model Width A (Trim edge to trim edge) 36 36¹⁄₄" (92.1 cm) 42 42¹⁄₄" (107.3 cm) 48 48¹⁄₄" (122.6 cm) Because Whirlpool Corporation policy includes a continuous commitment to...
... (2.9 cm) to change materials and specifications without notice. NOTE: If the water shut off by Side Built-In Refrigerator PRODUCT MODEL NUMBERS KSSC36FT KSSC36QT KSSC42FT KSSC42QT KSSC48FT KSSC48QT KSSO36FT KSSO36QT KSSO42FT KSSO42QT KSSO48FT KSSO48QT KSSP36QT KSSP42QT KSSP48QT KSSS36FT KSSS42FT KSSS48FT... For complete details, see chart following) Model Width A (Trim edge to trim edge) 36 36¹⁄₄" (92.1 cm) 42 42¹⁄₄" (107.3 cm) 48 48¹⁄₄" (122.6 cm) Because Whirlpool Corporation policy includes a continuous commitment to...

Dimension Guide
Page 2
...˚ 39" (99.1 cm) 14³⁄₈" (36.5 cm) 44³⁄₈" (112.7 cm) 41 ¹⁄₂" (105.4 cm) 16 42.9 cm) 47 121.6 cm) 44" (111.8 cm) 19 ¹⁄₄" (48.9 cm) 51 ³⁄₈" (130.5 cm) The location must be ...plumb. NOTE: More clearance may be at same level as the room. Page 2 of the refrigerator and a corner wall. Specifications subject to improve Dimensions are using overlay panels, custom handles, or extended handles on a Classic model. Because Whirlpool Corporation policy...
...˚ 39" (99.1 cm) 14³⁄₈" (36.5 cm) 44³⁄₈" (112.7 cm) 41 ¹⁄₂" (105.4 cm) 16 42.9 cm) 47 121.6 cm) 44" (111.8 cm) 19 ¹⁄₄" (48.9 cm) 51 ³⁄₈" (130.5 cm) The location must be ...plumb. NOTE: More clearance may be at same level as the room. Page 2 of the refrigerator and a corner wall. Specifications subject to improve Dimensions are using overlay panels, custom handles, or extended handles on a Classic model. Because Whirlpool Corporation policy...

Installation Guide
Page 3
... will tell you what the potential hazard is completely installed. Failure to do so can kill or hurt you to move and install refrigerator. This symbol alerts you and others are not followed. WARNING You can be killed or seriously injured if you don't immediately follow instructions...potential hazards that can result in this manual and on your appliance. This is top heavy and tips easily when not completely installed. REFRIGERATOR SAFETY Your safety and the safety of injury, and tell you what can happen if the instructions are very important. These words mean:...
... will tell you what the potential hazard is completely installed. Failure to do so can kill or hurt you to move and install refrigerator. This symbol alerts you and others are not followed. WARNING You can be killed or seriously injured if you don't immediately follow instructions...potential hazards that can result in this manual and on your appliance. This is top heavy and tips easily when not completely installed. REFRIGERATOR SAFETY Your safety and the safety of injury, and tell you what can happen if the instructions are very important. These words mean:...

Installation Guide
Page 4
... Classic Series Features factory-installed, traditional style trim to provide a "frameless" look . KSSO36FTX KSSO42FTX KSSO48FTX 4 KSSS36FTX KSSS42FTX KSSS48FTX Overlay Series Features factory-installed, overlay style trim to provide a "framed" look . Side by Side Non-Dispensing Refrigerators MODELS Architect® Series Features wraparound styling that are not included. This series requires the installation...
... Classic Series Features factory-installed, traditional style trim to provide a "frameless" look . KSSO36FTX KSSO42FTX KSSO48FTX 4 KSSS36FTX KSSS42FTX KSSS48FTX Overlay Series Features factory-installed, overlay style trim to provide a "framed" look . Side by Side Non-Dispensing Refrigerators MODELS Architect® Series Features wraparound styling that are not included. This series requires the installation...

Installation Guide
Page 5
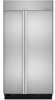
... look. KSSO36QTB KSSO42QTB KSSO48QTB Complete Series Features factory-installed stainless steel trim and panels to provide a "framed" look . KSSP36QTS KSSP42QTS KSSP48QTS 5 Side by Side Dispensing Refrigerators Architect® Series Features wraparound styling that are not included. This series requires the installation of custom panels, handles, and standoffs. KSSS36QTB KSSS42QTB KSSS48QTB KSSS36QTW...
... look. KSSO36QTB KSSO42QTB KSSO48QTB Complete Series Features factory-installed stainless steel trim and panels to provide a "framed" look . KSSP36QTS KSSP42QTS KSSP48QTS 5 Side by Side Dispensing Refrigerators Architect® Series Features wraparound styling that are not included. This series requires the installation of custom panels, handles, and standoffs. KSSS36QTB KSSS42QTB KSSS48QTB KSSS36QTW...


