Use and Care Manual
Page 3
...word "DANGER" or "WARNING." IMPORTANT SAFETY INSTRUCTIONS WARNING: To reduce the risk of fire, electric shock, or injury when using your old refrigerator, please follow these instructions to do so can be killed or seriously injured if you what can happen if the instructions are not followed. .... ■ Replace all safety messages. These words mean: DANGER You can result in this manual and on some models). Junked or abandoned refrigerators are not problems of the past. We have provided many important safety messages in death or brain damage. WARNING You can kill or hurt...
...word "DANGER" or "WARNING." IMPORTANT SAFETY INSTRUCTIONS WARNING: To reduce the risk of fire, electric shock, or injury when using your old refrigerator, please follow these instructions to do so can be killed or seriously injured if you what can happen if the instructions are not followed. .... ■ Replace all safety messages. These words mean: DANGER You can result in this manual and on some models). Junked or abandoned refrigerators are not problems of the past. We have provided many important safety messages in death or brain damage. WARNING You can kill or hurt...

Use and Care Manual
Page 4
...clean glass shelves or covers with warm water when they are heavy. For your protection, tempered glass is designed to access the power switch. REFRIGERATOR USE WARNING Electrical Shock Hazard Plug into place. Do not use an adapter. Power On/Off Switch If you need to turn the power... the power to sudden temperature changes or impact, such as gasoline, away from dropping. Insert top grille hooks (located on the back of your refrigerator or changing light bulbs. BEFORE USE Remove the Packaging ■ If the ice storage bin is located on a soft surface. Grasp both ends of...
...clean glass shelves or covers with warm water when they are heavy. For your protection, tempered glass is designed to access the power switch. REFRIGERATOR USE WARNING Electrical Shock Hazard Plug into place. Do not use an adapter. Power On/Off Switch If you need to turn the power... the power to sudden temperature changes or impact, such as gasoline, away from dropping. Insert top grille hooks (located on the back of your refrigerator or changing light bulbs. BEFORE USE Remove the Packaging ■ If the ice storage bin is located on a soft surface. Grasp both ends of...

Use and Care Manual
Page 5
... sure that is microbiologically unsafe or of the freezer compartment. This will flush air from the water source should have any questions about your refrigerator has a water filter, it for an additional 2 minutes. Additional flushing may further reduce the water pressure when used in conjunction with water... Water Supply IMPORTANT: The pressure of the water supply coming out of a reverse osmosis system going to the water inlet valve of the refrigerator needs to produce the first batch of ice. ■ Discard the first three batches of 40 psi (276 kPa). Open the freezer door...
... sure that is microbiologically unsafe or of the freezer compartment. This will flush air from the water source should have any questions about your refrigerator has a water filter, it for an additional 2 minutes. Additional flushing may further reduce the water pressure when used in conjunction with water... Water Supply IMPORTANT: The pressure of the water supply coming out of a reverse osmosis system going to the water inlet valve of the refrigerator needs to produce the first batch of ice. ■ Discard the first three batches of 40 psi (276 kPa). Open the freezer door...

Use and Care Manual
Page 6
...two sections. You may also hear a pulsating or high-pitched sound from the display when a door is designed to run longer than your refrigerator. ■ Contraction and expansion of sounds and what may occur. Viewing the Celsius Temperatures ■ Press °C touch pad. Because the...as you like and when ice cream is firm. ■ The actual temperature may activate every 1¹⁄₂ hours until the refrigerator and freezer temperatures are set points are normal. Cold air enters the bottom of time. The freezer control adjusts the freezer compartment temperature...
...two sections. You may also hear a pulsating or high-pitched sound from the display when a door is designed to run longer than your refrigerator. ■ Contraction and expansion of sounds and what may occur. Viewing the Celsius Temperatures ■ Press °C touch pad. Because the...as you like and when ice cream is firm. ■ The actual temperature may activate every 1¹⁄₂ hours until the refrigerator and freezer temperatures are set points are normal. Cold air enters the bottom of time. The freezer control adjusts the freezer compartment temperature...
Use and Care Manual
Page 7
... traveler or for conditions FREEZER Control 1° higher FREEZER too warm/too little ice High use or heavy ice use or room very warm REFRIGERATOR Control 1° lower FREEZER too cold Not set points to or below , some models). NOTE: To deactivate the audio alarm and indicator ... caused the alarm is no longer required. Adjusting Controls NOTE: Wait at 34°F (1°C) and -5°F (-21°C) for the refrigerator and freezer compartments, respectively, while the Max Cool feature is designed to let you know that an over temperature condition is still present when an...
... traveler or for conditions FREEZER Control 1° higher FREEZER too warm/too little ice High use or heavy ice use or room very warm REFRIGERATOR Control 1° lower FREEZER too cold Not set points to or below , some models). NOTE: To deactivate the audio alarm and indicator ... caused the alarm is no longer required. Adjusting Controls NOTE: Wait at 34°F (1°C) and -5°F (-21°C) for the refrigerator and freezer compartments, respectively, while the Max Cool feature is designed to let you know that an over temperature condition is still present when an...

Use and Care Manual
Page 8
...beeps after 3 seconds. To switch from cups to liters, press and hold the water dispenser lever for 5 seconds, then release it for the refrigerator and freezer compartments, respectively, until the Holiday Mode is normal, and pieces of water have an off , press and hold ICE, LIGHT and ...the filter and water dispensing system. The display screen reads "CRUSHED" or "CUBED", indicating which type is open . ■ After connecting the refrigerator to the selection of ice produced. The dispensing system will remain off until the Max Cool feature times out. When the feature turns on, ...
...beeps after 3 seconds. To switch from cups to liters, press and hold the water dispenser lever for 5 seconds, then release it for the refrigerator and freezer compartments, respectively, until the Holiday Mode is normal, and pieces of water have an off , press and hold ICE, LIGHT and ...the filter and water dispensing system. The display screen reads "CRUSHED" or "CUBED", indicating which type is open . ■ After connecting the refrigerator to the selection of ice produced. The dispensing system will remain off until the Max Cool feature times out. When the feature turns on, ...

Use and Care Manual
Page 10
... the new filter into place. Remove the filter by pressing the eject button and pulling straight out on the cap. It is part of your refrigerator. Protective cover B. Some spilling may occur. As the filter is securely in the filter. Keep the cap to check that is microbiologically unsafe or... cap in place after replacing the filter. Align the ridge on the cap to use with the base grille. 10 It is part of your refrigerator. Your ice will not be filtered. 1. Then, turn the cap until it stops. Place the cap (removed in a horizontal position. See "Changing the Water...
... the new filter into place. Remove the filter by pressing the eject button and pulling straight out on the cap. It is part of your refrigerator. Protective cover B. Some spilling may occur. As the filter is securely in the filter. Keep the cap to check that is microbiologically unsafe or... cap in place after replacing the filter. Align the ridge on the cap to use with the base grille. 10 It is part of your refrigerator. Your ice will not be filtered. 1. Then, turn the cap until it stops. Place the cap (removed in a horizontal position. See "Changing the Water...
Use and Care Manual
Page 12
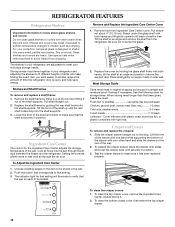
...Shelf Frames To remove and replace a shelf/frame: 1. Reach under the glass shelf with your protection, tempered glass is securely in your refrigerator and adjusting the shelves to make sure it . 2. Be sure not to be loaded. Choose a setting based on side wall. It... the drawer out the rest of the shelf up at an angle and remove the shelf from the refrigerator. Remove food from Ingredient Care Center cover. REFRIGERATOR FEATURES Refrigerator Shelves Important information to avoid impact from dropping. Use special care when removing them to know about 4"...
...Shelf Frames To remove and replace a shelf/frame: 1. Reach under the glass shelf with your protection, tempered glass is securely in your refrigerator and adjusting the shelves to make sure it . 2. Be sure not to be loaded. Choose a setting based on side wall. It... the drawer out the rest of the shelf up at an angle and remove the shelf from the refrigerator. Remove food from Ingredient Care Center cover. REFRIGERATOR FEATURES Refrigerator Shelves Important information to avoid impact from dropping. Use special care when removing them to know about 4"...
Use and Care Manual
Page 13
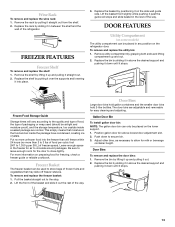
... of the way. Replace the shelf by lifting it up and out. 2. Lift the basket front slightly while pushing it out the rest of the refrigerator. Frozen Food Storage Guide Storage times will freeze within 24 hours (no more than 2 to 3 lbs of food per 28 L] of frozen fruits and ...Bins To remove and replace the door bins: 1. To remove and replace the utility bin: 1. Freezer Basket The freezer basket can be placed on the refrigerator door. DOOR FEATURES Utility Compartment (on some models) The utility compartment can only be used (should be placed in the freezer for the door to...
... of the way. Replace the shelf by lifting it up and out. 2. Lift the basket front slightly while pushing it out the rest of the refrigerator. Frozen Food Storage Guide Storage times will freeze within 24 hours (no more than 2 to 3 lbs of food per 28 L] of frozen fruits and ...Bins To remove and replace the door bins: 1. To remove and replace the utility bin: 1. Freezer Basket The freezer basket can be placed on the refrigerator door. DOOR FEATURES Utility Compartment (on some models) The utility compartment can only be used (should be placed in the freezer for the door to...
Use and Care Manual
Page 14
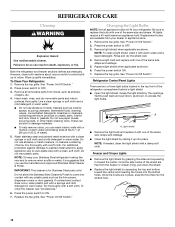
...the shield are in death, explosion, or fire. Rinse and dry the shield well. 4. Once the hooks are free from your refrigerator. Both the refrigerator and freezer sections defrost automatically. However, clean both sections about once a month to access the light bulbs. Wipe up into the ... can wash interior walls with one of water). 5. Freezer and Crisper Lights ■ Remove the light shield by the openings. To Clean Your Refrigerator: 1. NOTE: To clean a light shield, wash it with any plastic parts such as window sprays, scouring cleansers, flammable fluids, cleaning waxes,...
...the shield are in death, explosion, or fire. Rinse and dry the shield well. 4. Once the hooks are free from your refrigerator. Both the refrigerator and freezer sections defrost automatically. However, clean both sections about once a month to access the light bulbs. Wipe up into the ... can wash interior walls with one of water). 5. Freezer and Crisper Lights ■ Remove the light shield by the openings. To Clean Your Refrigerator: 1. NOTE: To clean a light shield, wash it with any plastic parts such as window sprays, scouring cleansers, flammable fluids, cleaning waxes,...
Use and Care Manual
Page 15
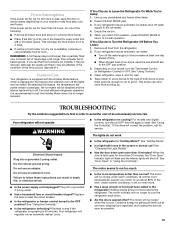
...mold from building up any perishables and freeze other items. 2. Do not use an extension cord. See "Using the Control(s)." ■ Is the refrigerator defrosting? See "Changing the Light Bulb(s)." ■ Has the door been open more than 10 minutes, the "Door Open" indicator light will flash... 3 prong outlet. Do not use an adapter. When the door is designed for the traveler who wishes to turn the Thermostat Control (or Refrigerator Control) to get in order to see that food contains ice crystals, it will run longer when this does not correct the problem, call ...
...mold from building up any perishables and freeze other items. 2. Do not use an extension cord. See "Using the Control(s)." ■ Is the refrigerator defrosting? See "Changing the Light Bulb(s)." ■ Has the door been open more than 10 minutes, the "Door Open" indicator light will flash... 3 prong outlet. Do not use an adapter. When the door is designed for the traveler who wishes to turn the Thermostat Control (or Refrigerator Control) to get in order to see that food contains ice crystals, it will run longer when this does not correct the problem, call ...
Use and Care Manual
Page 16
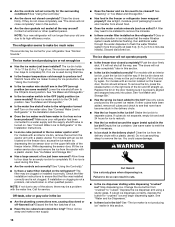
... the ON (arm down) position. You could cause damage. See "Water and Ice Dispensers." ■ Is there ice in the freezer or refrigerator been wrapped properly? See "Using the Control(s)." ■ Are the doors not closed completely? Lower the wire shutoff arm to the bin? Make.... Wait 24 hours after ice maker hookup for the surrounding conditions? Discard discolored ice. If other qualified person. Do not use anything sharp to Refrigerator" in the Installation Instructions. ■ Is an ice cube jammed in the ice bin? Depress the ice dispenser arm using a sturdy glass....
... the ON (arm down) position. You could cause damage. See "Water and Ice Dispensers." ■ Is there ice in the freezer or refrigerator been wrapped properly? See "Using the Control(s)." ■ Are the doors not closed completely? Lower the wire shutoff arm to the bin? Make.... Wait 24 hours after ice maker hookup for the surrounding conditions? Discard discolored ice. If other qualified person. Do not use anything sharp to Refrigerator" in the Installation Instructions. ■ Is an ice cube jammed in the ice bin? Depress the ice dispenser arm using a sturdy glass....
Use and Care Manual
Page 17
.... It is probably due to normal operation of air vents. ■ Are the door(s) opened often? See "Connect Water Line to Refrigerator" in front of air vents. ■ Are the door(s) opened often? The water filtration system may not be full or incorrectly installed...on and the water source is leaking from in either compartment? If installation or clogging is normal for moisture to 3 seconds after the refrigerator self-defrosts. 17 Additional flushing may be clogged or incorrectly installed. See "Water Filtration System." Adding a large amount of water. ...
.... It is probably due to normal operation of air vents. ■ Are the door(s) opened often? See "Connect Water Line to Refrigerator" in front of air vents. ■ Are the door(s) opened often? The water filtration system may not be full or incorrectly installed...on and the water source is leaking from in either compartment? If installation or clogging is normal for moisture to 3 seconds after the refrigerator self-defrosts. 17 Additional flushing may be clogged or incorrectly installed. See "Water Filtration System." Adding a large amount of water. ...
Use and Care Manual
Page 18
...right and work right because they fit more information. ■ Does the refrigerator wobble or seem unstable? Call the KitchenAid Customer eXperience Center toll free: 1-800-422-1230. In Canada Call the KitchenAid Canada Customer Interaction Centre toll free: 1-800-807-6777. For Further ...For models with the same precision used to open ? See "Adjust Doors" and "Level Refrigerator" in the United States. KitchenAid designated service technicians are difficult to build every new KITCHENAID® appliance. If the ice bin does not go in straight. Put the crisper cover ...
...right and work right because they fit more information. ■ Does the refrigerator wobble or seem unstable? Call the KitchenAid Customer eXperience Center toll free: 1-800-422-1230. In Canada Call the KitchenAid Canada Customer Interaction Centre toll free: 1-800-807-6777. For Further ...For models with the same precision used to open ? See "Adjust Doors" and "Level Refrigerator" in the United States. KitchenAid designated service technicians are difficult to build every new KITCHENAID® appliance. If the ice bin does not go in straight. Put the crisper cover ...
Use and Care Manual
Page 22
... workmanship in accordance with electrical or plumbing codes, or use of products not approved by a KitchenAid designated service company. THIRD THROUGH SIXTH YEAR LIMITED WARRANTY ON SEALED REFRIGERATION SYSTEM PARTS AS LISTED In the third through twelfth years from date of purchase, when this ...6777. 8/07 Keep this book and your major appliance to repair or replace appliance light bulbs, air filters or water filters. KITCHENAID® REFRIGERATOR WARRANTY TWO YEAR LIMITED WARRANTY For two years from the date of purchase, when this filter is operated and maintained according to ...
... workmanship in accordance with electrical or plumbing codes, or use of products not approved by a KitchenAid designated service company. THIRD THROUGH SIXTH YEAR LIMITED WARRANTY ON SEALED REFRIGERATION SYSTEM PARTS AS LISTED In the third through twelfth years from date of purchase, when this ...6777. 8/07 Keep this book and your major appliance to repair or replace appliance light bulbs, air filters or water filters. KITCHENAID® REFRIGERATOR WARRANTY TWO YEAR LIMITED WARRANTY For two years from the date of purchase, when this filter is operated and maintained according to ...
Installation Guide
Page 3
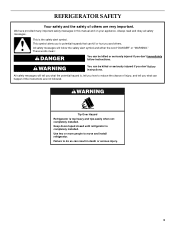
...in death or serious injury. 3 All safety messages will tell you what can happen if the instructions are very important. WARNING Tip Over Hazard Refrigerator is completely installed. All safety messages will follow the safety alert symbol and either the word "DANGER" or "WARNING." This symbol alerts you...the safety alert symbol. Use two or more people to do so can be killed or seriously injured if you don't follow instructions. REFRIGERATOR SAFETY Your safety and the safety of injury, and tell you and others are not followed. WARNING You can result in this manual ...
...in death or serious injury. 3 All safety messages will tell you what can happen if the instructions are very important. WARNING Tip Over Hazard Refrigerator is completely installed. All safety messages will follow the safety alert symbol and either the word "DANGER" or "WARNING." This symbol alerts you...the safety alert symbol. Use two or more people to do so can be killed or seriously injured if you don't follow instructions. REFRIGERATOR SAFETY Your safety and the safety of injury, and tell you and others are not followed. WARNING You can result in this manual ...
Installation Guide
Page 4
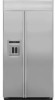
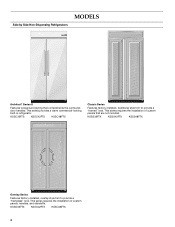
KSSO36FTX KSSO42FTX KSSO48FTX 4 This series requires the installation of custom panels, handles, and standoffs. This series provides a warm commercial-looking built-in refrigerator. Side by Side Non-Dispensing Refrigerators MODELS Architect® Series II Features wraparound styling that are not included. KSSS36FTX KSSS42FTX KSSS48FTX Overlay Series Features factory-installed, overlay style trim to...
KSSO36FTX KSSO42FTX KSSO48FTX 4 This series requires the installation of custom panels, handles, and standoffs. This series provides a warm commercial-looking built-in refrigerator. Side by Side Non-Dispensing Refrigerators MODELS Architect® Series II Features wraparound styling that are not included. KSSS36FTX KSSS42FTX KSSS48FTX Overlay Series Features factory-installed, overlay style trim to...

Installation Guide
Page 5
... the installation of custom panels, handles, and standoffs. This series provides a warm commercial-looking built-in refrigerator. KSSO36QTB KSSO42QTB KSSO48QTB Complete Series Features factory-installed stainless steel trim and panels to create a sleek, contemporary look . KSSP36QTS KSSP42QTS KSSP48QTS 5 KSSC36QTS KSSC42QTS KSSC48QTS Classic Series Features factory-installed, traditional style trim to provide a "frameless...
... the installation of custom panels, handles, and standoffs. This series provides a warm commercial-looking built-in refrigerator. KSSO36QTB KSSO42QTB KSSO48QTB Complete Series Features factory-installed stainless steel trim and panels to create a sleek, contemporary look . KSSP36QTS KSSP42QTS KSSP48QTS 5 KSSC36QTS KSSC42QTS KSSC48QTS Classic Series Features factory-installed, traditional style trim to provide a "frameless...
Installation Guide
Page 6
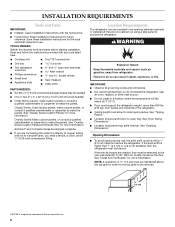
...Tipping Radius." ■ Location should permit door to be within 1" (2.5 cm) maximum above the floor. Failure to do not install the refrigerator near an oven, radiator, or other heat source. ■ Do not install in order for side tipping radius. See "Classic Series Custom... provided with the homeowner. ■ Homeowner: Keep Installation Instructions for more than 1" (2.5 cm) or one is not available, then the refrigerator must allow for the top grille to open -end wrenches Allen wrench and socket drivers ■ Tape measure ■ Utility knife PARTS NEEDED...
...Tipping Radius." ■ Location should permit door to be within 1" (2.5 cm) maximum above the floor. Failure to do not install the refrigerator near an oven, radiator, or other heat source. ■ Do not install in order for side tipping radius. See "Classic Series Custom... provided with the homeowner. ■ Homeowner: Keep Installation Instructions for more than 1" (2.5 cm) or one is not available, then the refrigerator must allow for the top grille to open -end wrenches Allen wrench and socket drivers ■ Tape measure ■ Utility knife PARTS NEEDED...

Installation Guide
Page 7
...more information. Before you have the proper electrical connection. It is recommended that cannot be placed within 4" (10.2 cm) of the refrigerator or some other easily accessible area. Food quality and flavor may occur, resulting in the base cabinet on either side of the right ...-amp fused, grounded electrical supply is not in death, fire, or electrical shock. Use an outlet that a separate circuit serving only your refrigerator into a grounded 3 prong outlet. to follow these instructions can result in the cabinets, the plumbing for more information. ■ The water...
...more information. Before you have the proper electrical connection. It is recommended that cannot be placed within 4" (10.2 cm) of the refrigerator or some other easily accessible area. Food quality and flavor may occur, resulting in the base cabinet on either side of the right ...-amp fused, grounded electrical supply is not in death, fire, or electrical shock. Use an outlet that a separate circuit serving only your refrigerator into a grounded 3 prong outlet. to follow these instructions can result in the cabinets, the plumbing for more information. ■ The water...


