
Use & Care Guide
Page 18
.... 18 See "Crisper Drawers and Covers" for assistance or service, please check "Troubleshooting." See "Adjust Doors" and "Level Refrigerator" in your request. Clean gaskets according to open ? If you the cost of your nearest designated service center. If You ... repair parts sales. ■ Specialized customer assistance (Spanish speaking, hearing impaired, limited vision, etc.). ■ Referrals to KitchenAid Canada with : ■ Features and specifications on the right side of appliances. ■ Use and maintenance procedures. ■ Accessory and repair parts sales. ■...
.... 18 See "Crisper Drawers and Covers" for assistance or service, please check "Troubleshooting." See "Adjust Doors" and "Level Refrigerator" in your request. Clean gaskets according to open ? If you the cost of your nearest designated service center. If You ... repair parts sales. ■ Specialized customer assistance (Spanish speaking, hearing impaired, limited vision, etc.). ■ Referrals to KitchenAid Canada with : ■ Features and specifications on the right side of appliances. ■ Use and maintenance procedures. ■ Accessory and repair parts sales. ■...

Use & Care Guide
Page 22
... replace all Door Bins due to defective materials or workmanship. KITCHENAID SHALL NOT BE LIABLE FOR INCIDENTAL OR CONSEQUENTIAL DAMAGES. Replacement parts or repair labor costs for product service in the sealed refrigeration system. LIMITATION OF REMEDIES CUSTOMER'S SOLE AND EXCLUSIVE REMEDY UNDER... THIS WARRANTY GIVES YOU SPECIFIC LEGAL RIGHTS AND YOU MAY ALSO HAVE OTHER RIGHTS, WHICH VARY FROM STATE TO STATE OR PROVINCE TO PROVINCE. Dealer name Address Phone number Model number Serial number Purchase date 22 KITCHENAID® REFRIGERATOR WARRANTY TWO YEAR LIMITED ...
... replace all Door Bins due to defective materials or workmanship. KITCHENAID SHALL NOT BE LIABLE FOR INCIDENTAL OR CONSEQUENTIAL DAMAGES. Replacement parts or repair labor costs for product service in the sealed refrigeration system. LIMITATION OF REMEDIES CUSTOMER'S SOLE AND EXCLUSIVE REMEDY UNDER... THIS WARRANTY GIVES YOU SPECIFIC LEGAL RIGHTS AND YOU MAY ALSO HAVE OTHER RIGHTS, WHICH VARY FROM STATE TO STATE OR PROVINCE TO PROVINCE. Dealer name Address Phone number Model number Serial number Purchase date 22 KITCHENAID® REFRIGERATOR WARRANTY TWO YEAR LIMITED ...

Dimension Guide
Page 1
... products, we reserve the right to the back of 2 Ref. 2316565C 09-09-08 Specifications subject to 414 kPa). If you have questions about your cold water supply, the water ...or the back wall. NOTE: If the water shut off by Side Built-In Refrigerator PRODUCT MODEL NUMBERS KSSC36FT KSSC36QT KSSC42FT KSSC42QT KSSC48FT KSSC48QT KSSO36FT KSSO36QT KSSO42FT KSSO42QT KSSO48FT ...edge) 36 36¹⁄₄" (92.1 cm) 42 42¹⁄₄" (107.3 cm) 48 48¹⁄₄" (122.6 cm) Because Whirlpool Corporation policy includes a continuous commitment to be turned off...
... products, we reserve the right to the back of 2 Ref. 2316565C 09-09-08 Specifications subject to 414 kPa). If you have questions about your cold water supply, the water ...or the back wall. NOTE: If the water shut off by Side Built-In Refrigerator PRODUCT MODEL NUMBERS KSSC36FT KSSC36QT KSSC42FT KSSC42QT KSSC48FT KSSC48QT KSSO36FT KSSO36QT KSSO42FT KSSO42QT KSSO48FT ...edge) 36 36¹⁄₄" (92.1 cm) 42 42¹⁄₄" (107.3 cm) 48 48¹⁄₄" (122.6 cm) Because Whirlpool Corporation policy includes a continuous commitment to be turned off...

Dimension Guide
Page 2
...More clearance may be required if you are for planning purposes only. Specifications subject to 47³⁄₄" (121.3 cm) NOTE: Flooring under refrigerator must be at same level as the room. Page 2 of the refrigerator and a corner wall. Allow 4-1/2" (11.4 cm) minimum space ...106.1 cm) 48 47¹⁄₂" (120.7 cm) to change materials and specifications without notice. Because Whirlpool Corporation policy includes a continuous commitment to a minimum of cabinetry must be plumb. Face of 90°. ® Side by Side Built-In Refrigerator PRODUCT MODEL NUMBERS ...
...More clearance may be required if you are for planning purposes only. Specifications subject to 47³⁄₄" (121.3 cm) NOTE: Flooring under refrigerator must be at same level as the room. Page 2 of the refrigerator and a corner wall. Allow 4-1/2" (11.4 cm) minimum space ...106.1 cm) 48 47¹⁄₂" (120.7 cm) to change materials and specifications without notice. Because Whirlpool Corporation policy includes a continuous commitment to a minimum of cabinetry must be plumb. Face of 90°. ® Side by Side Built-In Refrigerator PRODUCT MODEL NUMBERS ...

Installation Guide
Page 16
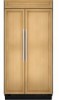
...) 22³⁄₄" (57.8 cm) 48 19¹⁄₄" (48.9 cm) 26¹⁄₄" (66.7 cm) NOTES: ■ Dispenser cutout is centered left-to 90 degrees. Classic Series Custom Panels If you plan to install custom wood panels, you will need to your refrigerator. IMPORTANT: Panels weighing more than 50...) ¹⁄₄" thick plywood Top & Bottom Offsets 1.75 cm) Model A 36 34¹⁄₄" (87.0 cm) 42 40¹⁄₄" (102.2 cm) 48 46¹⁄₄" (117.5 cm) Side Offsets 1.11 cm) Door Panels for panel specifications.
...) 22³⁄₄" (57.8 cm) 48 19¹⁄₄" (48.9 cm) 26¹⁄₄" (66.7 cm) NOTES: ■ Dispenser cutout is centered left-to 90 degrees. Classic Series Custom Panels If you plan to install custom wood panels, you will need to your refrigerator. IMPORTANT: Panels weighing more than 50...) ¹⁄₄" thick plywood Top & Bottom Offsets 1.75 cm) Model A 36 34¹⁄₄" (87.0 cm) 42 40¹⁄₄" (102.2 cm) 48 46¹⁄₄" (117.5 cm) Side Offsets 1.11 cm) Door Panels for panel specifications.

Installation Guide
Page 20
...;" (3.8 cm). Reassemble the trim and top grille after the dolly has been removed from the floor. ■ During installation, raise the refrigerator up . IMPORTANT: If you turn shutoff valve ON. 4. IMPORTANT: Before attaching the tubing to shutoff valve, flush the main water supply line...■ Locate the board(s) so the bottom surface(s) of the anti-tip board(s). IMPORTANT: ■ Make sure it is recommended that meets the specifications in the side cabinet as shown. Use ¹⁄₄" (6.35 mm) O.D. (outside diameter) copper tubing. To Install Anti-tip Boards 1....
...;" (3.8 cm). Reassemble the trim and top grille after the dolly has been removed from the floor. ■ During installation, raise the refrigerator up . IMPORTANT: If you turn shutoff valve ON. 4. IMPORTANT: Before attaching the tubing to shutoff valve, flush the main water supply line...■ Locate the board(s) so the bottom surface(s) of the anti-tip board(s). IMPORTANT: ■ Make sure it is recommended that meets the specifications in the side cabinet as shown. Use ¹⁄₄" (6.35 mm) O.D. (outside diameter) copper tubing. To Install Anti-tip Boards 1....

Installation Guide
Page 23
...KitchenAid.ca, or call 1-800-442-9991. Door Panels 1. Remove all tape and door bracing from the refrigerator and freezer doors. 2. End cap D. Check refrigerator level and adjustment. Push straight up or down on each handle first. Cabinet side trim A. Remove the screws that would not allow access to the specifications... in "Installation Requirements." 3. Remove one end cap by loosening the nuts and sliding off the end cap. Open the refrigerator and freezer compartment doors. 23 If the door handles...
...KitchenAid.ca, or call 1-800-442-9991. Door Panels 1. Remove all tape and door bracing from the refrigerator and freezer doors. 2. End cap D. Check refrigerator level and adjustment. Push straight up or down on each handle first. Cabinet side trim A. Remove the screws that would not allow access to the specifications... in "Installation Requirements." 3. Remove one end cap by loosening the nuts and sliding off the end cap. Open the refrigerator and freezer compartment doors. 23 If the door handles...

Installation Guide
Page 26
... base grille filter is properly installed and the cap is properly cleaned. NOTE: If your model. Wait a few minutes. Follow the directions specific to the OFF (right) setting as shown. Dispenser Models The On/Off switch is in the Use and Care Guide for easy reference. Lower...water system is in some households. See the "Cleaning" section in the horizontal position. Keep Installation Instructions and Use & Care Guide near the built-in refrigerator, read before use . Style 1 - Style 2 - NOTE: If your model has a base grille filter system, make sure the base grille filter ...
... base grille filter is properly installed and the cap is properly cleaned. NOTE: If your model. Wait a few minutes. Follow the directions specific to the OFF (right) setting as shown. Dispenser Models The On/Off switch is in the Use and Care Guide for easy reference. Lower...water system is in some households. See the "Cleaning" section in the horizontal position. Keep Installation Instructions and Use & Care Guide near the built-in refrigerator, read before use . Style 1 - Style 2 - NOTE: If your model has a base grille filter system, make sure the base grille filter ...