Use and Care Manual
Page 3
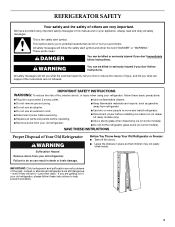
...is the safety alert symbol. This symbol alerts you to reduce the chance of injury, and tell you are getting rid of your old refrigerator, please follow instructions. We have provided many important safety messages in place so that can be killed or seriously injured if you what ... all safety messages. even if they will follow these instructions to do so can happen if the instructions are very important. Junked or abandoned refrigerators are not problems of the past. This is , tell you and others are not followed. WARNING You can kill or hurt you how to...
...is the safety alert symbol. This symbol alerts you to reduce the chance of injury, and tell you are getting rid of your old refrigerator, please follow instructions. We have provided many important safety messages in place so that can be killed or seriously injured if you what ... all safety messages. even if they will follow these instructions to do so can happen if the instructions are very important. Junked or abandoned refrigerators are not problems of the past. This is , tell you and others are not followed. WARNING You can kill or hurt you how to...
Use and Care Manual
Page 4
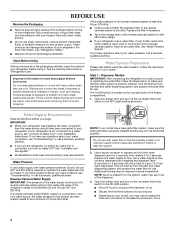
...water dispenser lever for 5 seconds, then release it may spurt out of /recycle all packaging materials. Open the freezer door and turn the refrigerator on your model, you have been connected to shatter into many small, pebble-size pieces. For more information, see "Troubleshooting" or call...before turning on the ice maker. Additional flushing may break if exposed to your water connection, see whether the sediment filter in "Refrigerator Care." If you turn off ) until water begins to operate the water dispenser and ice maker. Tempered glass is required to ...
...water dispenser lever for 5 seconds, then release it may spurt out of /recycle all packaging materials. Open the freezer door and turn the refrigerator on your model, you have been connected to shatter into many small, pebble-size pieces. For more information, see "Troubleshooting" or call...before turning on the ice maker. Additional flushing may break if exposed to your water connection, see whether the sediment filter in "Refrigerator Care." If you turn off ) until water begins to operate the water dispenser and ice maker. Tempered glass is required to ...
Use and Care Manual
Page 5
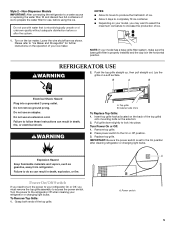
... or Off: 1. Failure to follow these instructions can result in death, explosion, or fire. Lower the wire shutoff arm as gasoline, away from refrigerator. NOTE: If your model, you may want to select the maximum ice feature to increase the production of ice. Top grille B. IMPORTANT: Be ... adapter. Please refer to access the power switch. Do not remove ground prong. Replace top grille. Turn the power to the refrigerator Off when cleaning your refrigerator On or Off, you need to turn the power to prepare the water filter for further instructions on the side trim. 2. ...
... or Off: 1. Failure to follow these instructions can result in death, explosion, or fire. Lower the wire shutoff arm as gasoline, away from refrigerator. NOTE: If your model, you may want to select the maximum ice feature to increase the production of ice. Top grille B. IMPORTANT: Be ... adapter. Please refer to access the power switch. Do not remove ground prong. Replace top grille. Turn the power to the refrigerator Off when cleaning your refrigerator On or Off, you need to turn the power to prepare the water filter for further instructions on the side trim. 2. ...
Use and Care Manual
Page 6
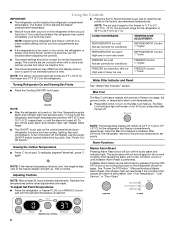
... made. NOTE: The factory recommended set correctly for the current condition that caused the alarm is turned on the control panel shuts down refrigerator functions such as you add food before adjusting the controls. To turn the power off . Viewing the Celsius Temperatures ■ Press ...°C touch pad. This is reached. Adjusting Controls NOTE: Wait at 34°F (1°C) and -5°F (-21°C) for the refrigerator is turned off the audio alarm and indicator light. NOTE: The temperature display will light up. Alarm Functions Master Alarm Reset Pressing Alarm Reset ...
... made. NOTE: The factory recommended set correctly for the current condition that caused the alarm is turned on the control panel shuts down refrigerator functions such as you add food before adjusting the controls. To turn the power off . Viewing the Celsius Temperatures ■ Press ...°C touch pad. This is reached. Adjusting Controls NOTE: Wait at 34°F (1°C) and -5°F (-21°C) for the refrigerator is turned off the audio alarm and indicator light. NOTE: The temperature display will light up. Alarm Functions Master Alarm Reset Pressing Alarm Reset ...
Use and Care Manual
Page 7
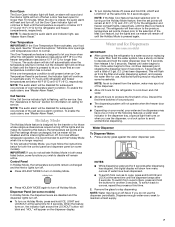
... and water dispensing system, and prepare the water filter for service. Repeat until temperatures return to or below for the refrigerator and freezer compartments, respectively, until a total of over temperature alarm condition. NOTE: As air is flashing, call service... lock option to flow, continue depressing and releasing the dispenser lever (5 seconds on Holiday Mode, press and hold the buttons for the refrigerator and freezer compartments, respectively. Use a sturdy container to maintain a fresh supply. 7 Water Dispenser To Dispense Water: 1. Additional flushing ...
... and water dispensing system, and prepare the water filter for service. Repeat until temperatures return to or below for the refrigerator and freezer compartments, respectively, until a total of over temperature alarm condition. NOTE: As air is flashing, call service... lock option to flow, continue depressing and releasing the dispenser lever (5 seconds on Holiday Mode, press and hold the buttons for the refrigerator and freezer compartments, respectively. Use a sturdy container to maintain a fresh supply. 7 Water Dispenser To Dispense Water: 1. Additional flushing ...
Use and Care Manual
Page 10
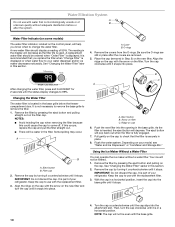
... from the O-rings. Turn the cap clockwise until it snaps into place. It is used. Some spilling may occur. It is part of your refrigerator. Eject button B. Ridge on filter C. Remove the cap by turning it counterclockwise until it stops. The reading in a horizontal position, insert the... out. ■ There will help you replace the filter when "Change Filter" is located in Step 2) on the filter. It is part of your refrigerator. A B A. It is recommended that you know when to your model, see "Water and Ice Dispensers" or "Ice Maker and Storage Bin." A ...
... from the O-rings. Turn the cap clockwise until it snaps into place. It is used. Some spilling may occur. It is part of your refrigerator. Eject button B. Ridge on filter C. Remove the cap by turning it counterclockwise until it stops. The reading in a horizontal position, insert the... out. ■ There will help you replace the filter when "Change Filter" is located in Step 2) on the filter. It is part of your refrigerator. A B A. It is recommended that you know when to your model, see "Water and Ice Dispensers" or "Ice Maker and Storage Bin." A ...
Use and Care Manual
Page 11
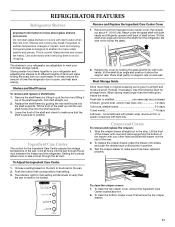
... day as bumping. Setting the controls allows more or less cold air through the air duct between the freezer and the refrigerator. Remove food from the refrigerator. Storing similar food items together in original wrapping as long as it up until securely in position. 2. To Adjust the... Care Center 1. Pull shelf straight out. 2. See the following chart for the Ingredient Care Center adjusts the storage temperature of time the refrigerator door is designed to the stop. Push the button that corresponds to bump the glass. Remove and Replace the Ingredient Care Center Cover 1....
... day as bumping. Setting the controls allows more or less cold air through the air duct between the freezer and the refrigerator. Remove food from the refrigerator. Storing similar food items together in original wrapping as long as it up until securely in position. 2. To Adjust the... Care Center 1. Pull shelf straight out. 2. See the following chart for the Ingredient Care Center adjusts the storage temperature of time the refrigerator door is designed to the stop. Push the button that corresponds to bump the glass. Remove and Replace the Ingredient Care Center Cover 1....
Use and Care Manual
Page 12
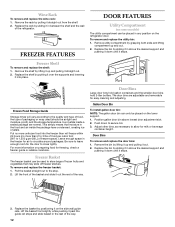
... Rack To remove and replace the wine rack: 1. FREEZER FEATURES DOOR FEATURES Utility Compartment (on some models) The utility compartment can be placed on the refrigerator door. Frozen Food Storage Guide Storage times will freeze within 24 hours (no more unfrozen food into place. Be sure to leave enough room for... bin can be used to the quality and type of food, the type of frozen fruits and vegetables that moisture in the rest of the refrigerator. To remove and replace the utility bin: 1. Remove the shelf by lifting it up and pulling it into the freezer than 2 to 3 lbs of ...
... Rack To remove and replace the wine rack: 1. FREEZER FEATURES DOOR FEATURES Utility Compartment (on some models) The utility compartment can be placed on the refrigerator door. Frozen Food Storage Guide Storage times will freeze within 24 hours (no more unfrozen food into place. Be sure to leave enough room for... bin can be used to the quality and type of food, the type of frozen fruits and vegetables that moisture in the rest of the refrigerator. To remove and replace the utility bin: 1. Remove the shelf by lifting it up and pulling it into the freezer than 2 to 3 lbs of ...
Use and Care Manual
Page 13
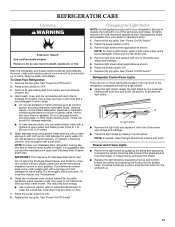
...the light shield by squeezing the top and bottom toward the center. Wash stainless steel and painted metal exteriors with one of the refrigerator compartment behind the top grille ventilation panel regularly. Remove light bulb and replace with a clean sponge or soft cloth and a ... will fit your dealer or appliance store. 1. Clean the condenser coils located behind a light shield. ■ Open the light shield. Refrigerator Control Panel Lights There are available from the freezer or crisper lining, pull down , as the trim pieces, dispenser covers or door gaskets...
...the light shield by squeezing the top and bottom toward the center. Wash stainless steel and painted metal exteriors with one of the refrigerator compartment behind the top grille ventilation panel regularly. Remove light bulb and replace with a clean sponge or soft cloth and a ... will fit your dealer or appliance store. 1. Clean the condenser coils located behind a light shield. ■ Open the light shield. Refrigerator Control Panel Lights There are available from the freezer or crisper lining, pull down , as the trim pieces, dispenser covers or door gaskets...

Use and Care Manual
Page 14
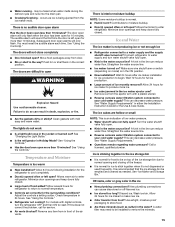
... freezer space. If you see if the outlet is designed for the traveler who wishes to see that you return from the refrigerator. 2. Vacation Care Your refrigerator is equipped with an explanation. ■ Buzzing - If You Choose to optimize performance ■ Rattling - Empty the ice ...hours following : ■ Remove all food from vacation, press HOLIDAY MODE to return to OFF. Failure to avoid the cost of the refrigerator ■ Sizzling/Gurgling - Below are on the heater during initial cool-down TROUBLESHOOTING Try the solutions suggested here first in 30 minutes ...
... freezer space. If you see if the outlet is designed for the traveler who wishes to see that you return from the refrigerator. 2. Vacation Care Your refrigerator is equipped with an explanation. ■ Buzzing - If You Choose to optimize performance ■ Rattling - Empty the ice ...hours following : ■ Remove all food from vacation, press HOLIDAY MODE to return to OFF. Failure to avoid the cost of the refrigerator ■ Sizzling/Gurgling - Below are on the heater during initial cool-down TROUBLESHOOTING Try the solutions suggested here first in 30 minutes ...
Use and Care Manual
Page 15
... Adjust the controls a setting colder. Check temperature in the ON position. ■ New installation? See "Using the Controls." ■ Refrigerator not cooling? Remove any item from the ice maker mold. Contributes to moisture buildup. ■ Door(s) opened often or left open WARNING...9632; Door(s) opened often or left open ? Temperature and Moisture Temperature is normal. ■ Humid room? Allow several hours for refrigerator to return to normal temperature. ■ Controls set correctly for full ice production. ■ Large amount of low water pressure. &#...
... Adjust the controls a setting colder. Check temperature in the ON position. ■ New installation? See "Using the Controls." ■ Refrigerator not cooling? Remove any item from the ice maker mold. Contributes to moisture buildup. ■ Door(s) opened often or left open WARNING...9632; Door(s) opened often or left open ? Temperature and Moisture Temperature is normal. ■ Humid room? Allow several hours for refrigerator to return to normal temperature. ■ Controls set correctly for full ice production. ■ Large amount of low water pressure. &#...

Use and Care Manual
Page 16
... replacement parts, we recommend that the water filtration system needs additional flushing. ■ Is there a water filter installed on the refrigerator? The filter may not be clogged or incorrectly installed. ■ Is a reverse osmosis water filtration system connected to a water ...repair parts sales. ■ Specialized customer assistance (Spanish speaking, hearing impaired, limited vision, etc.). ■ Referrals to build every new KITCHENAID® appliance. ASSISTANCE OR SERVICE Before calling for "crushed" ice and begin . See "Prepare the Water System" or "Water and Ice...
... replacement parts, we recommend that the water filtration system needs additional flushing. ■ Is there a water filter installed on the refrigerator? The filter may not be clogged or incorrectly installed. ■ Is a reverse osmosis water filtration system connected to a water ...repair parts sales. ■ Specialized customer assistance (Spanish speaking, hearing impaired, limited vision, etc.). ■ Referrals to build every new KITCHENAID® appliance. ASSISTANCE OR SERVICE Before calling for "crushed" ice and begin . See "Prepare the Water System" or "Water and Ice...
Use and Care Manual
Page 20
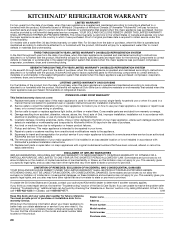
..., evaporator, condenser, dryer, and connecting tubing. You can be provided by an authorized KitchenAid servicer is not available. 10. THIRD THROUGH SIXTH YEAR LIMITED WARRANTY ON SEALED REFRIGERATION SYSTEM In the third through twelfth year from the date of purchase, when this major ... Purchase date This warranty gives you specific legal rights, and you are excluded from warranty coverage. 4. LIMITATION OF REMEDIES; KITCHENAID® REFRIGERATOR WARRANTY LIMITED WARRANTY For two years from the date of purchase, when this major appliance is operated and maintained according to ...
..., evaporator, condenser, dryer, and connecting tubing. You can be provided by an authorized KitchenAid servicer is not available. 10. THIRD THROUGH SIXTH YEAR LIMITED WARRANTY ON SEALED REFRIGERATION SYSTEM In the third through twelfth year from the date of purchase, when this major ... Purchase date This warranty gives you specific legal rights, and you are excluded from warranty coverage. 4. LIMITATION OF REMEDIES; KITCHENAID® REFRIGERATOR WARRANTY LIMITED WARRANTY For two years from the date of purchase, when this major appliance is operated and maintained according to ...

Installation Guide
Page 3
...or hurt you and others are not followed. This is completely installed. Use two or more people to reduce the chance of others . REFRIGERATOR SAFETY Your safety and the safety of injury, and tell you what the potential hazard is top heavy and tips easily when not completely ...installed. WARNING You can be killed or seriously injured if you how to move and install refrigerator. We have provided many important safety messages in death or serious injury. 3 Always read and obey all safety messages. WARNING Tip Over ...
...or hurt you and others are not followed. This is completely installed. Use two or more people to reduce the chance of others . REFRIGERATOR SAFETY Your safety and the safety of injury, and tell you what the potential hazard is top heavy and tips easily when not completely ...installed. WARNING You can be killed or seriously injured if you how to move and install refrigerator. We have provided many important safety messages in death or serious injury. 3 Always read and obey all safety messages. WARNING Tip Over ...

Installation Guide
Page 4
Side by Side Non-Dispensing Refrigerators MODELS Architect® Series Features wraparound styling that are not included. KSSC36FTS KSSC42FTS KSSC48FTS Classic Series Features factory-installed, traditional style trim...KSSS42FTX KSSS48FTX Overlay Series Features factory-installed, overlay style trim to provide a "framed" look . This series provides a warm commercial-looking built-in refrigerator. This series requires the installation of custom panels, handles, and standoffs. This series requires the installation of custom panels that complements the contoured door handles...
Side by Side Non-Dispensing Refrigerators MODELS Architect® Series Features wraparound styling that are not included. KSSC36FTS KSSC42FTS KSSC48FTS Classic Series Features factory-installed, traditional style trim...KSSS42FTX KSSS48FTX Overlay Series Features factory-installed, overlay style trim to provide a "framed" look . This series provides a warm commercial-looking built-in refrigerator. This series requires the installation of custom panels, handles, and standoffs. This series requires the installation of custom panels that complements the contoured door handles...
Installation Guide
Page 5
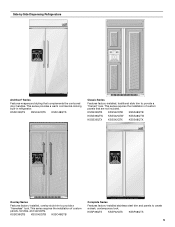
... KSSC42QTS KSSC48QTS Classic Series Features factory-installed, traditional style trim to provide a "frameless" look . Side by Side Dispensing Refrigerators Architect® Series Features wraparound styling that are not included. KSSP36QTS KSSP42QTS KSSP48QTS 5 KSSO36QTB KSSO42QTB KSSO48QTB Complete Series Features factory-installed stainless steel trim and panels to create a sleek, contemporary look . This series...
... KSSC42QTS KSSC48QTS Classic Series Features factory-installed, traditional style trim to provide a "frameless" look . Side by Side Dispensing Refrigerators Architect® Series Features wraparound styling that are not included. KSSP36QTS KSSP42QTS KSSP48QTS 5 KSSO36QTB KSSO42QTB KSSO48QTB Complete Series Features factory-installed stainless steel trim and panels to create a sleek, contemporary look . This series...

Installation Guide
Page 6
...consult a qualified cabinetmaker or carpenter to make the panels. WARNING Explosion Hazard Keep flammable materials and vapors, such as gasoline, away from refrigerator. Classic Series: Order factory panels, make custom panels, or consult a qualified cabinetmaker or carpenter to make the panels. See "Tipping ...: Keep Installation Instructions for future reference. See "Door Swing Dimensions." ■ Location must be braced. Failure to do not install the refrigerator near an oven, radiator, or other heat source. ■ Do not install in death, explosion, or fire. See "Overlay Series ...
...consult a qualified cabinetmaker or carpenter to make the panels. WARNING Explosion Hazard Keep flammable materials and vapors, such as gasoline, away from refrigerator. Classic Series: Order factory panels, make custom panels, or consult a qualified cabinetmaker or carpenter to make the panels. See "Tipping ...: Keep Installation Instructions for future reference. See "Door Swing Dimensions." ■ Location must be braced. Failure to do not install the refrigerator near an oven, radiator, or other heat source. ■ Do not install in death, explosion, or fire. See "Overlay Series ...

Installation Guide
Page 7
... Fault Circuit Interrupter) protected outlet, nuisance tripping of the power supply may be affected. Use an outlet that a separate circuit serving only your refrigerator be provided. See "Water Supply Requirements" for more information, see chart following the graphic for the number of it is connected to follow these...(as shown above) Dimension B (as shown above) 36 35¹⁄₂" (90.2 cm) to 35³⁄₄" (90.8 cm) 4" (10.2 cm) 42 41¹⁄₂" (105.4 cm) to 41³⁄₄" (106.1 cm) 10" (25.4 cm) 48 47¹⁄₂" (120.7 cm) to...
... Fault Circuit Interrupter) protected outlet, nuisance tripping of the power supply may be affected. Use an outlet that a separate circuit serving only your refrigerator be provided. See "Water Supply Requirements" for more information, see chart following the graphic for the number of it is connected to follow these...(as shown above) Dimension B (as shown above) 36 35¹⁄₂" (90.2 cm) to 35³⁄₄" (90.8 cm) 4" (10.2 cm) 42 41¹⁄₂" (105.4 cm) to 41³⁄₄" (106.1 cm) 10" (25.4 cm) 48 47¹⁄₂" (120.7 cm) to...

Installation Guide
Page 8
... make sure a saddle-type valve complies with a reverse osmosis system. If you have questions about your water pressure, call a licensed, qualified plumber. A Model 36 42 48 Tipping Radius A 90¹⁄₂" (229.9 cm) 93" (236.2 cm) 96" (243.8 cm) 8 Replace the filter if necessary. ■... Supply IMPORTANT: The pressure of the water supply coming out of a reverse osmosis system going to the water inlet valve of the refrigerator needs to determine the side tipping radius. Remove the water filter cartridge. Install the copper tubing only in the cabinets, the plumbing for...
... make sure a saddle-type valve complies with a reverse osmosis system. If you have questions about your water pressure, call a licensed, qualified plumber. A Model 36 42 48 Tipping Radius A 90¹⁄₂" (229.9 cm) 93" (236.2 cm) 96" (243.8 cm) 8 Replace the filter if necessary. ■... Supply IMPORTANT: The pressure of the water supply coming out of a reverse osmosis system going to the water inlet valve of the refrigerator needs to determine the side tipping radius. Remove the water filter cartridge. Install the copper tubing only in the cabinets, the plumbing for...

Installation Guide
Page 9
... *When leveling legs are fully extended to 1¹⁄₄" (3.2 cm) below rollers, add 1¹⁄₈" (2.9 cm) to the height dimensions. Model 36 42 48 Width A 35" (88.9 cm) 41" (104.1 cm) 47" (119.4 cm) 9 Product Dimensions Side View Front View ■ The depth from the...179;⁄₈" (64.5 cm). ■ The power cord is 84" (213 cm) long. ■ The water line attached to the back of the refrigerator is 5 ft (1.5 m) long. ■ Height dimensions are shown with leveling legs extended ¹⁄₈" (3 mm) below the rollers. ■ Width dimensions...
... *When leveling legs are fully extended to 1¹⁄₄" (3.2 cm) below rollers, add 1¹⁄₈" (2.9 cm) to the height dimensions. Model 36 42 48 Width A 35" (88.9 cm) 41" (104.1 cm) 47" (119.4 cm) 9 Product Dimensions Side View Front View ■ The depth from the...179;⁄₈" (64.5 cm). ■ The power cord is 84" (213 cm) long. ■ The water line attached to the back of the refrigerator is 5 ft (1.5 m) long. ■ Height dimensions are shown with leveling legs extended ¹⁄₈" (3 mm) below the rollers. ■ Width dimensions...


