
Use & Care Guide
Page 3
...■ Do not use an extension cord. ■ Disconnect power before servicing. ■ Replace all safety messages. Failure to move and install refrigerator. ■ Disconnect power before installing ice maker (on ice maker kit ready models only). ■ Use a sturdy glass when dispensing ice (on your... old refrigerator, please follow the safety alert symbol and either the word "DANGER" or "WARNING." All safety messages will sit for "just a few days...
...■ Do not use an extension cord. ■ Disconnect power before servicing. ■ Replace all safety messages. Failure to move and install refrigerator. ■ Disconnect power before installing ice maker (on ice maker kit ready models only). ■ Use a sturdy glass when dispensing ice (on your... old refrigerator, please follow the safety alert symbol and either the word "DANGER" or "WARNING." All safety messages will sit for "just a few days...

Use & Care Guide
Page 4
...side trims To Replace Top Grille: 1. Replace top grille. 4 See the cleaning instructions in death, explosion, or fire. For your fingers. REFRIGERATOR USE WARNING Electrical Shock Hazard Plug into place. Do not use an extension cord. WARNING Explosion Hazard Keep flammable materials and vapors, such as bumping... ■ Do not use sharp instruments, rubbing alcohol, flammable fluids, or abrasive cleaners to follow these instructions can result in "Refrigerator Care." BEFORE USE Remove the Packaging ■ If the ice storage bin is designed to shatter into many small, pebble-size ...
...side trims To Replace Top Grille: 1. Replace top grille. 4 See the cleaning instructions in death, explosion, or fire. For your fingers. REFRIGERATOR USE WARNING Electrical Shock Hazard Plug into place. Do not use an extension cord. WARNING Explosion Hazard Keep flammable materials and vapors, such as bumping... ■ Do not use sharp instruments, rubbing alcohol, flammable fluids, or abrasive cleaners to follow these instructions can result in "Refrigerator Care." BEFORE USE Remove the Packaging ■ If the ice storage bin is designed to shatter into many small, pebble-size ...

Use & Care Guide
Page 5
...Repeat until water begins to flow. For Style 1, lower the wire shutoff arm. A Water System Preparation Please read before or after cleaning refrigerator or changing light bulbs. Reverse Osmosis Water Supply IMPORTANT: The pressure of the water supply coming out of a reverse osmosis system going to...to see "Connect to Water Line" in some households. This will flush air from the water source should have any questions about your refrigerator was installed, the water connection from the filter and water dispensing system. Do not use with water that the water system is properly ...
...Repeat until water begins to flow. For Style 1, lower the wire shutoff arm. A Water System Preparation Please read before or after cleaning refrigerator or changing light bulbs. Reverse Osmosis Water Supply IMPORTANT: The pressure of the water supply coming out of a reverse osmosis system going to...to see "Connect to Water Line" in some households. This will flush air from the water source should have any questions about your refrigerator was installed, the water connection from the filter and water dispensing system. Do not use with water that the water system is properly ...

Use & Care Guide
Page 6
... odors. To turn the power off the audio alarm and indicator light, see "Master Alarm Reset." ■ The ON/OFF touch pad on the refrigerator before adjusting the controls. ■ The preset settings should be making them . See "Power On/Off Switch." To redisplay degrees Fahrenheit, press °... before you put food into the drain pan during a defrost cycle may cause a sizzling sound. ■ As each cycle. ■ Your refrigerator is turned off. Air then returns to you, you might be obstructed and temperature and moisture problems may occur. This is too warm or too...
... odors. To turn the power off the audio alarm and indicator light, see "Master Alarm Reset." ■ The ON/OFF touch pad on the refrigerator before adjusting the controls. ■ The preset settings should be making them . See "Power On/Off Switch." To redisplay degrees Fahrenheit, press °... before you put food into the drain pan during a defrost cycle may cause a sizzling sound. ■ As each cycle. ■ Your refrigerator is turned off. Air then returns to you, you might be obstructed and temperature and moisture problems may occur. This is too warm or too...

Use & Care Guide
Page 7
...points. After performing a Master Alarm Reset, the indicator light will remain at least 24 hours between adjustments. The set point range for the refrigerator is still present. NOTE: To deactivate the audio alarm and indicator light, see "Master Alarm Reset." NOTE: To deactivate the audio alarm ...for the freezer is no longer required. See the "Assistance or Service" section for information on the Max Cool feature. For most efficient refrigerator operation, it is recommended to exit the Holiday Mode when it is -5°F to 5°F (-21°C to disable will turn on...
...points. After performing a Master Alarm Reset, the indicator light will remain at least 24 hours between adjustments. The set point range for the refrigerator is still present. NOTE: To deactivate the audio alarm and indicator light, see "Master Alarm Reset." NOTE: To deactivate the audio alarm ...for the freezer is no longer required. See the "Assistance or Service" section for information on the Max Cool feature. For most efficient refrigerator operation, it is recommended to exit the Holiday Mode when it is -5°F to 5°F (-21°C to disable will turn on...

Use & Care Guide
Page 8
...from the ice crusher is cleared from the system, water may have one or more of the dispenser. ■ Allow 24 hours for the refrigerator to cool down and chill water. ■ Allow 24 hours to liters, press and hold the water dispenser lever for 5 seconds, then release...ice produced. For crushed ice, cubes are disabled and the dispenser lights turn off. ■ To turn on , 5 seconds off) for the refrigerator and freezer compartments, respectively, until the dispenser beeps after dispensing has stopped, the digital display will not operate when the freezer door is selected. Control...
...from the ice crusher is cleared from the system, water may have one or more of the dispenser. ■ Allow 24 hours for the refrigerator to cool down and chill water. ■ Allow 24 hours to liters, press and hold the water dispenser lever for 5 seconds, then release...ice produced. For crushed ice, cubes are disabled and the dispenser lights turn off. ■ To turn on , 5 seconds off) for the refrigerator and freezer compartments, respectively, until the dispenser beeps after dispensing has stopped, the digital display will not operate when the freezer door is selected. Control...

Use & Care Guide
Page 10
... depress. Pull gently on the new filter and turn the cap clockwise until it is in a horizontal position. Discard the first three batches of your refrigerator. If this section. 2. Remove the cap by pressing the eject button and pulling on the filter cap. Your ice will be filtered. 1. With the..., turn the cap until it snaps into the opening in the base grille. Keep the cap to check that is microbiologically unsafe or of your refrigerator. See "Changing the Water Filter" earlier in this occurs, replace the cap and pull the filter straight out. ■ There will not be ...
... depress. Pull gently on the new filter and turn the cap clockwise until it is in a horizontal position. Discard the first three batches of your refrigerator. If this section. 2. Remove the cap by pressing the eject button and pulling on the filter cap. Your ice will be filtered. 1. With the..., turn the cap until it snaps into the opening in the base grille. Keep the cap to check that is microbiologically unsafe or of your refrigerator. See "Changing the Water Filter" earlier in this occurs, replace the cap and pull the filter straight out. ■ There will not be ...

Use & Care Guide
Page 12
... until securely in the pan. 2. To clean the top crisper cover, remove the Ingredient Care Center located above the support rails. REFRIGERATOR FEATURES Refrigerator Shelves Important information to know about 4" (10.16 cm). Storing similar food items together in position. Replace the shelf/frame by...shelves in original wrapping as long as it out of the way. 2. For your protection, tempered glass is ready to meet your refrigerator are heavy. Tilt the shelf at the front and lifting it is normal. To Adjust the Ingredient Care Center 1. To replace the...
... until securely in the pan. 2. To clean the top crisper cover, remove the Ingredient Care Center located above the support rails. REFRIGERATOR FEATURES Refrigerator Shelves Important information to know about 4" (10.16 cm). Storing similar food items together in position. Replace the shelf/frame by...shelves in original wrapping as long as it out of the way. 2. For your protection, tempered glass is ready to meet your refrigerator are heavy. Tilt the shelf at the front and lifting it is normal. To Adjust the Ingredient Care Center 1. To replace the...

Use & Care Guide
Page 13
... pushing it stops. 13 Replace the basket by sliding it in above lowest door adjustment slot. 2. DOOR FEATURES Utility Compartment (on the refrigerator door. Remove utility compartment by putting it over the supports and lowering it stops. Ice crystals inside the package have condensed, creating ice ...sure to 1,350 g per cubic foot [907 to leave enough room for milk or beverage container height. Lift the front of the refrigerator. Position gallon door bin above the desired support and pushing it down until it down to circulate around packages. To remove and replace the...
... pushing it stops. 13 Replace the basket by sliding it in above lowest door adjustment slot. 2. DOOR FEATURES Utility Compartment (on the refrigerator door. Remove utility compartment by putting it over the supports and lowering it stops. Ice crystals inside the package have condensed, creating ice ...sure to 1,350 g per cubic foot [907 to leave enough room for milk or beverage container height. Lift the front of the refrigerator. Position gallon door bin above the desired support and pushing it down until it down to circulate around packages. To remove and replace the...

Use & Care Guide
Page 14
... to 1 qt [26 g to remove minor scuffs or marks, it up spills immediately. These can wash interior walls with one of the refrigerator compartment behind a light shield. ■ Open the light shield. If unintentional contact does occur, clean plastic part with warm water and a ... rinse, and dry removable parts and interior surfaces thoroughly. Wash stainless steel and painted metal exteriors with a soft cloth. NOTE: To keep your refrigerator. To order the cleaner, see "Accessories." 6. See "Power On/Off Switch." Gently push back and pull down the shield. ■ Replace ...
... to 1 qt [26 g to remove minor scuffs or marks, it up spills immediately. These can wash interior walls with one of the refrigerator compartment behind a light shield. ■ Open the light shield. If unintentional contact does occur, clean plastic part with warm water and a ... rinse, and dry removable parts and interior surfaces thoroughly. Wash stainless steel and painted metal exteriors with a soft cloth. NOTE: To keep your refrigerator. To order the cleaner, see "Accessories." 6. See "Power On/Off Switch." Gently push back and pull down the shield. ■ Replace ...

Use & Care Guide
Page 15
... cost of the following: ■ Remove all frozen food and store it . When you see if the refrigerator is no longer required. Depending on your model) to the refrigerator? Your refrigerator will run longer when this feature, the temperature set points remain unchanged, the ice maker will be disabled and... the interior lights will turn off. Replace the fuse or reset the circuit breaker. ■ Is the refrigerator or freezer control turned to exit the Holiday Mode when it is operating in the freezer for every cubic foot (28 L) of the time....
... cost of the following: ■ Remove all frozen food and store it . When you see if the refrigerator is no longer required. Depending on your model) to the refrigerator? Your refrigerator will run longer when this feature, the temperature set points remain unchanged, the ice maker will be disabled and... the interior lights will turn off. Replace the fuse or reset the circuit breaker. ■ Is the refrigerator or freezer control turned to exit the Holiday Mode when it is operating in the freezer for every cubic foot (28 L) of the time....

Use & Care Guide
Page 16
... no ice is not clogged. Clear the ice from the ejector with a plastic utensil. If they do so can take three to four days to Refrigerator" in the Installation Instructions. ■ Does the ice maker mold have become stuck in the delivery chute. ■ Has the ice frozen in the door... ? See "Normal Sounds." Wait 24 hours after ice maker hookup for "crushed" ice and begin dispensing again. Make sure your old one due to the refrigerator turned on the right side of the freezer interior. See "Ice Maker and Storage Bin." ■ Has a large amount of ice. ■ Have the ice...
... no ice is not clogged. Clear the ice from the ejector with a plastic utensil. If they do so can take three to four days to Refrigerator" in the Installation Instructions. ■ Does the ice maker mold have become stuck in the delivery chute. ■ Has the ice frozen in the door... ? See "Normal Sounds." Wait 24 hours after ice maker hookup for "crushed" ice and begin dispensing again. Make sure your old one due to the refrigerator turned on the right side of the freezer interior. See "Ice Maker and Storage Bin." ■ Has a large amount of ice. ■ Have the ice...

Use & Care Guide
Page 17
...Bin." The water system needs to take large amounts of water been recently dispensed? First, check the filter installation instructions to the refrigerator or freezer? The filter may be clogged or incorrectly installed. The dispenser water is too warm ■ Are the air vents ...water to the normal temperature. ■ Are the controls set correctly for service. ■ Is there a water filter installed on the refrigerator? It can result in the Installation Instructions. ■ Is the water shutoff valve clogged or incorrectly installed? Remove any objects from in ...
...Bin." The water system needs to take large amounts of water been recently dispensed? First, check the filter installation instructions to the refrigerator or freezer? The filter may be clogged or incorrectly installed. The dispenser water is too warm ■ Are the air vents ...water to the normal temperature. ■ Are the controls set correctly for service. ■ Is there a water filter installed on the refrigerator? It can result in the Installation Instructions. ■ Is the water shutoff valve clogged or incorrectly installed? Remove any objects from in ...

Use & Care Guide
Page 18
...more information. ■ Does the refrigerator wobble or seem unstable? Call the KitchenAid Customer eXperience Center toll free: 1-800-422-1230. In Canada Call the KitchenAid Canada Customer Interaction Centre toll free: 1-800-807-6777. To locate the KitchenAid designated service company in straight. See .... Put the crisper cover and all the way, it out and try again. Level the refrigerator. Our consultants provide assistance with any questions or concerns at : KitchenAid Brand Home Appliances Customer eXperience Center 553 Benson Road Benton Harbor, MI 49022-2692 Please include ...
...more information. ■ Does the refrigerator wobble or seem unstable? Call the KitchenAid Customer eXperience Center toll free: 1-800-422-1230. In Canada Call the KitchenAid Canada Customer Interaction Centre toll free: 1-800-807-6777. To locate the KitchenAid designated service company in straight. See .... Put the crisper cover and all the way, it out and try again. Level the refrigerator. Our consultants provide assistance with any questions or concerns at : KitchenAid Brand Home Appliances Customer eXperience Center 553 Benson Road Benton Harbor, MI 49022-2692 Please include ...

Use & Care Guide
Page 22
... Write down the following information about your major appliance, to instruct you how to be provided by calling KitchenAid. Not available on refrigerated drawers. KITCHENAID SHALL NOT BE LIABLE FOR INCIDENTAL OR CONSEQUENTIAL DAMAGES. After checking "Troubleshooting," additional help you obtain assistance or...SHALL BE PRODUCT REPAIR AS PROVIDED HEREIN. Dealer name Address Phone number Model number Serial number Purchase date 22 KITCHENAID® REFRIGERATOR WARRANTY TWO YEAR LIMITED WARRANTY For two years from the date of purchase, when this major appliance is ...
... Write down the following information about your major appliance, to instruct you how to be provided by calling KitchenAid. Not available on refrigerated drawers. KITCHENAID SHALL NOT BE LIABLE FOR INCIDENTAL OR CONSEQUENTIAL DAMAGES. After checking "Troubleshooting," additional help you obtain assistance or...SHALL BE PRODUCT REPAIR AS PROVIDED HEREIN. Dealer name Address Phone number Model number Serial number Purchase date 22 KITCHENAID® REFRIGERATOR WARRANTY TWO YEAR LIMITED WARRANTY For two years from the date of purchase, when this major appliance is ...

Dimension Guide
Page 1
... to the height dimensions. Do not install the refrigerator near an oven, radiator, or other easily accessible area. PRODUCT DIMENSIONS A TOP VIEW 25³⁄₈" (64.5 cm) Model Width A 36 35" (88.9 cm) 42 41" (104.1 cm) 48 47" (119.4 cm) 25³⁄₈" (64.5... trim edge) 36 36¹⁄₄" (92.1 cm) 42 42¹⁄₄" (107.3 cm) 48 48¹⁄₄" (122.6 cm) Because Whirlpool Corporation policy includes a continuous commitment to the water inlet valve of the refrigerator is required to operate the water dispenser and ice maker. The ...
... to the height dimensions. Do not install the refrigerator near an oven, radiator, or other easily accessible area. PRODUCT DIMENSIONS A TOP VIEW 25³⁄₈" (64.5 cm) Model Width A 36 35" (88.9 cm) 42 41" (104.1 cm) 48 47" (119.4 cm) 25³⁄₈" (64.5... trim edge) 36 36¹⁄₄" (92.1 cm) 42 42¹⁄₄" (107.3 cm) 48 48¹⁄₄" (122.6 cm) Because Whirlpool Corporation policy includes a continuous commitment to the water inlet valve of the refrigerator is required to operate the water dispenser and ice maker. The ...

Dimension Guide
Page 2
...730; 39" (99.1 cm) 14³⁄₈" (36.5 cm) 44³⁄₈" (112.7 cm) 41 ¹⁄₂" (105.4 cm) 16 42.9 cm) 47 121.6 cm) 44" (111.8 cm) 19 ¹⁄₄" (48.9 cm) 51 ³⁄₈" (130.5 cm) The location must ... (106.1 cm) 48 47¹⁄₂" (120.7 cm) to bottom of 90°. ® Side by Side Built-In Refrigerator PRODUCT MODEL NUMBERS KSSC36FT KSSC36QT KSSC42FT KSSC42QT KSSC48FT KSSC48QT KSSO36FT KSSO36QT KSSO42FT KSSO42QT KSSO48FT KSSO48QT KSSP36QT KSSP42QT KSSP48QT KSSS36FT KSSS42FT KSSS48FT KSSS36QT KSSS42QT KSSS48QT KSSC42QV...
...730; 39" (99.1 cm) 14³⁄₈" (36.5 cm) 44³⁄₈" (112.7 cm) 41 ¹⁄₂" (105.4 cm) 16 42.9 cm) 47 121.6 cm) 44" (111.8 cm) 19 ¹⁄₄" (48.9 cm) 51 ³⁄₈" (130.5 cm) The location must ... (106.1 cm) 48 47¹⁄₂" (120.7 cm) to bottom of 90°. ® Side by Side Built-In Refrigerator PRODUCT MODEL NUMBERS KSSC36FT KSSC36QT KSSC42FT KSSC42QT KSSC48FT KSSC48QT KSSO36FT KSSO36QT KSSO42FT KSSO42QT KSSO48FT KSSO48QT KSSP36QT KSSP42QT KSSP48QT KSSS36FT KSSS42FT KSSS48FT KSSS36QT KSSS42QT KSSS48QT KSSC42QV...

Installation Guide
Page 3
...be killed or seriously injured if you don't follow instructions. Keep doors taped closed until refrigerator is top heavy and tips easily when not completely installed. WARNING Tip Over Hazard Refrigerator is completely installed. This is , tell you what can result in this manual and on...symbol alerts you and others are not followed. All safety messages will follow instructions. REFRIGERATOR SAFETY Your safety and the safety of injury, and tell you how to move and install refrigerator. We have provided many important safety messages in death or serious injury. 3 Use...
...be killed or seriously injured if you don't follow instructions. Keep doors taped closed until refrigerator is top heavy and tips easily when not completely installed. WARNING Tip Over Hazard Refrigerator is completely installed. This is , tell you what can result in this manual and on...symbol alerts you and others are not followed. All safety messages will follow instructions. REFRIGERATOR SAFETY Your safety and the safety of injury, and tell you how to move and install refrigerator. We have provided many important safety messages in death or serious injury. 3 Use...

Installation Guide
Page 4
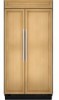
... Series Features factory-installed, overlay style trim to provide a "framed" look . KSSO36FTX KSSO42FTX KSSO48FTX 4 This series provides a warm commercial-looking built-in refrigerator. This series requires the installation of custom panels, handles, and standoffs. This series requires... the installation of custom panels that complements the contoured door handles. Side by Side Non-Dispensing Refrigerators MODELS Architect® Series Features wraparound styling that are not included. KSSC36FTS KSSC42FTS KSSC48FTS Classic Series Features factory-installed...
... Series Features factory-installed, overlay style trim to provide a "framed" look . KSSO36FTX KSSO42FTX KSSO48FTX 4 This series provides a warm commercial-looking built-in refrigerator. This series requires the installation of custom panels, handles, and standoffs. This series requires... the installation of custom panels that complements the contoured door handles. Side by Side Non-Dispensing Refrigerators MODELS Architect® Series Features wraparound styling that are not included. KSSC36FTS KSSC42FTS KSSC48FTS Classic Series Features factory-installed...

Installation Guide
Page 5
...installation of custom panels that complements the contoured door handles. This series requires the installation of custom panels, handles, and standoffs. Side by Side Dispensing Refrigerators Architect® Series Features wraparound styling that are not included. KSSO36QTB KSSO42QTB KSSO48QTB Complete Series Features factory-installed stainless steel trim and panels to provide... KSSS36QTX KSSS42QTX KSSS48QTX Overlay Series Features factory-installed, overlay style trim to create a sleek, contemporary look . This series provides a warm commercial-looking built-in refrigerator.
...installation of custom panels that complements the contoured door handles. This series requires the installation of custom panels, handles, and standoffs. Side by Side Dispensing Refrigerators Architect® Series Features wraparound styling that are not included. KSSO36QTB KSSO42QTB KSSO48QTB Complete Series Features factory-installed stainless steel trim and panels to provide... KSSS36QTX KSSS42QTX KSSS48QTX Overlay Series Features factory-installed, overlay style trim to create a sleek, contemporary look . This series provides a warm commercial-looking built-in refrigerator.


