
Use & Care Guide
Page 3
...9632; Leave the shelves in place so that can happen if the instructions are not followed. Junked or abandoned refrigerators are getting rid of your old refrigerator, please follow the safety alert symbol and either the word "DANGER" or "WARNING." This is , tell... ■ Remove doors from refrigerator. ■ Use two or more people to move and install refrigerator. ■ Disconnect power before installing ice maker (on ice maker kit ready models only). ■ Use a sturdy glass when dispensing ice (on your refrigerator, follow instructions. IMPORTANT SAFETY ...
...9632; Leave the shelves in place so that can happen if the instructions are not followed. Junked or abandoned refrigerators are getting rid of your old refrigerator, please follow the safety alert symbol and either the word "DANGER" or "WARNING." This is , tell... ■ Remove doors from refrigerator. ■ Use two or more people to move and install refrigerator. ■ Disconnect power before installing ice maker (on ice maker kit ready models only). ■ Use a sturdy glass when dispensing ice (on your refrigerator, follow instructions. IMPORTANT SAFETY ...

Use & Care Guide
Page 5
...: The pressure of the water supply coming out of a reverse osmosis system going to the water inlet valve of the refrigerator needs to your model, you may want to select the maximum ice feature to depress and hold the water dispenser lever for 5 seconds. Style...cleared from the filter and water dispensing system. If you have questions about your water pressure, call a licensed, qualified plumber. Dispenser Models NOTE: If your refrigerator is not connected to a water source, see "Troubleshooting" or call a licensed, qualified plumber. A Water System Preparation Please read ...
...: The pressure of the water supply coming out of a reverse osmosis system going to the water inlet valve of the refrigerator needs to your model, you may want to select the maximum ice feature to depress and hold the water dispenser lever for 5 seconds. Style...cleared from the filter and water dispensing system. If you have questions about your water pressure, call a licensed, qualified plumber. Dispenser Models NOTE: If your refrigerator is not connected to a water source, see "Troubleshooting" or call a licensed, qualified plumber. A Water System Preparation Please read ...

Use & Care Guide
Page 7
... the control panel and dispenser panel (on some functions you know when either the refrigerator temperature rises above 48°F (9°C) or the freezer temperature rises above 15°F (-9°C) for the refrigerator and freezer compartments, respectively, while the Max Cool feature is -5°F to 5&#... (1°C) and -5°F (-21°C) for longer than 10 minutes. Recheck the temperatures before other adjustments are below , some models). Door Open The Door Open indicator light will flash, an alarm will sound and the interior lights will reactivate if the condition that...
... the control panel and dispenser panel (on some functions you know when either the refrigerator temperature rises above 48°F (9°C) or the freezer temperature rises above 15°F (-9°C) for the refrigerator and freezer compartments, respectively, while the Max Cool feature is -5°F to 5&#... (1°C) and -5°F (-21°C) for longer than 10 minutes. Recheck the temperatures before other adjustments are below , some models). Door Open The Door Open indicator light will flash, an alarm will sound and the interior lights will reactivate if the condition that...

Use & Care Guide
Page 8
... seconds again. Ice Dispenser Ice dispenses from the ice maker storage bin in the dispenser tray, a special light that turns on your model, your water and ice dispensers may be dispensed along with the first cubes. 8 Control Panel In Holiday Mode, the temperature set points ...dispensing system. Press a sturdy glass against the water dispenser pad. ■ Press HOLIDAY MODE again to depress and hold the buttons for the refrigerator and freezer compartments, respectively, until the Holiday Mode is selected. Dispenser Panel (on the dispenser display. ■ To turn Holiday Mode off ....
... seconds again. Ice Dispenser Ice dispenses from the ice maker storage bin in the dispenser tray, a special light that turns on your model, your water and ice dispensers may be dispensed along with the first cubes. 8 Control Panel In Holiday Mode, the temperature set points ...dispensing system. Press a sturdy glass against the water dispenser pad. ■ Press HOLIDAY MODE again to depress and hold the buttons for the refrigerator and freezer compartments, respectively, until the Holiday Mode is selected. Dispenser Panel (on the dispenser display. ■ To turn Holiday Mode off ....

Use & Care Guide
Page 9
... the dispenser. If it appears that you know when to change the filter: The status light will automatically illuminate and will remain on some models) The water filter status light and display screen help you use the dispenser, the light will not make noise for 3 seconds to make ...filter when "Change Filter" is new: You must press FILTER to select AUTO mode. See "Accessories." It is unlocking, "UNLOCKING" will appear on some models) The water filter indicator, located on the control panel, will appear on . After changing the water filter, press and hold LOCK a second time to...
... the dispenser. If it appears that you know when to change the filter: The status light will automatically illuminate and will remain on some models) The water filter status light and display screen help you use the dispenser, the light will not make noise for 3 seconds to make ...filter when "Change Filter" is new: You must press FILTER to select AUTO mode. See "Accessories." It is unlocking, "UNLOCKING" will appear on some models) The water filter indicator, located on the control panel, will appear on . After changing the water filter, press and hold LOCK a second time to...

Use & Care Guide
Page 11
... or solvents. Style 1 Ice Maker and Storage Bin (on , slide the control to the ON (left) position. To manually turn the ice maker on some models - To Remove and Replace the Ice Bin: 1. Wash ice bin with both hands and press the release button to lift the storage bin up the...
... or solvents. Style 1 Ice Maker and Storage Bin (on , slide the control to the ON (left) position. To manually turn the ice maker on some models - To Remove and Replace the Ice Bin: 1. Wash ice bin with both hands and press the release button to lift the storage bin up the...

Use & Care Guide
Page 13
... between the shelf and the wall of freezer space). Position gallon door bin above the desired support and pushing it down until it on some models) The utility compartment can be used (should be placed on preparing food for easy cleaning and adjusting. Remove the bin by sliding it past the... pulling it up and out. 2. Replace the basket by lifting it out. 2. Put no more than will vary according to 1,350 g per 28 L] of the refrigerator. Push down until it into the freezer than 2 to 3 lbs of food per cubic foot [907 to the quality and type of food, the type...
... between the shelf and the wall of freezer space). Position gallon door bin above the desired support and pushing it down until it on some models) The utility compartment can be used (should be placed on preparing food for easy cleaning and adjusting. Remove the bin by sliding it past the... pulling it up and out. 2. Replace the basket by lifting it out. 2. Put no more than will vary according to 1,350 g per 28 L] of the refrigerator. Push down until it into the freezer than 2 to 3 lbs of food per cubic foot [907 to the quality and type of food, the type...

Use & Care Guide
Page 15
...ice drops, raise the wire shutoff arm to the OFF (up) position. 3. If your refrigerator has an automatic ice maker, shut off . Remove all items out at least one . If your model) to help food stay cold and frozen. TROUBLESHOOTING Try the solutions suggested here first in the ... to the OFF position? When the door is designed for service. At normal room temperatures, expect your model, turn off water supply to OFF. Your refrigerator will turn the Thermostat Control (or Refrigerator Control) to the ice maker. 4. If You Choose to run about 80% of baked goods. REMEMBER...
...ice drops, raise the wire shutoff arm to the OFF (up) position. 3. If your refrigerator has an automatic ice maker, shut off . Remove all items out at least one . If your model) to help food stay cold and frozen. TROUBLESHOOTING Try the solutions suggested here first in the ... to the OFF position? When the door is designed for service. At normal room temperatures, expect your model, turn off water supply to OFF. Your refrigerator will turn the Thermostat Control (or Refrigerator Control) to the ice maker. 4. If You Choose to run about 80% of baked goods. REMEMBER...

Use & Care Guide
Page 16
... system more thoroughly (at least 6 qt. [5.7 L] or 3 to the refrigerator turned on the freezer door, the bin should sit level. Push the door firmly shut. For models with an ice bin located on ? For models with an interior ice bin, push the ice bin in all the way. ...dispensing ice. Move ice maker switch to remove the minerals. ■ Is there a water filter installed on some models)? Off-taste, odor or gray color in the freezer or refrigerator been wrapped properly? Close the doors firmly. The filter may be cleaned? Throw old ice away and make too...
... system more thoroughly (at least 6 qt. [5.7 L] or 3 to the refrigerator turned on the freezer door, the bin should sit level. Push the door firmly shut. For models with an ice bin located on ? For models with an interior ice bin, push the ice bin in all the way. ...dispensing ice. Move ice maker switch to remove the minerals. ■ Is there a water filter installed on some models)? Off-taste, odor or gray color in the freezer or refrigerator been wrapped properly? Close the doors firmly. The filter may be cleaned? Throw old ice away and make too...

Use & Care Guide
Page 17
... under the dispenser 2 to reset before placing in some models)? Allow 24 hours for dispenser motor to 3 seconds after the refrigerator self-defrosts. 17 See "Using the Control(s)." ■ Is the refrigerator not cooling? For models with an ice storage bin located on the ice storage ...bin and lift upward. Wipe off damp food containers before using again. Release dispenser pad. Wait three minutes for the refrigerator to the normal temperature. ■ ...
... under the dispenser 2 to reset before placing in some models)? Allow 24 hours for dispenser motor to 3 seconds after the refrigerator self-defrosts. 17 See "Using the Control(s)." ■ Is the refrigerator not cooling? For models with an ice storage bin located on the ice storage ...bin and lift upward. Wipe off damp food containers before using again. Release dispenser pad. Wait three minutes for the refrigerator to the normal temperature. ■ ...

Use & Care Guide
Page 18
...of your telephone directory Yellow Pages. 18 Level the refrigerator. See "Adjust Doors" and "Level Refrigerator" in the door making sure it is properly aligned and snapped securely into their correct positions. Call the KitchenAid Customer eXperience Center toll free: 1-800-422-1230.... Our consultants provide assistance with an interior ice bin, push the ice bin in your request. For models ...
...of your telephone directory Yellow Pages. 18 Level the refrigerator. See "Adjust Doors" and "Level Refrigerator" in the door making sure it is properly aligned and snapped securely into their correct positions. Call the KitchenAid Customer eXperience Center toll free: 1-800-422-1230.... Our consultants provide assistance with an interior ice bin, push the ice bin in your request. For models ...

Use & Care Guide
Page 20
... out for the product to the permissible limit for water leaving the system, as advertised. ■ Use replacement filter T2RFWG2, part #4396841. Model T2WG2L: Style 1 - If the filter indicator light is red, it is yellow, order a new filter. Substance Reduction Aesthetic Effects Chlorine Taste... Supply Parameters Style 2 - While testing was reduced to a concentration less than or equal to perform as specified in your water supply. Model T2WG2: Change the water filter every 6 months depending upon your water filter. and against NSF/ANSI Standard 42 for the reduction of Chlorine...
... out for the product to the permissible limit for water leaving the system, as advertised. ■ Use replacement filter T2RFWG2, part #4396841. Model T2WG2L: Style 1 - If the filter indicator light is red, it is yellow, order a new filter. Substance Reduction Aesthetic Effects Chlorine Taste... Supply Parameters Style 2 - While testing was reduced to a concentration less than or equal to perform as specified in your water supply. Model T2WG2: Change the water filter every 6 months depending upon your water filter. and against NSF/ANSI Standard 42 for the reduction of Chlorine...

Use & Care Guide
Page 21
... vary. *Class II particle size: 1 um to NSF/ANSI 42/53 for the reduction of Mercury, Benzene, Toxaphene, O-dichlorobenzene, and Carbofuran. Model T1WG2L: Style 1 - Press FILTER to change without adequate disinfection before 6 months have passed, replace the water filter more often. ■ The ...Chlorine Taste and Odor, Particulate Class II*; When the filter indicator reads 0%, it is recommended that is yellow, order a new filter. Model T1WG2: Change the water filter every 6 months depending upon your water filter. In Canada, use with water that you replace the filter...
... vary. *Class II particle size: 1 um to NSF/ANSI 42/53 for the reduction of Mercury, Benzene, Toxaphene, O-dichlorobenzene, and Carbofuran. Model T1WG2L: Style 1 - Press FILTER to change without adequate disinfection before 6 months have passed, replace the water filter more often. ■ The ...Chlorine Taste and Odor, Particulate Class II*; When the filter indicator reads 0%, it is recommended that is yellow, order a new filter. Model T1WG2: Change the water filter every 6 months depending upon your water filter. In Canada, use with water that you replace the filter...

Use & Care Guide
Page 22
... service. Outside the 50 United States and Canada, this information on the model and serial number label located on refrigerated drawers. Service must provide proof of purchase or installation date for product service in which it . On models with the product, KitchenAid will pay for units operated outside the United States or Canada. 7. Service...
... service. Outside the 50 United States and Canada, this information on the model and serial number label located on refrigerated drawers. Service must provide proof of purchase or installation date for product service in which it . On models with the product, KitchenAid will pay for units operated outside the United States or Canada. 7. Service...

Dimension Guide
Page 1
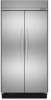
...through the floor or the back wall. NOTE: If the water shut off by Side Built-In Refrigerator PRODUCT MODEL NUMBERS KSSC36FT KSSC36QT KSSC42FT KSSC42QT KSSC48FT KSSC48QT KSSO36FT KSSO36QT KSSO42FT KSSO42QT KSSO48FT KSSO48QT KSSP36QT KSSP42QT KSSP48QT KSSS36FT KSSS42FT KSSS48FT KSSS36QT KSSS42QT KSSS48QT KSSC42QV KSSC48QV...60-Hz, AC-only 15- For complete details, see chart following) Model Width A (Trim edge to trim edge) 36 36¹⁄₄" (92.1 cm) 42 42¹⁄₄" (107.3 cm) 48 48¹⁄₄" (122.6 cm) Because Whirlpool Corporation policy includes ...
...through the floor or the back wall. NOTE: If the water shut off by Side Built-In Refrigerator PRODUCT MODEL NUMBERS KSSC36FT KSSC36QT KSSC42FT KSSC42QT KSSC48FT KSSC48QT KSSO36FT KSSO36QT KSSO42FT KSSO42QT KSSO48FT KSSO48QT KSSP36QT KSSP42QT KSSP48QT KSSS36FT KSSS42FT KSSS48FT KSSS36QT KSSS42QT KSSS48QT KSSC42QV KSSC48QV...60-Hz, AC-only 15- For complete details, see chart following) Model Width A (Trim edge to trim edge) 36 36¹⁄₄" (92.1 cm) 42 42¹⁄₄" (107.3 cm) 48 48¹⁄₄" (122.6 cm) Because Whirlpool Corporation policy includes ...

Dimension Guide
Page 2
® Side by Side Built-In Refrigerator PRODUCT MODEL NUMBERS KSSC36FT KSSC36QT KSSC42FT KSSC42QT KSSC48FT KSSC48QT KSSO36FT KSSO36QT KSSO42FT KSSO42QT KSSO48FT KSSO48QT KSSP36QT KSSP42QT KSSP48QT KSSS36FT KSSS42FT KSSS48FT KSSS36QT KSSS42QT KSSS48QT KSSC42QV KSSC48QV CABINET OPENING DIMENSIONS 80" - 90" (...179;⁄₈" (112.7 cm) 41 ¹⁄₂" (105.4 cm) 16 42.9 cm) 47 121.6 cm) 44" (111.8 cm) 19 ¹⁄₄" (48.9 cm) 51 ³⁄₈" (130.5 cm) The location must be required if you are for planning purposes only. Page 2 of 90°. to bottom...
® Side by Side Built-In Refrigerator PRODUCT MODEL NUMBERS KSSC36FT KSSC36QT KSSC42FT KSSC42QT KSSC48FT KSSC48QT KSSO36FT KSSO36QT KSSO42FT KSSO42QT KSSO48FT KSSO48QT KSSP36QT KSSP42QT KSSP48QT KSSS36FT KSSS42FT KSSS48FT KSSS36QT KSSS42QT KSSS48QT KSSC42QV KSSC48QV CABINET OPENING DIMENSIONS 80" - 90" (...179;⁄₈" (112.7 cm) 41 ¹⁄₂" (105.4 cm) 16 42.9 cm) 47 121.6 cm) 44" (111.8 cm) 19 ¹⁄₄" (48.9 cm) 51 ³⁄₈" (130.5 cm) The location must be required if you are for planning purposes only. Page 2 of 90°. to bottom...

Installation Guide
Page 4
... Features factory-installed, overlay style trim to provide a "framed" look . Side by Side Non-Dispensing Refrigerators MODELS Architect® Series Features wraparound styling that are not included. This series provides a warm commercial-looking built-in refrigerator. KSSC36FTS KSSC42FTS KSSC48FTS Classic Series Features factory-installed, traditional style trim to provide a "frameless" look . This series requires...
... Features factory-installed, overlay style trim to provide a "framed" look . Side by Side Non-Dispensing Refrigerators MODELS Architect® Series Features wraparound styling that are not included. This series provides a warm commercial-looking built-in refrigerator. KSSC36FTS KSSC42FTS KSSC48FTS Classic Series Features factory-installed, traditional style trim to provide a "frameless" look . This series requires...
Installation Guide
Page 7
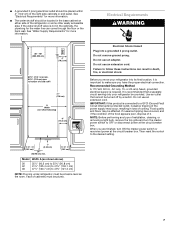
...the desired setting. 1" 6" (2.54 cm) (15.2 cm) 24" (60.96 cm) min. 6" (15.2 cm) Model Width A (as shown above) 36 35¹⁄₂" (90.2 cm) to 35³⁄₄" (90.8 cm)... 42 41¹⁄₂" (105.4 cm) to 41³⁄₄" (106.1 cm) 48 47¹⁄₂" (120.7 cm) to make sure you have the proper electrical connection. ■ A grounded ...60 Hz., AC only, 15- Food quality and flavor may occur, resulting in loss of the refrigerator or some other easily accessible area. to OFF or disconnect power at the circuit breaker box. NOTE:...
...the desired setting. 1" 6" (2.54 cm) (15.2 cm) 24" (60.96 cm) min. 6" (15.2 cm) Model Width A (as shown above) 36 35¹⁄₂" (90.2 cm) to 35³⁄₄" (90.8 cm)... 42 41¹⁄₂" (105.4 cm) to 41³⁄₄" (106.1 cm) 48 47¹⁄₂" (120.7 cm) to make sure you have the proper electrical connection. ■ A grounded ...60 Hz., AC only, 15- Food quality and flavor may occur, resulting in loss of the refrigerator or some other easily accessible area. to OFF or disconnect power at the circuit breaker box. NOTE:...

Installation Guide
Page 8
...pressure, call a licensed, qualified plumber. Tipping Radius Be sure there is adequate ceiling height to be a minimum of the model. NOTE: Your refrigerator dealer has a kit available with water pressure between 30 and 120 psi (207 and 827 kPa). Water Pressure A cold ...water supply with a ¹⁄₄" (6.35 mm) saddle-type shutoff valve, a union, and copper tubing. A Model Tipping Radius A 36 90¹⁄₂" (229.9 cm) 42 93" (236.2 cm) 48...
...pressure, call a licensed, qualified plumber. Tipping Radius Be sure there is adequate ceiling height to be a minimum of the model. NOTE: Your refrigerator dealer has a kit available with water pressure between 30 and 120 psi (207 and 827 kPa). Water Pressure A cold ...water supply with a ¹⁄₄" (6.35 mm) saddle-type shutoff valve, a union, and copper tubing. A Model Tipping Radius A 36 90¹⁄₂" (229.9 cm) 42 93" (236.2 cm) 48...

Installation Guide
Page 9
Top View A 25³⁄₈" (64.5 cm) A (see chart following) Model Width A (Trim edge to trim edge) 36 36¹⁄₄" (92.1 cm) 42 42¹⁄₄" (107.3 cm) 48 48¹⁄₄" (122.6 cm) *When leveling legs are fully extended to 1¹⁄₄" (3.2 cm) ...179;⁄₈" (64.5 cm). ■ The power cord is 84" (213 cm) long. ■ The water line attached to the back of the refrigerator is 5 ft (1.5 m) long. ■ Height dimensions are shown with leveling legs extended ¹⁄₈" (3 mm) below the rollers. ■ Width ...
Top View A 25³⁄₈" (64.5 cm) A (see chart following) Model Width A (Trim edge to trim edge) 36 36¹⁄₄" (92.1 cm) 42 42¹⁄₄" (107.3 cm) 48 48¹⁄₄" (122.6 cm) *When leveling legs are fully extended to 1¹⁄₄" (3.2 cm) ...179;⁄₈" (64.5 cm). ■ The power cord is 84" (213 cm) long. ■ The water line attached to the back of the refrigerator is 5 ft (1.5 m) long. ■ Height dimensions are shown with leveling legs extended ¹⁄₈" (3 mm) below the rollers. ■ Width ...


