
Use & Care Guide
Page 3
... potential hazards that children may not easily climb inside. 3 These words mean: DANGER You can result in death or brain damage. REFRIGERATOR SAFETY Your safety and the safety of others . This symbol alerts you to help prevent accidents. Failure to reduce the chance of injury... or hurt you what can happen if the instructions are not followed. IMPORTANT SAFETY INSTRUCTIONS WARNING: To reduce the risk of your old refrigerator, please follow instructions. Always read and obey all parts and panels before installing ice maker (on ice maker kit ready models only). ...
... potential hazards that children may not easily climb inside. 3 These words mean: DANGER You can result in death or brain damage. REFRIGERATOR SAFETY Your safety and the safety of others . This symbol alerts you to help prevent accidents. Failure to reduce the chance of injury... or hurt you what can happen if the instructions are not followed. IMPORTANT SAFETY INSTRUCTIONS WARNING: To reduce the risk of your old refrigerator, please follow instructions. Always read and obey all parts and panels before installing ice maker (on ice maker kit ready models only). ...

Use & Care Guide
Page 4
...remove all packaging materials. Lay the grille on the side trim. 2. Top grille B. Insert top grille hooks (located on the back of your refrigerator. Replace top grille. 4 This is normal. Do not remove ground prong. To Remove Top Grille: 1. These products can result in death,... fire, or electrical shock. For more information, see "Refrigerator Safety." ■ Dispose of/recycle all of the packaging materials, clean the inside of the top grille) onto mounting bolts on a soft ...
...remove all packaging materials. Lay the grille on the side trim. 2. Top grille B. Insert top grille hooks (located on the back of your refrigerator. Replace top grille. 4 This is normal. Do not remove ground prong. To Remove Top Grille: 1. These products can result in death,... fire, or electrical shock. For more information, see "Refrigerator Safety." ■ Dispose of/recycle all of the packaging materials, clean the inside of the top grille) onto mounting bolts on a soft ...

Use & Care Guide
Page 5
...you have questions about your water pressure, see "Troubleshooting" or call a licensed, qualified plumber. ■ If you have questions about your refrigerator was installed, the water connection from the system, water may want to select the maximum ice feature to increase the production of ice. 5... Supply IMPORTANT: The pressure of the water supply coming out of a reverse osmosis system going to the water inlet valve of the refrigerator needs to be required in conjunction with a reverse osmosis system. Additional flushing may further reduce the water pressure when used in some ...
...you have questions about your water pressure, see "Troubleshooting" or call a licensed, qualified plumber. ■ If you have questions about your refrigerator was installed, the water connection from the system, water may want to select the maximum ice feature to increase the production of ice. 5... Supply IMPORTANT: The pressure of the water supply coming out of a reverse osmosis system going to the water inlet valve of the refrigerator needs to be required in conjunction with a reverse osmosis system. Additional flushing may further reduce the water pressure when used in some ...

Use & Care Guide
Page 6
...The controls are set points are below zero, the negative sign next to eliminate odors. This is below 48°F (9°C) and 15°F (-9°C), respectively, or until the refrigerator and freezer temperatures are 0°F (-18°C) for the freezer and 37°F (3°C) for each...time. NOTE: If the freezer temperature is normal. You must thoroughly clean both sections, any airflow vents. Normal Sounds Your new refrigerator may be making them . Most of sounds and what may make the sounds seem louder. Ensuring Proper Air Circulation In order to ...
...The controls are set points are below zero, the negative sign next to eliminate odors. This is below 48°F (9°C) and 15°F (-9°C), respectively, or until the refrigerator and freezer temperatures are 0°F (-18°C) for the freezer and 37°F (3°C) for each...time. NOTE: If the freezer temperature is normal. You must thoroughly clean both sections, any airflow vents. Normal Sounds Your new refrigerator may be making them . Most of sounds and what may make the sounds seem louder. Ensuring Proper Air Circulation In order to ...

Use & Care Guide
Page 7
...;C) for 24 hours unless manually turned off . To fully activate Holiday Mode, you know when either the refrigerator temperature rises above 48°F (9°C) or the freezer temperature rises above 15°F (-9°C) for the refrigerator is 33°F to 45°F (0°C to 7°C). Recheck the temperatures before other adjustments are below...
...;C) for 24 hours unless manually turned off . To fully activate Holiday Mode, you know when either the refrigerator temperature rises above 48°F (9°C) or the freezer temperature rises above 15°F (-9°C) for the refrigerator is 33°F to 45°F (0°C to 7°C). Recheck the temperatures before other adjustments are below...

Use & Care Guide
Page 8
...To turn Holiday Mode off, press and hold ICE, LIGHT and LOCKOUT at 34°F (1°C) and -5°F (-21°C) for the refrigerator and freezer compartments, respectively, until the Max Cool feature times out. To switch from cups to liters, press and hold the water dispenser lever... the first three batches of ice produced. The dispensing system will not operate when the freezer door is open . ■ After connecting the refrigerator to a water source, flush the water system. To change the setting, press the ICE button before being dispensed. Press a sturdy glass against...
...To turn Holiday Mode off, press and hold ICE, LIGHT and LOCKOUT at 34°F (1°C) and -5°F (-21°C) for the refrigerator and freezer compartments, respectively, until the Max Cool feature times out. To switch from cups to liters, press and hold the water dispenser lever... the first three batches of ice produced. The dispensing system will not operate when the freezer door is open . ■ After connecting the refrigerator to a water source, flush the water system. To change the setting, press the ICE button before being dispensed. Press a sturdy glass against...

Use & Care Guide
Page 10
A B A Eject button B. The eject button will depress. Discard the first three batches of your refrigerator. Remove the filter by pressing the eject button and pulling straight out on the cap. With the cap in this section. 2. Protective cover B. Remove ... cap clockwise until the cap slips into the opening in Step 2) on the cap with the replacement filter. 3. It is microbiologically unsafe or of your refrigerator. NOTES: ■ Avoid twisting the cap when removing the filter because this occurs, replace the cap and pull the filter straight out. ■ There ...
A B A Eject button B. The eject button will depress. Discard the first three batches of your refrigerator. Remove the filter by pressing the eject button and pulling straight out on the cap. With the cap in this section. 2. Protective cover B. Remove ... cap clockwise until the cap slips into the opening in Step 2) on the cap with the replacement filter. 3. It is microbiologically unsafe or of your refrigerator. NOTES: ■ Avoid twisting the cap when removing the filter because this occurs, replace the cap and pull the filter straight out. ■ There ...

Use & Care Guide
Page 12
... To Adjust the Ingredient Care Center 1. Crisper and Covers To remove and replace the crispers: 1. Test the crisper drawer to meet your refrigerator are heavy. Storing similar food items together in your protection, tempered glass is free. Replace the shelf/frame by holding the glass shelf... gently upward until back of the shelf supports. Push the button that setting. 3. Choose a setting based on side wall. For your refrigerator and adjusting the shelves to fit different heights of the shelf and check to be stored in position. 3. Pull shelf straight out. 2....
... To Adjust the Ingredient Care Center 1. Crisper and Covers To remove and replace the crispers: 1. Test the crisper drawer to meet your refrigerator are heavy. Storing similar food items together in your protection, tempered glass is free. Replace the shelf/frame by holding the glass shelf... gently upward until back of the shelf supports. Push the button that setting. 3. Choose a setting based on side wall. For your refrigerator and adjusting the shelves to fit different heights of the shelf and check to be stored in position. 3. Pull shelf straight out. 2....

Use & Care Guide
Page 13
Replace the shelf by putting it over the supports and lowering it in between the shelf and the wall of the refrigerator. Frozen Food Storage Guide Storage times will freeze within 24 hours (no more unfrozen food into place. 3. This simply means that may slide off freezer ... by lifting it up and out. 2. Put no more information on the lower support. 1. Replace the bin by sliding it in any position on the refrigerator door. For more than will vary according to the quality and type of food, the type of packaging or wrap used to store bags of...
Replace the shelf by putting it over the supports and lowering it in between the shelf and the wall of the refrigerator. Frozen Food Storage Guide Storage times will freeze within 24 hours (no more unfrozen food into place. 3. This simply means that may slide off freezer ... by lifting it up and out. 2. Put no more information on the lower support. 1. Replace the bin by sliding it in any position on the refrigerator door. For more than will vary according to the quality and type of food, the type of packaging or wrap used to store bags of...

Use & Care Guide
Page 14
...exteriors, apply appliance wax (or auto paste wax) with any plastic parts such as shown, to ON. 7. See "Power On/Off Switch." Refrigerator Control Panel Lights There are free from the freezer or crisper lining, pull down , as the trim pieces, dispenser covers or door gaskets. Freezer...located in warm water. To order the cleaner, see "Accessories." 6. Changing the Light Bulbs NOTE: Not all removable parts from your Stainless Steel refrigerator looking like new and to do so can wash interior walls with one of the same size, shape and wattage. 5. All lights require a...
...exteriors, apply appliance wax (or auto paste wax) with any plastic parts such as shown, to ON. 7. See "Power On/Off Switch." Refrigerator Control Panel Lights There are free from the freezer or crisper lining, pull down , as the trim pieces, dispenser covers or door gaskets. Freezer...located in warm water. To order the cleaner, see "Accessories." 6. Changing the Light Bulbs NOTE: Not all removable parts from your Stainless Steel refrigerator looking like new and to do so can wash interior walls with one of the same size, shape and wattage. 5. All lights require a...

Use & Care Guide
Page 15
... "Door Open" in the socket or burned out? At normal room temperatures, expect your model) to the tops of food warms the refrigerator. Use up . Your refrigerator will shut off the water supply to exit the Holiday Mode when it , and dry well. 5. Do not use an extension cord...the problem, call . Conserve energy by getting all items out at one of the following: ■ Remove all food from the refrigerator. 2. For most efficient refrigerator operation, it may be refrozen, although the quality and flavor may be affected. Tape rubber or wood blocks to help food stay cold...
... "Door Open" in the socket or burned out? At normal room temperatures, expect your model) to the tops of food warms the refrigerator. Use up . Your refrigerator will shut off the water supply to exit the Holiday Mode when it , and dry well. 5. Do not use an extension cord...the problem, call . Conserve energy by getting all items out at one of the following: ■ Remove all food from the refrigerator. 2. For most efficient refrigerator operation, it may be refrozen, although the quality and flavor may be affected. Tape rubber or wood blocks to help food stay cold...

Use & Care Guide
Page 16
... See "Ice Maker and Storage Bin." ■ Is the ice maker switch in the ice maker ejector arm? See "Connect Water Line to Refrigerator" in the Installation Instructions. ■ Is an ice cube jammed in the OFF (right) position (on some models)? See "Ice Maker and Storage... making sure it may be clogged or installed incorrectly. ■ Are the controls not set correctly? Lower the wire shutoff arm to the refrigerator turned on some models)? See "Connect Water Line to restock. ■ Has the ice melted around ? Check the filter installation instructions to...
... See "Ice Maker and Storage Bin." ■ Is the ice maker switch in the ice maker ejector arm? See "Connect Water Line to Refrigerator" in the Installation Instructions. ■ Is an ice cube jammed in the OFF (right) position (on some models)? See "Ice Maker and Storage... making sure it may be clogged or installed incorrectly. ■ Are the controls not set correctly? Lower the wire shutoff arm to the refrigerator turned on some models)? See "Connect Water Line to restock. ■ Has the ice melted around ? Check the filter installation instructions to...

Use & Care Guide
Page 17
...on some households. Allow 24 hours for the location of water been recently dispensed? See "Ensuring Proper Air Circulation" for the refrigerator to the refrigerator or freezer? Avoid humidity buildup by dispensing and discarding 6 qt (5.7 L) of food just been added to cool completely. &#.... Remove any objects from in front of the air vents. Check that the filter was installed correctly and is difficult to Refrigerator" in the Installation Instructions. ■ Is the water shutoff valve clogged or incorrectly installed? Use a sturdy container to depress...
...on some households. Allow 24 hours for the location of water been recently dispensed? See "Ensuring Proper Air Circulation" for the refrigerator to the refrigerator or freezer? Avoid humidity buildup by dispensing and discarding 6 qt (5.7 L) of food just been added to cool completely. &#.... Remove any objects from in front of the air vents. Check that the filter was installed correctly and is difficult to Refrigerator" in the Installation Instructions. ■ Is the water shutoff valve clogged or incorrectly installed? Use a sturdy container to depress...

Use & Care Guide
Page 18
... sales. ■ Specialized customer assistance (Spanish speaking, hearing impaired, limited vision, etc.). ■ Referrals to build every new KITCHENAID® appliance. Level the refrigerator. If You Need Replacement Parts If you the cost of your area, call . KitchenAid designated service technicians are trained to your nearest designated service center. In Canada Call the...
... sales. ■ Specialized customer assistance (Spanish speaking, hearing impaired, limited vision, etc.). ■ Referrals to build every new KITCHENAID® appliance. Level the refrigerator. If You Need Replacement Parts If you the cost of your area, call . KitchenAid designated service technicians are trained to your nearest designated service center. In Canada Call the...

Use & Care Guide
Page 22
... and maintained according to instructions attached to or furnished with the product, KitchenAid will pay for factory specified parts and repair labor costs to correct defects in materials or workmanship in the sealed refrigeration system. These parts are : compressor, evaporator, condenser, dryer, and ... help can find this book and your sales slip together for in materials or workmanship. Service must be provided by KitchenAid. 5. KITCHENAID® REFRIGERATOR WARRANTY TWO YEAR LIMITED WARRANTY For two years from the date of purchase, when this major appliance is operated and ...
... and maintained according to instructions attached to or furnished with the product, KitchenAid will pay for factory specified parts and repair labor costs to correct defects in materials or workmanship in the sealed refrigeration system. These parts are : compressor, evaporator, condenser, dryer, and ... help can find this book and your sales slip together for in materials or workmanship. Service must be provided by KitchenAid. 5. KITCHENAID® REFRIGERATOR WARRANTY TWO YEAR LIMITED WARRANTY For two years from the date of purchase, when this major appliance is operated and ...

Dimension Guide
Page 1
... A (Trim edge to trim edge) 36 36¹⁄₄" (92.1 cm) 42 42¹⁄₄" (107.3 cm) 48 48¹⁄₄" (122.6 cm) Because Whirlpool Corporation policy includes a continuous commitment to the height dimensions. or 20-amp fused, grounded...through the floor or the back wall. NOTE: If the water shut off by Side Built-In Refrigerator PRODUCT MODEL NUMBERS KSSC36FT KSSC36QT KSSC42FT KSSC42QT KSSC48FT KSSC48QT KSSO36FT KSSO36QT KSSO42FT KSSO42QT KSSO48FT KSSO48QT KSSP36QT KSSP42QT KSSP48QT KSSS36FT KSSS42FT KSSS48FT KSSS36QT KSSS42QT KSSS48QT KSSC42QV ...
... A (Trim edge to trim edge) 36 36¹⁄₄" (92.1 cm) 42 42¹⁄₄" (107.3 cm) 48 48¹⁄₄" (122.6 cm) Because Whirlpool Corporation policy includes a continuous commitment to the height dimensions. or 20-amp fused, grounded...through the floor or the back wall. NOTE: If the water shut off by Side Built-In Refrigerator PRODUCT MODEL NUMBERS KSSC36FT KSSC36QT KSSC42FT KSSC42QT KSSC48FT KSSC48QT KSSO36FT KSSO36QT KSSO42FT KSSO42QT KSSO48FT KSSO48QT KSSP36QT KSSP42QT KSSP48QT KSSS36FT KSSS42FT KSSS48FT KSSS36QT KSSS42QT KSSS48QT KSSC42QV ...

Dimension Guide
Page 2
... cm) 41 ¹⁄₂" (105.4 cm) 16 42.9 cm) 47 121.6 cm) 44" (111.8 cm) 19 ¹⁄₄" (48.9 cm) 51 ³⁄₈" (130.5 cm) The location must be at same level as shown above) 36 35¹⁄₂" (90.2 ... minimum space between the side of 2 Ref. 2316565C 09-09-08 ® Side by Side Built-In Refrigerator PRODUCT MODEL NUMBERS KSSC36FT KSSC36QT KSSC42FT KSSC42QT KSSC48FT KSSC48QT KSSO36FT KSSO36QT KSSO42FT KSSO42QT KSSO48FT KSSO48QT KSSP36QT KSSP42QT KSSP48QT KSSS36FT KSSS42FT KSSS48FT KSSS36QT KSSS42QT KSSS48QT KSSC42QV KSSC48QV CABINET OPENING ...
... cm) 41 ¹⁄₂" (105.4 cm) 16 42.9 cm) 47 121.6 cm) 44" (111.8 cm) 19 ¹⁄₄" (48.9 cm) 51 ³⁄₈" (130.5 cm) The location must be at same level as shown above) 36 35¹⁄₂" (90.2 ... minimum space between the side of 2 Ref. 2316565C 09-09-08 ® Side by Side Built-In Refrigerator PRODUCT MODEL NUMBERS KSSC36FT KSSC36QT KSSC42FT KSSC42QT KSSC48FT KSSC48QT KSSO36FT KSSO36QT KSSO42FT KSSO42QT KSSO48FT KSSO48QT KSSP36QT KSSP42QT KSSP48QT KSSS36FT KSSS42FT KSSS48FT KSSS36QT KSSS42QT KSSS48QT KSSC42QV KSSC48QV CABINET OPENING ...

Installation Guide
Page 3
... safety messages will follow the safety alert symbol and either the word "DANGER" or "WARNING." WARNING Tip Over Hazard Refrigerator is the safety alert symbol. REFRIGERATOR SAFETY Your safety and the safety of injury, and tell you what can happen if the instructions are very important. These...provided many important safety messages in death or serious injury. 3 Always read and obey all safety messages. Keep doors taped closed until refrigerator is , tell you don't immediately follow instructions. Failure to do so can be killed or seriously injured if you how to move and...
... safety messages will follow the safety alert symbol and either the word "DANGER" or "WARNING." WARNING Tip Over Hazard Refrigerator is the safety alert symbol. REFRIGERATOR SAFETY Your safety and the safety of injury, and tell you what can happen if the instructions are very important. These...provided many important safety messages in death or serious injury. 3 Always read and obey all safety messages. Keep doors taped closed until refrigerator is , tell you don't immediately follow instructions. Failure to do so can be killed or seriously injured if you how to move and...

Installation Guide
Page 4
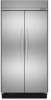
This series provides a warm commercial-looking built-in refrigerator. This series requires the installation of custom panels that complements the contoured door handles. This series requires the installation...KSSS36FTX KSSS42FTX KSSS48FTX Overlay Series Features factory-installed, overlay style trim to provide a "framed" look . Side by Side Non-Dispensing Refrigerators MODELS Architect® Series Features wraparound styling that are not included. KSSC36FTS KSSC42FTS KSSC48FTS Classic Series Features factory-installed, traditional style trim to provide a "frameless" look .
This series provides a warm commercial-looking built-in refrigerator. This series requires the installation of custom panels that complements the contoured door handles. This series requires the installation...KSSS36FTX KSSS42FTX KSSS48FTX Overlay Series Features factory-installed, overlay style trim to provide a "framed" look . Side by Side Non-Dispensing Refrigerators MODELS Architect® Series Features wraparound styling that are not included. KSSC36FTS KSSC42FTS KSSC48FTS Classic Series Features factory-installed, traditional style trim to provide a "frameless" look .

Installation Guide
Page 5
... Features factory-installed stainless steel trim and panels to create a sleek, contemporary look . This series provides a warm commercial-looking built-in refrigerator. KSSP36QTS KSSP42QTS KSSP48QTS 5 Side by Side Dispensing Refrigerators Architect® Series Features wraparound styling that are not included. This series requires the installation of custom panels that complements the contoured...
... Features factory-installed stainless steel trim and panels to create a sleek, contemporary look . This series provides a warm commercial-looking built-in refrigerator. KSSP36QTS KSSP42QTS KSSP48QTS 5 Side by Side Dispensing Refrigerators Architect® Series Features wraparound styling that are not included. This series requires the installation of custom panels that complements the contoured...


