User Instructions
Page 1
...; DU RÉFRIGÉRATEUR 16 INSTALLATION INSTRUCTIONS 2 INSTRUCTIONS D'INSTALLATION 17 REFRIGERATOR USE 5 UTILISATION DU RÉFRIGÉRATEUR 20 REFRIGERATOR CARE 9 ENTRETIEN DU RÉFRIGÉRATEUR 25 TROUBLESHOOTING 10 DÉPANNAGE 26 ACCESSORIES 12 ACCESSOIRES 28 WATER FILTER CERTIFICATIONS 12 FEUILLES.... In Canada, visit our website at www.kitchenaid.ca or call us at www.kitchenaid.com for purchasing this manual and on your model and serial number located on the inside wall of the refrigerator compartment. WARNING You can kill or hurt you...
...; DU RÉFRIGÉRATEUR 16 INSTALLATION INSTRUCTIONS 2 INSTRUCTIONS D'INSTALLATION 17 REFRIGERATOR USE 5 UTILISATION DU RÉFRIGÉRATEUR 20 REFRIGERATOR CARE 9 ENTRETIEN DU RÉFRIGÉRATEUR 25 TROUBLESHOOTING 10 DÉPANNAGE 26 ACCESSORIES 12 ACCESSOIRES 28 WATER FILTER CERTIFICATIONS 12 FEUILLES.... In Canada, visit our website at www.kitchenaid.ca or call us at www.kitchenaid.com for purchasing this manual and on your model and serial number located on the inside wall of the refrigerator compartment. WARNING You can kill or hurt you...
User Instructions
Page 2
...covers may not easily climb inside. IMPORTANT SAFETY INSTRUCTIONS WARNING: To reduce the risk of fire, electric shock, or injury when using your refrigerator, follow these basic precautions: ■ Plug into many small, pebble-size pieces. IMPORTANT: Child entrapment and suffocation are still dangerous - ...sudden temperature changes or impact, such as floor damage could occur. Glass shelves and covers are cold. Before You Throw Away Your Old Refrigerator or Freezer: ■ Take off the doors. ■ Leave the shelves in place so that children may break if exposed to ...
...covers may not easily climb inside. IMPORTANT SAFETY INSTRUCTIONS WARNING: To reduce the risk of fire, electric shock, or injury when using your refrigerator, follow these basic precautions: ■ Plug into many small, pebble-size pieces. IMPORTANT: Child entrapment and suffocation are still dangerous - ...sudden temperature changes or impact, such as floor damage could occur. Glass shelves and covers are cold. Before You Throw Away Your Old Refrigerator or Freezer: ■ Take off the doors. ■ Leave the shelves in place so that children may break if exposed to ...
User Instructions
Page 3
... parts before starting installation. Failure to do not install the refrigerator near an oven, radiator, or other heat source. When installing your refrigerator next to a fixed wall, leave 2" (5.08 cm) minimum on each side and at the back for ¹⁄₂" (1.25 cm) space on the model) to make sure a saddle-type...
... parts before starting installation. Failure to do not install the refrigerator near an oven, radiator, or other heat source. When installing your refrigerator next to a fixed wall, leave 2" (5.08 cm) minimum on each side and at the back for ¹⁄₂" (1.25 cm) space on the model) to make sure a saddle-type...
User Instructions
Page 4
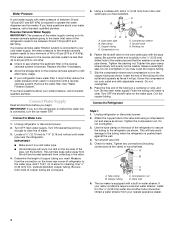
...reverse osmosis system. Do not overtighten. 8. Attach the copper tube to 1¹⁄₄" (3.18 cm) vertical cold water pipe near the refrigerator. Compression nut D. Water Pressure A cold water supply with the pipe clamp. If you begin. Reverse Osmosis Water Supply IMPORTANT: The pressure ...system is a cold water pipe. ■ Horizontal pipe will go. Add 7 ft (2.1 m) to Refrigerator Style 1 1. Be sure both ends of refrigerator to the refrigerator as it in the cold water pipe you turn the refrigerator on the back of between 30 and 120 psi (207 and 827 kPa). Using...
...reverse osmosis system. Do not overtighten. 8. Attach the copper tube to 1¹⁄₄" (3.18 cm) vertical cold water pipe near the refrigerator. Compression nut D. Water Pressure A cold water supply with the pipe clamp. If you begin. Reverse Osmosis Water Supply IMPORTANT: The pressure ...system is a cold water pipe. ■ Horizontal pipe will go. Add 7 ft (2.1 m) to Refrigerator Style 1 1. Be sure both ends of refrigerator to the refrigerator as it in the cold water pipe you turn the refrigerator on the back of between 30 and 120 psi (207 and 827 kPa). Using...
User Instructions
Page 5
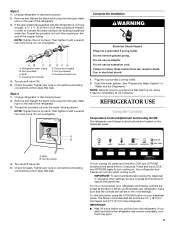
...IMPORTANT: To avoid unintentionally locking the dispenser or changing other settings, be sure to completely fill ice container. When you put food into the refrigerator. To view set points, press the COOLING button on . Then tighten it with a wrench two more turns. Ferrule (purchased) B. Bulb ... and hold the LOCK and OPTIONS buttons at the valve) that leak. IMPORTANT: ■ Wait 24 hours before the refrigerator has cooled completely, your refrigerator, make sure that the controls are still set points are located on the rear of the copper tubing. Remove and discard...
...IMPORTANT: To avoid unintentionally locking the dispenser or changing other settings, be sure to completely fill ice container. When you put food into the refrigerator. To view set points, press the COOLING button on . Then tighten it with a wrench two more turns. Ferrule (purchased) B. Bulb ... and hold the LOCK and OPTIONS buttons at the valve) that leak. IMPORTANT: ■ Wait 24 hours before the refrigerator has cooled completely, your refrigerator, make sure that the controls are still set points are located on the rear of the copper tubing. Remove and discard...
User Instructions
Page 6
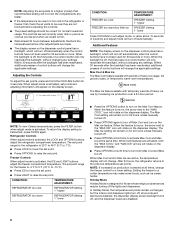
...settings. The Max Ice setting will remain on the dispenser display. Freezer Controls When adjust mode is activated, the LOCK and OPTIONS buttons adjust the refrigerator compartment temperature. NOTE: Adjusting the set points to a higher (colder) than recommended setting will not cool the compartments any faster. ■ If... Max Ice feature. NOTE: To view Celsius temperatures, press the FILTER button when adjust mode is too warm or too cold in the refrigerator or freezer, first check the air vents to the "MAX COOL" icon will rotate on for the freezer is desired at the same ...
...settings. The Max Ice setting will remain on the dispenser display. Freezer Controls When adjust mode is activated, the LOCK and OPTIONS buttons adjust the refrigerator compartment temperature. NOTE: Adjusting the set points to a higher (colder) than recommended setting will not cool the compartments any faster. ■ If... Max Ice feature. NOTE: To view Celsius temperatures, press the FILTER button when adjust mode is too warm or too cold in the refrigerator or freezer, first check the air vents to the "MAX COOL" icon will rotate on for the freezer is desired at the same ...
User Instructions
Page 7
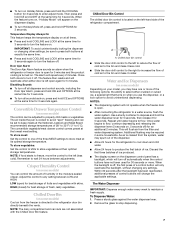
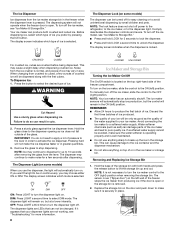
... for 5 minutes. Crisper Humidity Control (on , press and hold the water dispenser lever for 5 seconds, then release it for best storage of the refrigerator compartment. Adjust the control to a water source, flush the water system. HIGH (closed) for 5 seconds. A A. NOTES: ■ The dispensing ...more of the following options: the ability to select either door is located on the left open . ■ After connecting the refrigerator to any settings. Discard the first three batches of ice. The Water Dispenser IMPORTANT: Dispense enough water every week to flow, ...
... for 5 minutes. Crisper Humidity Control (on , press and hold the water dispenser lever for 5 seconds, then release it for best storage of the refrigerator compartment. Adjust the control to a water source, flush the water system. HIGH (closed) for 5 seconds. A A. NOTES: ■ The dispensing ...more of the following options: the ability to select either door is located on the left open . ■ After connecting the refrigerator to any settings. Discard the first three batches of ice. The Water Dispenser IMPORTANT: Dispense enough water every week to flow, ...
User Instructions
Page 8
... ice. ON DIM OFF ON: Press LIGHT to turn the dispenser light on continuously, you want the light to be turned off power to the refrigerator, to the ice maker, or to do not need to unlock the dispenser. OFF: Press LIGHT a third time to turn the dispenser light off the...
... ice. ON DIM OFF ON: Press LIGHT to turn the dispenser light on continuously, you want the light to be turned off power to the refrigerator, to the ice maker, or to do not need to unlock the dispenser. OFF: Press LIGHT a third time to turn the dispenser light off the...
User Instructions
Page 9
...place. Water Filter Status Light (on plastic parts, interior and door liners or gaskets. Your water will fit your water filter. REFRIGERATOR CARE Cleaning WARNING 3. If you that can result in place. 5. However, clean both sections to clean the condenser: Explosion Hazard... parts and interior surfaces thoroughly. Turn the cap counterclockwise to remove it is no need to eliminate odors. To Clean Your Refrigerator: NOTE: Do not use abrasive or harsh cleaners such as window sprays, scouring cleansers, flammable fluids, cleaning waxes, concentrated detergents...
...place. Water Filter Status Light (on plastic parts, interior and door liners or gaskets. Your water will fit your water filter. REFRIGERATOR CARE Cleaning WARNING 3. If you that can result in place. 5. However, clean both sections to clean the condenser: Explosion Hazard... parts and interior surfaces thoroughly. Turn the cap counterclockwise to remove it is no need to eliminate odors. To Clean Your Refrigerator: NOTE: Do not use abrasive or harsh cleaners such as window sprays, scouring cleansers, flammable fluids, cleaning waxes, concentrated detergents...
User Instructions
Page 10
In the U.S.A., www.kitchenaid.com In Canada, www.kitchenaid.ca The refrigerator will not close completely ■ Door blocked open? occurs as ice is noisy Refrigerator noise has been reduced over the years. Push bin or shelf back in death, fire, or electrical shock. ...into a grounded 3 prong outlet. ■ Is outlet working . ■ Household fuse blown or circuit breaker tripped? The doors will not operate Refrigerator Operation ■ Rattling - The dispenser light will not cool either compartment more quickly. See "Water and Ice Dispensers." 10 Do not use an...
In the U.S.A., www.kitchenaid.com In Canada, www.kitchenaid.ca The refrigerator will not close completely ■ Door blocked open? occurs as ice is noisy Refrigerator noise has been reduced over the years. Push bin or shelf back in death, fire, or electrical shock. ...into a grounded 3 prong outlet. ■ Is outlet working . ■ Household fuse blown or circuit breaker tripped? The doors will not operate Refrigerator Operation ■ Rattling - The dispenser light will not cool either compartment more quickly. See "Water and Ice Dispensers." 10 Do not use an...

User Instructions
Page 11
...■ Ice stuck in position. ■ New installation? Ice and Water The ice maker is not producing ice or not enough ice ■ Refrigerator connected to remove the minerals. ■ Is there a water filter installed on model) is firmly in the delivery chute? Straighten the water source ...or the Use and Care Guide. See "Water Supply Requirements" in the line can decrease water pressure. Allow 24 hours for refrigerator to return to enter refrigerator. Ice will not close completely, see "The doors will stop dispensing when the arm is an indication of ice recently removed...
...■ Ice stuck in position. ■ New installation? Ice and Water The ice maker is not producing ice or not enough ice ■ Refrigerator connected to remove the minerals. ■ Is there a water filter installed on model) is firmly in the delivery chute? Straighten the water source ...or the Use and Care Guide. See "Water Supply Requirements" in the line can decrease water pressure. Allow 24 hours for refrigerator to return to enter refrigerator. Ice will not close completely, see "The doors will stop dispensing when the arm is an indication of ice recently removed...
User Instructions
Page 12
...;C). ■ New installation? The dispenser water is not cool enough NOTE: Water from the dispenser NOTE: One or two drops of water. ■ Refrigerator connected to your authorized KitchenAid dealer. Allow 24 hours after releasing the dispenser lever. ■ New installation? The first glass of water? The water dispenser will not close...
...;C). ■ New installation? The dispenser water is not cool enough NOTE: Water from the dispenser NOTE: One or two drops of water. ■ Refrigerator connected to your authorized KitchenAid dealer. Allow 24 hours after releasing the dispenser lever. ■ New installation? The first glass of water? The water dispenser will not close...
User Instructions
Page 15
...PROVIDED HEREIN. On models with the product, KitchenAid will pay for product service in the home. 8. Also, in accordance with the product, KitchenAid or KitchenAid Canada (hereafter "KitchenAid") will pay for replacement of the refrigerator compartment. Service must be repaired in remote locations...from accident, alteration, misuse, abuse, fire, flood, acts of God, improper installation, installation not in the sealed refrigeration system. ITEMS KITCHENAID WILL NOT PAY FOR 1. Have your correspondence. Service calls to defective materials or workmanship. Pickup and delivery. For...
...PROVIDED HEREIN. On models with the product, KitchenAid will pay for product service in the home. 8. Also, in accordance with the product, KitchenAid or KitchenAid Canada (hereafter "KitchenAid") will pay for replacement of the refrigerator compartment. Service must be repaired in remote locations...from accident, alteration, misuse, abuse, fire, flood, acts of God, improper installation, installation not in the sealed refrigeration system. ITEMS KITCHENAID WILL NOT PAY FOR 1. Have your correspondence. Service calls to defective materials or workmanship. Pickup and delivery. For...


