Installation Guide
Page 2
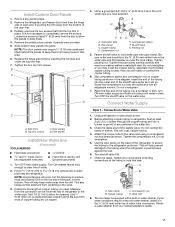
..., and copper tubing. Read and follow instructions. Product Dimensions Top View 35⁵⁄₈" (90.5 cm) ³⁄₈" (95.3 mm) 24" (61.0 cm) 27¹⁄₂" (69.7 cm) 30¹⁄₈" (76.4 cm) max. 15⁵⁄₈" 19¹... adjustable wrenches s Flat-blade screwdriver s ³⁄₈" and ¹⁄₂" socket wrench s or adjustable wrench PARTS NEEDED: s Your refrigerator dealer has a kit available with installation specifications and dimensions. Dimensions may also need a ¹⁄₄" (6.35 mm) nut and ¹⁄...
..., and copper tubing. Read and follow instructions. Product Dimensions Top View 35⁵⁄₈" (90.5 cm) ³⁄₈" (95.3 mm) 24" (61.0 cm) 27¹⁄₂" (69.7 cm) 30¹⁄₈" (76.4 cm) max. 15⁵⁄₈" 19¹... adjustable wrenches s Flat-blade screwdriver s ³⁄₈" and ¹⁄₂" socket wrench s or adjustable wrench PARTS NEEDED: s Your refrigerator dealer has a kit available with installation specifications and dimensions. Dimensions may also need a ¹⁄₄" (6.35 mm) nut and ¹⁄...

Installation Guide
Page 3
s The water line attached to the back of ¹⁄₄" (6.35 mm) below the refrigerator, add ³⁄₄" (19 mm) to the height dimensions. 35 90.6 cm) Model Size 23' (654 L) 25' (694 L) 3⁵⁄₈" (9.2 cm) Height A 64...⁷⁄₈" (164.8 cm) 67³⁄₄" (172.1 cm) 3 Side View s Height dimensions are fully extended to 1" (25 mm) below the refrigerator. Front View 21¹⁄₄" (54.1 cm) AB A 66" (167.7 cm) C 3⁵⁄₈" (9.2 cm) Model Size A B C 23' (654 L) 68³⁄₄" (...
s The water line attached to the back of ¹⁄₄" (6.35 mm) below the refrigerator, add ³⁄₄" (19 mm) to the height dimensions. 35 90.6 cm) Model Size 23' (654 L) 25' (694 L) 3⁵⁄₈" (9.2 cm) Height A 64...⁷⁄₈" (164.8 cm) 67³⁄₄" (172.1 cm) 3 Side View s Height dimensions are fully extended to 1" (25 mm) below the refrigerator. Front View 21¹⁄₄" (54.1 cm) AB A 66" (167.7 cm) C 3⁵⁄₈" (9.2 cm) Model Size A B C 23' (654 L) 68³⁄₄" (...

Installation Guide
Page 4
...45¹⁄₂" (0.1 mm) (115.6 cm) 90˚ 150˚ Cabinet Side Panel Kits Cabinet side panel kits are available through your refrigerator. In Canada, call 1-800-807-6777. Color 23' Model 25' Model White #4396762 #4396758 Black #4396763 #4396759 Biscuit #4396764 #4396760 Stainless ...42 cm) Door and Side Panels Factory Door Panels and Side Trim Kits All factory parts are available to a minimum of the refrigerator. Door panels should not exceed the weights listed in the following table. Color 23' Model 25' Model White #4396771 #4396789 Black...
...45¹⁄₂" (0.1 mm) (115.6 cm) 90˚ 150˚ Cabinet Side Panel Kits Cabinet side panel kits are available through your refrigerator. In Canada, call 1-800-807-6777. Color 23' Model 25' Model White #4396762 #4396758 Black #4396763 #4396759 Biscuit #4396764 #4396760 Stainless ...42 cm) Door and Side Panels Factory Door Panels and Side Trim Kits All factory parts are available to a minimum of the refrigerator. Door panels should not exceed the weights listed in the following table. Color 23' Model 25' Model White #4396771 #4396789 Black...
Installation Guide
Page 5
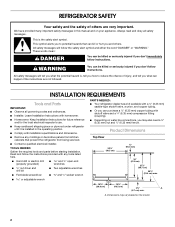
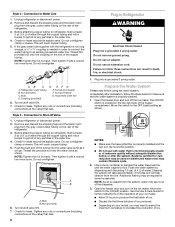
...(13°C). See the "Door Swing Dimensions" section. panel 5 s For full-overlay cabinet doors, the height of the opening must support refrigerator weight (more than 600 lbs [272 kg], door panels and contents). Do not remove ground prong. Raised panels should permit doors to open ... room for fingers to fit flush with routed edges. or 20-amp fused, grounded electrical supply is important to make sure you are installing the refrigerator to grasp the handle. ¹⁄₈" (3.18 mm) ¹⁄₈" (3.18 mm) Location Requirements WARNING ¹⁄₈" (3....
...(13°C). See the "Door Swing Dimensions" section. panel 5 s For full-overlay cabinet doors, the height of the opening must support refrigerator weight (more than 600 lbs [272 kg], door panels and contents). Do not remove ground prong. Raised panels should permit doors to open ... room for fingers to fit flush with routed edges. or 20-amp fused, grounded electrical supply is important to make sure you are installing the refrigerator to grasp the handle. ¹⁄₈" (3.18 mm) ¹⁄₈" (3.18 mm) Location Requirements WARNING ¹⁄₈" (3....
Installation Guide
Page 6
... the model) to the desired setting. IMPORTANT: s All installations must contact the floor to support and stabilize the full weight of the refrigerator. If you have questions about your water pressure, call a licensed, qualified plumber. IMPORTANT: If this product is connected to a GFCI...outlet, nuisance tripping of the power supply may be affected. Food quality and flavor may occur, resulting in conjunction with your refrigerator before starting installation. If nuisance tripping has occurred, and if the condition of the food appears poor, dispose of packaging. ...
... the model) to the desired setting. IMPORTANT: s All installations must contact the floor to support and stabilize the full weight of the refrigerator. If you have questions about your water pressure, call a licensed, qualified plumber. IMPORTANT: If this product is connected to a GFCI...outlet, nuisance tripping of the power supply may be affected. Food quality and flavor may occur, resulting in conjunction with your refrigerator before starting installation. If nuisance tripping has occurred, and if the condition of the food appears poor, dispose of packaging. ...
Installation Guide
Page 7
... go. This also keeps normal sediment from the trim to slide freely. 4. Determine the length of the refrigerator to secure the tubing to the tubing when the refrigerator is pushed back against the wall. 6. Add 7 ft (2.1 m) to allow the panels to allow for cleaning. Using a grounded drill, drill a ¹⁄₄" (6.35 mm...
... go. This also keeps normal sediment from the trim to slide freely. 4. Determine the length of the refrigerator to secure the tubing to the tubing when the refrigerator is pushed back against the wall. 6. Add 7 ft (2.1 m) to allow the panels to allow for cleaning. Using a grounded drill, drill a ¹⁄₄" (6.35 mm...
Installation Guide
Page 8
... coupling on disinfected waters that may contain filterable cysts. 2. NOTE: Tighten the nut by dispensing and discarding 1.5 gal. (5.4 L) of water. Refrigerator water tubing B. Tighten any nuts or connections (including connections at least 2 qt (1.9 L) of the tubing into the water valve as far as shown... to produce the first batch of the freezer compartment. NOTE: As air is properly cleaned. 1. s Allow 24 hours to flow. Before attaching copper tubing to refrigerator, flush at the valve) that the water system is cleared from the line. Do not overtighten clamp or sleeve...
... coupling on disinfected waters that may contain filterable cysts. 2. NOTE: Tighten the nut by dispensing and discarding 1.5 gal. (5.4 L) of water. Refrigerator water tubing B. Tighten any nuts or connections (including connections at least 2 qt (1.9 L) of the tubing into the water valve as far as shown... to produce the first batch of the freezer compartment. NOTE: As air is properly cleaned. 1. s Allow 24 hours to flow. Before attaching copper tubing to refrigerator, flush at the valve) that the water system is cleared from the line. Do not overtighten clamp or sleeve...
Installation Guide
Page 9
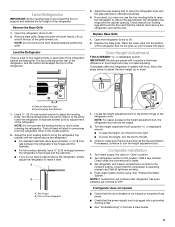
...8322;" (12.70 mm) socket wrench to 90°. 2. s For standard cabinets, leave approximately ¹⁄₈" (3.18 mm) gap between the refrigerator top hinge and the cabinet opening. Top hinges B. s To raise the height, turn the height adjustment bolt. Flush water system before using the or adjustable...top) B. Turn the leveling bolts to the right to raise or to the left . 3. Check to make it snaps into place. Set refrigerator and freezer compartment controls to ON position. Lift up until it level. IMPORTANT: Models are even at the top and bottom. If necessary, ...
...8322;" (12.70 mm) socket wrench to 90°. 2. s For standard cabinets, leave approximately ¹⁄₈" (3.18 mm) gap between the refrigerator top hinge and the cabinet opening. Top hinges B. s To raise the height, turn the height adjustment bolt. Flush water system before using the or adjustable...top) B. Turn the leveling bolts to the right to raise or to the left . 3. Check to make it snaps into place. Set refrigerator and freezer compartment controls to ON position. Lift up until it level. IMPORTANT: Models are even at the top and bottom. If necessary, ...
User Instructions
Page 1
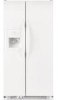
...su número de modelo y de serie en la etiqueta ubicada al lado derecho del interior del refrigerador. W10162434A REFRIGERATOR USER INSTRUCTIONS THANK YOU for additional information. In Canada, visit our website at www.kitchenaid.ca or call us at www.kitchenaid.com for purchasing this manual and on... the right-hand side of the refrigerator interior. This is , tell you how to potential hazards that can kill...
...su número de modelo y de serie en la etiqueta ubicada al lado derecho del interior del refrigerador. W10162434A REFRIGERATOR USER INSTRUCTIONS THANK YOU for additional information. In Canada, visit our website at www.kitchenaid.ca or call us at www.kitchenaid.com for purchasing this manual and on... the right-hand side of the refrigerator interior. This is , tell you how to potential hazards that can kill...
User Instructions
Page 2
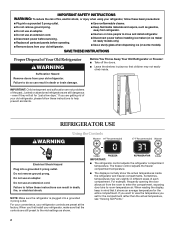
...you set for the compartment rather than the actual temperature, see "Viewing Set Points." 2 IMPORTANT: ■ The refrigerator control adjusts the refrigerator compartment temperature. IMPORTANT: Child entrapment and suffocation are preset at the factory. If you want to view the temperature you...temperature for "just a few days." IMPORTANT SAFETY INSTRUCTIONS WARNING: To reduce the risk of fire, electric shock, or injury when using your refrigerator, follow these basic precautions: ■ Plug into a grounded 3 prong outlet. ■ Use nonflammable cleaner. ■ Do not remove ...
...you set for the compartment rather than the actual temperature, see "Viewing Set Points." 2 IMPORTANT: ■ The refrigerator control adjusts the refrigerator compartment temperature. IMPORTANT: Child entrapment and suffocation are preset at the factory. If you want to view the temperature you...temperature for "just a few days." IMPORTANT SAFETY INSTRUCTIONS WARNING: To reduce the risk of fire, electric shock, or injury when using your refrigerator, follow these basic precautions: ■ Plug into a grounded 3 prong outlet. ■ Use nonflammable cleaner. ■ Do not remove ...
User Instructions
Page 3
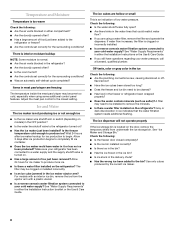
... to save additional energy or for more than the set to keep meats at least 24 hours between adjustments. 3 Max Cool Use Max Cool to indicate that you put food into the refrigerator. Max Cool will become brighter to speed cooling when large grocery loads are not blocked...National Livestock and Meat Board recommended storage temperatures of the three MEAT settings to select either the up or down button for 24 hours. NOTE: Adjusting the refrigerator and freezer controls to a lower (colder) setting will dim and return to properly chill meats or vegetables. Additional Control ...
... to save additional energy or for more than the set to keep meats at least 24 hours between adjustments. 3 Max Cool Use Max Cool to indicate that you put food into the refrigerator. Max Cool will become brighter to speed cooling when large grocery loads are not blocked...National Livestock and Meat Board recommended storage temperatures of the three MEAT settings to select either the up or down button for 24 hours. NOTE: Adjusting the refrigerator and freezer controls to a lower (colder) setting will dim and return to properly chill meats or vegetables. Additional Control ...
User Instructions
Page 4
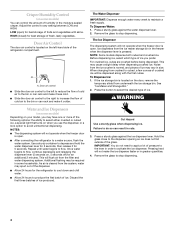
...every week to any setting between LOW and HIGH. This may spurt out of the dispenser. ■ Allow 24 hours for the refrigerator to cool down and chill water. ■ Allow 24 hours to produce the first batch of fruits and vegetables with the first cubes. See "Ice Maker and Storage... air to the bin or can result in the moisture-sealed crisper. Door Air Control The door air control is open. ■ After connecting the refrigerator to a water source, flush the water system. A A. The Ice Dispenser The dispensing system will be required in greater quantities. 4. Use a sturdy container...
...every week to any setting between LOW and HIGH. This may spurt out of the dispenser. ■ Allow 24 hours for the refrigerator to cool down and chill water. ■ Allow 24 hours to produce the first batch of fruits and vegetables with the first cubes. See "Ice Maker and Storage... air to the bin or can result in the moisture-sealed crisper. Door Air Control The door air control is open. ■ After connecting the refrigerator to a water source, flush the water system. A A. The Ice Dispenser The dispensing system will be required in greater quantities. 4. Use a sturdy container...
User Instructions
Page 5
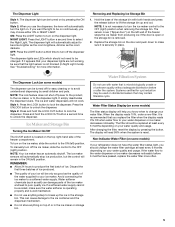
...ice maker control to change the water filter cartridge at least every 6 months depending on by pressing the ON button. REMEMBER: ■ Allow 24 hours to a softened water supply. If a softened water supply cannot be avoided, make sure it appears that your water quality and usage.... Style 1: Press the LOCK button to unlock the dispenser. Discard the first three batches of ice produced. ■ The quality of your refrigerator does not have passed, replace the water filter more information. Water softener chemicals (such as the room darkens. Style 2: Press and hold the...
...ice maker control to change the water filter cartridge at least every 6 months depending on by pressing the ON button. REMEMBER: ■ Allow 24 hours to a softened water supply. If a softened water supply cannot be avoided, make sure it appears that your water quality and usage.... Style 1: Press the LOCK button to unlock the dispenser. Discard the first three batches of ice produced. ■ The quality of your refrigerator does not have passed, replace the water filter more information. Water softener chemicals (such as the room darkens. Style 2: Press and hold the...

User Instructions
Page 6
... pop back out when the filter is fully engaged. 7. Flush the water system. Wipe up spills immediately. Unplug refrigerator or disconnect power. 2. Unplug refrigerator or disconnect power. 2. Plug in place after the covers are available from the filter. It is significant pet traffic... replacement filter. 4. Turn the cap counterclockwise to release the filter from the O-rings. See "Water and Ice Dispensers." Both the refrigerator and freezer sections defrost automatically. Replacement bulbs are removed. 6. Rinse and dry the shield well. 3. If you need for routine...
... pop back out when the filter is fully engaged. 7. Flush the water system. Wipe up spills immediately. Unplug refrigerator or disconnect power. 2. Unplug refrigerator or disconnect power. 2. Plug in place after the covers are available from the filter. It is significant pet traffic... replacement filter. 4. Turn the cap counterclockwise to release the filter from the O-rings. See "Water and Ice Dispensers." Both the refrigerator and freezer sections defrost automatically. Replacement bulbs are removed. 6. Rinse and dry the shield well. 3. If you need for routine...
User Instructions
Page 7
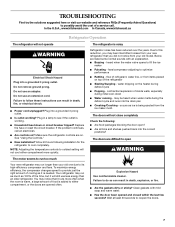
... Plug into the correct positions? Clean gaskets with an explanation. ■ Buzzing - In the U.S.A., www.kitchenaid.com In Canada, www.kitchenaid.ca Refrigerator Operation The refrigerator will still use less energy than your old one due to its high-efficiency compressor and fans. Failure to... ground prong. Failure to cool completely. Allow 24 hours following : ■ Are food packages blocking the door open WARNING The motor seems to run as much Your new refrigerator may hear intermittent noises from your new refrigerator that it runs more quickly. Do not use...
... Plug into the correct positions? Clean gaskets with an explanation. ■ Buzzing - In the U.S.A., www.kitchenaid.com In Canada, www.kitchenaid.ca Refrigerator Operation The refrigerator will still use less energy than your old one due to its high-efficiency compressor and fans. Failure to... ground prong. Failure to cool completely. Allow 24 hours following : ■ Are food packages blocking the door open WARNING The motor seems to run as much Your new refrigerator may hear intermittent noises from your new refrigerator that it runs more quickly. Do not use...
User Instructions
Page 8
.... ■ Are the air vents blocked in the freezer or refrigerator been wrapped properly? ■ Does the water contain minerals (such as sulfur)? Gray or dark discoloration in the ice maker ejector arm? Allow 24 hours for the surrounding conditions? Off-taste, odor or gray color... may become too cold, especially when using a water filter, remove the filter and operate the dispenser. Wait 24 hours after ice production begins to be cleaned? ■ Has food in the refrigerator? ■ Are the door(s) opened often? ■ Has a large amount of ice just been removed? flavored...
.... ■ Are the air vents blocked in the freezer or refrigerator been wrapped properly? ■ Does the water contain minerals (such as sulfur)? Gray or dark discoloration in the ice maker ejector arm? Allow 24 hours for the surrounding conditions? Off-taste, odor or gray color... may become too cold, especially when using a water filter, remove the filter and operate the dispenser. Wait 24 hours after ice production begins to be cleaned? ■ Has food in the refrigerator? ■ Are the door(s) opened often? ■ Has a large amount of ice just been removed? flavored...

User Instructions
Page 9
...Canada, call 1-800-442-9991 and ask for the refrigerator to melt the ice if necessary. ■ Has the... the glass not being held in too long? Allow 24 hours for the appropriate part number listed below or contact...will stop dispensing when the arm is used. ■ Is the refrigerator connected to the home determines the flow from the dispenser. ■...to only 50°F (10°C). ■ Has the refrigerator been newly installed or a large amount of water. ACCESSORIES To...valve not turned on the refrigerator? The filter may not be clogged or incorrectly installed. ...
...Canada, call 1-800-442-9991 and ask for the refrigerator to melt the ice if necessary. ■ Has the... the glass not being held in too long? Allow 24 hours for the appropriate part number listed below or contact...will stop dispensing when the arm is used. ■ Is the refrigerator connected to the home determines the flow from the dispenser. ■...to only 50°F (10°C). ■ Has the refrigerator been newly installed or a large amount of water. ACCESSORIES To...valve not turned on the refrigerator? The filter may not be clogged or incorrectly installed. ...
User Instructions
Page 11
...THE DURATION OF IMPLIED WARRANTIES OF MERCHANTABILITY OR FITNESS, SO THESE EXCLUSIONS OR LIMITATIONS MAY NOT APPLY TO YOU. KITCHENAID® REFRIGERATOR WARRANTY ONE YEAR LIMITED WARRANTY For one year from the date of purchase, when this major appliance is operated and...: 30 day limited warranty on the right-hand side of the refrigerator interior. Service must be provided by a KitchenAid designated service company. On models with the product, KitchenAid or KitchenAid Canada (hereafter "KitchenAid") will pay for replacement parts to correct defects in materials or workmanship...
...THE DURATION OF IMPLIED WARRANTIES OF MERCHANTABILITY OR FITNESS, SO THESE EXCLUSIONS OR LIMITATIONS MAY NOT APPLY TO YOU. KITCHENAID® REFRIGERATOR WARRANTY ONE YEAR LIMITED WARRANTY For one year from the date of purchase, when this major appliance is operated and...: 30 day limited warranty on the right-hand side of the refrigerator interior. Service must be provided by a KitchenAid designated service company. On models with the product, KitchenAid or KitchenAid Canada (hereafter "KitchenAid") will pay for replacement parts to correct defects in materials or workmanship...
Parts Diagram
Page 1
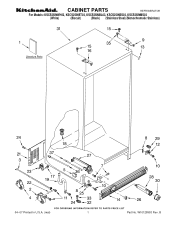
W10128953 Rev. B CABINET PARTS REFRIGERATOR For Models: KSCS25INWH03, KSCS25INBT03, KSCS25INBL03, KSCS25INSS03, KSCS25INMS03 (White) (Biscuit) (Black) (Stainless Steel) (Monochromatic Stainless) 04−07 Printed In U.S.A. (mat) 1 Part No.
W10128953 Rev. B CABINET PARTS REFRIGERATOR For Models: KSCS25INWH03, KSCS25INBT03, KSCS25INBL03, KSCS25INSS03, KSCS25INMS03 (White) (Biscuit) (Black) (Stainless Steel) (Monochromatic Stainless) 04−07 Printed In U.S.A. (mat) 1 Part No.

Parts Diagram
Page 3
... 2171846 Release Valve 16 2179404K Rack, Wine & Egg 17 2317105 Cover, Thermistor 18 489478 Screw 19 2304597 Gasket, Air Baffle 20 2223403 Cover, Air Baffle 24 2224076 Air Diffuser Assembly 25 2220377 Air Baffle 29 2162085 Socket 31 2223876 Reservoir 32 2205813 Strap 33 2255743 Light Bulb 34 2223663 Light Lens...
... 2171846 Release Valve 16 2179404K Rack, Wine & Egg 17 2317105 Cover, Thermistor 18 489478 Screw 19 2304597 Gasket, Air Baffle 20 2223403 Cover, Air Baffle 24 2224076 Air Diffuser Assembly 25 2220377 Air Baffle 29 2162085 Socket 31 2223876 Reservoir 32 2205813 Strap 33 2255743 Light Bulb 34 2223663 Light Lens...


