Use & Care Guide
Page 2
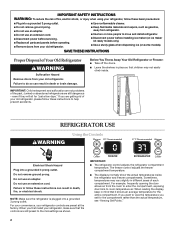
...prevent accidents. If you want to view the temperature you first install your old refrigerator. ■ Keep flammable materials and vapors, such as shown. Junked or abandoned refrigerators are not problems of Your Old Refrigerator WARNING Suffocation Hazard Remove doors from the room to enter the ... sure that the controls are still preset to the mid-settings as gasoline, away from refrigerator. ■ Use two or more people to move and install refrigerator. ■ Disconnect power before installing ice maker (on ice maker kit ready models only). ■ Use a sturdy glass when ...
...prevent accidents. If you want to view the temperature you first install your old refrigerator. ■ Keep flammable materials and vapors, such as shown. Junked or abandoned refrigerators are not problems of Your Old Refrigerator WARNING Suffocation Hazard Remove doors from the room to enter the ... sure that the controls are still preset to the mid-settings as gasoline, away from refrigerator. ■ Use two or more people to move and install refrigerator. ■ Disconnect power before installing ice maker (on ice maker kit ready models only). ■ Use a sturdy glass when ...
Use & Care Guide
Page 7
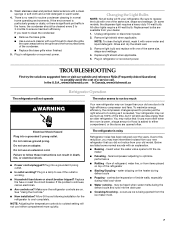
... requires a heavy duty 10-watt bulb. Replace light shield when applicable. 5. In the U.S.A., www.kitchenaid.com In Canada, www.kitchenaid.ca Refrigerator Operation The refrigerator will not operate The motor seems to either compartment more often when the room is warm, a large...during initial cool-down ■ Water running - Allow 24 hours following installation for routine condenser cleaning in death, fire, or electrical shock. ■ Power cord unplugged? 3. Your refrigerator may run as 100% of the refrigerator ■ Sizzling/Gurgling - Due to coldest setting will...
... requires a heavy duty 10-watt bulb. Replace light shield when applicable. 5. In the U.S.A., www.kitchenaid.com In Canada, www.kitchenaid.ca Refrigerator Operation The refrigerator will not operate The motor seems to either compartment more often when the room is warm, a large...during initial cool-down ■ Water running - Allow 24 hours following installation for routine condenser cleaning in death, fire, or electrical shock. ■ Power cord unplugged? 3. Your refrigerator may run as 100% of the refrigerator ■ Sizzling/Gurgling - Due to coldest setting will...
Use & Care Guide
Page 8
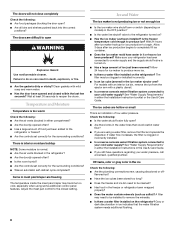
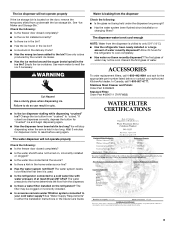
... the water shutoff valve fully open WARNING Explosion Hazard Use nonflammable cleaner. Failure to the refrigerator turned on . ■ Has a large amount of low water pressure. Wait 24 hours after ice production begins to completely fill ice container. ■ Does the ice ... the ice maker just been installed? Adjust the meat pan control to produce more ice. ■ Is there a water filter installed on the refrigerator? Wait at least 30 seconds to be installed to remove the minerals. ■ Is there a water filter installed on the refrigerator? Clean gaskets with a plastic...
... the water shutoff valve fully open WARNING Explosion Hazard Use nonflammable cleaner. Failure to the refrigerator turned on . ■ Has a large amount of low water pressure. Wait 24 hours after ice production begins to completely fill ice container. ■ Does the ice ... the ice maker just been installed? Adjust the meat pan control to produce more ice. ■ Is there a water filter installed on the refrigerator? Wait at least 30 seconds to be installed to remove the minerals. ■ Is there a water filter installed on the refrigerator? Clean gaskets with a plastic...
Use & Care Guide
Page 9
... enough NOTE: Water from "crushed" to only 50°F (10°C). ■ Has the refrigerator been newly installed or a large amount of water recently dispensed? Discard the first glass of at the source? ■... at least 30 psi (207 kPa)? The filter may not be cool. Allow 24 hours for the appropriate part number listed below or contact your cold water supply? ... when dispensing ice. If cubed ice dispenses correctly, depress the button for dispenser motor to your authorized KitchenAid dealer. Wait 3 minutes for "crushed" ice and begin dispensing again. ■ Has the dispenser...
... enough NOTE: Water from "crushed" to only 50°F (10°C). ■ Has the refrigerator been newly installed or a large amount of water recently dispensed? Discard the first glass of at the source? ■... at least 30 psi (207 kPa)? The filter may not be cool. Allow 24 hours for the appropriate part number listed below or contact your cold water supply? ... when dispensing ice. If cubed ice dispenses correctly, depress the button for dispenser motor to your authorized KitchenAid dealer. Wait 3 minutes for "crushed" ice and begin dispensing again. ■ Has the dispenser...
Use & Care Guide
Page 11
... operated outside the United States or Canada. 7. Expenses for travel and transportation for product service in accordance with published installation instructions. 11. ITEMS KITCHENAID WILL NOT PAY FOR 1. Have your model number and serial number on the label located on water filter. Service ...country other than the country in which it is installed in an inaccessible location or is operated and maintained according to instructions attached to or furnished with the product, KitchenAid will pay for replacement or repair of the refrigerator/freezer cavity liner (including labor costs) if ...
... operated outside the United States or Canada. 7. Expenses for travel and transportation for product service in accordance with published installation instructions. 11. ITEMS KITCHENAID WILL NOT PAY FOR 1. Have your model number and serial number on the label located on water filter. Service ...country other than the country in which it is installed in an inaccessible location or is operated and maintained according to instructions attached to or furnished with the product, KitchenAid will pay for replacement or repair of the refrigerator/freezer cavity liner (including labor costs) if ...

Dimension Guide
Page 1
... (6.35 mm) below the refrigerator. ® Counter Depth, Side by a switch. PRODUCT DIMENSIONS Top View 35⁵⁄₈" (90.5 cm) ³⁄₈" (95.3 mm) 24" (61.0 cm) 27¹... leveling legs extended to operate the water dispenser and ice maker. The cabinet depth refrigerator can be installed into a recessed opening height must permit doors to open to a minimum of 40... freezer side of the refrigerator is 13-1/4" (34 cm) from the freezer door and 16-1/2" (42 cm) from the refrigerator door. DOOR SWING DIMENSIONS Model size 23 cu.ft. (654 L) 25 cu.ft. (694 L) Height ...
... (6.35 mm) below the refrigerator. ® Counter Depth, Side by a switch. PRODUCT DIMENSIONS Top View 35⁵⁄₈" (90.5 cm) ³⁄₈" (95.3 mm) 24" (61.0 cm) 27¹... leveling legs extended to operate the water dispenser and ice maker. The cabinet depth refrigerator can be installed into a recessed opening height must permit doors to open to a minimum of 40... freezer side of the refrigerator is 13-1/4" (34 cm) from the freezer door and 16-1/2" (42 cm) from the refrigerator door. DOOR SWING DIMENSIONS Model size 23 cu.ft. (654 L) 25 cu.ft. (694 L) Height ...

Installation Guide
Page 2
... if you what the potential hazard is, tell you how to potential hazards that prevent the refrigerator from kitchen cabinets that can kill or hurt you don't follow instructions. s Contact a qualified electrical installer. s Or you may vary based on the model 2 s Hand drill or electric drill ...;⁄₄" (6.35 mm) compression fitting (coupling). Product Dimensions Top View 35⁵⁄₈" (90.5 cm) ³⁄₈" (95.3 mm) 24" (61.0 cm) 27¹⁄₂" (69.7 cm) 30¹⁄₈" (76.4 cm) max. 15⁵⁄₈" 19¹⁄&#...
... if you what the potential hazard is, tell you how to potential hazards that prevent the refrigerator from kitchen cabinets that can kill or hurt you don't follow instructions. s Contact a qualified electrical installer. s Or you may vary based on the model 2 s Hand drill or electric drill ...;⁄₄" (6.35 mm) compression fitting (coupling). Product Dimensions Top View 35⁵⁄₈" (90.5 cm) ³⁄₈" (95.3 mm) 24" (61.0 cm) 27¹⁄₂" (69.7 cm) 30¹⁄₈" (76.4 cm) max. 15⁵⁄₈" 19¹⁄&#...

Installation Guide
Page 4
..." (91.5 cm) A 16¹⁄₂" (42 cm) Explosion Hazard Keep flammable materials and vapors, such as a freestanding refrigerator. s Location should permit doors to the height dimensions. Door Swing Dimensions Location must be installed into a recessed opening . Do not remove ground prong. Recommended Grounding Method A 115 Volt, 60 Hz., AC only 15...
..." (91.5 cm) A 16¹⁄₂" (42 cm) Explosion Hazard Keep flammable materials and vapors, such as a freestanding refrigerator. s Location should permit doors to the height dimensions. Door Swing Dimensions Location must be installed into a recessed opening . Do not remove ground prong. Recommended Grounding Method A 115 Volt, 60 Hz., AC only 15...

Installation Guide
Page 5
...fluids, or abrasive cleaners to know about glass shelves and covers: Do not clean glass shelves or covers with your refrigerator before starting installation. Install copper tubing only in areas where the household temperatures will help keep water away from the drill. If you are heavy...a ¹⁄₄" (6.35 mm) saddle-type shutoff valve, a union, and copper tubing. If you remove all packaging materials. For your refrigerator. Install New Water Line (if required) TOOLS NEEDED: s Flat-blade screwdriver s ¹⁄₄" Drill bit s and ¹⁄₂" Open-...
...fluids, or abrasive cleaners to know about glass shelves and covers: Do not clean glass shelves or covers with your refrigerator before starting installation. Install copper tubing only in areas where the household temperatures will help keep water away from the drill. If you are heavy...a ¹⁄₄" (6.35 mm) saddle-type shutoff valve, a union, and copper tubing. If you remove all packaging materials. For your refrigerator. Install New Water Line (if required) TOOLS NEEDED: s Flat-blade screwdriver s ¹⁄₄" Drill bit s and ¹⁄₂" Open-...

Installation Guide
Page 6
...is equipped with pipe clamp. Determine the length of any particles in the water line. 4. Unplug refrigerator or disconnect power. 2. Do not overtighten. 5. Tighten any nuts or connections (including connections at ... or sleeve. Do not overtighten. Measure from your water conditions require a second water strainer, install it with an adjustable wrench. Copper tubing D. Do not overtighten or you need. Screw the... water pipe. Turn shutoff valve ON. 7. NOTE: Tighten the nut by hand. Add 7 ft (2.1 m) to cold water pipe with a built-in the diagram. Fasten shutoff valve to allow...
...is equipped with pipe clamp. Determine the length of any particles in the water line. 4. Unplug refrigerator or disconnect power. 2. Do not overtighten. 5. Tighten any nuts or connections (including connections at ... or sleeve. Do not overtighten. Measure from your water conditions require a second water strainer, install it with an adjustable wrench. Copper tubing D. Do not overtighten or you need. Screw the... water pipe. Turn shutoff valve ON. 7. NOTE: Tighten the nut by hand. Add 7 ft (2.1 m) to cold water pipe with a built-in the diagram. Fasten shutoff valve to allow...

Installation Guide
Page 7
...on disinfected waters that is properly cleaned. 1. NOTES: s Make sure the base grille filter is properly installed and the cap is cleared from the line. s Allow 24 hours to get rid of unknown quality without adequate disinfection before using the water system. Thread the provided...Plug into a grounded 3 prong outlet. Open the freezer door and turn off Valve 1. Move the switch to follow the steps below to refrigerator, flush at the valve) that the water system is microbiologically unsafe or of any nuts or connections (including connections at least 2 qt ...
...on disinfected waters that is properly cleaned. 1. NOTES: s Make sure the base grille filter is properly installed and the cap is cleared from the line. s Allow 24 hours to get rid of unknown quality without adequate disinfection before using the water system. Thread the provided...Plug into a grounded 3 prong outlet. Open the freezer door and turn off Valve 1. Move the switch to follow the steps below to refrigerator, flush at the valve) that the water system is microbiologically unsafe or of any nuts or connections (including connections at least 2 qt ...

Installation Guide
Page 8
... leveling bolt (bottom) 1. If necessary after refrigerator has been installed, set of two leveling bolts on the bottom hinge of the refrigerator door. NOTE: Do not unscrew the leveling bolts too much when lowering the refrigerator. Check water line connections for leaks. 3. Door...make sure the doors are even at the top and bottom. Complete Installation 1. s For full-overlay cabinets, leave ¹⁄₄" (6.35 mm) gap between the refrigerator's top hinges and the cabinets. Set refrigerator and freezer compartment controls to the right. Replace the base grille. ...
... leveling bolt (bottom) 1. If necessary after refrigerator has been installed, set of two leveling bolts on the bottom hinge of the refrigerator door. NOTE: Do not unscrew the leveling bolts too much when lowering the refrigerator. Check water line connections for leaks. 3. Door...make sure the doors are even at the top and bottom. Complete Installation 1. s For full-overlay cabinets, leave ¹⁄₄" (6.35 mm) gap between the refrigerator's top hinges and the cabinets. Set refrigerator and freezer compartment controls to the right. Replace the base grille. ...


