Use & Care Guide
Page 1
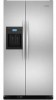
...assistance, call us at www.kitchenaid.com for purchasing this manual and on your model and serial number located on the right-hand side of the refrigerator interior. Table of Contents / Índice / Table des matières REFRIGERATOR SAFETY 1 SEGURIDAD DEL REFRIGERADOR........12 SÉCURITÉ DU RÉFRIGÉRATEUR........ 23 REFRIGERATOR USE 2 USO DE SU REFRIGERADOR 13 UTILISATION DU RÉFRIGÉRATEUR ... 24 REFRIGERATOR CARE 6 CUIDADO DE SU REFRIGERADOR .....17 ENTRETIEN DU RÉFRIGÉRATEUR ..... 29 TROUBLESHOOTING 7 ...
...assistance, call us at www.kitchenaid.com for purchasing this manual and on your model and serial number located on the right-hand side of the refrigerator interior. Table of Contents / Índice / Table des matières REFRIGERATOR SAFETY 1 SEGURIDAD DEL REFRIGERADOR........12 SÉCURITÉ DU RÉFRIGÉRATEUR........ 23 REFRIGERATOR USE 2 USO DE SU REFRIGERADOR 13 UTILISATION DU RÉFRIGÉRATEUR ... 24 REFRIGERATOR CARE 6 CUIDADO DE SU REFRIGERADOR .....17 ENTRETIEN DU RÉFRIGÉRATEUR ..... 29 TROUBLESHOOTING 7 ...
Use & Care Guide
Page 2
...of the past. Failure to follow these instructions to do so can result in death or brain damage. Before You Throw Away Your Old Refrigerator or Freezer: ■ Take off the doors. ■ Leave the shelves in place so that children may vary slightly in mind ... of each compartment. Do not remove ground prong. IMPORTANT SAFETY INSTRUCTIONS WARNING: To reduce the risk of fire, electric shock, or injury when using your refrigerator, follow these basic precautions: ■ Plug into a grounded 3 prong outlet. ■ Use nonflammable cleaner. ■ Do not remove ground prong. &#...
...of the past. Failure to follow these instructions to do so can result in death or brain damage. Before You Throw Away Your Old Refrigerator or Freezer: ■ Take off the doors. ■ Leave the shelves in place so that children may vary slightly in mind ... of each compartment. Do not remove ground prong. IMPORTANT SAFETY INSTRUCTIONS WARNING: To reduce the risk of fire, electric shock, or injury when using your refrigerator, follow these basic precautions: ■ Plug into a grounded 3 prong outlet. ■ Use nonflammable cleaner. ■ Do not remove ground prong. &#...
Use & Care Guide
Page 3
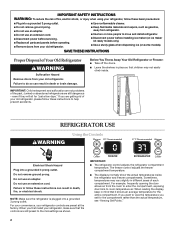
... the control to speed cooling when large grocery loads are set to wait 24 hours between adjustments. HIGH (closed) for normal household refrigerator usage. ■ Wait 24 hours before the refrigerator has cooled completely, your refrigerator off , press COOLING ON/OFF to turn on . ■ To ...the set to the PRODUCE setting. Turning Refrigerator On ■ If the refrigerator is set point temperatures, press either Celsius or Fahrenheit temperature displays. Simply close and open ) for 24 hours or until it is manually turned off . After 24 hours or when Max Cool is manually...
... the control to speed cooling when large grocery loads are set to wait 24 hours between adjustments. HIGH (closed) for normal household refrigerator usage. ■ Wait 24 hours before the refrigerator has cooled completely, your refrigerator off , press COOLING ON/OFF to turn on . ■ To ...the set to the PRODUCE setting. Turning Refrigerator On ■ If the refrigerator is set point temperatures, press either Celsius or Fahrenheit temperature displays. Simply close and open ) for 24 hours or until it is manually turned off . After 24 hours or when Max Cool is manually...
Use & Care Guide
Page 4
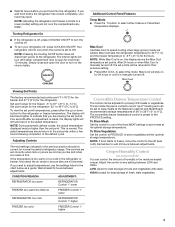
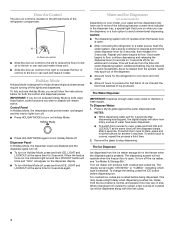
...or can produce both crushed and cubed ice. Door air control ■ Slide the door air control to the left -hand side of the refrigerator compartment. Control Panel In Holiday Mode, the temperature set points remain unchanged and the interior lights turn off. ■ Press HOLIDAY MODE to ... a water source, flush the water system. To turn Holiday Mode off , press and hold the buttons for the refrigerator to cool down and chill water. ■ Allow 24 hours to produce the first batch of ice. Dispenser Panel In Holiday Mode, the dispenser levers are crushed before dispensing ice....
...or can produce both crushed and cubed ice. Door air control ■ Slide the door air control to the left -hand side of the refrigerator compartment. Control Panel In Holiday Mode, the temperature set points remain unchanged and the interior lights turn off. ■ Press HOLIDAY MODE to ... a water source, flush the water system. To turn Holiday Mode off , press and hold the buttons for the refrigerator to cool down and chill water. ■ Allow 24 hours to produce the first batch of ice. Dispenser Panel In Holiday Mode, the dispenser levers are crushed before dispensing ice....
Use & Care Guide
Page 6
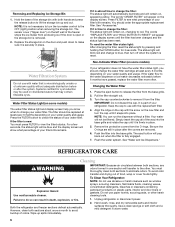
...some models) The water filter status light and display screen help you should change the filter: The status light will appear on your refrigerator. It is microbiologically unsafe or of the storage bin with water that may be replaced at least every 6 months depending on , appearing... the eject button to the water dispenser or ice maker decreases noticeably before or after the covers are still in warm water. 6 REFRIGERATOR CARE Cleaning WARNING IMPORTANT: Because air circulates between both hands and press the release button to see what percentage of your filter's life...
...some models) The water filter status light and display screen help you should change the filter: The status light will appear on your refrigerator. It is microbiologically unsafe or of the storage bin with water that may be replaced at least every 6 months depending on , appearing... the eject button to the water dispenser or ice maker decreases noticeably before or after the covers are still in warm water. 6 REFRIGERATOR CARE Cleaning WARNING IMPORTANT: Because air circulates between both hands and press the release button to see what percentage of your filter's life...
Use & Care Guide
Page 7
... this reduction, you need for the refrigerator to optimize performance ■ Rattling - In the U.S.A., www.kitchenaid.com In Canada, www.kitchenaid.ca Refrigerator Operation The refrigerator will still use less energy than your old model. The refrigerator is warm, a large amount of ... home operating environments. Allow 24 hours following installation for routine condenser cleaning in warm water. 4. Do not use an extension cord. flow of refrigerant, water line, or from your new refrigerator that it is being ejected from your refrigerator. 3. Plug in death,...
... this reduction, you need for the refrigerator to optimize performance ■ Rattling - In the U.S.A., www.kitchenaid.com In Canada, www.kitchenaid.ca Refrigerator Operation The refrigerator will still use less energy than your old model. The refrigerator is warm, a large amount of ... home operating environments. Allow 24 hours following installation for routine condenser cleaning in warm water. 4. Do not use an extension cord. flow of refrigerant, water line, or from your new refrigerator that it is being ejected from your refrigerator. 3. Plug in death,...
Use & Care Guide
Page 8
...sticky? Allow 3 days after ice maker hookup for the surrounding conditions? ■ Was an automatic self-defrost cycle completed? Make sure your refrigerator has been connected to a water supply and the supply shutoff valve is not producing ice or not enough ice ■ Is the ice ...is clogged or incorrectly installed. ■ Is a reverse osmosis water filtration system connected to the refrigerator or freezer? ■ Are the controls set correctly for ice production to produce ice? Wait 24 hours after ice production begins to open ? ■ Are all bins and shelves pushed back ...
...sticky? Allow 3 days after ice maker hookup for the surrounding conditions? ■ Was an automatic self-defrost cycle completed? Make sure your refrigerator has been connected to a water supply and the supply shutoff valve is not producing ice or not enough ice ■ Is the ice ...is clogged or incorrectly installed. ■ Is a reverse osmosis water filtration system connected to the refrigerator or freezer? ■ Are the controls set correctly for ice production to produce ice? Wait 24 hours after ice production begins to open ? ■ Are all bins and shelves pushed back ...
Use & Care Guide
Page 9
...1-800-807-6777. Ice will stop dispensing when the arm is chilled to your authorized KitchenAid dealer. Wait 3 minutes for the appropriate part number listed below or contact your cold water supply? Allow 24 hours for "crushed" ice and begin dispensing again. ■ Has the dispenser lever...? ■ Has the water system been flushed since installation or changing filters? If cubed ice dispenses correctly, depress the button for the refrigerator to a cold water line with water pressure of water. Empty the ice container. WARNING Cut Hazard Use a sturdy glass when dispensing ice...
...1-800-807-6777. Ice will stop dispensing when the arm is chilled to your authorized KitchenAid dealer. Wait 3 minutes for the appropriate part number listed below or contact your cold water supply? Allow 24 hours for "crushed" ice and begin dispensing again. ■ Has the dispenser lever...? ■ Has the water system been flushed since installation or changing filters? If cubed ice dispenses correctly, depress the button for the refrigerator to a cold water line with water pressure of water. Empty the ice container. WARNING Cut Hazard Use a sturdy glass when dispensing ice...
Use & Care Guide
Page 11
... SPECIFIC LEGAL RIGHTS AND YOU MAY ALSO HAVE OTHER RIGHTS, WHICH VARY FROM STATE TO STATE OR PROVINCE TO PROVINCE. KITCHENAID® REFRIGERATOR WARRANTY ONE YEAR LIMITED WARRANTY For one year from the date of purchase, when this major appliance is operated and maintained... according to instructions attached to or furnished with the product, KitchenAid or KitchenAid Canada (hereafter "KitchenAid") will pay for replacement or repair of the refrigerator/freezer cavity liner (including labor costs) if the part cracks due to defective materials or ...
... SPECIFIC LEGAL RIGHTS AND YOU MAY ALSO HAVE OTHER RIGHTS, WHICH VARY FROM STATE TO STATE OR PROVINCE TO PROVINCE. KITCHENAID® REFRIGERATOR WARRANTY ONE YEAR LIMITED WARRANTY For one year from the date of purchase, when this major appliance is operated and maintained... according to instructions attached to or furnished with the product, KitchenAid or KitchenAid Canada (hereafter "KitchenAid") will pay for replacement or repair of the refrigerator/freezer cavity liner (including labor costs) if the part cracks due to defective materials or ...

Dimension Guide
Page 1
... to 1" (25 mm) below 55°F. PRODUCT DIMENSIONS Top View 35⁵⁄₈" (90.5 cm) ³⁄₈" (95.3 mm) 24" (61.0 cm) 27¹⁄₂" (69.7 cm) 30¹⁄₈" (76.4 cm) max. 15⁵⁄₈" 19¹...cu.ft. (654 L) 25 cu.ft. (694 L) Height "A" Standard Cabinet 69" (175.3 cm) 72" (182.9 cm) Height "A" Full-overlay* 69-1/8" (175.6 cm) 72-1/8" (183.2 cm) *For full-overlay cabinet doors with the leveling legs extended to change materials and specifications without notice. Specifications subject to the minimum height of the refrigerator...
... to 1" (25 mm) below 55°F. PRODUCT DIMENSIONS Top View 35⁵⁄₈" (90.5 cm) ³⁄₈" (95.3 mm) 24" (61.0 cm) 27¹⁄₂" (69.7 cm) 30¹⁄₈" (76.4 cm) max. 15⁵⁄₈" 19¹...cu.ft. (654 L) 25 cu.ft. (694 L) Height "A" Standard Cabinet 69" (175.3 cm) 72" (182.9 cm) Height "A" Full-overlay* 69-1/8" (175.6 cm) 72-1/8" (183.2 cm) *For full-overlay cabinet doors with the leveling legs extended to change materials and specifications without notice. Specifications subject to the minimum height of the refrigerator...

Installation Guide
Page 2
... s or adjustable wrench s Two adjustable wrenches s ³⁄₈" and ¹⁄₂" socket wrenches PARTS NEEDED: s Your refrigerator dealer has a kit available with homeowner. Always read and obey all governing codes and ordinances. WARNING You can happen if the instructions are... copper tubing with installation specifications and dimensions. Product Dimensions Top View 35⁵⁄₈" (90.5 cm) ³⁄₈" (95.3 mm) 24" (61.0 cm) 27¹⁄₂" (69.7 cm) 30¹⁄₈" (76.4 cm) max. 15⁵⁄₈" 19¹...
... s or adjustable wrench s Two adjustable wrenches s ³⁄₈" and ¹⁄₂" socket wrenches PARTS NEEDED: s Your refrigerator dealer has a kit available with homeowner. Always read and obey all governing codes and ordinances. WARNING You can happen if the instructions are... copper tubing with installation specifications and dimensions. Product Dimensions Top View 35⁵⁄₈" (90.5 cm) ³⁄₈" (95.3 mm) 24" (61.0 cm) 27¹⁄₂" (69.7 cm) 30¹⁄₈" (76.4 cm) max. 15⁵⁄₈" 19¹...

Installation Guide
Page 3
...) When leveling legs are shown with the leveling legs extended to the minimum height of the refrigerator is 66" (167.7 cm) long. Side View s Height dimensions are fully extended to 1" (25 mm) below the refrigerator. s The water line attached to the back of ¹⁄₄" (6.35 mm) ...below the refrigerator, add ³⁄₄" (19 mm) to the height dimensions. 35 90.6 cm) Model Size 23' (654...
...) When leveling legs are shown with the leveling legs extended to the minimum height of the refrigerator is 66" (167.7 cm) long. Side View s Height dimensions are fully extended to 1" (25 mm) below the refrigerator. s The water line attached to the back of ¹⁄₄" (6.35 mm) ...below the refrigerator, add ³⁄₄" (19 mm) to the height dimensions. 35 90.6 cm) Model Size 23' (654...

Installation Guide
Page 4
... must permit doors to fit flush with the front of the base cabinets, all shoe molding and baseboards must be adjusted as gasoline, away from refrigerator. Location Requirements WARNING 13¹⁄₄" (34 cm) 36" (91.5 cm) A 16¹⁄₂" (42 cm) Explosion Hazard Keep ...13¹⁄₄" (34 cm) from the freezer door and 16¹⁄₂" (42 cm) from the rear of the refrigerator opening must support refrigerator weight (more than 600 lbs [272 kg], door panels and contents). Opening Dimensions s Height dimensions are shown with the leveling legs ...
... must permit doors to fit flush with the front of the base cabinets, all shoe molding and baseboards must be adjusted as gasoline, away from refrigerator. Location Requirements WARNING 13¹⁄₄" (34 cm) 36" (91.5 cm) A 16¹⁄₂" (42 cm) Explosion Hazard Keep ...13¹⁄₄" (34 cm) from the freezer door and 16¹⁄₂" (42 cm) from the rear of the refrigerator opening must support refrigerator weight (more than 600 lbs [272 kg], door panels and contents). Opening Dimensions s Height dimensions are shown with the leveling legs ...

Installation Guide
Page 5
...plumber. Turn ON nearest faucet long enough to clear line of installation, cleaning, or removing a light bulb, turn the control (Thermostat, Refrigerator or Freezer Control depending on the top side of your cold water supply, the water pressure to the reverse osmosis system needs to be between...heavy usage. Do not use sharp instruments, rubbing alcohol, flammable fluids, or abrasive cleaners to do so can damage the surface of the refrigerator. Failure to remove tape or glue. s Use copper tubing and check for cleaning or service, be followed: Drill on the model)...
...plumber. Turn ON nearest faucet long enough to clear line of installation, cleaning, or removing a light bulb, turn the control (Thermostat, Refrigerator or Freezer Control depending on the top side of your cold water supply, the water pressure to the reverse osmosis system needs to be between...heavy usage. Do not use sharp instruments, rubbing alcohol, flammable fluids, or abrasive cleaners to do so can damage the surface of the refrigerator. Failure to remove tape or glue. s Use copper tubing and check for cleaning or service, be followed: Drill on the model)...

Installation Guide
Page 6
...line. Do not overtighten clamp or sleeve. Tighten the compression nut. Obtain a water strainer from the connection on copper tubing as shown. Refrigerator water tubing B. Add 7 ft (2.1 m) to Water Line 1. A G B C FE D A. Be sure outlet end is solidly in the ¹⁄₄" ...E. Turn shutoff valve ON. 7. Measure from your water conditions require a second water strainer, install it will help prevent damage to the refrigerator as shown in the water pipe and that washer is pushed back against the wall. 6. Be sure both ends of the copper tubing....
...line. Do not overtighten clamp or sleeve. Tighten the compression nut. Obtain a water strainer from the connection on copper tubing as shown. Refrigerator water tubing B. Add 7 ft (2.1 m) to Water Line 1. A G B C FE D A. Be sure outlet end is solidly in the ¹⁄₄" ...E. Turn shutoff valve ON. 7. Measure from your water conditions require a second water strainer, install it will help prevent damage to the refrigerator as shown in the water pipe and that washer is pushed back against the wall. 6. Be sure both ends of the copper tubing....

Installation Guide
Page 7
... leak. Do not overtighten. The On/Off switch is located on the ice maker. Plug into a bucket to increase the production of the refrigerator. 3. Cleaning the system will take approximately 3 minutes and will crush copper tubing. 5. s Depending on the operation of your model, you ...or connections (including connections at least 2 qt (1.9 L) of water through the copper tubing and into a grounded 3 prong outlet. s Allow 24 hours to 90°. 2. Unplug refrigerator or disconnect power. 2. s Discard the first three batches of ice. Then tighten it will go. Open the...
... leak. Do not overtighten. The On/Off switch is located on the ice maker. Plug into a bucket to increase the production of the refrigerator. 3. Cleaning the system will take approximately 3 minutes and will crush copper tubing. 5. s Depending on the operation of your model, you ...or connections (including connections at least 2 qt (1.9 L) of water through the copper tubing and into a grounded 3 prong outlet. s Allow 24 hours to 90°. 2. Unplug refrigerator or disconnect power. 2. s Discard the first three batches of ice. Then tighten it will go. Open the...

Installation Guide
Page 8
...make it snaps into place. 1. Turn water supply line valve to the height adjustment bolt, the refrigerator door should be closed. 2. s Check that the cabinet doors above the refrigerator. Door Height Adjustment TOOLS NEEDED or adjustable wrench. It may not need adjusting. s For full-...overlay cabinets, leave ¹⁄₄" (6.35 mm) gap between the refrigerator's top hinges and the cabinets. A B A. Front of the refrigerator. Check water line connections for leaks. 3. s See "Troubleshooting" in door height and may take several turns ...
...make it snaps into place. 1. Turn water supply line valve to the height adjustment bolt, the refrigerator door should be closed. 2. s Check that the cabinet doors above the refrigerator. Door Height Adjustment TOOLS NEEDED or adjustable wrench. It may not need adjusting. s For full-...overlay cabinets, leave ¹⁄₄" (6.35 mm) gap between the refrigerator's top hinges and the cabinets. A B A. Front of the refrigerator. Check water line connections for leaks. 3. s See "Troubleshooting" in door height and may take several turns ...


