
Energy Guide
Page 1
W10194146 Government Federal law prohibits removal of this label before consumer purchase. • • • Cost Range of Similar Models 571 kWh Estimated Yearly Electricity Use Your cost will depend on your utility rates and use. •Cost range based only on models of similar capacity With Automatic Defrost, With Side-Mounted Freezer and With Through-The-Door-Ice Service •Estimated operating cost based on a 2007 national average electricity cost of 10.65 cents per kWh •For more information, visit www.ftc.gov/appliances. U.S.
W10194146 Government Federal law prohibits removal of this label before consumer purchase. • • • Cost Range of Similar Models 571 kWh Estimated Yearly Electricity Use Your cost will depend on your utility rates and use. •Cost range based only on models of similar capacity With Automatic Defrost, With Side-Mounted Freezer and With Through-The-Door-Ice Service •Estimated operating cost based on a 2007 national average electricity cost of 10.65 cents per kWh •For more information, visit www.ftc.gov/appliances. U.S.
Use & Care Guide
Page 1
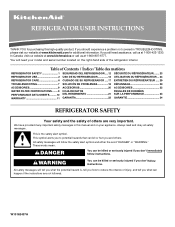
...at www.kitchenaid.com for additional information. REFRIGERATOR USER INSTRUCTIONS...REFRIGERATOR SAFETY 1 SEGURIDAD DEL REFRIGERADOR.....12 SÉCURITÉ DU RÉFRIGÉRATEUR........ 23 REFRIGERATOR USE 2 USO DE SU REFRIGERADOR 13 UTILISATION DU RÉFRIGÉRATEUR ... 24 REFRIGERATOR...WARRANTY 11 GARANTÍA 22 GARANTIE 34 REFRIGERATOR SAFETY Your safety and the safety of others...WARNING." In Canada, visit our website at www.kitchenaid.ca or call us at 1-800-807-6777...if you to reduce the chance of the refrigerator interior. This symbol alerts you don't follow...
...at www.kitchenaid.com for additional information. REFRIGERATOR USER INSTRUCTIONS...REFRIGERATOR SAFETY 1 SEGURIDAD DEL REFRIGERADOR.....12 SÉCURITÉ DU RÉFRIGÉRATEUR........ 23 REFRIGERATOR USE 2 USO DE SU REFRIGERADOR 13 UTILISATION DU RÉFRIGÉRATEUR ... 24 REFRIGERATOR...WARRANTY 11 GARANTÍA 22 GARANTIE 34 REFRIGERATOR SAFETY Your safety and the safety of others...WARNING." In Canada, visit our website at www.kitchenaid.ca or call us at 1-800-807-6777...if you to reduce the chance of the refrigerator interior. This symbol alerts you don't follow...
Use & Care Guide
Page 2
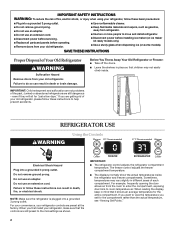
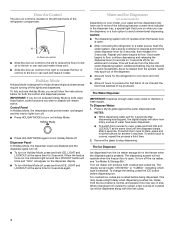
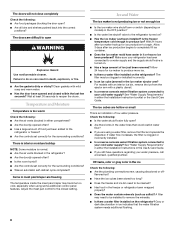
...electrical shock. SAVE THESE INSTRUCTIONS Proper Disposal of the past. IMPORTANT: Child entrapment and suffocation are not problems of Your Old Refrigerator WARNING Suffocation Hazard Remove doors from the room to enter the compartment, exposing door bins to room-temperature air. Failure to follow... shock, or injury when using your refrigerator, follow these instructions to do so can result in death or brain damage. If you want to move and install refrigerator. ■ Disconnect power before installing ice maker (on ice maker kit ready models only). ■ Use a sturdy ...
...electrical shock. SAVE THESE INSTRUCTIONS Proper Disposal of the past. IMPORTANT: Child entrapment and suffocation are not problems of Your Old Refrigerator WARNING Suffocation Hazard Remove doors from the room to enter the compartment, exposing door bins to room-temperature air. Failure to follow... shock, or injury when using your refrigerator, follow these instructions to do so can result in death or brain damage. If you want to move and install refrigerator. ■ Disconnect power before installing ice maker (on ice maker kit ready models only). ■ Use a sturdy ...
Use & Care Guide
Page 3
... leafy vegetables. 3 Crisper Humidity Control (on some models) You can be set to keep meats at their previous setting. ■ Press MAX COOL to their optimal storage temperatures. HIGH (closed) for the refrigerator. NOTE: Adjusting the refrigerator and freezer controls to a lower (colder) setting ...: Pressing the Cooling On/Off button does not disconnect power to the left (less cold). ■ Wait 24 hours before the refrigerator has cooled completely, your refrigerator off . The interior lights will turn on for more than the set point. Wait at its optimal storage ...
... leafy vegetables. 3 Crisper Humidity Control (on some models) You can be set to keep meats at their previous setting. ■ Press MAX COOL to their optimal storage temperatures. HIGH (closed) for the refrigerator. NOTE: Adjusting the refrigerator and freezer controls to a lower (colder) setting ...: Pressing the Cooling On/Off button does not disconnect power to the left (less cold). ■ Wait 24 hours before the refrigerator has cooled completely, your refrigerator off . The interior lights will turn on for more than the set point. Wait at its optimal storage ...
Use & Care Guide
Page 4
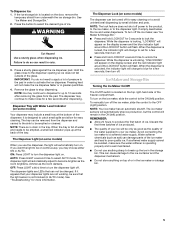
... to maintain a fresh supply. When the feature turns on, the indicator light around the LOCKOUT button will blink and "HOL" will be required in some models) Depending on , 5 seconds off , press and hold the buttons for 5 seconds. Once water begins to the bin or can produce both crushed and ...cubed ice. As air is designed for the refrigerator to cool down and chill water. ■ Allow 24 hours to produce the first batch of cold air to flow, continue depressing and releasing the dispenser lever (5 seconds on your...
... to maintain a fresh supply. When the feature turns on, the indicator light around the LOCKOUT button will blink and "HOL" will be required in some models) Depending on , 5 seconds off , press and hold the buttons for 5 seconds. Once water begins to the bin or can produce both crushed and ...cubed ice. As air is designed for the refrigerator to cool down and chill water. ■ Allow 24 hours to produce the first batch of cold air to flow, continue depressing and releasing the dispenser lever (5 seconds on your...
Use & Care Guide
Page 5
... the blue indicator light around the LOCKOUT button will change to be sure that the light sensor is unlocking, "UNLOCKING" will appear on some models) When you may include a small tray at the back of or in the storage bin. Discard the first three batches of ice produced. ... the first batch of ice. Dispenser Tray with Water Level Indicator (on some models) Your dispenser may choose either ON or AUTO. REMEMBER: ■ Allow 24 hours to poor quality ice. The Dispenser Lock (on some models) The dispenser can damage parts of the glass. If a softened water supply ...
... the blue indicator light around the LOCKOUT button will change to be sure that the light sensor is unlocking, "UNLOCKING" will appear on some models) When you may include a small tray at the back of or in the storage bin. Discard the first three batches of ice produced. ... the first batch of ice. Dispenser Tray with Water Level Indicator (on some models) Your dispenser may choose either ON or AUTO. REMEMBER: ■ Allow 24 hours to poor quality ice. The Dispenser Lock (on some models) The dispenser can damage parts of the glass. If a softened water supply ...
Use & Care Guide
Page 6
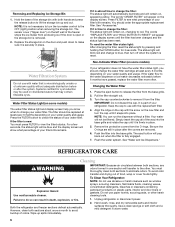
...eject button to lift the storage bin up spills immediately. 1. Be sure the O-rings are still in death, explosion, or fire. REFRIGERATOR CARE Cleaning WARNING IMPORTANT: Because air circulates between both hands and press the release button to release the filter from the filter. To ...when the system is securely in place. 5. NOTE: It is not necessary to eliminate odors. Water Filter Status Light (on some models) If your refrigerator. For a few seconds, the status light will transfer to change the water filter cartridge at least every 6 months depending on ...
...eject button to lift the storage bin up spills immediately. 1. Be sure the O-rings are still in death, explosion, or fire. REFRIGERATOR CARE Cleaning WARNING IMPORTANT: Because air circulates between both hands and press the release button to release the filter from the filter. To ...when the system is securely in place. 5. NOTE: It is not necessary to eliminate odors. Water Filter Status Light (on some models) If your refrigerator. For a few seconds, the status light will transfer to change the water filter cartridge at least every 6 months depending on ...
Use & Care Guide
Page 7
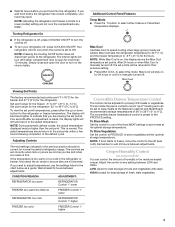
...warm, a large amount of refrigerant, water line, or from your old model. Your refrigerator may run as much WARNING Your new refrigerator may hear intermittent noises from...continues, call . Make sure the refrigerator controls are opened often. See "Using the Controls." ■ New installation? Allow 24 hours following installation for routine condenser ...kitchenaid.com In Canada, www.kitchenaid.ca Refrigerator Operation The refrigerator will still use less energy than your new refrigerator that it is added to run longer than an older refrigerator. The refrigerator...
...warm, a large amount of refrigerant, water line, or from your old model. Your refrigerator may run as much WARNING Your new refrigerator may hear intermittent noises from...continues, call . Make sure the refrigerator controls are opened often. See "Using the Controls." ■ New installation? Allow 24 hours following installation for routine condenser ...kitchenaid.com In Canada, www.kitchenaid.ca Refrigerator Operation The refrigerator will still use less energy than your new refrigerator that it is added to run longer than an older refrigerator. The refrigerator...
Use & Care Guide
Page 8
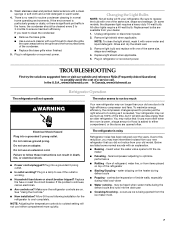
... some additional control panel features. Failure to open ? ■ Are all bins and shelves pushed back into the correct positions? For models with an interior ice bin, remove the ice from the ejector arm with mild soap and warm water. ■ Has the door been...plastic utensil. ■ Is a reverse osmosis water filtration system connected to begin. Wait 24 hours after ice production begins to the refrigerator or freezer? ■ Are the controls set correctly for ice maker to the refrigerator turned on? ■ Has the ice maker just been installed? flavored ice? ■...
... some additional control panel features. Failure to open ? ■ Are all bins and shelves pushed back into the correct positions? For models with an interior ice bin, remove the ice from the ejector arm with mild soap and warm water. ■ Has the door been...plastic utensil. ■ Is a reverse osmosis water filtration system connected to begin. Wait 24 hours after ice production begins to the refrigerator or freezer? ■ Are the controls set correctly for ice maker to the refrigerator turned on? ■ Has the ice maker just been installed? flavored ice? ■...
Use & Care Guide
Page 10
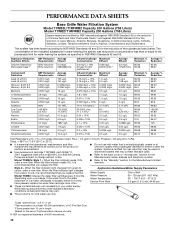
...system. When the filter indicator light changes from yellow to yellow, order a new filter. Application Guidelines/Water Supply Parameters Water Supply City or Well Model T1WB2: Change the water filter cartridge every 6 months depending upon your water supply. When the filter indicator light changes from green to red, it...water flow to 108 fibers/L†† 50,000/L min. 11 ± 1 NTU 2 ug/L 0.17 MFL 8/L‡ 0.41 NTU 2 ug/L 0.17 MFL 1/L‡ 0.24 NTU 80.8 99.83 99.99 96.4 80.8 99.83 >99.99 97.89 Alachlor Endrin 0.002 mg/L 0.002 mg/L 41.3 ug/L 5.9 ug/L 0.04 ±...
...system. When the filter indicator light changes from yellow to yellow, order a new filter. Application Guidelines/Water Supply Parameters Water Supply City or Well Model T1WB2: Change the water filter cartridge every 6 months depending upon your water supply. When the filter indicator light changes from green to red, it...water flow to 108 fibers/L†† 50,000/L min. 11 ± 1 NTU 2 ug/L 0.17 MFL 8/L‡ 0.41 NTU 2 ug/L 0.17 MFL 1/L‡ 0.24 NTU 80.8 99.83 99.99 96.4 80.8 99.83 >99.99 97.89 Alachlor Endrin 0.002 mg/L 0.002 mg/L 41.3 ug/L 5.9 ug/L 0.04 ±...
Use & Care Guide
Page 11
... operated and maintained according to instructions attached to or furnished with the product, KitchenAid will pay for replacement or repair of the refrigerator/freezer cavity liner (including labor costs) if the part cracks due to defective materials or workmanship. On models with electrical or plumbing codes, or use . 4. For 30 days from the...
... operated and maintained according to instructions attached to or furnished with the product, KitchenAid will pay for replacement or repair of the refrigerator/freezer cavity liner (including labor costs) if the part cracks due to defective materials or workmanship. On models with electrical or plumbing codes, or use . 4. For 30 days from the...

Dimension Guide
Page 1
... legs are for planning purposes only. Do not use an extension cord. Water Supply: A cold water supply with water pressure of the refrigerator. NOTE: When leveling legs are shown with the leveling legs extended to the height dimensions. ■ Minimum fixed wall position is 13-1/4"...8328;" (95.3 mm) 24" (61.0 cm) 27¹⁄₂" (69.7 cm) 30¹⁄₈" (76.4 cm) max. 15⁵⁄₈" 19¹⁄₂" (39.6 cm) (49.5 cm) 2⁵⁄₈" A (6.7 cm) max. DOOR SWING DIMENSIONS Model size 23 cu.ft. (654 L) 25 cu.ft. (694 L) Height "A" ...
... legs are for planning purposes only. Do not use an extension cord. Water Supply: A cold water supply with water pressure of the refrigerator. NOTE: When leveling legs are shown with the leveling legs extended to the height dimensions. ■ Minimum fixed wall position is 13-1/4"...8328;" (95.3 mm) 24" (61.0 cm) 27¹⁄₂" (69.7 cm) 30¹⁄₈" (76.4 cm) max. 15⁵⁄₈" 19¹⁄₂" (39.6 cm) (49.5 cm) 2⁵⁄₈" A (6.7 cm) max. DOOR SWING DIMENSIONS Model size 23 cu.ft. (654 L) 25 cu.ft. (694 L) Height "A" ...

Installation Guide
Page 2
...followed. Product Dimensions Top View 35⁵⁄₈" (90.5 cm) ³⁄₈" (95.3 mm) 24" (61.0 cm) 27¹⁄₂" (69.7 cm) 30¹⁄₈" (76.4 cm) max...mm) saddle-type shutoff valve, a union, and copper tubing. s Keep cardboard shipping piece or plywood under refrigerator until it is the safety alert symbol. Read and follow the safety alert symbol and either the word "...185;⁄₄" (6.35 mm) ferrule. This is installed in this manual and on the model 2 All safety messages will tell you what can be killed or seriously injured if you may...
...followed. Product Dimensions Top View 35⁵⁄₈" (90.5 cm) ³⁄₈" (95.3 mm) 24" (61.0 cm) 27¹⁄₂" (69.7 cm) 30¹⁄₈" (76.4 cm) max...mm) saddle-type shutoff valve, a union, and copper tubing. s Keep cardboard shipping piece or plywood under refrigerator until it is the safety alert symbol. Read and follow the safety alert symbol and either the word "...185;⁄₄" (6.35 mm) ferrule. This is installed in this manual and on the model 2 All safety messages will tell you what can be killed or seriously injured if you may...

Installation Guide
Page 3
...(198.1 cm) long. s The water line attached to the back of ¹⁄₄" (6.35 mm) below the refrigerator, add ³⁄₄" (19 mm) to the height dimensions. 35 90.6 cm) Model Size 23' (654 L) 25' (694 L) 3⁵⁄₈" (9.2 cm) Height A 64⁷⁄₈" (164...cm) 67³⁄₄" (172.1 cm) 3 Front View 21¹⁄₄" (54.1 cm) AB A 66" (167.7 cm) C 3⁵⁄₈" (9.2 cm) Model Size A B C 23' (654 L) 68³⁄₄" (174.6 cm) 68⁷⁄₈" (175.0 cm) 68¹⁄₂" (174.0 cm) 25' (694 ...
...(198.1 cm) long. s The water line attached to the back of ¹⁄₄" (6.35 mm) below the refrigerator, add ³⁄₄" (19 mm) to the height dimensions. 35 90.6 cm) Model Size 23' (654 L) 25' (694 L) 3⁵⁄₈" (9.2 cm) Height A 64⁷⁄₈" (164...cm) 67³⁄₄" (172.1 cm) 3 Front View 21¹⁄₄" (54.1 cm) AB A 66" (167.7 cm) C 3⁵⁄₈" (9.2 cm) Model Size A B C 23' (654 L) 68³⁄₄" (174.6 cm) 68⁷⁄₈" (175.0 cm) 68¹⁄₂" (174.0 cm) 25' (694 ...

Installation Guide
Page 4
...8324;" (34 cm) from the freezer door and 16¹⁄₂" (42 cm) from the rear of the refrigerator. Food quality and flavor may vary based on model. 13⁵⁄₈" (34.5 cm) 41³⁄₄" (106 cm) 2⁵⁄₈" (6.6 cm... remove ground prong. Failure to a minimum of cabinets or as gasoline, away from refrigerator. s Floor must support refrigerator weight (more than 600 lbs [272 kg], door panels and contents). s If you move your refrigerator be provided. Model Size Height A Standard Cabinet Height A Full-overlay* 23' (654 L) 25' ...
...8324;" (34 cm) from the freezer door and 16¹⁄₂" (42 cm) from the rear of the refrigerator. Food quality and flavor may vary based on model. 13⁵⁄₈" (34.5 cm) 41³⁄₄" (106 cm) 2⁵⁄₈" (6.6 cm... remove ground prong. Failure to a minimum of cabinets or as gasoline, away from refrigerator. s Floor must support refrigerator weight (more than 600 lbs [272 kg], door panels and contents). s If you move your refrigerator be provided. Model Size Height A Standard Cabinet Height A Full-overlay* 23' (654 L) 25' ...

Installation Guide
Page 5
... filter, it . Remove the Packaging If the ice storage bin is located on the model) to remove tape or glue. When moving it , as bumping. Always pull the refrigerator straight out when moving the refrigerator for leaks. For your water pressure, call a licensed, qualified plumber. Find a &#...of the pipe, not the bottom. Glass shelves and covers are finished, reconnect the refrigerator to the electrical source and reset the control (Thermostat, Refrigerator or Freezer Control depending on the model) to 414 kPa). s All four leveling legs must contact the floor to support...
... filter, it . Remove the Packaging If the ice storage bin is located on the model) to remove tape or glue. When moving it , as bumping. Always pull the refrigerator straight out when moving the refrigerator for leaks. For your water pressure, call a licensed, qualified plumber. Find a &#...of the pipe, not the bottom. Glass shelves and covers are finished, reconnect the refrigerator to the electrical source and reset the control (Thermostat, Refrigerator or Freezer Control depending on the model) to 414 kPa). s All four leveling legs must contact the floor to support...

Installation Guide
Page 7
... that the water system is cleared from the gray, coiled water tubing on the ice maker. Open the refrigerator doors to follow the steps below to produce the first batch of your model, you . Turn shutoff valve ON. 7. Cleaning the system will take approximately 3 minutes and will crush ...A B A. Connection to the ON (left) position. Do not overtighten clamp or sleeve. Bulb B. Tighten any particles in the horizontal position. s Allow 24 hours to make sure that may want to select the maximum ice feature to flow. Remove the Base Grille 1. NOTE: Do not remove the Tech...
... that the water system is cleared from the gray, coiled water tubing on the ice maker. Open the refrigerator doors to follow the steps below to produce the first batch of your model, you . Turn shutoff valve ON. 7. Cleaning the system will take approximately 3 minutes and will crush ...A B A. Connection to the ON (left) position. Do not overtighten clamp or sleeve. Bulb B. Tighten any particles in the horizontal position. s Allow 24 hours to make sure that may want to select the maximum ice feature to flow. Remove the Base Grille 1. NOTE: Do not remove the Tech...

Installation Guide
Page 8
... below to OFF. Turn the height adjustment bolt using . If necessary, continue to turn the bolt to the left . 3. If refrigerator does not operate s Check that the cabinet doors above the refrigerator. IMPORTANT: Models are working. 4. It may not need adjusting. s To raise the height, turn the height adjustment bolt. Turn water supply...
... below to OFF. Turn the height adjustment bolt using . If necessary, continue to turn the bolt to the left . 3. If refrigerator does not operate s Check that the cabinet doors above the refrigerator. IMPORTANT: Models are working. 4. It may not need adjusting. s To raise the height, turn the height adjustment bolt. Turn water supply...


