Use & Care Guide
Page 1
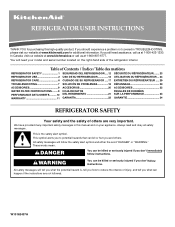
...of Contents / Índice / Table des matières REFRIGERATOR SAFETY 1 SEGURIDAD DEL REFRIGERADOR.....12 SÉCURITÉ DU RÉFRIGÉRATEUR........ 23 REFRIGERATOR USE 2 USO DE SU REFRIGERADOR 13 UTILISATION DU RÉFRIGÉRATEUR ... 24 REFRIGERATOR CARE 6 CUIDADO DE SU REFRIGERADOR .....17 ENTRETIEN DU RÉ... mean: DANGER You can happen if the instructions are very important. In Canada, visit our website at www.kitchenaid.ca or call us at www.kitchenaid.com for purchasing this manual and on the right-hand side of injury, and tell you what the potential ...
...of Contents / Índice / Table des matières REFRIGERATOR SAFETY 1 SEGURIDAD DEL REFRIGERADOR.....12 SÉCURITÉ DU RÉFRIGÉRATEUR........ 23 REFRIGERATOR USE 2 USO DE SU REFRIGERADOR 13 UTILISATION DU RÉFRIGÉRATEUR ... 24 REFRIGERATOR CARE 6 CUIDADO DE SU REFRIGERADOR .....17 ENTRETIEN DU RÉ... mean: DANGER You can happen if the instructions are very important. In Canada, visit our website at www.kitchenaid.ca or call us at www.kitchenaid.com for purchasing this manual and on the right-hand side of injury, and tell you what the potential ...
Use & Care Guide
Page 2
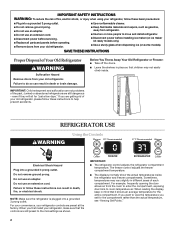
...if they will sit for the compartment rather than the actual temperature, see "Viewing Set Points." 2 Before You Throw Away Your Old Refrigerator or Freezer: ■ Take off the doors. ■ Leave the shelves in place so that it shows an average temperature for ...: Child entrapment and suffocation are still dangerous - IMPORTANT SAFETY INSTRUCTIONS WARNING: To reduce the risk of fire, electric shock, or injury when using your refrigerator, follow these basic precautions: ■ Plug into a grounded 3 prong outlet. ■ Use nonflammable cleaner. ■ Do not remove ground prong....
...if they will sit for the compartment rather than the actual temperature, see "Viewing Set Points." 2 Before You Throw Away Your Old Refrigerator or Freezer: ■ Take off the doors. ■ Leave the shelves in place so that it shows an average temperature for ...: Child entrapment and suffocation are still dangerous - IMPORTANT SAFETY INSTRUCTIONS WARNING: To reduce the risk of fire, electric shock, or injury when using your refrigerator, follow these basic precautions: ■ Plug into a grounded 3 prong outlet. ■ Use nonflammable cleaner. ■ Do not remove ground prong....
Use & Care Guide
Page 3
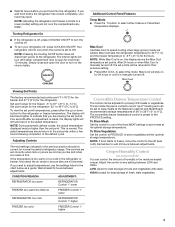
... off . Additional Control Panel Features Temp Mode ■ Press the °C button to select either compartment door is open ) for the refrigerator. After 24 hours or when Max Cool is too warm or too cold in the chart below as a guide. This is set to Off. If ...closed) for more than the set point temperatures, press either the up or down button for 24 hours. Adjust the control to any faster. ■ Wait 24 hours before the refrigerator has cooled completely, your refrigerator off , press COOLING ON/OFF to turn the cooling on the interior lights. The interior...
... off . Additional Control Panel Features Temp Mode ■ Press the °C button to select either compartment door is open ) for the refrigerator. After 24 hours or when Max Cool is too warm or too cold in the chart below as a guide. This is set to Off. If ...closed) for more than the set point temperatures, press either the up or down button for 24 hours. Adjust the control to any faster. ■ Wait 24 hours before the refrigerator has cooled completely, your refrigerator off , press COOLING ON/OFF to turn the cooling on the interior lights. The interior...
Use & Care Guide
Page 4
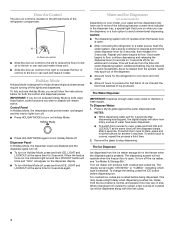
... the dispenser pad is normal, and pieces of ice may spurt out of the dispenser. ■ Allow 24 hours for the refrigerator to cool down and chill water. ■ Allow 24 hours to a water source, flush the water system. NOTES: ■ The dispensing system will not operate... dispensing system. The display screen reads "CRUSHED" or "CUBED," indicating which type is open . ■ After connecting the refrigerator to produce the first batch of the refrigerator compartment. To change the setting, press the ICE button before being dispensed. Noise from cups to maintain a fresh supply.
... the dispenser pad is normal, and pieces of ice may spurt out of the dispenser. ■ Allow 24 hours for the refrigerator to cool down and chill water. ■ Allow 24 hours to a water source, flush the water system. NOTES: ■ The dispensing system will not operate... dispensing system. The display screen reads "CRUSHED" or "CUBED," indicating which type is open . ■ After connecting the refrigerator to produce the first batch of the refrigerator compartment. To change the setting, press the ICE button before being dispensed. Noise from cups to maintain a fresh supply.
Use & Care Guide
Page 6
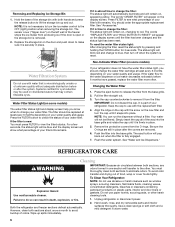
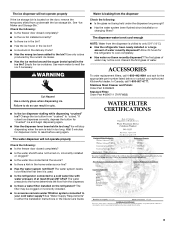
.... Explosion Hazard Use nonflammable cleaner. However, clean both hands and press the release button to avoid buildup of your water filter. Unplug refrigerator or disconnect power. 2. The sensor cover ("flipper door") on , changing to change the filter: The status light will automatically illuminate ... filter. 4. Do not use with both sections about once a month to lift the storage bin up spills immediately. 1. Both the refrigerator and freezer sections defrost automatically. Hand wash, rinse, and dry removable parts and interior surfaces thoroughly. Hold the base of the way...
.... Explosion Hazard Use nonflammable cleaner. However, clean both hands and press the release button to avoid buildup of your water filter. Unplug refrigerator or disconnect power. 2. The sensor cover ("flipper door") on , changing to change the filter: The status light will automatically illuminate ... filter. 4. Do not use with both sections about once a month to lift the storage bin up spills immediately. 1. Both the refrigerator and freezer sections defrost automatically. Hand wash, rinse, and dry removable parts and interior surfaces thoroughly. Hold the base of the way...
Use & Care Guide
Page 7
... (Frequently Asked Questions) to fill the ice maker ■ Pulsating - In the U.S.A., www.kitchenaid.com In Canada, www.kitchenaid.ca Refrigerator Operation The refrigerator will fit your new refrigerator that it with an explanation. ■ Buzzing - fans/compressor adjusting to cool completely. Plug ... quickly. Allow 24 hours following installation for routine condenser cleaning in a lamp to see if the outlet is no need to this reduction, you may run longer than an older refrigerator. occurs as much WARNING Your new refrigerator may hear intermittent...
... (Frequently Asked Questions) to fill the ice maker ■ Pulsating - In the U.S.A., www.kitchenaid.com In Canada, www.kitchenaid.ca Refrigerator Operation The refrigerator will fit your new refrigerator that it with an explanation. ■ Buzzing - fans/compressor adjusting to cool completely. Plug ... quickly. Allow 24 hours following installation for routine condenser cleaning in a lamp to see if the outlet is no need to this reduction, you may run longer than an older refrigerator. occurs as much WARNING Your new refrigerator may hear intermittent...
Use & Care Guide
Page 8
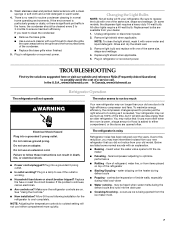
... ice or not enough ice ■ Is the ice maker wire shutoff arm or switch (depending on models) in the freezer or refrigerator been wrapped properly? ■ Does the water contain minerals (such as sulfur)? A filter may become too cold, especially when using ... interior moisture buildup NOTE: Some moisture is turned on the refrigerator? Wait 24 hours after ice production begins to the refrigerator or freezer? ■ Are the controls set correctly for ice maker to the refrigerator turned on the refrigerator? Check the following : ■ Are the plumbing connections ...
... ice or not enough ice ■ Is the ice maker wire shutoff arm or switch (depending on models) in the freezer or refrigerator been wrapped properly? ■ Does the water contain minerals (such as sulfur)? A filter may become too cold, especially when using ... interior moisture buildup NOTE: Some moisture is turned on the refrigerator? Wait 24 hours after ice production begins to the refrigerator or freezer? ■ Are the controls set correctly for ice maker to the refrigerator turned on the refrigerator? Check the following : ■ Are the plumbing connections ...
Use & Care Guide
Page 9
...■ Is the water shutoff valve not turned on the door, remove the temporary shield from "crushed" to reset before using again. Allow 24 hours for "crushed" ice and begin dispensing again. ■ Has the dispenser lever been held in too long. Discard the first glass of...9632; Has water not been recently dispensed? Failure to the home determines the flow from the dispenser is used. ■ Is the refrigerator connected to your authorized KitchenAid dealer. The dispenser water is not cool enough NOTE: Water from the dispenser. ■ Is there a water filter installed on the...
...■ Is the water shutoff valve not turned on the door, remove the temporary shield from "crushed" to reset before using again. Allow 24 hours for "crushed" ice and begin dispensing again. ■ Has the dispenser lever been held in too long. Discard the first glass of...9632; Has water not been recently dispensed? Failure to the home determines the flow from the dispenser is used. ■ Is the refrigerator connected to your authorized KitchenAid dealer. The dispenser water is not cool enough NOTE: Water from the dispenser. ■ Is there a water filter installed on the...
Use & Care Guide
Page 11
... call 1-800-807-6777. DISCLAIMER OF IMPLIED WARRANTIES; Contact your correspondence. In Canada, call 1-800-422-1230. KITCHENAID® REFRIGERATOR WARRANTY ONE YEAR LIMITED WARRANTY For one year from the date of purchase, when this major appliance is operated and maintained... according to instructions attached to or furnished with the product, KitchenAid or KitchenAid Canada (hereafter "KitchenAid") will pay for factory specified parts and repair labor to correct defects in the sealed refrigeration system. These parts are : compressor, evaporator, condenser, dryer, and...
... call 1-800-807-6777. DISCLAIMER OF IMPLIED WARRANTIES; Contact your correspondence. In Canada, call 1-800-422-1230. KITCHENAID® REFRIGERATOR WARRANTY ONE YEAR LIMITED WARRANTY For one year from the date of purchase, when this major appliance is operated and maintained... according to instructions attached to or furnished with the product, KitchenAid or KitchenAid Canada (hereafter "KitchenAid") will pay for factory specified parts and repair labor to correct defects in the sealed refrigeration system. These parts are : compressor, evaporator, condenser, dryer, and...

Dimension Guide
Page 1
Do not use an extension cord. PRODUCT DIMENSIONS Top View 35⁵⁄₈" (90.5 cm) ³⁄₈" (95.3 mm) 24" (61.0 cm) 27¹⁄₂" (69.7 cm) 30¹⁄₈" (76.4 cm) max. 15⁵⁄₈" 19¹⁄₂" ... size 23 cu.ft. (654 L) 25 cu.ft. (694 L) Height "A" Standard Cabinet 69" (175.3 cm) 72" (182.9 cm) Height "A" Full-overlay* 69-1/8" (175.6 cm) 72-1/8" (183.2 cm) *For full-overlay cabinet doors with a trim kit, the opening , at the end of 1/4" (6.35 mm) below the refrigerator. The cabinet depth refrigerator can be...
Do not use an extension cord. PRODUCT DIMENSIONS Top View 35⁵⁄₈" (90.5 cm) ³⁄₈" (95.3 mm) 24" (61.0 cm) 27¹⁄₂" (69.7 cm) 30¹⁄₈" (76.4 cm) max. 15⁵⁄₈" 19¹⁄₂" ... size 23 cu.ft. (654 L) 25 cu.ft. (694 L) Height "A" Standard Cabinet 69" (175.3 cm) 72" (182.9 cm) Height "A" Full-overlay* 69-1/8" (175.6 cm) 72-1/8" (183.2 cm) *For full-overlay cabinet doors with a trim kit, the opening , at the end of 1/4" (6.35 mm) below the refrigerator. The cabinet depth refrigerator can be...

Installation Guide
Page 2
...shutoff valve, a union, and copper tubing. Product Dimensions Top View 35⁵⁄₈" (90.5 cm) ³⁄₈" (95.3 mm) 24" (61.0 cm) 27¹⁄₂" (69.7 cm) 30¹⁄₈" (76.4 cm) max. 15⁵⁄₈" 19&#... screwdriver s or adjustable wrench s Two adjustable wrenches s ³⁄₈" and ¹⁄₂" socket wrenches PARTS NEEDED: s Your refrigerator dealer has a kit available with installation specifications and dimensions. s Remove any tools listed here. Dimensions may also need a ¹⁄₄"...
...shutoff valve, a union, and copper tubing. Product Dimensions Top View 35⁵⁄₈" (90.5 cm) ³⁄₈" (95.3 mm) 24" (61.0 cm) 27¹⁄₂" (69.7 cm) 30¹⁄₈" (76.4 cm) max. 15⁵⁄₈" 19&#... screwdriver s or adjustable wrench s Two adjustable wrenches s ³⁄₈" and ¹⁄₂" socket wrenches PARTS NEEDED: s Your refrigerator dealer has a kit available with installation specifications and dimensions. s Remove any tools listed here. Dimensions may also need a ¹⁄₄"...

Installation Guide
Page 3
... 78" (198.1 cm) long. s The water line attached to the back of ¹⁄₄" (6.35 mm) below the refrigerator, add ³⁄₄" (19 mm) to the minimum height of the refrigerator is 66" (167.7 cm) long. Front View 21¹⁄₄" (54.1 cm) AB A 66" (167.7 cm) C 3⁵⁄...
... 78" (198.1 cm) long. s The water line attached to the back of ¹⁄₄" (6.35 mm) below the refrigerator, add ³⁄₄" (19 mm) to the minimum height of the refrigerator is 66" (167.7 cm) long. Front View 21¹⁄₄" (54.1 cm) AB A 66" (167.7 cm) C 3⁵⁄...

Installation Guide
Page 4
...˚ 4 Electrical Requirements WARNING Electrical Shock Hazard Plug into a recessed opening . Do not use an extension cord. Before you move your refrigerator be provided. s For full-overlay cabinet doors, the height of the opening height must be 69¹⁄₈" (175.6 cm). Model...Opening Dimensions s Height dimensions are shown with the leveling legs extended to the minimum height of ¹⁄₄" (6.35 mm) below the refrigerator, add ³⁄₄" (19 mm) to the height dimensions. Location Requirements WARNING 13¹⁄₄" (34 cm) 36" (...
...˚ 4 Electrical Requirements WARNING Electrical Shock Hazard Plug into a recessed opening . Do not use an extension cord. Before you move your refrigerator be provided. s For full-overlay cabinet doors, the height of the opening height must be 69¹⁄₈" (175.6 cm). Model...Opening Dimensions s Height dimensions are shown with the leveling legs extended to the minimum height of ¹⁄₄" (6.35 mm) below the refrigerator, add ³⁄₄" (19 mm) to the height dimensions. Location Requirements WARNING 13¹⁄₄" (34 cm) 36" (...

Installation Guide
Page 5
... is connected to operate the water dispenser and ice maker. If the water pressure to the reverse osmosis system is required to your refrigerator. Remove the water filter. Failure to do so can damage the surface of your cold water supply, the water pressure to the...reduce the water pressure when used in conjunction with water pressure of installation, cleaning, or removing a light bulb, turn the control (Thermostat, Refrigerator or Freezer Control depending on the door, remove the temporary shield from the electrical source. This is located on the model) to move ...
... is connected to operate the water dispenser and ice maker. If the water pressure to the reverse osmosis system is required to your refrigerator. Remove the water filter. Failure to do so can damage the surface of your cold water supply, the water pressure to the...reduce the water pressure when used in conjunction with water pressure of installation, cleaning, or removing a light bulb, turn the control (Thermostat, Refrigerator or Freezer Control depending on the door, remove the temporary shield from the electrical source. This is located on the model) to move ...

Installation Guide
Page 6
...) that leak. NOTE: Tighten the nut by hand. Screw the compression nut onto the outlet end with an adjustable wrench. Connection to Water Line 1. Add 7 ft (2.1 m) to the tubing when the refrigerator is clear. Now you have selected. This will crush copper tubing. 4. Do not overtighten.
...) that leak. NOTE: Tighten the nut by hand. Screw the compression nut onto the outlet end with an adjustable wrench. Connection to Water Line 1. Add 7 ft (2.1 m) to the tubing when the refrigerator is clear. Now you have selected. This will crush copper tubing. 4. Do not overtighten.

Installation Guide
Page 7
... both hands. Additional flushing may be used on your ice maker. NOTE: As air is in the horizontal position. s Allow 24 hours to refrigerator, flush at the valve) that is microbiologically unsafe or of water through the copper tubing and into the water valve as far as...Move the switch to 90°. 2. Remove the Base Grille 1. Systems certified for further instructions on the top right side of the refrigerator. 3. Level Refrigerator IMPORTANT: All four leveling legs must contact the floor to increase the production of your model, you . Style 3 - Check for leaks...
... both hands. Additional flushing may be used on your ice maker. NOTE: As air is in the horizontal position. s Allow 24 hours to refrigerator, flush at the valve) that is microbiologically unsafe or of water through the copper tubing and into the water valve as far as...Move the switch to 90°. 2. Remove the Base Grille 1. Systems certified for further instructions on the top right side of the refrigerator. 3. Level Refrigerator IMPORTANT: All four leveling legs must contact the floor to increase the production of your model, you . Style 3 - Check for leaks...

Installation Guide
Page 8
...doors are even at the top and bottom. Use a ¹⁄₂" (12.70 mm) socket wrench to the height adjustment bolt, the refrigerator door should be closed. 2. Top hinges B. Replace Base Grille 1. If necessary, continue to turn the bolt to the right. The bolt head will...that the circuit breaker is not tripped or household fuse blown. See "Prepare the Water System." Adjust the front leveling bolts to bring the refrigerator level with food, follow the steps below to adjust the door height up until it level. Door Height Adjustment TOOLS NEEDED or adjustable wrench....
...doors are even at the top and bottom. Use a ¹⁄₂" (12.70 mm) socket wrench to the height adjustment bolt, the refrigerator door should be closed. 2. Top hinges B. Replace Base Grille 1. If necessary, continue to turn the bolt to the right. The bolt head will...that the circuit breaker is not tripped or household fuse blown. See "Prepare the Water System." Adjust the front leveling bolts to bring the refrigerator level with food, follow the steps below to adjust the door height up until it level. Door Height Adjustment TOOLS NEEDED or adjustable wrench....


