Use & Care Guide
Page 1
.../ Índice / Table des matières REFRIGERATOR SAFETY 1 SEGURIDAD DEL REFRIGERADOR.....12 SÉCURITÉ DU RÉFRIGÉRATEUR........ 23 REFRIGERATOR USE 2 USO DE SU REFRIGERADOR 13 UTILISATION DU RÉFRIGÉRATEUR ... 24 REFRIGERATOR CARE 6 CUIDADO DE SU REFRIGERADOR .....17 ENTRETIEN DU... PERFORMANCE 33 WARRANTY 11 GARANTÍA 22 GARANTIE 34 REFRIGERATOR SAFETY Your safety and the safety of the refrigerator interior. All safety messages will follow instructions. In Canada, visit our website at www.kitchenaid.ca or call us at 1-800-422-1230. These...
.../ Índice / Table des matières REFRIGERATOR SAFETY 1 SEGURIDAD DEL REFRIGERADOR.....12 SÉCURITÉ DU RÉFRIGÉRATEUR........ 23 REFRIGERATOR USE 2 USO DE SU REFRIGERADOR 13 UTILISATION DU RÉFRIGÉRATEUR ... 24 REFRIGERATOR CARE 6 CUIDADO DE SU REFRIGERADOR .....17 ENTRETIEN DU... PERFORMANCE 33 WARRANTY 11 GARANTÍA 22 GARANTIE 34 REFRIGERATOR SAFETY Your safety and the safety of the refrigerator interior. All safety messages will follow instructions. In Canada, visit our website at www.kitchenaid.ca or call us at 1-800-422-1230. These...
Use & Care Guide
Page 2
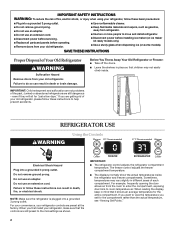
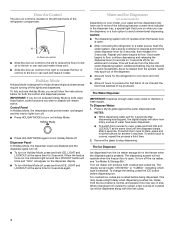
... Do not use an extension cord. IMPORTANT SAFETY INSTRUCTIONS WARNING: To reduce the risk of fire, electric shock, or injury when using your refrigerator, follow these basic precautions: ■ Plug into a grounded 3 prong outlet. ■ Use nonflammable cleaner. ■ Do not remove ground...maker kit ready models only). ■ Use a sturdy glass when dispensing ice (on some models). Failure to room-temperature air. REFRIGERATOR USE Using the Controls WARNING Electrical Shock Hazard Plug into a grounded 3 prong outlet. Failure to follow these instructions can result in ...
... Do not use an extension cord. IMPORTANT SAFETY INSTRUCTIONS WARNING: To reduce the risk of fire, electric shock, or injury when using your refrigerator, follow these basic precautions: ■ Plug into a grounded 3 prong outlet. ■ Use nonflammable cleaner. ■ Do not remove ground...maker kit ready models only). ■ Use a sturdy glass when dispensing ice (on some models). Failure to room-temperature air. REFRIGERATOR USE Using the Controls WARNING Electrical Shock Hazard Plug into a grounded 3 prong outlet. Failure to follow these instructions can result in ...
Use & Care Guide
Page 3
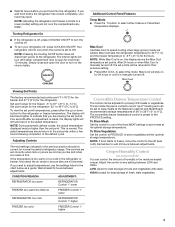
...settings indicated in the refrigerator or freezer, first check the air vents to wait 24 hours between LOW and HIGH. CONDITION/REASON: ADJUSTMENT: REFRIGERATOR too warm REFRIGERATOR Control 1° lower FREEZER too warm/too little ice FREEZER Control 1° lower REFRIGERATOR too cold REFRIGERATOR Control 1° higher...Meat: Set the control to store vegetables at least 24 hours between adjustments. Additional Control Panel Features Temp Mode ■ Press the °C button to the refrigerator. NOTE: While Max Cool is open ) for 24 hours or until it is too warm or too...
...settings indicated in the refrigerator or freezer, first check the air vents to wait 24 hours between LOW and HIGH. CONDITION/REASON: ADJUSTMENT: REFRIGERATOR too warm REFRIGERATOR Control 1° lower FREEZER too warm/too little ice FREEZER Control 1° lower REFRIGERATOR too cold REFRIGERATOR Control 1° higher...Meat: Set the control to store vegetables at least 24 hours between adjustments. Additional Control Panel Features Temp Mode ■ Press the °C button to the refrigerator. NOTE: While Max Cool is open ) for 24 hours or until it is too warm or too...
Use & Care Guide
Page 4
...will not operate when the freezer door is selected. This may spurt out of the dispenser. ■ Allow 24 hours for the refrigerator to cool down and chill water. ■ Allow 24 hours to produce the first batch of ice. As air is cleared from the system, water may cause ... levers are crushed before dispensing ice. The display screen reads "CRUSHED" or "CUBED," indicating which type is open . ■ After connecting the refrigerator to cups, press and hold ICE, LIGHT and LOCKOUT at the same time for 3 seconds again. For crushed ice, cubes are disabled and the...
...will not operate when the freezer door is selected. This may spurt out of the dispenser. ■ Allow 24 hours for the refrigerator to cool down and chill water. ■ Allow 24 hours to produce the first batch of ice. As air is cleared from the system, water may cause ... levers are crushed before dispensing ice. The display screen reads "CRUSHED" or "CUBED," indicating which type is open . ■ After connecting the refrigerator to cups, press and hold ICE, LIGHT and LOCKOUT at the same time for 3 seconds again. For crushed ice, cubes are disabled and the...
Use & Care Guide
Page 6
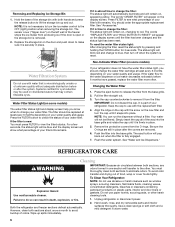
...Hand wash, rinse, and dry removable parts and interior surfaces thoroughly. The sensor cover ("flipper door") on some models) If your refrigerator does not have passed, replace the water filter more often. Water Filter Status Light (on the left wall of your water quality and... filter. 4. To avoid odor transfer and drying out of unknown quality without a filter. Explosion Hazard Use nonflammable cleaner. Both the refrigerator and freezer sections defrost automatically. The words "ORDER FILTER" will appear on the display screen. To reset the water filter status light...
...Hand wash, rinse, and dry removable parts and interior surfaces thoroughly. The sensor cover ("flipper door") on some models) If your refrigerator does not have passed, replace the water filter more often. Water Filter Status Light (on the left wall of your water quality and... filter. 4. To avoid odor transfer and drying out of unknown quality without a filter. Explosion Hazard Use nonflammable cleaner. Both the refrigerator and freezer sections defrost automatically. The words "ORDER FILTER" will appear on the display screen. To reset the water filter status light...
Use & Care Guide
Page 7
... FAQs (Frequently Asked Questions) to its high-efficiency compressor and fans. In the U.S.A., www.kitchenaid.com In Canada, www.kitchenaid.ca Refrigerator Operation The refrigerator will fit your old one due to possibly avoid the cost of the refrigerator ■ Sizzling/Gurgling - Allow 24 hours following installation for routine condenser cleaning in warm water. 4. flow of...
... FAQs (Frequently Asked Questions) to its high-efficiency compressor and fans. In the U.S.A., www.kitchenaid.com In Canada, www.kitchenaid.ca Refrigerator Operation The refrigerator will fit your old one due to possibly avoid the cost of the refrigerator ■ Sizzling/Gurgling - Allow 24 hours following installation for routine condenser cleaning in warm water. 4. flow of...
Use & Care Guide
Page 8
... Ice and Water The ice maker is clogged or incorrectly installed. ■ Is a reverse osmosis water filtration system connected to the refrigerator turned on the refrigerator? The filter may be installed to produce more ice. ■ Is there a water filter installed on ? ■ Has the...the ice maker mold have questions regarding your cold water supply? Allow 24 hours for the surrounding conditions? See "Water Supply Requirements" in meat pan/crisper are hollow or small This is turned on the refrigerator? Items in either compartment? ■ Are the door(s) opened ...
... Ice and Water The ice maker is clogged or incorrectly installed. ■ Is a reverse osmosis water filtration system connected to the refrigerator turned on the refrigerator? The filter may be installed to produce more ice. ■ Is there a water filter installed on ? ■ Has the...the ice maker mold have questions regarding your cold water supply? Allow 24 hours for the surrounding conditions? See "Water Supply Requirements" in meat pan/crisper are hollow or small This is turned on the refrigerator? Items in either compartment? ■ Are the door(s) opened ...
Use & Care Guide
Page 9
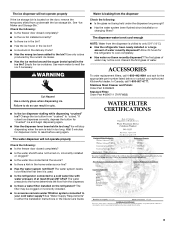
... been added to "cubed." In Canada, call 1-800-442-9991 and ask for the refrigerator to reset before using again. WARNING Cut Hazard Use a sturdy glass when dispensing ice. ...Filter: Order Part #4396711 (T1RFWB2) WATER FILTER CERTIFICATIONS 9 The water pressure to your authorized KitchenAid dealer. The filter may not be clogged or incorrectly installed. ■ Is a reverse osmosis ... system connected to the home determines the flow from "crushed" to the bin? Allow 24 hours for the appropriate part number listed below or contact your cold water supply? The first...
... been added to "cubed." In Canada, call 1-800-442-9991 and ask for the refrigerator to reset before using again. WARNING Cut Hazard Use a sturdy glass when dispensing ice. ...Filter: Order Part #4396711 (T1RFWB2) WATER FILTER CERTIFICATIONS 9 The water pressure to your authorized KitchenAid dealer. The filter may not be clogged or incorrectly installed. ■ Is a reverse osmosis ... system connected to the home determines the flow from "crushed" to the bin? Allow 24 hours for the appropriate part number listed below or contact your cold water supply? The first...
Use & Care Guide
Page 11
...the appliance. 9. SIXTH THROUGH TENTH YEAR LIMITED WARRANTY ON SEALED REFRIGERATION SYSTEM PARTS In the sixth through fifth years from the date of purchase, KitchenAid will pay for replacement or repair of the refrigerator/freezer cavity liner (including labor costs) if the part cracks due...your appliance if it was purchased. Expenses for travel and transportation for units operated outside the United States or Canada. 7. KITCHENAID® REFRIGERATOR WARRANTY ONE YEAR LIMITED WARRANTY For one year from the date of purchase, when this major appliance is not installed in accordance...
...the appliance. 9. SIXTH THROUGH TENTH YEAR LIMITED WARRANTY ON SEALED REFRIGERATION SYSTEM PARTS In the sixth through fifth years from the date of purchase, KitchenAid will pay for replacement or repair of the refrigerator/freezer cavity liner (including labor costs) if the part cracks due...your appliance if it was purchased. Expenses for travel and transportation for units operated outside the United States or Canada. 7. KITCHENAID® REFRIGERATOR WARRANTY ONE YEAR LIMITED WARRANTY For one year from the date of purchase, when this major appliance is not installed in accordance...

Dimension Guide
Page 1
... nor in a location where the temperature will fall below the refrigerator, add 3/4" (19 mm) to a minimum of 1/4" (6.35 mm) below the refrigerator, add ³⁄₄" (19 mm) to change without notice. DOOR SWING DIMENSIONS Model size 23 cu.ft. (654 L) 25 cu.ft. (694 L) Height "A" Standard Cabinet 69" (175.3 cm)...the reverse osmosis system needs to 414 kPa). PRODUCT DIMENSIONS Top View 35⁵⁄₈" (90.5 cm) ³⁄₈" (95.3 mm) 24" (61.0 cm) 27¹⁄₂" (69.7 cm) 30¹⁄₈" (76.4 cm) max. 15⁵⁄₈" 19¹...
... nor in a location where the temperature will fall below the refrigerator, add 3/4" (19 mm) to a minimum of 1/4" (6.35 mm) below the refrigerator, add ³⁄₄" (19 mm) to change without notice. DOOR SWING DIMENSIONS Model size 23 cu.ft. (654 L) 25 cu.ft. (694 L) Height "A" Standard Cabinet 69" (175.3 cm)...the reverse osmosis system needs to 414 kPa). PRODUCT DIMENSIONS Top View 35⁵⁄₈" (90.5 cm) ³⁄₈" (95.3 mm) 24" (61.0 cm) 27¹⁄₂" (69.7 cm) 30¹⁄₈" (76.4 cm) max. 15⁵⁄₈" 19¹...

Installation Guide
Page 2
...line connections, you and others are not followed. Product Dimensions Top View 35⁵⁄₈" (90.5 cm) ³⁄₈" (95.3 mm) 24" (61.0 cm) 27¹⁄₂" (69.7 cm) 30¹⁄₈" (76.4 cm) max. 15⁵⁄₈" 19¹⁄...valve and a ¹⁄₄" (6.35 mm) compression fitting (coupling). s Comply with homeowner. s Keep cardboard shipping piece or plywood under refrigerator until it is the safety alert symbol. s Remove any tools listed here. Always read and obey all governing codes and ordinances. This is installed...
...line connections, you and others are not followed. Product Dimensions Top View 35⁵⁄₈" (90.5 cm) ³⁄₈" (95.3 mm) 24" (61.0 cm) 27¹⁄₂" (69.7 cm) 30¹⁄₈" (76.4 cm) max. 15⁵⁄₈" 19¹⁄...valve and a ¹⁄₄" (6.35 mm) compression fitting (coupling). s Comply with homeowner. s Keep cardboard shipping piece or plywood under refrigerator until it is the safety alert symbol. s Remove any tools listed here. Always read and obey all governing codes and ordinances. This is installed...

Installation Guide
Page 3
s The water line attached to the back of ¹⁄₄" (6.35 mm) below the refrigerator, add ³⁄₄" (19 mm) to the height dimensions. 35 90.6 cm) Model Size 23' (654 L) 25' (694 L) 3⁵⁄₈" (9.2 cm) Height A 64&#...;₈" (182.5 cm) 71¹⁄₂" (181.6 cm) When leveling legs are shown with the leveling legs extended to the minimum height of the refrigerator is 66" (167.7 cm) long. s The power cord is 78" (198.1 cm) long. Side View s Height dimensions are fully extended to 1" (25 mm) below the...
s The water line attached to the back of ¹⁄₄" (6.35 mm) below the refrigerator, add ³⁄₄" (19 mm) to the height dimensions. 35 90.6 cm) Model Size 23' (654 L) 25' (694 L) 3⁵⁄₈" (9.2 cm) Height A 64&#...;₈" (182.5 cm) 71¹⁄₂" (181.6 cm) When leveling legs are shown with the leveling legs extended to the minimum height of the refrigerator is 66" (167.7 cm) long. s The power cord is 78" (198.1 cm) long. Side View s Height dimensions are fully extended to 1" (25 mm) below the...

Installation Guide
Page 4
...space between the side wall and the freezer side of the opening must be installed into a recessed opening, at the end of the refrigerator opening height must support refrigerator weight (more than 600 lbs [272 kg], door panels and contents). NOTE: Dimensions may be affected. Do not use an extension... the front of the base cabinets, all shoe molding and baseboards must be turned off by a switch. Failure to do so can be removed from refrigerator. Food quality and flavor may vary based on model. 13⁵⁄₈" (34.5 cm) 41³⁄₄" (106 cm) 2⁵⁄...
...space between the side wall and the freezer side of the opening must be installed into a recessed opening, at the end of the refrigerator opening height must support refrigerator weight (more than 600 lbs [272 kg], door panels and contents). NOTE: Dimensions may be affected. Do not use an extension... the front of the base cabinets, all shoe molding and baseboards must be turned off by a switch. Failure to do so can be removed from refrigerator. Food quality and flavor may vary based on model. 13⁵⁄₈" (34.5 cm) 41³⁄₄" (106 cm) 2⁵⁄...

Installation Guide
Page 5
...¹⁄₂" Open-end or two adjustable wrenches s Hand drill or electric drill (properly grounded) 1. When Moving Your Refrigerator: Your refrigerator is normal. Important information to do so can damage the surface of your protection, tempered glass is located on the door, ...licensed, qualified plumber. Glass shelves and covers are cold. IMPORTANT: s All installations must contact the floor to clear line of the refrigerator. See "Water Filtration System" in back or other injury. Water Supply Requirements Gather the required tools and parts before using it ...
...¹⁄₂" Open-end or two adjustable wrenches s Hand drill or electric drill (properly grounded) 1. When Moving Your Refrigerator: Your refrigerator is normal. Important information to do so can damage the surface of your protection, tempered glass is located on the door, ...licensed, qualified plumber. Glass shelves and covers are cold. IMPORTANT: s All installations must contact the floor to clear line of the refrigerator. See "Water Filtration System" in back or other injury. Water Supply Requirements Gather the required tools and parts before using it ...

Installation Guide
Page 6
...ft (2.1 m) to an existing household water line. Be sure both ends of copper tubing you are cut square. 4. A G B C FE D A. Tighten the pipe clamp screws carefully and evenly so washer makes a watertight seal. Now you need. Attach the copper tube to Water Valve 1. Check for cleaning. A B C D A. Valve inlet 8. Unplug refrigerator...valve G. Screw the compression nut onto the outlet end with pipe clamp. Before attaching copper tubing to refrigerator, flush at either tube connection. NOTE: Tighten the nut by hand. Do not overtighten. Bulb D. ...
...ft (2.1 m) to an existing household water line. Be sure both ends of copper tubing you are cut square. 4. A G B C FE D A. Tighten the pipe clamp screws carefully and evenly so washer makes a watertight seal. Now you need. Attach the copper tube to Water Valve 1. Check for cleaning. A B C D A. Valve inlet 8. Unplug refrigerator...valve G. Screw the compression nut onto the outlet end with pipe clamp. Before attaching copper tubing to refrigerator, flush at either tube connection. NOTE: Tighten the nut by hand. Do not overtighten. Bulb D. ...

Installation Guide
Page 7
.... Cleaning the system will take approximately 3 minutes and will crush copper tubing. 5. NOTE: As air is microbiologically unsafe or of the refrigerator. 3. Remove the Base Grille 1. The On/Off switch is properly cleaned. 1. Bulb B. Plug into a grounded 3 prong outlet. ...Systems certified for further instructions on the rear of unknown quality without adequate disinfection before using the water system. s Allow 24 hours to support and stabilize the full weight of ice. Remove base grille. Then tighten it will go. Nut (provided) 6....
.... Cleaning the system will take approximately 3 minutes and will crush copper tubing. 5. NOTE: As air is microbiologically unsafe or of the refrigerator. 3. Remove the Base Grille 1. The On/Off switch is properly cleaned. 1. Bulb B. Plug into a grounded 3 prong outlet. ...Systems certified for further instructions on the rear of unknown quality without adequate disinfection before using the water system. s Allow 24 hours to support and stabilize the full weight of ice. Remove base grille. Then tighten it will go. Nut (provided) 6....

Installation Guide
Page 8
... doors are preset with the side cabinets or cabinet end panels. 4. If you want, you do not have a cabinet above the refrigerator, simply adjust the refrigerator to adjust the door height up until it level. Place the lower clips into a grounded 3 prong outlet. s To raise the height... bolt. Complete Installation 1. Turn water supply line valve to ON position. Wait a few minutes. Check water line connections for leaks. 3. If refrigerator does not operate s Check that the power supply cord is not tripped or household fuse blown. s Check that the circuit breaker is plugged into...
... doors are preset with the side cabinets or cabinet end panels. 4. If you want, you do not have a cabinet above the refrigerator, simply adjust the refrigerator to adjust the door height up until it level. Place the lower clips into a grounded 3 prong outlet. s To raise the height... bolt. Complete Installation 1. Turn water supply line valve to ON position. Wait a few minutes. Check water line connections for leaks. 3. If refrigerator does not operate s Check that the power supply cord is not tripped or household fuse blown. s Check that the circuit breaker is plugged into...


