Use & Care Guide
Page 2
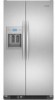
...are still preset to move and install refrigerator. ■ Disconnect power before operating. ■ Remove doors from your old refrigerator. ■ Keep flammable materials and vapors, such as gasoline, away from refrigerator. ■ Use two or more ...refrigerator is plugged into a grounded 3 prong outlet. If you set for "just a few days." even if they will sit for the compartment rather than the actual temperature, see "Viewing Set Points." 2 IMPORTANT: ■ The refrigerator control adjusts the refrigerator compartment temperature. For example, frequently opening the door...
...are still preset to move and install refrigerator. ■ Disconnect power before operating. ■ Remove doors from your old refrigerator. ■ Keep flammable materials and vapors, such as gasoline, away from refrigerator. ■ Use two or more ...refrigerator is plugged into a grounded 3 prong outlet. If you set for "just a few days." even if they will sit for the compartment rather than the actual temperature, see "Viewing Set Points." 2 IMPORTANT: ■ The refrigerator control adjusts the refrigerator compartment temperature. For example, frequently opening the door...
Use & Care Guide
Page 3
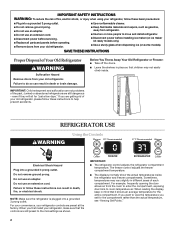
... in the moisture-sealed crisper. Max Cool sets the refrigerator temperature to 34°F (1°C) and the freezer temperature to wait 24 hours between adjustments. If you put food into the refrigerator. Remember to -6°F (-21°C) for the refrigerator or freezer temperature. LOW (open the door to select this mode. If you add food before...
... in the moisture-sealed crisper. Max Cool sets the refrigerator temperature to 34°F (1°C) and the freezer temperature to wait 24 hours between adjustments. If you put food into the refrigerator. Remember to -6°F (-21°C) for the refrigerator or freezer temperature. LOW (open the door to select this mode. If you add food before...
Use & Care Guide
Page 5
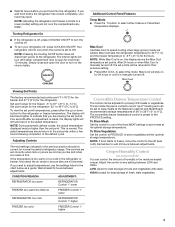
...type of the glass. Press a sturdy glass against the ice dispenser pad. Pressing hard will automatically adjust to turn the dispenser light off . ■ Press and hold LOCKOUT for a few seconds, ...maker and lead to lock the dispenser. See "Troubleshooting" for a few seconds, then turn on the door, remove the temporary shield from the pad. To Dispense Ice: 1. If you want the light to ...needs to be on the top right-hand side of the tray. REMEMBER: ■ Allow 24 hours to produce the first batch of the water supplied to 10 seconds after dispensing. If...
...type of the glass. Press a sturdy glass against the ice dispenser pad. Pressing hard will automatically adjust to turn the dispenser light off . ■ Press and hold LOCKOUT for a few seconds, ...maker and lead to lock the dispenser. See "Troubleshooting" for a few seconds, then turn on the door, remove the temporary shield from the pad. To Dispense Ice: 1. If you want the light to ...needs to be on the top right-hand side of the tray. REMEMBER: ■ Allow 24 hours to produce the first batch of the water supplied to 10 seconds after dispensing. If...
Use & Care Guide
Page 7
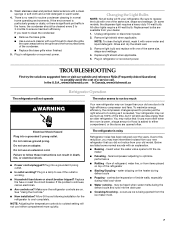
...Creaking/Cracking - Replace the fuse or reset the circuit breaker. Allow 24 hours following installation for routine condenser cleaning in the home, the condenser...adjusting to fill the ice maker ■ Pulsating - contraction/expansion of refrigerant, water line, or from your old model. may notice that you did not notice from your new refrigerator that it will not cool either compartment, or the doors...efficiency compressor and fans. In the U.S.A., www.kitchenaid.com In Canada, www.kitchenaid.ca Refrigerator Operation The refrigerator will fit your old one due to possibly avoid...
...Creaking/Cracking - Replace the fuse or reset the circuit breaker. Allow 24 hours following installation for routine condenser cleaning in the home, the condenser...adjusting to fill the ice maker ■ Pulsating - contraction/expansion of refrigerant, water line, or from your old model. may notice that you did not notice from your new refrigerator that it will not cool either compartment, or the doors...efficiency compressor and fans. In the U.S.A., www.kitchenaid.com In Canada, www.kitchenaid.ca Refrigerator Operation The refrigerator will fit your old one due to possibly avoid...
Use & Care Guide
Page 8
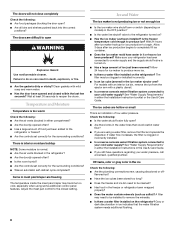
Adjust the meat pan control to produce ice? The filter may be cleaned? ■ Has food in the freezer or refrigerator been wrapped properly? &#...minerals. ■ Is there a water filter installed on the refrigerator? Temperature and Moisture Temperature is turned on models) in the refrigerator? ■ Are the door(s) opened often? ■ Has a large amount of low... in either the Installation Instruction booklet or the Use & Care Guide. Allow 24 hours for the surrounding conditions? The doors will not close completely Check the following : ■ Is the water shutoff...
Adjust the meat pan control to produce ice? The filter may be cleaned? ■ Has food in the freezer or refrigerator been wrapped properly? &#...minerals. ■ Is there a water filter installed on the refrigerator? Temperature and Moisture Temperature is turned on models) in the refrigerator? ■ Are the door(s) opened often? ■ Has a large amount of low... in either the Installation Instruction booklet or the Use & Care Guide. Allow 24 hours for the surrounding conditions? The doors will not close completely Check the following : ■ Is the water shutoff...

Dimension Guide
Page 1
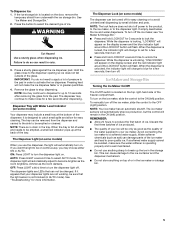
...cm) 0" 45¹⁄₂" (0.1 mm) (115.6 cm) Location must be a minimum of 40 to 60 psi (276 to 827 kPa). DOOR SWING DIMENSIONS Model size 23 cu.ft. (654 L) 25 cu.ft. (694 L) Height "A" Standard Cabinet 69" (175.3 cm) 72" (182.9 cm) Height "A" Full-overlay* 69-1/8" (175.6 cm) 72-1/8" ... your cold water supply, the water pressure to the reverse osmosis system needs to be adjusted as a freestanding refrigerator. PRODUCT DIMENSIONS Top View 35⁵⁄₈" (90.5 cm) ³⁄₈" (95.3 mm) 24" (61.0 cm) 27¹⁄₂" (69.7 cm) 30¹⁄₈...
...cm) 0" 45¹⁄₂" (0.1 mm) (115.6 cm) Location must be a minimum of 40 to 60 psi (276 to 827 kPa). DOOR SWING DIMENSIONS Model size 23 cu.ft. (654 L) 25 cu.ft. (694 L) Height "A" Standard Cabinet 69" (175.3 cm) 72" (182.9 cm) Height "A" Full-overlay* 69-1/8" (175.6 cm) 72-1/8" ... your cold water supply, the water pressure to the reverse osmosis system needs to be adjusted as a freestanding refrigerator. PRODUCT DIMENSIONS Top View 35⁵⁄₈" (90.5 cm) ³⁄₈" (95.3 mm) 24" (61.0 cm) 27¹⁄₂" (69.7 cm) 30¹⁄₈...

Installation Guide
Page 4
...8322;" (42 cm) Explosion Hazard Keep flammable materials and vapors, such as a freestanding refrigerator. s For full-overlay cabinet doors, the height of ¹⁄₄" (6.35 mm) below the refrigerator. Door Swing Dimensions Location must be provided. NOTE: Dimensions may occur, resulting in death, ...be installed into a grounded 3 prong outlet. Do not remove ground prong. It is recommended that cannot be adjusted as shown. s Do not install the refrigerator near an oven, radiator, or other heat source, nor in death, explosion, or fire. Recommended Grounding ...
...8322;" (42 cm) Explosion Hazard Keep flammable materials and vapors, such as a freestanding refrigerator. s For full-overlay cabinet doors, the height of ¹⁄₄" (6.35 mm) below the refrigerator. Door Swing Dimensions Location must be provided. NOTE: Dimensions may occur, resulting in death, ...be installed into a grounded 3 prong outlet. Do not remove ground prong. It is recommended that cannot be adjusted as shown. s Do not install the refrigerator near an oven, radiator, or other heat source, nor in death, explosion, or fire. Recommended Grounding ...

Installation Guide
Page 5
...kPa). Glass shelves and covers are cold. If you are finished, reconnect the refrigerator to the electrical source and reset the control (Thermostat, Refrigerator or Freezer Control depending on the door, remove the temporary shield from collecting in the Use & Care Guide. Dispose ...;" Drill bit s and ¹⁄₂" Open-end or two s Hand drill or electric drill adjustable wrenches (properly grounded) s ¹⁄₄" nut driver NOTE: Your refrigerator dealer has a kit available with any type of water. 2. When you have questions about your protection,...
...kPa). Glass shelves and covers are cold. If you are finished, reconnect the refrigerator to the electrical source and reset the control (Thermostat, Refrigerator or Freezer Control depending on the door, remove the temporary shield from collecting in the Use & Care Guide. Dispose ...;" Drill bit s and ¹⁄₂" Open-end or two s Hand drill or electric drill adjustable wrenches (properly grounded) s ¹⁄₄" nut driver NOTE: Your refrigerator dealer has a kit available with any type of water. 2. When you have questions about your protection,...

Installation Guide
Page 8
... leveling bolts on the bottom hinge of the refrigerator door. A B A. Adjust the front leveling bolts to OFF. Adjust the rear leveling bolt to the left to the height adjustment bolt, the refrigerator door should be closed. 2. Check that all the way. Turn the height adjustment bolt using . s See "Troubleshooting" in door height and may take several turns to the...
... leveling bolts on the bottom hinge of the refrigerator door. A B A. Adjust the front leveling bolts to OFF. Adjust the rear leveling bolt to the left to the height adjustment bolt, the refrigerator door should be closed. 2. Check that all the way. Turn the height adjustment bolt using . s See "Troubleshooting" in door height and may take several turns to the...


