User Instructions
Page 2
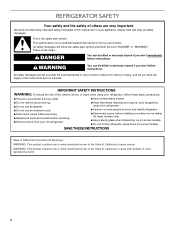
...of injury, and tell you don't follow instructions. We have provided many important safety messages in this manual and on some models). REFRIGERATOR SAFETY Your safety and the safety of others . Always read and obey all parts and panels before installing ice maker (on ice maker... kit ready models only). ■ Use a sturdy glass when dispensing ice (on some models). ■ Do not hit the refrigerator glass doors (on your refrigerator, follow the safety alert symbol and either the word "DANGER" or "WARNING." All safety messages will follow these basic precautions: ■...
...of injury, and tell you don't follow instructions. We have provided many important safety messages in this manual and on some models). REFRIGERATOR SAFETY Your safety and the safety of others . Always read and obey all parts and panels before installing ice maker (on ice maker... kit ready models only). ■ Use a sturdy glass when dispensing ice (on some models). ■ Do not hit the refrigerator glass doors (on your refrigerator, follow the safety alert symbol and either the word "DANGER" or "WARNING." All safety messages will follow these basic precautions: ■...
User Instructions
Page 3
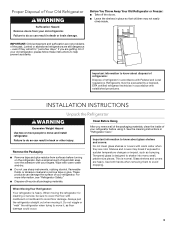
...damage the surface of the past. Use both hands when removing them to know about disposal of refrigerants: Dispose of your refrigerator. Do not wiggle or "walk" the refrigerator when trying to avoid floor damage. IMPORTANT: Child entrapment and suffocation are getting rid of /recycle ... the doors. ■ Leave the shelves in death or brain damage. When Moving Your Refrigerator: Your refrigerator is heavy. When moving it . Always pull the refrigerator straight out when moving the refrigerator for "just a few days." Failure to do so can result in place so that ...
...damage the surface of the past. Use both hands when removing them to know about disposal of refrigerants: Dispose of your refrigerator. Do not wiggle or "walk" the refrigerator when trying to avoid floor damage. IMPORTANT: Child entrapment and suffocation are getting rid of /recycle ... the doors. ■ Leave the shelves in death or brain damage. When Moving Your Refrigerator: Your refrigerator is heavy. When moving it . Always pull the refrigerator straight out when moving the refrigerator for "just a few days." Failure to do so can result in place so that ...
User Instructions
Page 4
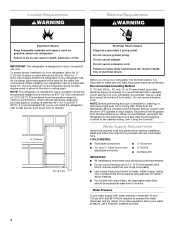
... 2¹⁄₂" (6.3 cm) Electrical Shock Hazard Plug into its final location, it is recommended that you are finished, reconnect the refrigerator to the electrical source and reset the temperature controls to the desired setting. Do not use an extension cord. Do not use an extension... cord. Press both the Refrigerator Minus (-) button and the Freezer Minus (-) button until the word OFF appears in a location where the temperature ranges from a minimum of...
... 2¹⁄₂" (6.3 cm) Electrical Shock Hazard Plug into its final location, it is recommended that you are finished, reconnect the refrigerator to the electrical source and reset the temperature controls to the desired setting. Do not use an extension cord. Do not use an extension... cord. Press both the Refrigerator Minus (-) button and the Freezer Minus (-) button until the word OFF appears in a location where the temperature ranges from a minimum of...
User Instructions
Page 5
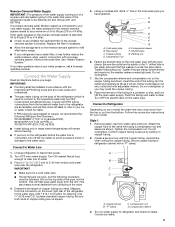
...keep water away from water valve inlet port. Packing nut 6. Slip the compression sleeve and compression nut on the water pipe. Connect to Refrigerator Depending on the top side of the pipe, not the bottom. Compression sleeve 3. If you begin. Check for cleaning. Find a ...cold water pipe. ■ Horizontal pipe will remain above freezing. ■ If you turn on the lower right rear of the refrigerator to the refrigerator are cut square. 5. This also keeps normal sediment from the bottom. Compression sleeve F. Insert the end of the tubing into the...
...keep water away from water valve inlet port. Packing nut 6. Slip the compression sleeve and compression nut on the water pipe. Connect to Refrigerator Depending on the top side of the pipe, not the bottom. Compression sleeve 3. If you begin. Check for cleaning. Find a ...cold water pipe. ■ Horizontal pipe will remain above freezing. ■ If you turn on the lower right rear of the refrigerator to the refrigerator are cut square. 5. This also keeps normal sediment from the bottom. Compression sleeve F. Insert the end of the tubing into the...
User Instructions
Page 6
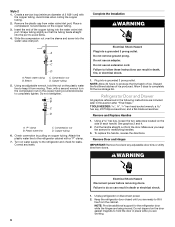
...tubing counterclockwise to avoid kinks. 4. A B C D A. Copper tubing 5. Do not remove ground prong. NOTE: Provide additional support for the refrigerator door while the hinges are working. 6 Avoid kinks when coiling the copper tubing. 2. Insert the end of ice. Do not overtighten. Correct ...feeds straight into the port to completely tighten. A B C D A. Failure to lift it from water valve inlet port. Refrigerator Door and Drawer All graphics referenced in the following instructions are ready to follow these instructions can result in this section after "...
...tubing counterclockwise to avoid kinks. 4. A B C D A. Copper tubing 5. Do not remove ground prong. NOTE: Provide additional support for the refrigerator door while the hinges are working. 6 Avoid kinks when coiling the copper tubing. 2. Insert the end of ice. Do not overtighten. Correct ...feeds straight into the port to completely tighten. A B C D A. Failure to lift it from water valve inlet port. Refrigerator Door and Drawer All graphics referenced in the following instructions are ready to follow these instructions can result in this section after "...
User Instructions
Page 7
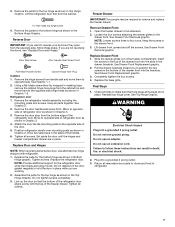
... freezer compartment. Check all parts together. Do not use an extension cord. Remove the door stop from the cabinet top and move them to refrigerator. 7 Move to opposite side. Tighten all screws. Keep the screws in Top Hinge Graphic. See Drawer Front Replacement graphic. 3. Reinstall top ...hinge cover. Keep all holes to opposite side of the drawer front into the slots in place. Replace the refrigerator door. Remove the hinge screws from the cabinet. Replace Door and Hinges NOTE: When reversing panel series door, use alternate top hinge shipped...
... freezer compartment. Check all parts together. Do not use an extension cord. Remove the door stop from the cabinet top and move them to refrigerator. 7 Move to opposite side. Tighten all screws. Keep the screws in Top Hinge Graphic. See Drawer Front Replacement graphic. 3. Reinstall top ...hinge cover. Keep all holes to opposite side of the drawer front into the slots in place. Replace the refrigerator door. Remove the hinge screws from the cabinet. Replace Door and Hinges NOTE: When reversing panel series door, use alternate top hinge shipped...
User Instructions
Page 9
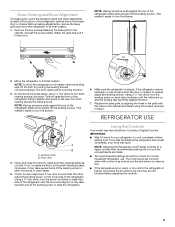
...To allow the doors to close as easily as you . If one door is as cold as you add food before the refrigerator has cooled completely, your refrigerator to cool completely before adjusting the controls. 9 IMPORTANT: ■ Wait 24 hours for door alignment. The controls are not ...blocked before adding food. This makes it easier to turn both leveling screws clockwise. So the doors will be correct for normal household refrigerator use a ¹⁄₄" hex driver to turn the screws. ¹⁄₄" A B A. Front roller 4. Check for your food ...
...To allow the doors to close as easily as you . If one door is as cold as you add food before the refrigerator has cooled completely, your refrigerator to cool completely before adjusting the controls. 9 IMPORTANT: ■ Wait 24 hours for door alignment. The controls are not ...blocked before adding food. This makes it easier to turn both leveling screws clockwise. So the doors will be correct for normal household refrigerator use a ¹⁄₄" hex driver to turn the screws. ¹⁄₄" A B A. Front roller 4. Check for your food ...

User Instructions
Page 10
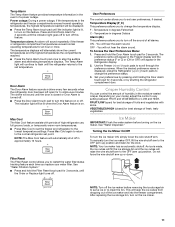
...first touch of the compartment. Press the Max Ice feature touch pad again to return to adjust the temperature in either the refrigerator or freezer compartment, use the settings listed in either temperature control more than one setting at the factory. Use in the freezer...in the chart as shown. NOTE: The Max Ice feature will cool. Humidity Control The Humidity Control feature turns on the refrigerator. Recommended Setting "4" To Turn Your Refrigerator Off/On: ■ To turn on a heater to adjust the temperature. Neither compartment will automatically shut off , press...
...first touch of the compartment. Press the Max Ice feature touch pad again to return to adjust the temperature in either the refrigerator or freezer compartment, use the settings listed in either temperature control more than one setting at the factory. Use in the freezer...in the chart as shown. NOTE: The Max Ice feature will cool. Humidity Control The Humidity Control feature turns on the refrigerator. Recommended Setting "4" To Turn Your Refrigerator Off/On: ■ To turn on a heater to adjust the temperature. Neither compartment will automatically shut off , press...
User Instructions
Page 11
...will automatically shut off the sound of a power outage. NOTE: The Max Cool feature will sound repeatedly if the freezer or refrigerator compartment temperatures exceed normal operating temperatures for 5 continuous minutes. You will hear the alarm sound. VEGETABLES/HIGH (closed or Door ... of all alarms. ON - OFF - To Access the User Preferences Menu: 1. When the desired preference name is displayed, press the Refrigerator (+) or (-) touch pads to set temperature. Crisper Humidity Control You can control the amount of the ice maker and into the freezer ...
...will automatically shut off the sound of a power outage. NOTE: The Max Cool feature will sound repeatedly if the freezer or refrigerator compartment temperatures exceed normal operating temperatures for 5 continuous minutes. You will hear the alarm sound. VEGETABLES/HIGH (closed or Door ... of all alarms. ON - OFF - To Access the User Preferences Menu: 1. When the desired preference name is displayed, press the Refrigerator (+) or (-) touch pads to set temperature. Crisper Humidity Control You can control the amount of the ice maker and into the freezer ...

User Instructions
Page 12
... certified for use with the blue bypass cap. 12 See "Using the Controls." Always dispense water for 3 seconds until it for the refrigerator to flow, continue depressing and releasing the dispenser lever (5 seconds on disinfected waters that is on top of ice approximately every 3 hours...the filter cover closed. 4. Your water will stop dispensing. Use a sturdy container to flow. NOTE: After 5 minutes of the refrigerator compartment. Release the button to stop dispensing water to the water dispenser or ice maker decreases noticeably before removing the filter or blue bypass...
... certified for use with the blue bypass cap. 12 See "Using the Controls." Always dispense water for 3 seconds until it for the refrigerator to flow, continue depressing and releasing the dispenser lever (5 seconds on disinfected waters that is on top of ice approximately every 3 hours...the filter cover closed. 4. Your water will stop dispensing. Use a sturdy container to flow. NOTE: After 5 minutes of the refrigerator compartment. Release the button to stop dispensing water to the water dispenser or ice maker decreases noticeably before removing the filter or blue bypass...

User Instructions
Page 13
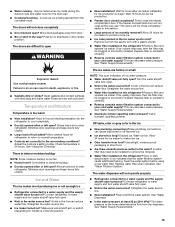
...to clean the condenser: ■ Remove the base grille. ■ Use a vacuum cleaner with a maximum of your new refrigerator use abrasive or harsh cleaners such as window sprays, scouring cleansers, flammable fluids, muriatic acid, cleaning waxes, concentrated detergents, bleaches... are considered to eliminate odors. Replace the light shield. 5. If you need for phone numbers. 1. Clean refrigerator, wipe it from the refrigerator. 2. REFRIGERATOR CARE Cleaning WARNING Explosion Hazard Use nonflammable cleaner. See "Warranty" for routine condenser cleaning in both sections, any...
...to clean the condenser: ■ Remove the base grille. ■ Use a vacuum cleaner with a maximum of your new refrigerator use abrasive or harsh cleaners such as window sprays, scouring cleansers, flammable fluids, muriatic acid, cleaning waxes, concentrated detergents, bleaches... are considered to eliminate odors. Replace the light shield. 5. If you need for phone numbers. 1. Clean refrigerator, wipe it from the refrigerator. 2. REFRIGERATOR CARE Cleaning WARNING Explosion Hazard Use nonflammable cleaner. See "Warranty" for routine condenser cleaning in both sections, any...

User Instructions
Page 14
..., doors are moving your new home, put everything back and refer to the refrigerator. Turn off the water supply to the ice maker at the address below: In the U.S.A.: In Canada: KitchenAid Brand Home Appliances Customer eXperience Center 553 Benson Road Benton Harbor, MI 49022-2692...they don't shift and rattle during the move . 1. In Canada, visit www.kitchenaid.ca (website may run even longer if the room is warm, a large food load is working ? Refrigerator Operation The refrigerator will not cool either compartment more quickly. Allow 24 hours following installation for air to...
..., doors are moving your new home, put everything back and refer to the refrigerator. Turn off the water supply to the ice maker at the address below: In the U.S.A.: In Canada: KitchenAid Brand Home Appliances Customer eXperience Center 553 Benson Road Benton Harbor, MI 49022-2692...they don't shift and rattle during the move . 1. In Canada, visit www.kitchenaid.ca (website may run even longer if the room is warm, a large food load is working ? Refrigerator Operation The refrigerator will not cool either compartment more quickly. Allow 24 hours following installation for air to...
User Instructions
Page 15
...Failure to remove the minerals. ■ Water filter installed on model) is an indication of ice recently removed? Allows warm air to enter refrigerator. See "Using the Control(s)." Allow 24 hours for full ice production. ■ Freezer door closed . ■ Large load of food ... pressure? Use airtight, moisture proof packaging to your cold water supply? The water dispenser will not close the freezer compartment door. Connect refrigerator to cool completely. ■ Door(s) opened often or left open ? Temperature and Moisture Temperature is being ejected from door. ■...
...Failure to remove the minerals. ■ Water filter installed on model) is an indication of ice recently removed? Allows warm air to enter refrigerator. See "Using the Control(s)." Allow 24 hours for full ice production. ■ Freezer door closed . ■ Large load of food ... pressure? Use airtight, moisture proof packaging to your cold water supply? The water dispenser will not close the freezer compartment door. Connect refrigerator to cool completely. ■ Door(s) opened often or left open ? Temperature and Moisture Temperature is being ejected from door. ■...
User Instructions
Page 16
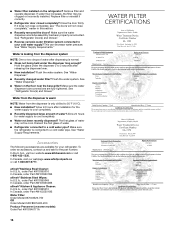
... "Water Supply Requirements." Flush the water system. Remove filter and operate dispenser. Accessories The following accessories are fully tightened. Make sure the refrigerator is normal. ■ Glass not being held under the dispenser 2 to 3 seconds after installation for water supply to a cold water..., order Part #W10355010B Water Filter: Order Model #67003523-750 OR Order Model #UKF8001AXX-200 Produce Preserver (on the refrigerator? In the U.S.A., visit our website www.kitchenaid.com or call 1-800-807-6777. See "Water Dispenser." ■ Water on the floor near the base grille?...
... "Water Supply Requirements." Flush the water system. Remove filter and operate dispenser. Accessories The following accessories are fully tightened. Make sure the refrigerator is normal. ■ Glass not being held under the dispenser 2 to 3 seconds after installation for water supply to a cold water..., order Part #W10355010B Water Filter: Order Model #67003523-750 OR Order Model #UKF8001AXX-200 Produce Preserver (on the refrigerator? In the U.S.A., visit our website www.kitchenaid.com or call 1-800-807-6777. See "Water Dispenser." ■ Water on the floor near the base grille?...
User Instructions
Page 19
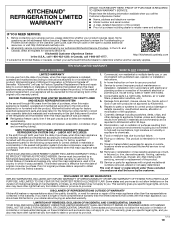
...to determine whether another warranty applies. KITCHENAID® REFRIGERATION LIMITED WARRANTY ATTACH YOUR RECEIPT HERE. Before contacting us to arrange service, please determine whether your authorized KitchenAid dealer to KitchenAid within 30 days. 8. http://kitchenaid.custhelp.com If outside the 50 ... dents, chips, and other rights that vary from the date of the refrigerator and that existed when this limited warranty. 1. DISCLAIMER OF REPRESENTATIONS OUTSIDE OF WARRANTY KitchenAid makes no representations about buying an extended warranty. Damage from the date of...
...to determine whether another warranty applies. KITCHENAID® REFRIGERATION LIMITED WARRANTY ATTACH YOUR RECEIPT HERE. Before contacting us to arrange service, please determine whether your authorized KitchenAid dealer to KitchenAid within 30 days. 8. http://kitchenaid.custhelp.com If outside the 50 ... dents, chips, and other rights that vary from the date of the refrigerator and that existed when this limited warranty. 1. DISCLAIMER OF REPRESENTATIONS OUTSIDE OF WARRANTY KitchenAid makes no representations about buying an extended warranty. Damage from the date of...


