
Use & Care Guide
Page 1
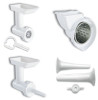
...se han aprobado para usarse con todas las batidoras domésticas con base KitchenAid®. U.S.A.: 1-800-541-6390 Canada: 1-800-807-6777 KitchenAid.com KitchenAid.ca 9709647B STAND MIXER ATTACHMENTS FOOD GRINDER FGA FRUIT/VEGETABLE STRAINER FVSFGA/FVSP FOOD TRAY FT INSTRUCTIONS ACCESSOIRES DU ... CON BASE MOLINO FGA COLADOR DE FRUTAS Y VEGETALES FVSFGA/FVSP BANDEJA PARA ALIMENTOS FT INSTRUCCIONES These attachments have been approved for use with all KitchenAid® household stand mixers. L'utilisation de ces accessoires a été approuvée pour tous les batteurs sur socle...
...se han aprobado para usarse con todas las batidoras domésticas con base KitchenAid®. U.S.A.: 1-800-541-6390 Canada: 1-800-807-6777 KitchenAid.com KitchenAid.ca 9709647B STAND MIXER ATTACHMENTS FOOD GRINDER FGA FRUIT/VEGETABLE STRAINER FVSFGA/FVSP FOOD TRAY FT INSTRUCTIONS ACCESSOIRES DU ... CON BASE MOLINO FGA COLADOR DE FRUTAS Y VEGETALES FVSFGA/FVSP BANDEJA PARA ALIMENTOS FT INSTRUCCIONES These attachments have been approved for use with all KitchenAid® household stand mixers. L'utilisation de ces accessoires a été approuvée pour tous les batteurs sur socle...

Use & Care Guide
Page 3
... Mixer Attachment Safety 3 Important Safeguards ...3 FEATURES AND OPERATION To Attach Stand Mixer Attachment 4 Before Attaching Stand Mixer Attachment 4 Food Grinder Attachment 4 To Assemble Food Grinder Attachment 4 To Use Food Grinder Attachment 5 To Clean Food Grinder Attachment 5 Fruit/Vegetable Strainer Attachment 6 To Assemble Fruit/Vegetable Strainer Attachment 6 To Use Fruit/Vegetable Strainer Attachment 6 To Strain Fruits and Vegetables 6 To Clean Fruit/Vegetable Strainer Attachment 7 Food Tray Attachment...8 To Attach...
... Mixer Attachment Safety 3 Important Safeguards ...3 FEATURES AND OPERATION To Attach Stand Mixer Attachment 4 Before Attaching Stand Mixer Attachment 4 Food Grinder Attachment 4 To Assemble Food Grinder Attachment 4 To Use Food Grinder Attachment 5 To Clean Food Grinder Attachment 5 Fruit/Vegetable Strainer Attachment 6 To Assemble Fruit/Vegetable Strainer Attachment 6 To Use Fruit/Vegetable Strainer Attachment 6 To Strain Fruits and Vegetables 6 To Clean Fruit/Vegetable Strainer Attachment 7 Food Tray Attachment...8 To Attach...
Use & Care Guide
Page 4
... Meatballs with Cream Sauce 9 Bolognese Sauce...10 Pesto Sauce ...10 Golden Peach Chutney 11 Harvest Apple Butter...11 Hummus...11 WARRANTY AND SERVICE INFORMATION KitchenAid® Stand Mixer Attachment Warranty 12 Hassle-Free Replacement Warranty - 50 United States and District of Columbia ..........13 Hassle-Free Replacement Warranty - Canada 13 How to Arrange for...
... Meatballs with Cream Sauce 9 Bolognese Sauce...10 Pesto Sauce ...10 Golden Peach Chutney 11 Harvest Apple Butter...11 Hummus...11 WARRANTY AND SERVICE INFORMATION KitchenAid® Stand Mixer Attachment Warranty 12 Hassle-Free Replacement Warranty - 50 United States and District of Columbia ..........13 Hassle-Free Replacement Warranty - Canada 13 How to Arrange for...
Use & Care Guide
Page 5
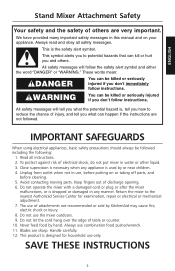
...KitchenAid may cause fire, electric shock or injury. 8. WARNING You can be killed or seriously injured if you what can happen if the instructions are not followed. To protect against risk of electrical shock, do not put mixer...use combination food pusher/wrench. 11. Keep fingers out of table or counter. 10. The use of attachments not recommended or sold by or near children. 4. SAVE THESE INSTRUCTIONS 3 This is designed for examination... liquid. 3. Avoid contacting moving parts. ENGLISH Stand Mixer Attachment Safety Your safety and the safety of others .
...KitchenAid may cause fire, electric shock or injury. 8. WARNING You can be killed or seriously injured if you what can happen if the instructions are not followed. To protect against risk of electrical shock, do not put mixer...use combination food pusher/wrench. 11. Keep fingers out of table or counter. 10. The use of attachments not recommended or sold by or near children. 4. SAVE THESE INSTRUCTIONS 3 This is designed for examination... liquid. 3. Avoid contacting moving parts. ENGLISH Stand Mixer Attachment Safety Your safety and the safety of others .

Use & Care Guide
Page 6
...: The combination food pusher/wrench (F) is completely secured to Sausage Stuffer. 4 Unplug mixer. 3. Turn Stand Mixer speed control to a Fruit/Vegetable Strainer. Place ring (E) on the hub rim. 7. ENGLISH To Attach Stand Mixer Attachment Before Attaching Stand Mixer Attachment 1. Loosen the attachment knob (A) by hand until the attachment is used for removal of the grind worm. 3. It may be necessary...
...: The combination food pusher/wrench (F) is completely secured to Sausage Stuffer. 4 Unplug mixer. 3. Turn Stand Mixer speed control to a Fruit/Vegetable Strainer. Place ring (E) on the hub rim. 7. ENGLISH To Attach Stand Mixer Attachment Before Attaching Stand Mixer Attachment 1. Loosen the attachment knob (A) by hand until the attachment is used for removal of the grind worm. 3. It may be necessary...

Use & Care Guide
Page 7
... 5 NOTE: Liquid may jam the Food Grinder. Best texture results from children. To drain liquid, continue to the food grinder attachment, do not use food pusher. To avoid damage to mixer, do so can result in hopper when processing large amounts of openings. Grinding Meat - To grind bread for spreads and breadcrumbs... cooked meats, firm vegetables, dried fruits and cheese. Homemade bread should be cut into long narrow strips. 2. Fine Plate - NOTE: To avoid damage to operate mixer. To Clean Food Grinder Attachment First completely disassemble food grinder...
... 5 NOTE: Liquid may jam the Food Grinder. Best texture results from children. To drain liquid, continue to the food grinder attachment, do not use food pusher. To avoid damage to mixer, do so can result in hopper when processing large amounts of openings. Grinding Meat - To grind bread for spreads and breadcrumbs... cooked meats, firm vegetables, dried fruits and cheese. Homemade bread should be cut into long narrow strips. 2. Fine Plate - NOTE: To avoid damage to operate mixer. To Clean Food Grinder Attachment First completely disassemble food grinder...

Use & Care Guide
Page 8
... Cut food into pieces that will fit in place. 2. Keep away from hopper. 6 Fruit/Vegetable Strainer Attachment C B D A H G ENGLISH F E To Assemble Fruit/Vegetable Strainer Attachment 1. Insert the larger worm into hopper using the combination food pusher/wrench. Do not use food pusher... • Remove hulls or stems, for removal of ring. 6. After attaching Fruit/Vegetable Strainer attachment to mixer, place mixer bowl under strainer tray to catch strained food and a smaller bowl under open end to mixer, do so can result in the grinder body. 4. Slide the strainer...
... Cut food into pieces that will fit in place. 2. Keep away from hopper. 6 Fruit/Vegetable Strainer Attachment C B D A H G ENGLISH F E To Assemble Fruit/Vegetable Strainer Attachment 1. Insert the larger worm into hopper using the combination food pusher/wrench. Do not use food pusher... • Remove hulls or stems, for removal of ring. 6. After attaching Fruit/Vegetable Strainer attachment to mixer, place mixer bowl under strainer tray to catch strained food and a smaller bowl under open end to mixer, do so can result in the grinder body. 4. Slide the strainer...

Use & Care Guide
Page 9
... • Spring and shaft assembly Some foods may be used to grinder body. If ring is too tight to the fruit/vegetable strainer attachment and/or mixer, Labruscan or slip-skin type grapes such as Tokay and Thompson Seedless may be hand washed in the Fruit/Vegetable Strainer. NOTE: To ...avoid damage to the fruit/ vegetable strainer attachment, do not use cycle for normally soiled dishes, or (2) rub a small amount of oil or shortening over...
... • Spring and shaft assembly Some foods may be used to grinder body. If ring is too tight to the fruit/vegetable strainer attachment and/or mixer, Labruscan or slip-skin type grapes such as Tokay and Thompson Seedless may be hand washed in the Fruit/Vegetable Strainer. NOTE: To ...avoid damage to the fruit/ vegetable strainer attachment, do not use cycle for normally soiled dishes, or (2) rub a small amount of oil or shortening over...

Use & Care Guide
Page 10
... to Speed 4 and feed food into pieces that will fit in place. To Clean Food Tray Attachment Wash in amputations or cuts. 1. Unplug mixer. Rotating Blade Hazard Always use food pusher. If you wish, you may place on top rack ... Food Tray Attachment with the Food Grinder (model FGA) and the Fruit/Vegetable Strainer (model FVSFGA) attachments. 3. ENGLISH Food Tray Attachment To Use Food Tray Attachment WARNING To Attach Food Tray Attachment Before attaching food tray attachment: 1. Attach Food Grinder or Fruit/Vegetable Strainer Attachment to OFF. 2. Turn mixer to do...
... to Speed 4 and feed food into pieces that will fit in place. To Clean Food Tray Attachment Wash in amputations or cuts. 1. Unplug mixer. Rotating Blade Hazard Always use food pusher. If you wish, you may place on top rack ... Food Tray Attachment with the Food Grinder (model FGA) and the Fruit/Vegetable Strainer (model FVSFGA) attachments. 3. ENGLISH Food Tray Attachment To Use Food Tray Attachment WARNING To Attach Food Tray Attachment Before attaching food tray attachment: 1. Attach Food Grinder or Fruit/Vegetable Strainer Attachment to OFF. 2. Turn mixer to do...

Use & Care Guide
Page 11
... all remaining ingredients; Gradually stir in center. Yield: 20 appetizer servings (4 meatballs per serving) or 10 main dish servings (8 meatballs per serving). Turn to low. Attach Food Grinder to mixer. Attach Food Grinder to mixer. For thicker salsa, heat mixture to bubble.
... all remaining ingredients; Gradually stir in center. Yield: 20 appetizer servings (4 meatballs per serving) or 10 main dish servings (8 meatballs per serving). Turn to low. Attach Food Grinder to mixer. Attach Food Grinder to mixer. For thicker salsa, heat mixture to bubble.

Use & Care Guide
Page 12
... 1/2 teaspoon (2 mL) pepper 1 cup (235 mL) Parmesan cheese 1/2 cup (120 mL) olive oil Assemble Food Grinder using coarse grinding plate and attach to Speed 6 and whip 1 minute. Yield: 2 cups (475 mL). 10 Turn to Speed 4 and grind basil leaves, parsley sprigs, and garlic... Add salt, pepper, and Parmesan cheese. Attach bowl and wire whip. Assemble Fruit/Vegetable Strainer and attach to Speed 4 and strain tomatoes. Yield: 2 qt (1.9 L). Turn to Speed 4 and grind mixture into mixer bowl. Stop and scrape bowl. Turn to mixer. ENGLISH Bolognese Sauce 2 tablespoons (30 mL...
... 1/2 teaspoon (2 mL) pepper 1 cup (235 mL) Parmesan cheese 1/2 cup (120 mL) olive oil Assemble Food Grinder using coarse grinding plate and attach to Speed 6 and whip 1 minute. Yield: 2 cups (475 mL). 10 Turn to Speed 4 and grind basil leaves, parsley sprigs, and garlic... Add salt, pepper, and Parmesan cheese. Attach bowl and wire whip. Assemble Fruit/Vegetable Strainer and attach to Speed 4 and strain tomatoes. Yield: 2 qt (1.9 L). Turn to Speed 4 and grind mixture into mixer bowl. Stop and scrape bowl. Turn to mixer. ENGLISH Bolognese Sauce 2 tablespoons (30 mL...

Use & Care Guide
Page 13
Cook over low heat until sugar is dissolved, stirring constantly. Assemble Fruit/Vegetable Strainer and attach to mixer. Turn to Speed 4 and strain peaches into large saucepan placed under strainer. mix well. Cook over medium heat about 20 ... 3 cloves garlic, minced 1/2 teaspoon (2 mL) salt 1/4 teaspoon (1 mL) paprika (optional) Assemble Fruit/Vegetable Strainer and attach to mixer. Attach bowl and wire whip to pan. Stop and scrape bowl. Return apples to mixer. Process 10 minutes in large saucepan or Dutch oven. Yield: About 5 cups (1.2 L) (2 teaspoons [10 mL] per ...
Cook over low heat until sugar is dissolved, stirring constantly. Assemble Fruit/Vegetable Strainer and attach to mixer. Turn to Speed 4 and strain peaches into large saucepan placed under strainer. mix well. Cook over medium heat about 20 ... 3 cloves garlic, minced 1/2 teaspoon (2 mL) salt 1/4 teaspoon (1 mL) paprika (optional) Assemble Fruit/Vegetable Strainer and attach to mixer. Attach bowl and wire whip to pan. Stop and scrape bowl. Return apples to mixer. Process 10 minutes in large saucepan or Dutch oven. Yield: About 5 cups (1.2 L) (2 teaspoons [10 mL] per ...

Use & Care Guide
Page 14
...ARE EXCLUDED TO THE EXTENT LEGALLY PERMISSIBLE. KITCHENAID AND KITCHENAID CANADA DO NOT ASSUME ANY RESPONSIBILITY FOR INCIDENTAL OR CONSEQUENTIAL DAMAGES. See the following page for details on how to Arrange for replacement. Repairs when Stand Mixer Attachment are used in materials and workmanship. C....BY LAW ARE LIMITED TO ONE YEAR, OR THE SHORTEST PERIOD ALLOWED BY LAW. DISCLAIMER OF IMPLIED WARRANTIES; B. ENGLISH KitchenAid® Stand Mixer Attachment Warranty Length of Warranty: 50 United States, the District of Columbia, Canada, and Puerto Rico: One-year limited warranty...
...ARE EXCLUDED TO THE EXTENT LEGALLY PERMISSIBLE. KITCHENAID AND KITCHENAID CANADA DO NOT ASSUME ANY RESPONSIBILITY FOR INCIDENTAL OR CONSEQUENTIAL DAMAGES. See the following page for details on how to Arrange for replacement. Repairs when Stand Mixer Attachment are used in materials and workmanship. C....BY LAW ARE LIMITED TO ONE YEAR, OR THE SHORTEST PERIOD ALLOWED BY LAW. DISCLAIMER OF IMPLIED WARRANTIES; B. ENGLISH KitchenAid® Stand Mixer Attachment Warranty Length of Warranty: 50 United States, the District of Columbia, Canada, and Puerto Rico: One-year limited warranty...

Use & Care Guide
Page 15
...re so confident the quality of our products meets the exacting standards of the KitchenAid brand that , if your Stand Mixer Attachment should fail within the first year of ownership, KitchenAid will arrange to deliver an identical or comparable replacement to your door free of ...We're so confident the quality of our products meets the exacting standards of KitchenAid that , if your Stand Mixer Attachment should fail within the first year of ownership, KitchenAid Canada will replace your Stand Mixer Attachment with an identical or comparable replacement. Box numbers, please.) When you are...
...re so confident the quality of our products meets the exacting standards of the KitchenAid brand that , if your Stand Mixer Attachment should fail within the first year of ownership, KitchenAid will arrange to deliver an identical or comparable replacement to your door free of ...We're so confident the quality of our products meets the exacting standards of KitchenAid that , if your Stand Mixer Attachment should fail within the first year of ownership, KitchenAid Canada will replace your Stand Mixer Attachment with an identical or comparable replacement. Box numbers, please.) When you are...

Use & Care Guide
Page 16
... Rico, call toll-free 1-800-807-6777. to : Customer Satisfaction Center KitchenAid Portable Appliances P.O. Joseph, MI 49085-0218 To order accessories or replacement parts for your Stand Mixer Attachment in Mexico, call toll-free 1-800-541-6390. ENGLISH How to Arrange ... Saturday, 10 a.m. Joseph, MI 49085-0218 Or contact an Authorized Service Center near you purchased the Stand Mixer Attachment for Service after the Warranty Expires - to : Customer Satisfaction Center KitchenAid Portable Appliances P.O. Box 218 St. Or write to 5 p.m. Box 218 St. Or write to : ...
... Rico, call toll-free 1-800-807-6777. to : Customer Satisfaction Center KitchenAid Portable Appliances P.O. Joseph, MI 49085-0218 To order accessories or replacement parts for your Stand Mixer Attachment in Mexico, call toll-free 1-800-541-6390. ENGLISH How to Arrange ... Saturday, 10 a.m. Joseph, MI 49085-0218 Or contact an Authorized Service Center near you purchased the Stand Mixer Attachment for Service after the Warranty Expires - to : Customer Satisfaction Center KitchenAid Portable Appliances P.O. Box 218 St. Or write to 5 p.m. Box 218 St. Or write to : ...

