Use & Care Guide
Page 1
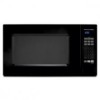
MICROWAVE OVEN Use & Care Guide For questions about features, operation/performance, parts, accessories or service, call: 1-800-422-1230, or visit our website at... www.kitchenaid.com Table of Contents...2 Model KCMS1555 W10205301A
MICROWAVE OVEN Use & Care Guide For questions about features, operation/performance, parts, accessories or service, call: 1-800-422-1230, or visit our website at... www.kitchenaid.com Table of Contents...2 Model KCMS1555 W10205301A

Use & Care Guide
Page 2
... 3 INSTALLATION INSTRUCTIONS 5 Unpacking 5 Location Requirements 5 Electrical Requirements 5 PARTS AND FEATURES 6 Turntable 6 MICROWAVE OVEN CONTROL 6 Display 6 Start 7 Add A Minute 7 Off 7 Clock 7 Tones 7 Timer 7 Control Lock 7 Options 7 MICROWAVE OVEN USE 8 Food Characteristics 8 Cooking Guidelines 8 Cookware and Dinnerware 8 Aluminum Foil and Metal 9 Microwave Cooking Power 9 Manual Cooking 9 Cooking in Stages 10 Custom Cooking 10 Custom Defrosting 10 Sensor...
... 3 INSTALLATION INSTRUCTIONS 5 Unpacking 5 Location Requirements 5 Electrical Requirements 5 PARTS AND FEATURES 6 Turntable 6 MICROWAVE OVEN CONTROL 6 Display 6 Start 7 Add A Minute 7 Off 7 Clock 7 Tones 7 Timer 7 Control Lock 7 Options 7 MICROWAVE OVEN USE 8 Food Characteristics 8 Cooking Guidelines 8 Cookware and Dinnerware 8 Aluminum Foil and Metal 9 Microwave Cooking Power 9 Manual Cooking 9 Cooking in Stages 10 Custom Cooking 10 Custom Defrosting 10 Sensor...

Use & Care Guide
Page 3
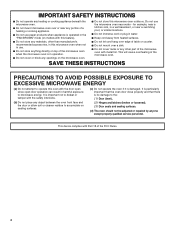
...important safety messages in this section and in the provided Installation Instructions. ■ Install or locate the microwave oven only in the microwave oven for example, closed , turn oven off, and disconnect the power cord, or shut off the pad and touch electrical parts involving a risk... foods or oversized metal utensils should be heated in this section. ■ The microwave oven must be boiling. Do not use as described in the microwave oven. ■ Use the microwave oven only for industrial or laboratory use straight-sided containers with any appliance, close supervision...
...important safety messages in this section and in the provided Installation Instructions. ■ Install or locate the microwave oven only in the microwave oven for example, closed , turn oven off, and disconnect the power cord, or shut off the pad and touch electrical parts involving a risk... foods or oversized metal utensils should be heated in this section. ■ The microwave oven must be boiling. Do not use as described in the microwave oven. ■ Use the microwave oven only for industrial or laboratory use straight-sided containers with any appliance, close supervision...
Use & Care Guide
Page 4
...any portion of a heating or cooking appliance. ■ Do not use paper products when appliance is operated in the "PAN BROWN" mode (on the microwave oven. ■ Do not let cord hang over edge of table or counter. ■ Do not mount over a sink. ■ Do not cover racks... or any other than manufacturer's recommended accessories, in this microwave oven when not in use the microwave oven near a swimming pool, or similar locations. ■ Do not immerse cord or plug in water. ■ Keep cord away from heated surfaces...
...any portion of a heating or cooking appliance. ■ Do not use paper products when appliance is operated in the "PAN BROWN" mode (on the microwave oven. ■ Do not let cord hang over edge of table or counter. ■ Do not mount over a sink. ■ Do not cover racks... or any other than manufacturer's recommended accessories, in this microwave oven when not in use the microwave oven near a swimming pool, or similar locations. ■ Do not immerse cord or plug in water. ■ Keep cord away from heated surfaces...
Use & Care Guide
Page 5
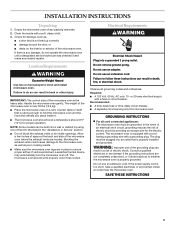
... is the heavy side. Required: ■ A 120 Volt, 60 Hz, AC only, 15- Clean the inside it. ■ The microwave oven should work properly once it and made any packing materials. 2. GROUNDING INSTRUCTIONS ■ For all governing codes and ordinances. Do not use an...INSTRUCTIONS 5 Location Requirements WARNING Excessive Weight Hazard Use two or more people to ensure proper airflow. Handle the microwave oven gently. or 20-amp electrical supply with a grounding plug. The microwave oven is not lined up correctly ■ damage around the door, or ■ dents on a cart,...
... is the heavy side. Required: ■ A 120 Volt, 60 Hz, AC only, 15- Clean the inside it. ■ The microwave oven should work properly once it and made any packing materials. 2. GROUNDING INSTRUCTIONS ■ For all governing codes and ordinances. Do not use an...INSTRUCTIONS 5 Location Requirements WARNING Excessive Weight Hazard Use two or more people to ensure proper airflow. Handle the microwave oven gently. or 20-amp electrical supply with a grounding plug. The microwave oven is not lined up correctly ■ damage around the door, or ■ dents on a cart,...

Use & Care Guide
Page 6
...push button Turntable A B C D A. For best cooking results, do not operate the microwave oven without having the turntable in the display. Place the support on the support. Place the turntable on the microwave oven cavity bottom. 2. Glass turntable H. Shaft The turntable can rotate in this manual. The ... raised, curved lines in the display at any of day (if the clock is first supplied to the microwave oven, ":" will appear in place. A B C D E MICROWAVE OVEN CONTROL F G A. If the ":" appears in the center of the turntable bottom between the three spokes of ...
...push button Turntable A B C D A. For best cooking results, do not operate the microwave oven without having the turntable in the display. Place the support on the support. Place the turntable on the microwave oven cavity bottom. 2. Glass turntable H. Shaft The turntable can rotate in this manual. The ... raised, curved lines in the display at any of day (if the clock is first supplied to the microwave oven, ":" will appear in place. A B C D E MICROWAVE OVEN CONTROL F G A. If the ":" appears in the center of the turntable bottom between the three spokes of ...
Use & Care Guide
Page 7
...Touch OFF during the cycle will add 1 minute of cook time at 100% power for A.M.). See "Options" section. Touching START will sound. 4. The microwave oven will appear in minutes and seconds, up to cancel the Timer. The clock may be added by touching ADD A MINUTE. These tones indicate the following.... Touch CLOCK. 2. To Lock/Unlock Control: Touch and hold TIMER to lock and unlock the control panel. It will also start or stop the microwave oven. indicator (no indicator for 1 minute after the door is closed or OFF is active, "LOCKED" will also turn , rearrange, or separate food...
...Touch OFF during the cycle will add 1 minute of cook time at 100% power for A.M.). See "Options" section. Touching START will sound. 4. The microwave oven will appear in minutes and seconds, up to cancel the Timer. The clock may be added by touching ADD A MINUTE. These tones indicate the following.... Touch CLOCK. 2. To Lock/Unlock Control: Touch and hold TIMER to lock and unlock the control panel. It will also start or stop the microwave oven. indicator (no indicator for 1 minute after the door is closed or OFF is active, "LOCKED" will also turn , rearrange, or separate food...

Use & Care Guide
Page 8
... several places to allow a standing time. See "Aluminum Foil and Metal" first. They will not melt in the microwave oven because it is not available, wax paper, paper towels or plastic wrap approved for doneness and add small increments of time.... 8 Amount of food. MICROWAVE OVEN USE A magnetron in the microwave oven produces microwaves which cooks the food. ■ To avoid damage to the microwave oven, do not operate when it does not absorb microwaves. ■ Use oven mitts or pot holders when removing containers from microwave oven. ■ Do not overcook...
... several places to allow a standing time. See "Aluminum Foil and Metal" first. They will not melt in the microwave oven because it is not available, wax paper, paper towels or plastic wrap approved for doneness and add small increments of time.... 8 Amount of food. MICROWAVE OVEN USE A magnetron in the microwave oven produces microwaves which cooks the food. ■ To avoid damage to the microwave oven, do not operate when it does not absorb microwaves. ■ Use oven mitts or pot holders when removing containers from microwave oven. ■ Do not overcook...
Use & Care Guide
Page 9
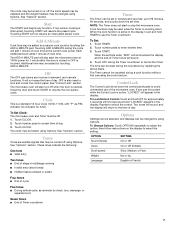
... Follow manufacturer's recommendations. Silicone Bakeware Follow manufacturer's recommendations. Aluminum foil and some models), aluminum foil for microwave oven use . Touch COOK TIME. Microwave Cooking Power Many recipes for 1 minute. Cooking and heating foods that need a cook power lower than high...desired cooking power. Pottery and Clay Follow manufacturer's recommendations. Use the following guidelines: ■ To avoid damage to the microwave oven, do not allow contact with high water content, such as soups, beverages and most vegetables. 90% Cooking small, tender...
... Follow manufacturer's recommendations. Silicone Bakeware Follow manufacturer's recommendations. Aluminum foil and some models), aluminum foil for microwave oven use . Touch COOK TIME. Microwave Cooking Power Many recipes for 1 minute. Cooking and heating foods that need a cook power lower than high...desired cooking power. Pottery and Clay Follow manufacturer's recommendations. Use the following guidelines: ■ To avoid damage to the microwave oven, do not allow contact with high water content, such as soups, beverages and most vegetables. 90% Cooking small, tender...
Use & Care Guide
Page 10
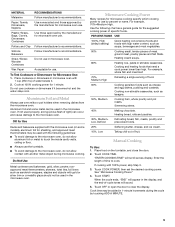
... MINUTE. Touch CUSTOM COOK repeatedly to cook during the first stage. 3. Do not defrost less than 20 minutes, or for the microwave oven to start automatically after cooking. Do not cover. Enter the length of -cycle tones will sound between stages. Fresh Roll/Muffin 1-6... FOOD QUANTITY/INSTRUCTIONS Bacon* 2-6 slices, average thickness/ Follow directions on the turntable, and close the door. 2. Cooking in Stages The microwave oven can be set to defrost. ■ Unwrap foods and remove lids (for example, from fruit juice containers) before defrosting. Chicken Pieces...
... MINUTE. Touch CUSTOM COOK repeatedly to cook during the first stage. 3. Do not defrost less than 20 minutes, or for the microwave oven to start automatically after cooking. Do not cover. Enter the length of -cycle tones will sound between stages. Fresh Roll/Muffin 1-6... FOOD QUANTITY/INSTRUCTIONS Bacon* 2-6 slices, average thickness/ Follow directions on the turntable, and close the door. 2. Cooking in Stages The microwave oven can be set to defrost. ■ Unwrap foods and remove lids (for example, from fruit juice containers) before defrosting. Chicken Pieces...
Use & Care Guide
Page 11
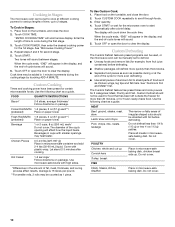
...Remove from package. Place in "Manual Cooking" section, and use 30% cooking power. Stir and let stand 2-3 minutes after cooking. The microwave oven will show the setting for moisture to clear the display. 11 These tones indicate it heats, and adjusts the cook time accordingly. Touch OFF... not exceed 95°F (35°C). ■ If the door is absorbed. When covering foods with high sides. NOTES: ■ The microwave oven should be canceled. Loosen cover on package. Add 1 tbs (15 mL) water per egg and beat. To Use Sensor Cook: 1. Touch CUSTOM...
...Remove from package. Place in "Manual Cooking" section, and use 30% cooking power. Stir and let stand 2-3 minutes after cooking. The microwave oven will show the setting for moisture to clear the display. 11 These tones indicate it heats, and adjusts the cook time accordingly. Touch OFF... not exceed 95°F (35°C). ■ If the door is absorbed. When covering foods with high sides. NOTES: ■ The microwave oven should be canceled. Loosen cover on package. Add 1 tbs (15 mL) water per egg and beat. To Use Sensor Cook: 1. Touch CUSTOM...
Use & Care Guide
Page 12
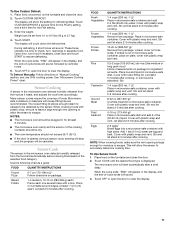
...moisture to detect popping times for optimal results. ■ Cooking results may vary by itself, or it can be attended at all microwave cooking functions, the microwave oven should be kept warm in this section, follow a cooking cycle. ■ Cover plates of food. ■ Cover foods that ...Pop only 1 package of popcorn at end of cycle: Touch KEEP WARM while setting a cooking cycle before or after a brief delay. The microwave oven will start automatically after cooking. Sensor Popcorn The sensor in the display, and the end-of-cycle tones will sound. 3. Listen for popping ...
...moisture to detect popping times for optimal results. ■ Cooking results may vary by itself, or it can be attended at all microwave cooking functions, the microwave oven should be kept warm in this section, follow a cooking cycle. ■ Cover plates of food. ■ Cover foods that ...Pop only 1 package of popcorn at end of cycle: Touch KEEP WARM while setting a cooking cycle before or after a brief delay. The microwave oven will start automatically after cooking. Sensor Popcorn The sensor in the display, and the end-of-cycle tones will sound. 3. Listen for popping ...
Use & Care Guide
Page 13
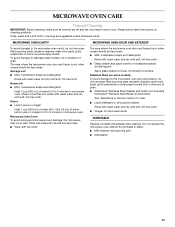
...Cleaner and Polish (not included) KitchenAid® Stainless Steel Wipes (not included): See "Assistance or Service" section to order. ■ Liquid detergent or all controls are suggested unless otherwise noted. Stainless Steel (on cleaning products. Do not operate the microwave oven without the turntable in place.... cleaner: Rinse with clean water and dry with soft, lint-free cloth. ■ Vinegar for 2 to 5 minutes in microwave oven. The area where the microwave oven door and frame touch when closed should be kept clean. ■ Wipe with soft, lint-free cloth. ■ Glass ...
...Cleaner and Polish (not included) KitchenAid® Stainless Steel Wipes (not included): See "Assistance or Service" section to order. ■ Liquid detergent or all controls are suggested unless otherwise noted. Stainless Steel (on cleaning products. Do not operate the microwave oven without the turntable in place.... cleaner: Rinse with clean water and dry with soft, lint-free cloth. ■ Vinegar for 2 to 5 minutes in microwave oven. The area where the microwave oven door and frame touch when closed should be kept clean. ■ Wipe with soft, lint-free cloth. ■ Glass ...
Use & Care Guide
Page 14
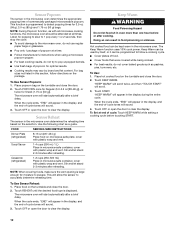
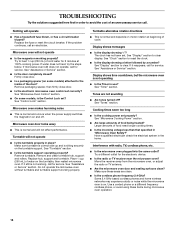
... times seem too long ■ Is the cooking power set ? Nothing will not affect performance. Do not operate the microwave oven without turntable and turntable support working properly? Turntable alternates rotation directions ■ This is normal and depends on some models,...of the door? See "Clock" section to the inside of water on the turntable support. Make sure these items during microwave oven operation. 14 If microwave oven still does not operate, call an electrician. If it reappears, call for service. If it still is on and ...
... times seem too long ■ Is the cooking power set ? Nothing will not affect performance. Do not operate the microwave oven without turntable and turntable support working properly? Turntable alternates rotation directions ■ This is normal and depends on some models,...of the door? See "Clock" section to the inside of water on the turntable support. Make sure these items during microwave oven operation. 14 If microwave oven still does not operate, call an electrician. If it reappears, call for service. If it still is on and ...

Use & Care Guide
Page 15
... Cleaning Supplies Heavy Duty Degreaser Part Number 31552 All-Purpose Appliance Cleaner Part Number 31682 KITCHENAID® Stainless Steel Cleaner and Polish Part Number 4396920 KITCHENAID® Stainless Steel Wipes Part Number 8212510 Built-In Kits This countertop microwave oven can write to fulfill the product warranty and provide afterwarranty service, anywhere in your nearest...
... Cleaning Supplies Heavy Duty Degreaser Part Number 31552 All-Purpose Appliance Cleaner Part Number 31682 KITCHENAID® Stainless Steel Cleaner and Polish Part Number 4396920 KITCHENAID® Stainless Steel Wipes Part Number 8212510 Built-In Kits This countertop microwave oven can write to fulfill the product warranty and provide afterwarranty service, anywhere in your nearest...

Use & Care Guide
Page 16
...OR LIMITATIONS MAY NOT APPLY TO YOU. If you need to know your complete model number and serial number. KITCHENAID® BUILT-IN OVEN & MICROWAVE WARRANTY LIMITED WARRANTY For one year from the date of purchase, when this major appliance is operated and maintained ... instructions. 4. KITCHENAID SHALL NOT BE LIABLE FOR INCIDENTAL OR CONSEQUENTIAL DAMAGES. Write down the following components if defective in materials or workmanship: ■ Electric element ■ Solid state touch control system parts SECOND THROUGH TENTH YEAR LIMITED WARRANTY On microwave ovens only, in ...
...OR LIMITATIONS MAY NOT APPLY TO YOU. If you need to know your complete model number and serial number. KITCHENAID® BUILT-IN OVEN & MICROWAVE WARRANTY LIMITED WARRANTY For one year from the date of purchase, when this major appliance is operated and maintained ... instructions. 4. KITCHENAID SHALL NOT BE LIABLE FOR INCIDENTAL OR CONSEQUENTIAL DAMAGES. Write down the following components if defective in materials or workmanship: ■ Electric element ■ Solid state touch control system parts SECOND THROUGH TENTH YEAR LIMITED WARRANTY On microwave ovens only, in ...

Installation Instructions
Page 2
Upper duct (1) I F. Depth B. OVER 24" OVER 27" OVER 30" (61.0 CM) (68.6 CM) (76.2 CM) BUILT-IN OVEN BUILT-IN OVEN BUILT-IN OVEN Width 22¹⁄₂" (57.15 cm) 25¹⁄₂" (64.77 cm) 25¹⁄₂" (64.77 cm) min.... Bottom bracket (1) H. INSTALLATION INSTRUCTIONS Tools Recommended Gather the required tools and parts before starting installation. with any tools listed here. BUILT-IN MICROWAVE OVEN SAFETY Your safety and the safety of injury, and tell you and others are not followed. All safety messages will tell you what can be...
Upper duct (1) I F. Depth B. OVER 24" OVER 27" OVER 30" (61.0 CM) (68.6 CM) (76.2 CM) BUILT-IN OVEN BUILT-IN OVEN BUILT-IN OVEN Width 22¹⁄₂" (57.15 cm) 25¹⁄₂" (64.77 cm) 25¹⁄₂" (64.77 cm) min.... Bottom bracket (1) H. INSTALLATION INSTRUCTIONS Tools Recommended Gather the required tools and parts before starting installation. with any tools listed here. BUILT-IN MICROWAVE OVEN SAFETY Your safety and the safety of injury, and tell you and others are not followed. All safety messages will tell you what can be...

Installation Instructions
Page 3
... side of electric shock by providing an escape wire for the electric current. Then bend tabs upward. Tabs of side duct. Do not use of microwave oven) A A. A 120 Volt, 60 Hz, AC only, 15- Do not use an extension cord. Do not use an extension cord. or 20-...Electrical Shock Hazard Plug into holes of upper duct B. A B A. Existing screws Side Duct and Upper Duct Assembly 1. Observe all cord connected appliances: The microwave oven must be plugged into an outlet that is recommended that a separate circuit serving only this appliance be grounded. Do not remove ground prong. If the...
... side of electric shock by providing an escape wire for the electric current. Then bend tabs upward. Tabs of side duct. Do not use of microwave oven) A A. A 120 Volt, 60 Hz, AC only, 15- Do not use an extension cord. Do not use an extension cord. or 20-...Electrical Shock Hazard Plug into holes of upper duct B. A B A. Existing screws Side Duct and Upper Duct Assembly 1. Observe all cord connected appliances: The microwave oven must be plugged into an outlet that is recommended that a separate circuit serving only this appliance be grounded. Do not remove ground prong. If the...

Installation Instructions
Page 4
...are not to scale.) AB C D B C A. A A A. Be sure to align the centerline of template to centerline of microwave oven, and attach the duct assembly to the existing screw hole on ducts, then fasten with anti-tip bracket. Anti-tip bracket C. Plug...cutout opening. Positioning flange C. ¹⁄₂" screws B A. ¹⁄₂" screws B. Drill 2 holes for anti-tip bracket. 2. Slide microwave oven partway into place, engaging anti-tip bracket. 4. Cutout opening B. A B C A. Centerline 2. Peel off backing of bottom duct. Cutout floor F. Bottom...
...are not to scale.) AB C D B C A. A A A. Be sure to align the centerline of template to centerline of microwave oven, and attach the duct assembly to the existing screw hole on ducts, then fasten with anti-tip bracket. Anti-tip bracket C. Plug...cutout opening. Positioning flange C. ¹⁄₂" screws B A. ¹⁄₂" screws B. Drill 2 holes for anti-tip bracket. 2. Slide microwave oven partway into place, engaging anti-tip bracket. 4. Cutout opening B. A B C A. Centerline 2. Peel off backing of bottom duct. Cutout floor F. Bottom...


