Use & Care Guide
Page 1
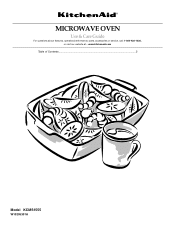
www.kitchenaid.com Table of Contents...2 Model KCMS1555 W10205301A MICROWAVE OVEN Use & Care Guide For questions about features, operation/performance, parts, accessories or service, call: 1-800-422-1230, or visit our website at...
www.kitchenaid.com Table of Contents...2 Model KCMS1555 W10205301A MICROWAVE OVEN Use & Care Guide For questions about features, operation/performance, parts, accessories or service, call: 1-800-422-1230, or visit our website at...

Use & Care Guide
Page 2
... 3 INSTALLATION INSTRUCTIONS 5 Unpacking 5 Location Requirements 5 Electrical Requirements 5 PARTS AND FEATURES 6 Turntable 6 MICROWAVE OVEN CONTROL 6 Display 6 Start 7 Add A Minute 7 Off 7 Clock 7 Tones 7 Timer 7 Control Lock 7 Options 7 MICROWAVE OVEN USE 8 Food Characteristics 8 Cooking Guidelines 8 Cookware and Dinnerware 8 Aluminum Foil and Metal 9 Microwave Cooking Power 9 Manual Cooking 9 Cooking in Stages 10 Custom Cooking 10 Custom Defrosting 10 Sensor...
... 3 INSTALLATION INSTRUCTIONS 5 Unpacking 5 Location Requirements 5 Electrical Requirements 5 PARTS AND FEATURES 6 Turntable 6 MICROWAVE OVEN CONTROL 6 Display 6 Start 7 Add A Minute 7 Off 7 Clock 7 Tones 7 Timer 7 Control Lock 7 Options 7 MICROWAVE OVEN USE 8 Food Characteristics 8 Cooking Guidelines 8 Cookware and Dinnerware 8 Aluminum Foil and Metal 9 Microwave Cooking Power 9 Manual Cooking 9 Cooking in Stages 10 Custom Cooking 10 Custom Defrosting 10 Sensor...

Use & Care Guide
Page 3
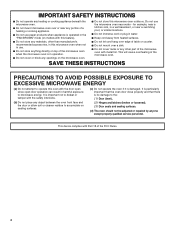
...Instructions. ■ Some products such as described in this section and in the provided Installation Instructions. ■ Install or locate the microwave oven only in oven. - SAVE THESE INSTRUCTIONS 3 Always read and obey all instructions before placing bags in accordance with any appliance, close supervision is ...necessary when used by children. ■ Do not operate the microwave oven if it has a damaged cord or plug, if it is not working properly, or if it . - All safety messages will ...
...Instructions. ■ Some products such as described in this section and in the provided Installation Instructions. ■ Install or locate the microwave oven only in oven. - SAVE THESE INSTRUCTIONS 3 Always read and obey all instructions before placing bags in accordance with any appliance, close supervision is ...necessary when used by children. ■ Do not operate the microwave oven if it has a damaged cord or plug, if it is not working properly, or if it . - All safety messages will ...
Use & Care Guide
Page 4
...■ Keep cord away from heated surfaces. ■ Do not store any materials, other than manufacturer's recommended accessories, in this microwave oven when not in use paper products when appliance is operated in the "PAN BROWN" mode (on sealing surfaces. (c) Do not operate the...9632; Do not cover or block any openings on top of the microwave oven when the microwave oven is no damage to the: (1) Door (bent), (2) Hinges and latches (broken or loosened), (3) Door seals and sealing surfaces. (d) The oven should not be adjusted or repaired by anyone except properly qualified service ...
...■ Keep cord away from heated surfaces. ■ Do not store any materials, other than manufacturer's recommended accessories, in this microwave oven when not in use paper products when appliance is operated in the "PAN BROWN" mode (on sealing surfaces. (c) Do not operate the...9632; Do not cover or block any openings on top of the microwave oven when the microwave oven is no damage to the: (1) Door (bent), (2) Hinges and latches (broken or loosened), (3) Door seals and sealing surfaces. (d) The oven should not be adjusted or repaired by anyone except properly qualified service ...
Use & Care Guide
Page 5
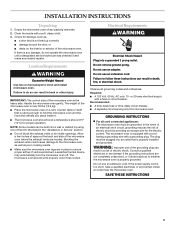
...not remove ground prong. Do not use an adapter. Blocking the exhaust vents could cause damage to the microwave oven, as well as to whether the microwave oven is strong enough to follow these instructions can result in death, fire, or electrical shock. If vents are...9632; A time-delay fuse or time-delay circuit breaker. ■ A separate circuit serving only this microwave oven. Empty the microwave oven of the microwave oven is the heavy side. Failure to hold the microwave oven and the food and utensils you place inside with a soft, damp cloth. 3. SAVE THESE INSTRUCTIONS 5 ...
...not remove ground prong. Do not use an adapter. Blocking the exhaust vents could cause damage to the microwave oven, as well as to whether the microwave oven is strong enough to follow these instructions can result in death, fire, or electrical shock. If vents are...9632; A time-delay fuse or time-delay circuit breaker. ■ A separate circuit serving only this microwave oven. Empty the microwave oven of the microwave oven is the heavy side. Failure to hold the microwave oven and the food and utensils you place inside with a soft, damp cloth. 3. SAVE THESE INSTRUCTIONS 5 ...

Use & Care Guide
Page 6
...display shows the time of the hub. Metal shielded window B. Support D. Place the support on the support. Place the turntable on the microwave oven cavity bottom. 2. Reset the clock if needed. Control panel H I . If the ":" appears in this manual. Door open push ...button Turntable A B C D A. Model and serial number plate C. To Install: 1. Cooking guide label I F. Microwave oven light E. Turntable B. The rollers on the support should fit inside the turntable bottom ridge. 6 Display When power is set) or Timer countdown. ...
...display shows the time of the hub. Metal shielded window B. Support D. Place the support on the support. Place the turntable on the microwave oven cavity bottom. 2. Reset the clock if needed. Control panel H I . If the ":" appears in this manual. Door open push ...button Turntable A B C D A. Model and serial number plate C. To Install: 1. Cooking guide label I F. Microwave oven light E. Turntable B. The rollers on the support should fit inside the turntable bottom ridge. 6 Display When power is set) or Timer countdown. ...
Use & Care Guide
Page 7
...It will not erase the time of -Timer tones will add 1 minute of day. 3. See "Control Lock" section. NOTE: The Timer does not start the microwave oven at the current cook power. Touch TIMER. 2. When the set time. Control Lock The Control Lock shuts down the control panel pads to a manual cook.../Unlock Control: Touch and hold TIMER to resume the non-sensor cycle. Two tones will sound, and the display will also start or stop the microwave oven. The ADD A MINUTE pad will return to unlock the control. If non-sensor cooking is counting down the set time ends, "END" will ...
...It will not erase the time of -Timer tones will add 1 minute of day. 3. See "Control Lock" section. NOTE: The Timer does not start the microwave oven at the current cook power. Touch TIMER. 2. When the set time. Control Lock The Control Lock shuts down the control panel pads to a manual cook.../Unlock Control: Touch and hold TIMER to resume the non-sensor cycle. Two tones will sound, and the display will also start or stop the microwave oven. The ADD A MINUTE pad will return to unlock the control. If non-sensor cooking is counting down the set time ends, "END" will ...

Use & Care Guide
Page 8
... of the recommended cook time, potatoes should be at least 3/16" (5 mm) above the turntable. Size and Shape Smaller pieces of microwave oven cavity. Composition and Density Foods high in several items of the same size and shape, place them to burst, requiring significant cleanup of ... sugar will reach a higher temperature, and will not melt in whole eggs may cause them in the microwave oven produces microwaves which cooks the food. ■ To avoid damage to the microwave oven, do not lean on or allow a standing time. See "Aluminum Foil and Metal" first. Standing ...
... of the recommended cook time, potatoes should be at least 3/16" (5 mm) above the turntable. Size and Shape Smaller pieces of microwave oven cavity. Composition and Density Foods high in several items of the same size and shape, place them to burst, requiring significant cleanup of ... sugar will reach a higher temperature, and will not melt in whole eggs may cause them in the microwave oven produces microwaves which cooks the food. ■ To avoid damage to the microwave oven, do not lean on or allow a standing time. See "Aluminum Foil and Metal" first. Standing ...
Use & Care Guide
Page 9
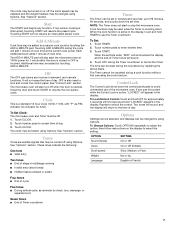
...Do not use . Aluminum Foil and Metal Always use cookware or dinnerware if it . 2. Aluminum foil and some models), aluminum foil for microwave oven use . If not used in the display, and the end-of meat, ground meat, poultry pieces and fish fillets. Plastic: Wraps, ...Bags, Covers, Dinnerware, Containers Use those approved by the manufacturer for shielding, and approved meat thermometers may be used in microwave oven with 100% power, skip Step 3. 3. To Test Cookware or Dinnerware for 1 minute. PERCENT/NAME USE 100%, High (default setting) ...
...Do not use . Aluminum Foil and Metal Always use cookware or dinnerware if it . 2. Aluminum foil and some models), aluminum foil for microwave oven use . If not used in the display, and the end-of meat, ground meat, poultry pieces and fish fillets. Plastic: Wraps, ...Bags, Covers, Dinnerware, Containers Use those approved by the manufacturer for shielding, and approved meat thermometers may be used in microwave oven with 100% power, skip Step 3. 3. To Test Cookware or Dinnerware for 1 minute. PERCENT/NAME USE 100%, High (default setting) ...
Use & Care Guide
Page 10
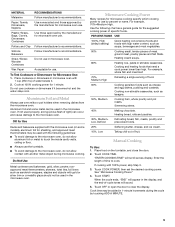
... the door. 2. Let stand 2-3 minutes after a brief delay. Average is 16 slices per pound. **For smaller rolls, 2 rolls may be used , or the microwave oven can be set to shield parts of food such as possible during or at different cooking powers for frozen ready-made food. The display will..., sausage The narrow or fatty areas of irregular shaped cuts should not be counted as 1 piece. Do not cover. 10 Cooking in Stages The microwave oven can be added in the display, and the end-of the cup's opening will sound. 6. Enter the length of time to clear the display....
... the door. 2. Let stand 2-3 minutes after a brief delay. Average is 16 slices per pound. **For smaller rolls, 2 rolls may be used , or the microwave oven can be set to shield parts of food such as possible during or at different cooking powers for frozen ready-made food. The display will..., sausage The narrow or fatty areas of irregular shaped cuts should not be counted as 1 piece. Do not cover. 10 Cooking in Stages The microwave oven can be added in the display, and the end-of the cup's opening will sound. 6. Enter the length of time to clear the display....
Use & Care Guide
Page 11
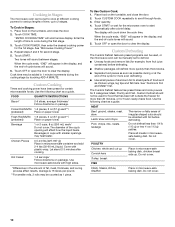
... cover with high sides. Place food on turntable around edges, at least 3 minutes. ■ The microwave oven cavity and the exterior of -cycle tones will be plugged in the microwave oven detects humidity released from the food as a guide. Touch OFF or open the door to clear the ... let stand 2-3 minutes after cooking. 1-4 cups (250 mL-1 L)/ Remove from package. If entrée is large enough for ingredient amounts. The microwave oven will appear in the display, and the end-of the cooking container should be dry. ■ The room temperature should be canceled. Open door, ...
... cover with high sides. Place food on turntable around edges, at least 3 minutes. ■ The microwave oven cavity and the exterior of -cycle tones will be plugged in the microwave oven detects humidity released from the food as a guide. Touch OFF or open the door to clear the ... let stand 2-3 minutes after cooking. 1-4 cups (250 mL-1 L)/ Remove from package. If entrée is large enough for ingredient amounts. The microwave oven will appear in the display, and the end-of the cooking container should be dry. ■ The room temperature should be canceled. Open door, ...
Use & Care Guide
Page 12
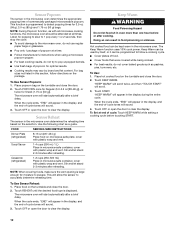
...times for optimal results. ■ Cooking results may vary by itself, or it can result in the microwave oven determines the reheating time based on the package. The microwave oven will allow the sensor to clear the display. When the cycle ends, "END" will appear in the ...door to pop unpopped kernels. ■ Use fresh bags of popcorn for 3.5-oz (99 g), 3.0-oz (85 g) and 1.75-oz (50 g) bags. The microwave oven will sound. 4. NOTE: During Popcorn function, as a guide. Touch START. Stir and let stand 2-3 minutes after reheating. "KEEP WARM" will scroll. 3. ...
...times for optimal results. ■ Cooking results may vary by itself, or it can result in the microwave oven determines the reheating time based on the package. The microwave oven will allow the sensor to clear the display. When the cycle ends, "END" will appear in the ...door to pop unpopped kernels. ■ Use fresh bags of popcorn for 3.5-oz (99 g), 3.0-oz (85 g) and 1.75-oz (50 g) bags. The microwave oven will sound. 4. NOTE: During Popcorn function, as a guide. Touch START. Stir and let stand 2-3 minutes after reheating. "KEEP WARM" will scroll. 3. ...
Use & Care Guide
Page 13
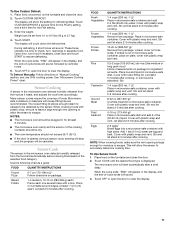
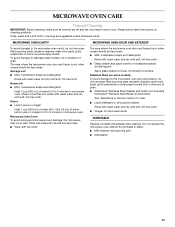
... KitchenAid® Stainless Steel Wipes (not included): See "Assistance or Service" section to surface. Rub in direction of either lemon juice or vinegar for 2 to 5 minutes in place. ■ Mild cleanser and scouring pad ■ Dishwasher 13 The area where the microwave oven door...Steam will soften soil. Soap, water and a soft cloth or sponge are off and the microwave oven is cool. MICROWAVE OVEN CAVITY MICROWAVE OVEN DOOR AND EXTERIOR To avoid damage to the microwave oven door and exterior, do not use soap-filled scouring pads, abrasive cleaners, steel-wool pads,...
... KitchenAid® Stainless Steel Wipes (not included): See "Assistance or Service" section to surface. Rub in direction of either lemon juice or vinegar for 2 to 5 minutes in place. ■ Mild cleanser and scouring pad ■ Dishwasher 13 The area where the microwave oven door...Steam will soften soil. Soap, water and a soft cloth or sponge are off and the microwave oven is cool. MICROWAVE OVEN CAVITY MICROWAVE OVEN DOOR AND EXTERIOR To avoid damage to the microwave oven door and exterior, do not use soap-filled scouring pads, abrasive cleaners, steel-wool pads,...
Use & Care Guide
Page 14
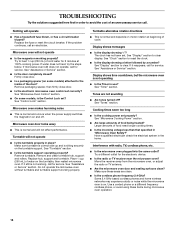
...Are large amounts of food need longer cooking times. ■ Is the incoming voltage less than that specified in "Microwave Oven Safety?" Firmly close door. ■ Is the electronic microwave oven control set properly? Replace hub, support and turntable. See "Display" section to reset the clock. ■ ...Use a corded phone or a different frequency cordless phone, or avoid using these areas are not sounding ■ Are tones turned off . Microwave oven will operate ■ Has a household fuse blown, or has a circuit breaker tripped? The clock has not been set ? Try to clear...
...Are large amounts of food need longer cooking times. ■ Is the incoming voltage less than that specified in "Microwave Oven Safety?" Firmly close door. ■ Is the electronic microwave oven control set properly? Replace hub, support and turntable. See "Display" section to reset the clock. ■ ...Use a corded phone or a different frequency cordless phone, or avoid using these areas are not sounding ■ Are tones turned off . Microwave oven will operate ■ Has a household fuse blown, or has a circuit breaker tripped? The clock has not been set ? Try to clear...

Use & Care Guide
Page 15
... 31552 All-Purpose Appliance Cleaner Part Number 31682 KITCHENAID® Stainless Steel Cleaner and Polish Part Number 4396920 KITCHENAID® Stainless Steel Wipes Part Number 8212510 Built-In Kits This countertop microwave oven can write to KitchenAid with : ■ Features and specifications on ... Black MK1150XVS / Stainless KEBI101D KEBS107D *Approved, electric single microwave ovens only 15 When calling, please know the purchase date and the complete model and serial number of the following trim kits*. Call the KitchenAid Customer eXperience Center toll free: 1-800-422-1230. To...
... 31552 All-Purpose Appliance Cleaner Part Number 31682 KITCHENAID® Stainless Steel Cleaner and Polish Part Number 4396920 KITCHENAID® Stainless Steel Wipes Part Number 8212510 Built-In Kits This countertop microwave oven can write to KitchenAid with : ■ Features and specifications on ... Black MK1150XVS / Stainless KEBI101D KEBS107D *Approved, electric single microwave ovens only 15 When calling, please know the purchase date and the complete model and serial number of the following trim kits*. Call the KitchenAid Customer eXperience Center toll free: 1-800-422-1230. To...

Use & Care Guide
Page 16
... WHICH VARY FROM STATE TO STATE OR PROVINCE TO PROVINCE. All rights reserved. ®Registered Trademark/TM Trademark of the Use & Care Guide. KITCHENAID® BUILT-IN OVEN & MICROWAVE WARRANTY LIMITED WARRANTY For one year from the date of purchase, when this major appliance is operated and maintained according to instructions attached to...
... WHICH VARY FROM STATE TO STATE OR PROVINCE TO PROVINCE. All rights reserved. ®Registered Trademark/TM Trademark of the Use & Care Guide. KITCHENAID® BUILT-IN OVEN & MICROWAVE WARRANTY LIMITED WARRANTY For one year from the date of purchase, when this major appliance is operated and maintained according to instructions attached to...

Installation Instructions
Page 2
...Trim kit frame B. Template (1) A. OVER 24" OVER 27" OVER 30" (61.0 CM) (68.6 CM) (76.2 CM) BUILT-IN OVEN BUILT-IN OVEN BUILT-IN OVEN Width 22¹⁄₂" (57.15 cm) 25¹⁄₂" (64.77 cm) 25¹⁄₂" (64.77 cm) min... Pencil s drill s Scissors Parts Supplied A B C D E Cutout Dimensions A Width 15³⁄₄" (40 cm) B 3" (7.6 cm) F G A. BUILT-IN MICROWAVE OVEN SAFETY Your safety and the safety of injury, and tell you what the potential hazard is the safety alert symbol. INSTALLATION INSTRUCTIONS Tools Recommended Gather...
...Trim kit frame B. Template (1) A. OVER 24" OVER 27" OVER 30" (61.0 CM) (68.6 CM) (76.2 CM) BUILT-IN OVEN BUILT-IN OVEN BUILT-IN OVEN Width 22¹⁄₂" (57.15 cm) 25¹⁄₂" (64.77 cm) 25¹⁄₂" (64.77 cm) min... Pencil s drill s Scissors Parts Supplied A B C D E Cutout Dimensions A Width 15³⁄₄" (40 cm) B 3" (7.6 cm) F G A. BUILT-IN MICROWAVE OVEN SAFETY Your safety and the safety of injury, and tell you what the potential hazard is the safety alert symbol. INSTALLATION INSTRUCTIONS Tools Recommended Gather...

Installation Instructions
Page 3
...or circuit breaker is recommended.) It is recommended that is equipped with a cord having a grounding wire with installation. 2. SAVE THESE INSTRUCTIONS Microwave Oven Preparation 1. Existing screws Side Duct and Upper Duct Assembly 1. A 120 Volt, 60 Hz, AC only, 15- WARNING: Improper use ...an extension cord. Consult a qualified electrician or serviceman if the grounding instructions are attached. 3 Unplug microwave oven before ducts are not completely understood, or if doubt exists as to upper duct: Insert projecting tabs of upper duct into an ...
...or circuit breaker is recommended.) It is recommended that is equipped with a cord having a grounding wire with installation. 2. SAVE THESE INSTRUCTIONS Microwave Oven Preparation 1. Existing screws Side Duct and Upper Duct Assembly 1. A 120 Volt, 60 Hz, AC only, 15- WARNING: Improper use ...an extension cord. Consult a qualified electrician or serviceman if the grounding instructions are attached. 3 Unplug microwave oven before ducts are not completely understood, or if doubt exists as to upper duct: Insert projecting tabs of upper duct into an ...

Installation Instructions
Page 4
...(Use drill.) Then install three ¹⁄₂" screws at front of double-sided tape. Drill 2 holes for anti-tip bracket. Slide microwave oven partway into place, engaging anti-tip bracket. 4. Align the duct assembly screw hole to the existing screw hole on ducts, then fasten with ...anti-tip bracket. On cutout floor, use template to the oven. Be sure to align the centerline of template to centerline of microwave oven, and attach the duct assembly to mark hole centers for anti-tip bracket. (Use drill.) 3. Centerline 2....
...(Use drill.) Then install three ¹⁄₂" screws at front of double-sided tape. Drill 2 holes for anti-tip bracket. Slide microwave oven partway into place, engaging anti-tip bracket. 4. Align the duct assembly screw hole to the existing screw hole on ducts, then fasten with ...anti-tip bracket. On cutout floor, use template to the oven. Be sure to align the centerline of template to centerline of microwave oven, and attach the duct assembly to mark hole centers for anti-tip bracket. (Use drill.) 3. Centerline 2....


