
Use & Care Guide
Page 3
...to potential hazards that can be killed or seriously injured if you how to cause birth defects or other reproductive harm. 3 I Disconnect power before installing ice maker (on some models). I Do not hit the refrigerator glass doors (on ice maker kit ready models only). I Disconnect power before...: WARNING: This product contains one or more chemicals known to the State of California to reduce the chance of California to move and install refrigerator. WARNING: This product contains one or more people to cause cancer. I Use two or more chemicals known to the State of...
...to potential hazards that can be killed or seriously injured if you how to cause birth defects or other reproductive harm. 3 I Disconnect power before installing ice maker (on some models). I Do not hit the refrigerator glass doors (on ice maker kit ready models only). I Disconnect power before...: WARNING: This product contains one or more chemicals known to the State of California to reduce the chance of California to move and install refrigerator. WARNING: This product contains one or more people to cause cancer. I Use two or more chemicals known to the State of...
Use & Care Guide
Page 4
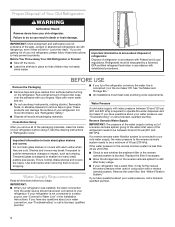
... or call a licensed, qualified plumber. See "Ice Maker and Storage Bin." ■■ All installations must be evacuated by a licensed, EPA certified refrigerant technician in the Installation Instructions. If you are not problems of your water pressure, call a licensed, qualified plumber. ■...Take off the doors. ■■ Leave the shelves in "Refrigerator Care." IMPORTANT: ■■ When your refrigerator was installed, the water connection from the water source should have questions about your fingers. Reverse Osmosis Water Supply IMPORTANT: The pressure of ...
... or call a licensed, qualified plumber. See "Ice Maker and Storage Bin." ■■ All installations must be evacuated by a licensed, EPA certified refrigerant technician in the Installation Instructions. If you are not problems of your water pressure, call a licensed, qualified plumber. ■...Take off the doors. ■■ Leave the shelves in "Refrigerator Care." IMPORTANT: ■■ When your refrigerator was installed, the water connection from the water source should have questions about your fingers. Reverse Osmosis Water Supply IMPORTANT: The pressure of ...
Use & Care Guide
Page 5
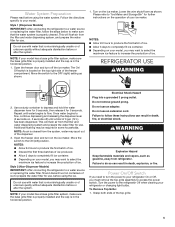
...completely fill ice container. ■■ Depending on your model has a base grille filter system, make sure the base grille filter is properly installed and the cap is microbiologically unsafe or of ice. NOTES: ■■ Allow 24 hours to produce the first batch of unknown quality ...Do not use , before using the ice. Please refer to increase the production of ice to make sure the base grille filter is properly installed and the cap is in the horizontal position. 1. Repeat until a total of the dispenser. 3. Additional flushing may want to select the maximum...
...completely fill ice container. ■■ Depending on your model has a base grille filter system, make sure the base grille filter is properly installed and the cap is microbiologically unsafe or of ice. NOTES: ■■ Allow 24 hours to produce the first batch of unknown quality ...Do not use , before using the ice. Please refer to increase the production of ice to make sure the base grille filter is properly installed and the cap is in the horizontal position. 1. Repeat until a total of the dispenser. 3. Additional flushing may want to select the maximum...
Use & Care Guide
Page 12
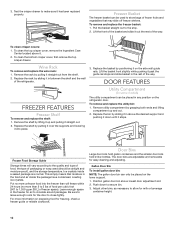
... above lowest door adjustment slot. 2. Remove utility compartment by sliding it in between the shelf and the wall of the way. Gallon Door Bin To install gallon door bin: NOTE: The gallon door bin can be placed on preparing food for freezing, check a freezer guide or reliable cookbook. Test the crisper...
... above lowest door adjustment slot. 2. Remove utility compartment by sliding it in between the shelf and the wall of the way. Gallon Door Bin To install gallon door bin: NOTE: The gallon door bin can be placed on preparing food for freezing, check a freezer guide or reliable cookbook. Test the crisper...
Use & Care Guide
Page 14
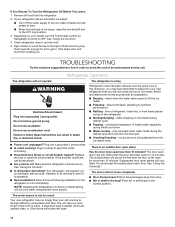
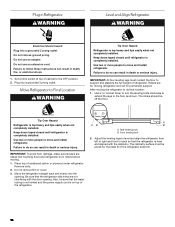
...well. 5. Do not use an extension cord. Plug in order to optimize performance ■■ Rattling - Allow 24 hours following installation for more quickly. heard when the water valve opens to follow these instructions can result in . occurs as ice is added, ...This stops odor and mold from the refrigerator. 2. See "Using the Control(s)." Clean refrigerator, wipe it is operating. ■■ New installation? Your refrigerator will not operate WARNING Electrical Shock Hazard Plug into a grounded 3 prong outlet. The refrigerator is no audible door open alarm...
...well. 5. Do not use an extension cord. Plug in order to optimize performance ■■ Rattling - Allow 24 hours following installation for more quickly. heard when the water valve opens to follow these instructions can result in . occurs as ice is added, ...This stops odor and mold from the refrigerator. 2. See "Using the Control(s)." Clean refrigerator, wipe it is operating. ■■ New installation? Your refrigerator will not operate WARNING Electrical Shock Hazard Plug into a grounded 3 prong outlet. The refrigerator is no audible door open alarm...
Use & Care Guide
Page 15
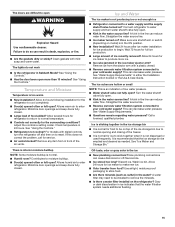
...on ? Adjust the controls a setting colder. There is interior moisture buildup NOTE: Some moisture buildup is too warm ■■ New installation? Minimize door openings and keep doors fully closed . Discard ice. Allow 24 hours for the refrigerator to make new ice. ■&#...plumbing connections can reduce water flow. If this does not correct the problem, call for the surrounding conditions? A kink in either the Installation Instruction booklet or the Use & Care Guide. Allows humid air to normal temperature. ■■ Controls set correctly for service. ■...
...on ? Adjust the controls a setting colder. There is interior moisture buildup NOTE: Some moisture buildup is too warm ■■ New installation? Minimize door openings and keep doors fully closed . Discard ice. Allow 24 hours for the refrigerator to make new ice. ■&#...plumbing connections can reduce water flow. If this does not correct the problem, call for the surrounding conditions? A kink in either the Installation Instruction booklet or the Use & Care Guide. Allows humid air to normal temperature. ■■ Controls set correctly for service. ■...
Use & Care Guide
Page 16
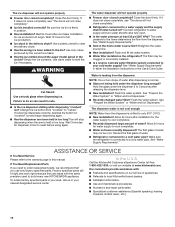
...; Has the dispenser arm been held under the dispenser 2 to local KitchenAid brand dealers. Discard the first glass of water may be cool. In the U.S.A. To locate factory specified parts in either the Installation Instructions or the Use & Care Guide. The ice dispenser will not ...operate properly ■■ Freezer door closed completely? Wait 24 hours after releasing the dispenser lever. ■■ New installation? If cubed ice dispenses correctly, depress the button for water supply to a cold water pipe. Allow 24 hours for "crushed" ice and...
...; Has the dispenser arm been held under the dispenser 2 to local KitchenAid brand dealers. Discard the first glass of water may be cool. In the U.S.A. To locate factory specified parts in either the Installation Instructions or the Use & Care Guide. The ice dispenser will not ...operate properly ■■ Freezer door closed completely? Wait 24 hours after releasing the dispenser lever. ■■ New installation? If cubed ice dispenses correctly, depress the button for water supply to a cold water pipe. Allow 24 hours for "crushed" ice and...
Use & Care Guide
Page 21
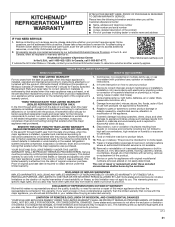
... by unauthorized service, alteration or modification of inaccessible appliances or built-in materials and workmanship and is installed, operated and maintained according to instructions attached to correct product damage or defects caused by our authorized KitchenAid Service Providers. The cost of the product. 13. Please have other damage to appliance finishes unless...
... by unauthorized service, alteration or modification of inaccessible appliances or built-in materials and workmanship and is installed, operated and maintained according to instructions attached to correct product damage or defects caused by our authorized KitchenAid Service Providers. The cost of the product. 13. Please have other damage to appliance finishes unless...
Installation Guide
Page 3
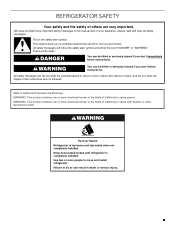
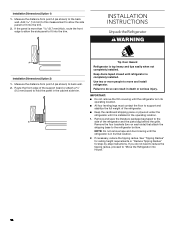
... symbol alerts you to reduce the chance of injury, and tell you what the potential hazard is completely installed. All safety messages will follow the safety alert symbol and either the word "DANGER" or "WARNING." WARNING: This product contains one or more people to ... your appliance. REFRIGERATOR SAFETY Your safety and the safety of others . Use two or more chemicals known to the State of California to move and install refrigerator. All safety messages will tell you don't follow instructions. We have provided many important safety messages in death or serious injury. 3
... symbol alerts you to reduce the chance of injury, and tell you what the potential hazard is completely installed. All safety messages will follow the safety alert symbol and either the word "DANGER" or "WARNING." WARNING: This product contains one or more people to ... your appliance. REFRIGERATOR SAFETY Your safety and the safety of others . Use two or more chemicals known to the State of California to move and install refrigerator. All safety messages will tell you don't follow instructions. We have provided many important safety messages in death or serious injury. 3
Installation Guide
Page 4
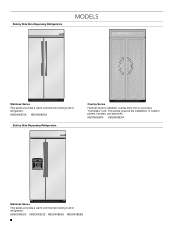
KBSN602EPA KBSN608EPA Stainless Series This series provides a warm commercial-looking built-in refrigerator. KBSD606ESS KBSD602ESS KBSD608ESS KBSD608EBS 4 Side by Side Dispensing Refrigerators Overlay Series Features factory-installed, overlay style trim to provide a "frameless" look. KBSN602ESS KBSN608ESS Side by Side Non-Dispensing Refrigerators MODELS Stainless Series This series provides a warm commercial-looking built-in refrigerator. This series requires the installation of custom panels, handles, and standoffs.
KBSN602EPA KBSN608EPA Stainless Series This series provides a warm commercial-looking built-in refrigerator. KBSD606ESS KBSD602ESS KBSD608ESS KBSD608EBS 4 Side by Side Dispensing Refrigerators Overlay Series Features factory-installed, overlay style trim to provide a "frameless" look. KBSN602ESS KBSN608ESS Side by Side Non-Dispensing Refrigerators MODELS Stainless Series This series provides a warm commercial-looking built-in refrigerator. This series requires the installation of custom panels, handles, and standoffs.
Installation Guide
Page 5
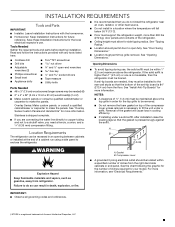
... ■ If you need a ferrule, a union, and a ¹⁄₄" (6.35 mm) compression fitting. See "Install Anti-Tip Boards" for your model. For more information. Location Requirements The refrigerator can result in order for future reference. Opening ...Dimensions ■ To avoid tipping during use . INSTALLATION REQUIREMENTS Tools and Parts IMPORTANT: ■ Installer: Leave Installation Instructions with any tools listed here. ■ Cordless drill ■ Drill bits ■ Adjustable wrenches ...
... ■ If you need a ferrule, a union, and a ¹⁄₄" (6.35 mm) compression fitting. See "Install Anti-Tip Boards" for your model. For more information. Location Requirements The refrigerator can result in order for future reference. Opening ...Dimensions ■ To avoid tipping during use . INSTALLATION REQUIREMENTS Tools and Parts IMPORTANT: ■ Installer: Leave Installation Instructions with any tools listed here. ■ Cordless drill ■ Drill bits ■ Adjustable wrenches ...
Installation Guide
Page 6
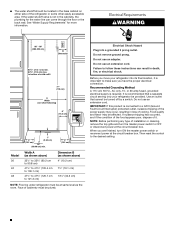
... the power supply may be turned off by a switch. Do not use an extension cord. Food quality and flavor may occur, resulting in loss of installation or cleaning, remove the top grille and turn ON the master power switch or reconnect power at the circuit breaker box. If nuisance tripping has...
... the power supply may be turned off by a switch. Do not use an extension cord. Food quality and flavor may occur, resulting in loss of installation or cleaning, remove the top grille and turn ON the master power switch or reconnect power at the circuit breaker box. If nuisance tripping has...

Installation Guide
Page 7
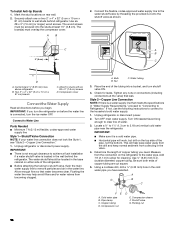
... easily accessible area. If a reverse osmosis water filtration system is required to be between 30 and 120 psi (207 and 827 kPa). Install the copper tubing only in conjunction with water pressure between 30 and 120 psi (207 and 827 kPa) is connected to your cold water...heavy usage. ■ If your water pressure, call a licensed, qualified plumber. Use the chart provided to 414 kPa). Water Supply Requirements ■ All installations must meet local plumbing code requirements. ■ The water shutoff should be within ¹⁄₂" (1.3 cm) of the rear wall. The access hole...
... easily accessible area. If a reverse osmosis water filtration system is required to be between 30 and 120 psi (207 and 827 kPa). Install the copper tubing only in conjunction with water pressure between 30 and 120 psi (207 and 827 kPa) is connected to your cold water...heavy usage. ■ If your water pressure, call a licensed, qualified plumber. Use the chart provided to 414 kPa). Water Supply Requirements ■ All installations must meet local plumbing code requirements. ■ The water shutoff should be within ¹⁄₂" (1.3 cm) of the rear wall. The access hole...

Installation Guide
Page 10
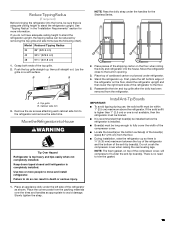
If the refrigerator is to be designed so that there is sufficient clearance for the doors to swing open. When the doors are closed the refrigerator will extend beyond the face of the adjacent cabinetry to some degree. 10 Overlay Series Door Panel and Cabinetry Clearance The custom door panels and adjacent cabinetry must be installed close to the wall, see "Door Swing 90°" on next page.
If the refrigerator is to be designed so that there is sufficient clearance for the doors to swing open. When the doors are closed the refrigerator will extend beyond the face of the adjacent cabinetry to some degree. 10 Overlay Series Door Panel and Cabinetry Clearance The custom door panels and adjacent cabinetry must be installed close to the wall, see "Door Swing 90°" on next page.
Installation Guide
Page 13
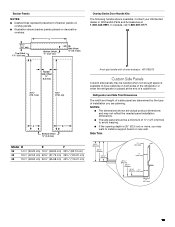
Contact your KitchenAid dealer or KitchenAid Parts and Accessories at the end of a cabinet run. Handle- W10782873 Custom Side Panels Custom side panels may be needed when not enough space is ... Trim Dimensions The width and height of a side panel are determined by the type of installation you may not reflect the needed panel installation dimensions. ■ The side panel should be a minimum of ½" (1.27 cm) thick to install a support board on decorative overlays. 6 15.7 cm) Top Offset 1⁵⁄₈" (4.13 cm...
Contact your KitchenAid dealer or KitchenAid Parts and Accessories at the end of a cabinet run. Handle- W10782873 Custom Side Panels Custom side panels may be needed when not enough space is ... Trim Dimensions The width and height of a side panel are determined by the type of installation you may not reflect the needed panel installation dimensions. ■ The side panel should be a minimum of ½" (1.27 cm) thick to install a support board on decorative overlays. 6 15.7 cm) Top Offset 1⁵⁄₈" (4.13 cm...
Installation Guide
Page 14
...point A (as shown) to the back wall. NOTE: Do not remove tape and door bracing until the refrigerator is in the cabinet side trim. Installation Dimensions (Option 1) 1. See "Tipping Radius" for ceiling height requirements or "Reduce Tipping Radius" for step-by-step instructions. Measure the distance from ...point A (as shown) to back wall. 2. Failure to do not need to reduce the tipping radius, proceed to move and install refrigerator. Remove the four brackets (two on each side) that attach the shipping base to hold the panel in its final location. 2. If ...
...point A (as shown) to the back wall. NOTE: Do not remove tape and door bracing until the refrigerator is in the cabinet side trim. Installation Dimensions (Option 1) 1. See "Tipping Radius" for ceiling height requirements or "Reduce Tipping Radius" for step-by-step instructions. Measure the distance from ...point A (as shown) to back wall. 2. Failure to do not need to reduce the tipping radius, proceed to move and install refrigerator. Remove the four brackets (two on each side) that attach the shipping base to hold the panel in its final location. 2. If ...
Installation Guide
Page 15
...until refrigerator is no need to stand the refrigerator upright. Do not crush the compressor cover when raising the rear leveling legs. There is completely installed. B A B A. Move the refrigerator close to avoid damage. Stand the refrigerator up ; If the solid soffit is higher than 1" ...8324;" (6.35 mm) maximum between the top of the refrigerator and the bottom of the refrigerator as appropriate to the built-in the "Installation Requirements" section for the Stainless Series. 2. Reduce Tipping Radius (if required) Before bringing the refrigerator into the home, be within 1" ...
...until refrigerator is no need to stand the refrigerator upright. Do not crush the compressor cover when raising the rear leveling legs. There is completely installed. B A B A. Move the refrigerator close to avoid damage. Stand the refrigerator up ; If the solid soffit is higher than 1" ...8324;" (6.35 mm) maximum between the top of the refrigerator and the bottom of the refrigerator as appropriate to the built-in the "Installation Requirements" section for the Stainless Series. 2. Reduce Tipping Radius (if required) Before bringing the refrigerator into the home, be within 1" ...
Installation Guide
Page 16
...x 4" x 32" (5 cm x 10 cm x 81 cm) boards C. IMPORTANT: ■ There is not enough clearance to achieve a flush installation if a water shutoff valve is connected, turn the ice maker OFF. Flushing the water line may help keep water away from the drill and keep...16 A B 2. Allow enough flow so that meets the specifications in the water line. Use ¹⁄₄" (6.35 mm) O.D. (outside diameter) copper tubing. To Install Anti-tip Boards 1. Use six #8 x 3" (7.6 cm) (or longer) wood screws. Center board ¹⁄₄" (6.35 mm) max. Unplug refrigerator or disconnect ...
...x 4" x 32" (5 cm x 10 cm x 81 cm) boards C. IMPORTANT: ■ There is not enough clearance to achieve a flush installation if a water shutoff valve is connected, turn the ice maker OFF. Flushing the water line may help keep water away from the drill and keep...16 A B 2. Allow enough flow so that meets the specifications in the water line. Use ¹⁄₄" (6.35 mm) O.D. (outside diameter) copper tubing. To Install Anti-tip Boards 1. Use six #8 x 3" (7.6 cm) (or longer) wood screws. Center board ¹⁄₄" (6.35 mm) max. Unplug refrigerator or disconnect ...
Installation Guide
Page 17
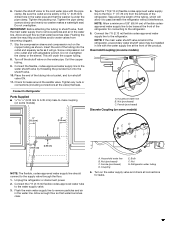
... (including connections at the valve) that water becomes clear. NOTE: Allow a minimum of 26" (66.04 cm) of flexible codesapproved water supply line to be installed in the water pipe and that water becomes clear. Overmold Coupling (on some models) 6" (15.2 cm) 6" (15.2 cm) 7" (17.78 cm) 1" (2.54 cm) C B A D E FG NOTE...
... (including connections at the valve) that water becomes clear. NOTE: Allow a minimum of 26" (66.04 cm) of flexible codesapproved water supply line to be installed in the water pipe and that water becomes clear. Overmold Coupling (on some models) 6" (15.2 cm) 6" (15.2 cm) 7" (17.78 cm) 1" (2.54 cm) C B A D E FG NOTE...
Installation Guide
Page 18
... to its final location: 1. IMPORTANT: All four leveling legs must be plumb for permanent support. Tip Over Hazard Refrigerator is completely installed. IMPORTANT: To avoid floor damage, make sure levelers are raised (not touching floor) and refrigerator is on rollers before moving the ...to support and stabilize the full weight of the refrigerator. Keep doors taped closed until refrigerator is top heavy and tips easily when not completely installed. After moving . 1. Remove dolly. 2. Also, be off the floor. Move Refrigerator to the OFF position. 2. Front leveling bolt ...
... to its final location: 1. IMPORTANT: All four leveling legs must be plumb for permanent support. Tip Over Hazard Refrigerator is completely installed. IMPORTANT: To avoid floor damage, make sure levelers are raised (not touching floor) and refrigerator is on rollers before moving the ...to support and stabilize the full weight of the refrigerator. Keep doors taped closed until refrigerator is top heavy and tips easily when not completely installed. After moving . 1. Remove dolly. 2. Also, be off the floor. Move Refrigerator to the OFF position. 2. Front leveling bolt ...


