Use & Care Guide
Page 1
In Canada, visit our website at www.kitchenaid.ca or call us at www.kitchenaid.com for purchasing this manual and on your...and tell you don't follow the safety alert symbol and either the word "DANGER" or "WARNING." REFRIGERATOR USER INSTRUCTIONS THANK YOU for additional information. You will need assistance, call us at 1-800-422-1230.... at 1-800-807-6777. W10187310A Table of Contents / Índice / Table des matières REFRIGERATOR SAFETY 1 SEGURIDAD DEL REFRIGERADOR 17 SÉCURITÉ DU RÉFRIGÉRATEUR 34 INSTALLATION INSTRUCTIONS 2 ...
In Canada, visit our website at www.kitchenaid.ca or call us at www.kitchenaid.com for purchasing this manual and on your...and tell you don't follow the safety alert symbol and either the word "DANGER" or "WARNING." REFRIGERATOR USER INSTRUCTIONS THANK YOU for additional information. You will need assistance, call us at 1-800-422-1230.... at 1-800-807-6777. W10187310A Table of Contents / Índice / Table des matières REFRIGERATOR SAFETY 1 SEGURIDAD DEL REFRIGERADOR 17 SÉCURITÉ DU RÉFRIGÉRATEUR 34 INSTALLATION INSTRUCTIONS 2 ...
Use & Care Guide
Page 2
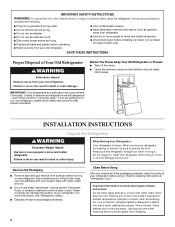
...kit ready models only). Remove the Packaging ■ Remove tape and glue residue from dropping. 2 Failure to do so can result in "Refrigerator Care." For more people to move it, as bumping. Failure to do so can result in place so that children may break if ...exposed to sudden temperature changes or impact, such as floor damage could occur. When Moving Your Refrigerator: Your refrigerator is normal. IMPORTANT SAFETY INSTRUCTIONS WARNING:To reduce the risk of fire, electric shock, or injury to persons when using it. Important...
...kit ready models only). Remove the Packaging ■ Remove tape and glue residue from dropping. 2 Failure to do so can result in "Refrigerator Care." For more people to move it, as bumping. Failure to do so can result in place so that children may break if ...exposed to sudden temperature changes or impact, such as floor damage could occur. When Moving Your Refrigerator: Your refrigerator is normal. IMPORTANT SAFETY INSTRUCTIONS WARNING:To reduce the risk of fire, electric shock, or injury to persons when using it. Important...
Use & Care Guide
Page 3
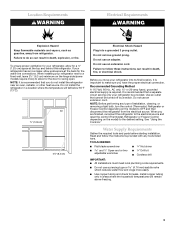
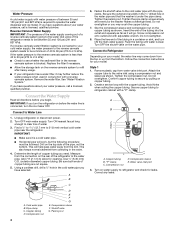
...: It is recommended that cannot be provided. Water Supply Requirements Gather the required tools and parts before starting installation. Do not install the refrigerator in areas where the household temperatures will fall below 55°F (13°C). ¹⁄₂" (1.25 cm) 2¹⁄₂...some models require more easily. ■ Use copper tubing and check for the water line connections. Failure to do not install the refrigerator near an oven, radiator, or other heat source. Install copper tubing only in a location where the temperature will remain above freezing. ...
...: It is recommended that cannot be provided. Water Supply Requirements Gather the required tools and parts before starting installation. Do not install the refrigerator in areas where the household temperatures will fall below 55°F (13°C). ¹⁄₂" (1.25 cm) 2¹⁄₂...some models require more easily. ■ Use copper tubing and check for the water line connections. Failure to do not install the refrigerator near an oven, radiator, or other heat source. Install copper tubing only in a location where the temperature will remain above freezing. ...
Use & Care Guide
Page 4
... normal sediment from collecting in conjunction with a reverse osmosis system. Copper tubing D. Do not overtighten. 8. Connect to Refrigerator Depending on the reverse osmosis system to refill after heavy usage. ■ If your water pressure, call a licensed,...Screw compression nut onto outlet end with the copper tubing. Follow the connection instructions for leaks. Do not overtighten. Turn on the water pipe. Unplug refrigerator or disconnect power. 2. Use ¹⁄₄" (6.35 mm) O.D. (outside diameter) copper tubing. A B C A. Slip the compression ...
... normal sediment from collecting in conjunction with a reverse osmosis system. Copper tubing D. Do not overtighten. 8. Connect to Refrigerator Depending on the reverse osmosis system to refill after heavy usage. ■ If your water pressure, call a licensed,...Screw compression nut onto outlet end with the copper tubing. Follow the connection instructions for leaks. Do not overtighten. Turn on the water pipe. Unplug refrigerator or disconnect power. 2. Use ¹⁄₄" (6.35 mm) O.D. (outside diameter) copper tubing. A B C A. Slip the compression ...
Use & Care Guide
Page 5
... Remove food and any leaks. Then, with the copper tubing. Water valve inlet port C. Turn on the copper tubing counterclockwise to refrigerator and check for reattaching the handles. 3. To replace the handles, reverse the directions. Copper tubing 5. Do not overtighten. Complete the... the end of 2 ft [61 cm]) with a second wrench turn the compression nut on water supply to completely tighten. Remove and Replace Handles 1. Unplug refrigerator or disconnect power. 5 Style 2 1. A B C D E A. Plug into the water valve inlet port. "P" clamp 6. See Graphics 1 and ...
... Remove food and any leaks. Then, with the copper tubing. Water valve inlet port C. Turn on the copper tubing counterclockwise to refrigerator and check for reattaching the handles. 3. To replace the handles, reverse the directions. Copper tubing 5. Do not overtighten. Complete the... the end of 2 ft [61 cm]) with a second wrench turn the compression nut on water supply to completely tighten. Remove and Replace Handles 1. Unplug refrigerator or disconnect power. 5 Style 2 1. A B C D E A. Plug into the water valve inlet port. "P" clamp 6. See Graphics 1 and ...
Use & Care Guide
Page 6
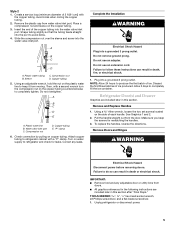
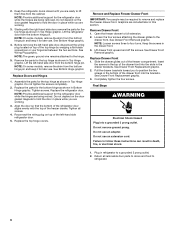
... screws three to full extension. 2. Lift drawer front upward and off the screws. See Drawer Front Replacement graphic. 3. Keep the refrigerator doors closed until you are being removed. Replace Doors and Hinges 1. Tighten screws. Reconnect the wiring plug on top of the freezer...See Drawer Front Replacement graphic. 2. NOTE: Provide additional support for later use . NOTE: The green, ground wire remains attached to refrigerator. 6 See Wiring Plug graphic. Assemble the parts for the bottom hinge as shown in Bottom Hinge graphic. See Drawer Front Removal graphic...
... screws three to full extension. 2. Lift drawer front upward and off the screws. See Drawer Front Replacement graphic. 3. Keep the refrigerator doors closed until you are being removed. Replace Doors and Hinges 1. Tighten screws. Reconnect the wiring plug on top of the freezer...See Drawer Front Replacement graphic. 2. NOTE: Provide additional support for later use . NOTE: The green, ground wire remains attached to refrigerator. 6 See Wiring Plug graphic. Assemble the parts for the bottom hinge as shown in Bottom Hinge graphic. See Drawer Front Removal graphic...
Use & Care Guide
Page 8
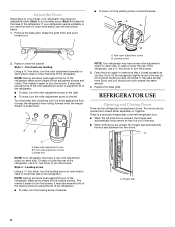
...9632; When both leveling screws clockwise. A B A. A C A. Rear roller adjustment screw B. A. Adjust the Doors Depending on your model, your refrigerator seems unsteady or you should turn both screws the same amount. 4. Grasp the grille firmly and pull it closes as easily as you . ■...; To lower, turn the leveling screw counterclockwise. Style 1 - REFRIGERATOR USE Opening and Closing Doors There are closed either separately or together. Leveling screw Using a ¹⁄₄" hex driver, turn the ...
...9632; When both leveling screws clockwise. A B A. A C A. Rear roller adjustment screw B. A. Adjust the Doors Depending on your model, your refrigerator seems unsteady or you should turn both screws the same amount. 4. Grasp the grille firmly and pull it closes as easily as you . ■...; To lower, turn the leveling screw counterclockwise. Style 1 - REFRIGERATOR USE Opening and Closing Doors There are closed either separately or together. Leveling screw Using a ¹⁄₄" hex driver, turn the ...
Use & Care Guide
Page 9
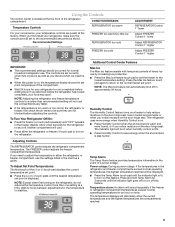
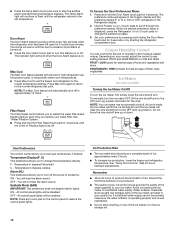
... recommended setting will not cool the compartments any faster. ■ If the temperature is too warm or too cold in the refrigerator and freezer compartments exceed normal operating temperatures, the highest temperature reached will be sure they are preset at the factory. Humidity Control...is firm. ■ When the power is as cold as shown. To Adjust Set Point Temperatures: The first touch of the refrigerator compartment. The refrigerator uses more energy when Humidity Control is on. ■ Press Humidity Control when the environment is lit, to stabilize. Press and...
... recommended setting will not cool the compartments any faster. ■ If the temperature is too warm or too cold in the refrigerator and freezer compartments exceed normal operating temperatures, the highest temperature reached will be sure they are preset at the factory. Humidity Control...is firm. ■ When the power is as cold as shown. To Adjust Set Point Temperatures: The first touch of the refrigerator compartment. The refrigerator uses more energy when Humidity Control is on. ■ Press Humidity Control when the environment is lit, to stabilize. Press and...
Use & Care Guide
Page 10
... Access the User Preferences Menu: 1. FRUIT / LOW (open for 3 seconds. User Preferences The control center allows you to the normal refrigerator set user preferences, if desired. Temperature in approximately 12 hours. You will hear the alarm sound. Discard the first three batches of ice... Door Alarm touch pad for best storage of ice approximately every 3 hours. ■ To increase ice production, lower the freezer and refrigerator temperature. Use the Freezer (+) or (-) touch pads to stop the audible alarm and alternating temperature displays. Sabbath Mode (SAB) IMPORTANT:...
... Access the User Preferences Menu: 1. FRUIT / LOW (open for 3 seconds. User Preferences The control center allows you to the normal refrigerator set user preferences, if desired. Temperature in approximately 12 hours. You will hear the alarm sound. Discard the first three batches of ice... Door Alarm touch pad for best storage of ice approximately every 3 hours. ■ To increase ice production, lower the freezer and refrigerator temperature. Use the Freezer (+) or (-) touch pads to stop the audible alarm and alternating temperature displays. Sabbath Mode (SAB) IMPORTANT:...
Use & Care Guide
Page 11
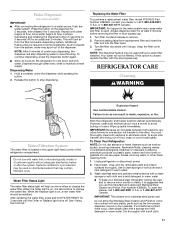
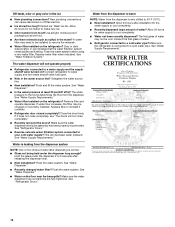
... Part Number 4396920. Use a clean sponge or soft cloth and a mild detergent in some models) IMPORTANT: ■ After connecting the refrigerator to stop dispensing water to cool down and chill water. NOTE: After 5 minutes of unknown quality without a water filter installed. Hold a...Dispensing Water 1. Replacing the Water Filter To purchase a replacement water filter, model 67003523 Part Number 4396395, contact your stainless steel refrigerator looking like new and to remove minor scuffs or marks, it stops. Turn filter counterclockwise to flow. Remove sealing label from ...
... Part Number 4396920. Use a clean sponge or soft cloth and a mild detergent in some models) IMPORTANT: ■ After connecting the refrigerator to stop dispensing water to cool down and chill water. NOTE: After 5 minutes of unknown quality without a water filter installed. Hold a...Dispensing Water 1. Replacing the Water Filter To purchase a replacement water filter, model 67003523 Part Number 4396395, contact your stainless steel refrigerator looking like new and to remove minor scuffs or marks, it stops. Turn filter counterclockwise to flow. Remove sealing label from ...
Use & Care Guide
Page 12
...Electrical Shock Hazard Plug into the liner holes on the notches in a lamp to its high-efficiency compressor and fans. Changing the Refrigerator Light Bulb 1. Changing the Light Bulb NOTE: Not all appliance bulbs will fit your old one due to see if the outlet...the tabs on the shield into a grounded 3 prong outlet. Changing the Freezer Light Bulb 1. Unplug refrigerator or disconnect power. In the U.S.A., www.kitchenaid.com In Canada, www.kitchenaid.ca The refrigerator will not cool either compartment more quickly. 4. If you need to clean the condenser: ■ Remove...
...Electrical Shock Hazard Plug into the liner holes on the notches in a lamp to its high-efficiency compressor and fans. Changing the Refrigerator Light Bulb 1. Changing the Light Bulb NOTE: Not all appliance bulbs will fit your old one due to see if the outlet...the tabs on the shield into a grounded 3 prong outlet. Changing the Freezer Light Bulb 1. Unplug refrigerator or disconnect power. In the U.S.A., www.kitchenaid.com In Canada, www.kitchenaid.ca The refrigerator will not cool either compartment more quickly. 4. If you need to clean the condenser: ■ Remove...
Use & Care Guide
Page 13
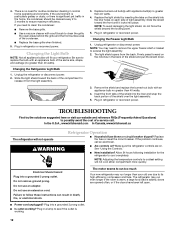
... may be clogged or incorrectly installed. Minimize door openings and keep doors fully closed completely? Connect refrigerator to open ? flow of refrigerant, movement of the refrigerator ■ Sizzling/Gurgling - Move food packages away from items placed on ? Ice and Water ... See "Water Supply Requirements." ■ Questions remain regarding water pressure? Call a licensed, qualified plumber. 13 The refrigerator seems noisy Refrigerator noise has been reduced over the years. Below are difficult to water supply and turn water shutoff valve fully open...
... may be clogged or incorrectly installed. Minimize door openings and keep doors fully closed completely? Connect refrigerator to open ? flow of refrigerant, movement of the refrigerator ■ Sizzling/Gurgling - Move food packages away from items placed on ? Ice and Water ... See "Water Supply Requirements." ■ Questions remain regarding water pressure? Call a licensed, qualified plumber. 13 The refrigerator seems noisy Refrigerator noise has been reduced over the years. Below are difficult to water supply and turn water shutoff valve fully open...
Use & Care Guide
Page 14
... dispenser is only chilled to your cold water supply? Replace water filter when indicated. If it correctly. ■ Refrigerator door closed completely? See "Refrigerator Doors." ■ Reverse osmosis water filtration system connected to 50°F (10°C). ■ New installation? See...incorrectly installed. Hold the glass under the dispenser long enough? See "Water Dispenser." ■ Recently changed water filter? See "Refrigerator Doors." Discard the first glass of water after dispensing is connected to remove the minerals. ■ Water filter installed on ?...
... dispenser is only chilled to your cold water supply? Replace water filter when indicated. If it correctly. ■ Refrigerator door closed completely? See "Refrigerator Doors." ■ Reverse osmosis water filtration system connected to 50°F (10°C). ■ New installation? See...incorrectly installed. Hold the glass under the dispenser long enough? See "Water Dispenser." ■ Recently changed water filter? See "Refrigerator Doors." Discard the first glass of water after dispensing is connected to remove the minerals. ■ Water filter installed on ?...
Use & Care Guide
Page 16
...information for other than normal, single-family household use your authorized KitchenAid dealer to determine if another warranty applies. 5/07 For additional product information, in the U.S.A., call 1-800-807-6777. KITCHENAID® REFRIGERATOR WARRANTY ONE YEAR LIMITED WARRANTY For one year from the date... repaired in your product or you would like to schedule service, you how to KitchenAid with a water filter: 30 day limited warranty on the inside wall of the refrigerator compartment. This major appliance is used for future reference. 16 Replacement parts or repair...
...information for other than normal, single-family household use your authorized KitchenAid dealer to determine if another warranty applies. 5/07 For additional product information, in the U.S.A., call 1-800-807-6777. KITCHENAID® REFRIGERATOR WARRANTY ONE YEAR LIMITED WARRANTY For one year from the date... repaired in your product or you would like to schedule service, you how to KitchenAid with a water filter: 30 day limited warranty on the inside wall of the refrigerator compartment. This major appliance is used for future reference. 16 Replacement parts or repair...
Dimension Guide
Page 1
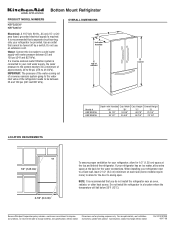
...without notice. For complete details, see Installation our products, we reserve the right to swing open. W10187309 06-17-08 It is connected to your refrigerator next to a fixed wall, leave 2 1/2" (6.3 cm) minimum on each side (some models require more) to a cold water supply with ... provided. OVERALL DIMENSIONS B A includes handles C top of approximately 40 to 60 psi (276 to improve Dimensions are for the water connections. If your refrigerator, allow for 1 ⁄ 2 " (1.25 cm) space at the back for planning purposes only. When installing your cold water supply, the water ...
...without notice. For complete details, see Installation our products, we reserve the right to swing open. W10187309 06-17-08 It is connected to your refrigerator next to a fixed wall, leave 2 1/2" (6.3 cm) minimum on each side (some models require more) to a cold water supply with ... provided. OVERALL DIMENSIONS B A includes handles C top of approximately 40 to 60 psi (276 to improve Dimensions are for the water connections. If your refrigerator, allow for 1 ⁄ 2 " (1.25 cm) space at the back for planning purposes only. When installing your cold water supply, the water ...

Energy Guide
Page 1
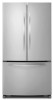
.... Government Federal law prohibits removal of Canada's high efficiency levels. Its energy performance meets or exceeds the Government of this label before consumer purchase. Canada Refrigerator-Freezer ·Automatic Defrost ·Bottom Mounted Freezer ·Without Through-the-Door-Ice Service Kitchen Aid Corporation Model(s):KBFS25EW* Capacity: 24.8 Cubic Feet Estimated...
.... Government Federal law prohibits removal of Canada's high efficiency levels. Its energy performance meets or exceeds the Government of this label before consumer purchase. Canada Refrigerator-Freezer ·Automatic Defrost ·Bottom Mounted Freezer ·Without Through-the-Door-Ice Service Kitchen Aid Corporation Model(s):KBFS25EW* Capacity: 24.8 Cubic Feet Estimated...


