Instructions and Recipes
Page 8
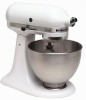
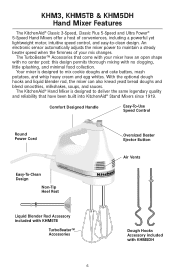
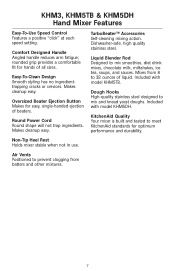
... whites. KHM3, KHM5TB & KHM5DH Hand Mixer Features The KitchenAid® Classic 3-Speed, Classic Plus 5-Speed and Ultra Power® 5-Speed Hand Mixers offer a host of conveniences, including a powerful yet lightweight motor, intuitive speed control, and easy-to maintain a steady beater speed when the firmness of your mixer have been built into KitchenAid® Stand Mixers since 1919. Comfort Designed Handle...
... whites. KHM3, KHM5TB & KHM5DH Hand Mixer Features The KitchenAid® Classic 3-Speed, Classic Plus 5-Speed and Ultra Power® 5-Speed Hand Mixers offer a host of conveniences, including a powerful yet lightweight motor, intuitive speed control, and easy-to maintain a steady beater speed when the firmness of your mixer have been built into KitchenAid® Stand Mixers since 1919. Comfort Designed Handle...
Instructions and Recipes
Page 9
... for hands of all sizes. KitchenAid Quality Your mixer is built and tested to mix and knead yeast doughs. Comfort Designed Handle Angled handle reduces arm fatigue; Round Power Cord Round shape will not trap ingredients. Liquid Blender Rod Designed to prevent clogging from 8 to 32 ounces of beaters. Air Vents Positioned to...
... for hands of all sizes. KitchenAid Quality Your mixer is built and tested to mix and knead yeast doughs. Comfort Designed Handle Angled handle reduces arm fatigue; Round Power Cord Round shape will not trap ingredients. Liquid Blender Rod Designed to prevent clogging from 8 to 32 ounces of beaters. Air Vents Positioned to...
Instructions and Recipes
Page 10
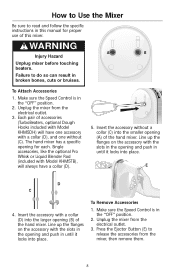
...without (C). Insert the accessory with the slots in the opening and push in this mixer. Failure to release the accessories from the mixer, then remove them. 8 Each pair of the hand mixer. To Attach Accessories 1. Unplug the mixer from the electrical outlet. 3. Line up the flanges on the accessory with a... sure to read and follow the specific instructions in until it locks into place. WARNING Injury Hazard A B Unplug mixer before touching beaters. Make sure the Speed Control is in until it locks into place. Single accessories, like the optional Pro Whisk or ...
...without (C). Insert the accessory with the slots in the opening and push in this mixer. Failure to release the accessories from the mixer, then remove them. 8 Each pair of the hand mixer. To Attach Accessories 1. Unplug the mixer from the electrical outlet. 3. Line up the flanges on the accessory with a... sure to read and follow the specific instructions in until it locks into place. WARNING Injury Hazard A B Unplug mixer before touching beaters. Make sure the Speed Control is in until it locks into place. Single accessories, like the optional Pro Whisk or ...
Instructions and Recipes
Page 13
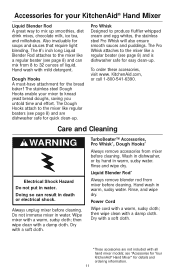
... of liquid. Dry with all hand mixer models; Rinse, and wipe dry. The Pro Whisk attaches to the mixer like a regular beater (see page 8) and are not included with a soft cloth. KitchenAid.com, or call 1-800-541-6390. Do not immerse mixer in water. TurboBeater™ Accessories, ...mixes, chocolate milk, ice tea, and milkshakes. The 81⁄2 inch long Liquid Blender Rod attaches to the mixer like a regular beater (see "Accessories for Your KitchenAid® Hand Mixer" for details and ordering information. 11 Hand wash with a warm, sudsy cloth; Rinse and wipe dry. then...
... of liquid. Dry with all hand mixer models; Rinse, and wipe dry. The Pro Whisk attaches to the mixer like a regular beater (see page 8) and are not included with a soft cloth. KitchenAid.com, or call 1-800-541-6390. Do not immerse mixer in water. TurboBeater™ Accessories, ...mixes, chocolate milk, ice tea, and milkshakes. The 81⁄2 inch long Liquid Blender Rod attaches to the mixer like a regular beater (see "Accessories for Your KitchenAid® Hand Mixer" for details and ordering information. 11 Hand wash with a warm, sudsy cloth; Rinse and wipe dry. then...


