
User Manual
Page 4
... areas, nor on the transceiver. The transceiver may overheat. • Do not modify this transceiver unless instructed by this manual or by KENWOOD documentation. • When using a regulated power supply, connect the specified DC cable (option) to prevent fire, personal injury, or transceiver... damage: • Do not transmit with high output power for extended periods. Contact your authorized KENWOOD dealer, customer service, or service station. PRECAUTIONS Please observe the following precautions to the DC IN jack on unstable surfaces. •...
... areas, nor on the transceiver. The transceiver may overheat. • Do not modify this transceiver unless instructed by this manual or by KENWOOD documentation. • When using a regulated power supply, connect the specified DC cable (option) to prevent fire, personal injury, or transceiver... damage: • Do not transmit with high output power for extended periods. Contact your authorized KENWOOD dealer, customer service, or service station. PRECAUTIONS Please observe the following precautions to the DC IN jack on unstable surfaces. •...
User Manual
Page 5
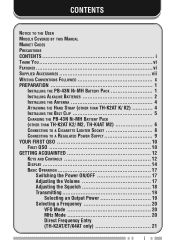
... WRITING CONVENTIONS FOLLOWED x PREPARATION 1 INSTALLING THE PB-43N NI-MH BATTERY PACK 1 INSTALLING ALKALINE BATTERIES 2 INSTALLING THE ANTENNA 4 ATTACHING THE HAND STRAP (OTHER THAN TH-K2AT K/ K2 4 INSTALLING THE BELT CLIP 5 CHARGING THE PB-43N NI-MH BATTERY PACK (OTHER THAN TH-K2AT K2/ M2, TH-K4AT M2 6 CONNECTING TO A CIGARETTE LIGHTER SOCKET 8 CONNECTING TO A REGULATED... Volume 17 Adjusting the Squelch 18 Transmitting 19 Selecting an Output Power 19 Selecting a Frequency 20 VFO Mode 20 MHz Mode 20 Direct Frequency Entry (TH-K2AT/ET/K4AT only 21 i
... WRITING CONVENTIONS FOLLOWED x PREPARATION 1 INSTALLING THE PB-43N NI-MH BATTERY PACK 1 INSTALLING ALKALINE BATTERIES 2 INSTALLING THE ANTENNA 4 ATTACHING THE HAND STRAP (OTHER THAN TH-K2AT K/ K2 4 INSTALLING THE BELT CLIP 5 CHARGING THE PB-43N NI-MH BATTERY PACK (OTHER THAN TH-K2AT K2/ M2, TH-K4AT M2 6 CONNECTING TO A CIGARETTE LIGHTER SOCKET 8 CONNECTING TO A REGULATED... Volume 17 Adjusting the Squelch 18 Transmitting 19 Selecting an Output Power 19 Selecting a Frequency 20 VFO Mode 20 MHz Mode 20 Direct Frequency Entry (TH-K2AT/ET/K4AT only 21 i

User Manual
Page 8
OPERATOR CONVENIENCES 82 APO (AUTO POWER OFF 82 BATTERY LIFE 83 REMAINING BATTERY CAPACITY 83 BATTERY SAVER 84 BEAT SHIFT 85 BEEP FUNCTION 85 BUSY CHANNEL LOCKOUT 86 FREQUENCY STEP SIZE 86 LAMP 88 LOCK FUNCTION 88 Tuning Control Unlock 89 ... PG-4Y PC Interface Cable 106 Using the MCP-1A Software 107 TROUBLESHOOTING 108 GENERAL INFORMATION 108 Service 108 Service Note 109 Cleaning 110 BACKUP BATTERY 110 iv
OPERATOR CONVENIENCES 82 APO (AUTO POWER OFF 82 BATTERY LIFE 83 REMAINING BATTERY CAPACITY 83 BATTERY SAVER 84 BEAT SHIFT 85 BEEP FUNCTION 85 BUSY CHANNEL LOCKOUT 86 FREQUENCY STEP SIZE 86 LAMP 88 LOCK FUNCTION 88 Tuning Control Unlock 89 ... PG-4Y PC Interface Cable 106 Using the MCP-1A Software 107 TROUBLESHOOTING 108 GENERAL INFORMATION 108 Service 108 Service Note 109 Cleaning 110 BACKUP BATTERY 110 iv

User Manual
Page 10
...This small FM portable transceiver features a 5-watt transmitter and various selective calls without installing options. Though user friendly, this KENWOOD TH-K2AT/ E/ ET, TH-K4AT/ E transceiver. It has been developed by a team of engineers determined to manage the memory channel contents. &#...8226; Built-in the coming years. Allow the manual to 5 W operation) • 100 memory channels or 50 channels with names • Long operation period with a Ni-MH battery...
...This small FM portable transceiver features a 5-watt transmitter and various selective calls without installing options. Though user friendly, this KENWOOD TH-K2AT/ E/ ET, TH-K4AT/ E transceiver. It has been developed by a team of engineers determined to manage the memory channel contents. &#...8226; Built-in the coming years. Allow the manual to 5 W operation) • 100 memory channels or 50 channels with names • Long operation period with a Ni-MH battery...

User Manual
Page 11
Quantity Accessory Part Number TH-K2AT K K2 M M2 Belt hook (w/ screws) Antenna J29-0709-XX 1 1 1 1 T90-1018-XX 1 1 1 1 Strap Battery case J69-0342-XX - - 1 1 A02-3817-XX - 1 - 1 Ni-MH battery Charger W09-0991-XX 1 - 1 - W08-0959-XX - - 1 - W08-0960-XX 1 - - - C B62-1695-XX - - - 1 I B62-1702-XX - - - - vii We recommend you keep the box and...
Quantity Accessory Part Number TH-K2AT K K2 M M2 Belt hook (w/ screws) Antenna J29-0709-XX 1 1 1 1 T90-1018-XX 1 1 1 1 Strap Battery case J69-0342-XX - - 1 1 A02-3817-XX - 1 - 1 Ni-MH battery Charger W09-0991-XX 1 - 1 - W08-0959-XX - - 1 - W08-0960-XX 1 - - - C B62-1695-XX - - - 1 I B62-1702-XX - - - - vii We recommend you keep the box and...

User Manual
Page 13
Ni-MH battery W09-0991-XX - 1 Charger W08-0959-XX - 1 W08-0960-XX - - I B62-1702-XX - 1 F B62-1757-XX - 1 D B62-1758-XX - 1 Warranty card - - 1 ix Quantity Accessory Part Number TH-K4AT TH-K4E M2 E3 Belt hook (w/ screws) J29-0709-XX 1 1 Antenna T90-1019-XX 1 1 Strap J69-0342-XX 1 1 Battery case A02-3817-XX 1 - E B62-1696-XX 1 1 S B62-1697-XX - 1 G B62-1699-XX - 1 Instruction Manual C B62-1695-XX 1 -
Ni-MH battery W09-0991-XX - 1 Charger W08-0959-XX - 1 W08-0960-XX - - I B62-1702-XX - 1 F B62-1757-XX - 1 D B62-1758-XX - 1 Warranty card - - 1 ix Quantity Accessory Part Number TH-K4AT TH-K4E M2 E3 Belt hook (w/ screws) J29-0709-XX 1 1 Antenna T90-1019-XX 1 1 Strap J69-0342-XX 1 1 Battery case A02-3817-XX 1 - E B62-1696-XX 1 1 S B62-1697-XX - 1 G B62-1699-XX - 1 Instruction Manual C B62-1695-XX 1 -

User Manual
Page 15
..., refer to prevent accidentally pressing the release latch and removing the battery pack. 1 PREPARATION INSTALLING THE PB-43N Ni-MH BATTERY PACK Note: Because the battery pack is provided uncharged, you must charge the battery pack before using it with the corresponding grooves on the upper rear of the transceiver,... then firmly press the battery pack to lock it in place. 3 Flip the safety catch into place to "CHARGING THE PB-43N Ni-MH BATTERY PACK (Other than TH-K2AT K2/ M2, TH-K4AT M2)" {page 6}. 1 Unlock (open) the safety catch located...
..., refer to prevent accidentally pressing the release latch and removing the battery pack. 1 PREPARATION INSTALLING THE PB-43N Ni-MH BATTERY PACK Note: Because the battery pack is provided uncharged, you must charge the battery pack before using it with the corresponding grooves on the upper rear of the transceiver,... then firmly press the battery pack to lock it in place. 3 Flip the safety catch into place to "CHARGING THE PB-43N Ni-MH BATTERY PACK (Other than TH-K2AT K2/ M2, TH-K4AT M2)" {page 6}. 1 Unlock (open) the safety catch located...

User Manual
Page 16
Lift the battery pack away from the transceiver. INSTALLING ALKALINE BATTERIES 1 To open the BT-14 battery case lid, insert your thumb or finger into the hole on the top of the battery case, then pull the cover up. 2 4 To remove the battery pack, lift the safety catch, then press the release latch to unlock the battery pack.
Lift the battery pack away from the transceiver. INSTALLING ALKALINE BATTERIES 1 To open the BT-14 battery case lid, insert your thumb or finger into the hole on the top of the battery case, then pull the cover up. 2 4 To remove the battery pack, lift the safety catch, then press the release latch to unlock the battery pack.

User Manual
Page 17
... implement under only the lip of Alkaline batteries. Thus, the high battery power indicator may not appear even though new Alkaline batteries are installed {page 83}. x The voltage of new Alkaline batteries varies slightly, depending on top click. 4 To install the battery case onto (or remove it is not... you do not damage the release latch. 3 x To lift the battery pack safety catch, use for several months. x Always replace all batteries from the case when it from) the transceiver, follow steps 1 to 3 of battery case, then close the cover until the locking tabs on the manufacturer....
... implement under only the lip of Alkaline batteries. Thus, the high battery power indicator may not appear even though new Alkaline batteries are installed {page 83}. x The voltage of new Alkaline batteries varies slightly, depending on top click. 4 To install the battery case onto (or remove it is not... you do not damage the release latch. 3 x To lift the battery pack safety catch, use for several months. x Always replace all batteries from the case when it from) the transceiver, follow steps 1 to 3 of battery case, then close the cover until the locking tabs on the manufacturer....

User Manual
Page 20
...PB-43N Ni-MH BATTERY PACK (OTHER THAN TH-K2AT K2/ M2, TH-K4AT M2) The Ni-MH battery pack can be charged after it has been installed onto the transceiver. (The battery pack is provided uncharged for safety purposes.) 1 Confirm that the transceiver power is OFF. • While charging the battery pack, leave the ...2 Insert the charger plug into an AC wall outlet. • Charging starts. 4 It takes approximately 12 hours to charge an empty PB-43N Ni-MH battery pack. After 12 hours, remove the charger plug from the transceiver DC IN jack. 5 Unplug the charger from the AC wall outlet. 6 DC IN jack...
...PB-43N Ni-MH BATTERY PACK (OTHER THAN TH-K2AT K2/ M2, TH-K4AT M2) The Ni-MH battery pack can be charged after it has been installed onto the transceiver. (The battery pack is provided uncharged for safety purposes.) 1 Confirm that the transceiver power is OFF. • While charging the battery pack, leave the ...2 Insert the charger plug into an AC wall outlet. • Charging starts. 4 It takes approximately 12 hours to charge an empty PB-43N Ni-MH battery pack. After 12 hours, remove the charger plug from the transceiver DC IN jack. 5 Unplug the charger from the AC wall outlet. 6 DC IN jack...

User Manual
Page 21
... does not start. Repeat this case, turn the transceiver power ON and then OFF again to initiate charging. x If the battery pack is recharged repeatedly before the battery pack is not fully used for more than 60°C (140° F) during charging, the transceiver stops charging. In ...x Do not plug the charger into the DC IN jack for a long time, the battery pack capacity temporarily decreases. This could result in order to discharge the battery pack, then recharge the battery pack as possible after the charging period is designed to more than 24 hours. In this...
... does not start. Repeat this case, turn the transceiver power ON and then OFF again to initiate charging. x If the battery pack is recharged repeatedly before the battery pack is not fully used for more than 60°C (140° F) during charging, the transceiver stops charging. In ...x Do not plug the charger into the DC IN jack for a long time, the battery pack capacity temporarily decreases. This could result in order to discharge the battery pack, then recharge the battery pack as possible after the charging period is designed to more than 24 hours. In this...

User Manual
Page 22
... source via a DC-DC converter, only use the PG-2W to the cigarette lighter plug, the transceiver automatically starts charging the PB-43N Ni-MH battery pack. x If the input voltage exceeds approximately 16.5 V, warning beeps sound and "DC ERR" appears. 8 Using the PG-2W DC cable in the ...background. While you operate the transceiver, it charges the PB-43N Ni-MH battery pack in this situation may cause a fire. Extensive voltage could result in your vehicle, use an optional PG-3J Cigarette Lighter cable. DC-DC Converter...
... source via a DC-DC converter, only use the PG-2W to the cigarette lighter plug, the transceiver automatically starts charging the PB-43N Ni-MH battery pack. x If the input voltage exceeds approximately 16.5 V, warning beeps sound and "DC ERR" appears. 8 Using the PG-2W DC cable in the ...background. While you operate the transceiver, it charges the PB-43N Ni-MH battery pack in this situation may cause a fire. Extensive voltage could result in your vehicle, use an optional PG-3J Cigarette Lighter cable. DC-DC Converter...

User Manual
Page 23
... cable to the DC IN jack of both the transceiver and the DC power supply is gradually reduced to charge the PB-43N Ni-MH battery pack. If the input voltage exceeds approximately 16.5 V, warning beeps sound and "DC ERR" appears. Note: x If the DC power supply voltage is connected with... the DC IN jack, the transceiver automatically initiates charging the PB-43N Ni-MH battery pack. While a DC power supply is below 12.0 V DC, you may not be between 12.0 V and 16.0 V to the negative (-) terminal. Remove the DC IN...
... cable to the DC IN jack of both the transceiver and the DC power supply is gradually reduced to charge the PB-43N Ni-MH battery pack. If the input voltage exceeds approximately 16.5 V, warning beeps sound and "DC ERR" appears. Note: x If the DC power supply voltage is connected with... the DC IN jack, the transceiver automatically initiates charging the PB-43N Ni-MH battery pack. While a DC power supply is below 12.0 V DC, you may not be between 12.0 V and 16.0 V to the negative (-) terminal. Remove the DC IN...

User Manual
Page 29
... {page 88}. !4 Appears when the Memory Channel Lockout function is ON {page 67}. !5 Appears when the VOX function is activated {page 65}. Confirm the remaining battery capacity when the transceiver transmits {page 83}. 15 u Appears when a Priority Scan function is ON {page 96}. !6 S-meter (RX) and remaining...
... {page 88}. !4 Appears when the Memory Channel Lockout function is ON {page 67}. !5 Appears when the VOX function is activated {page 65}. Confirm the remaining battery capacity when the transceiver transmits {page 83}. 15 u Appears when a Priority Scan function is ON {page 96}. !6 S-meter (RX) and remaining...

User Manual
Page 33
s Selecting an Output Power Selecting a lower transmission power is the best way to reduce battery consumption, if communication is 10 minutes) {page 94}, the internal timeout timer generates a warning beep and the transceiver stops transmitting. In this case, release [PTT] ...
s Selecting an Output Power Selecting a lower transmission power is the best way to reduce battery consumption, if communication is 10 minutes) {page 94}, the internal timeout timer generates a warning beep and the transceiver stops transmitting. In this case, release [PTT] ...

User Manual
Page 41
Page M.NAME 14 Memory name 6 characters - 48 MDF SAV APO CK1 HLD Memory name/ 15 Frequency MN/ FRQ display MN 49 OFF/ 0.2/ 0.4/ 16 Battery saver 0.6/ 0.8/ 1.0/ 1.0 84 2.0/ 3.0/ 4.0/ 5.0 17 Automatic Power-OFF OFF/ 30/ 60/ 90/ 120/ 180 min. 30 82 18 CALL key CALL/ 1750 CALL/ 1750 36, 64 19 ...
Page M.NAME 14 Memory name 6 characters - 48 MDF SAV APO CK1 HLD Memory name/ 15 Frequency MN/ FRQ display MN 49 OFF/ 0.2/ 0.4/ 16 Battery saver 0.6/ 0.8/ 1.0/ 1.0 84 2.0/ 3.0/ 4.0/ 5.0 17 Automatic Power-OFF OFF/ 30/ 60/ 90/ 120/ 180 min. 30 82 18 CALL key CALL/ 1750 CALL/ 1750 36, 64 19 ...

User Manual
Page 97
...-43N (7.2 V) BT-14 (9.0 V) Output Power H M L H M L Operating Time/ Hours (Approx.) TH-K2AT/ E/ ET TH-K4AT/ E 5.5 5.0 8.5 7.5 11.0 10.0 4.0 3.0 8.0 7.0 10.5 9.5 REMAINING BATTERY CAPACITY You can confirm the remaining battery capacity when you , in low power. The operating times listed in the table below are measured under the following cyclic conditions: TX: 6 seconds, RX: 6 seconds, ...
...-43N (7.2 V) BT-14 (9.0 V) Output Power H M L H M L Operating Time/ Hours (Approx.) TH-K2AT/ E/ ET TH-K4AT/ E 5.5 5.0 8.5 7.5 11.0 10.0 4.0 3.0 8.0 7.0 10.5 9.5 REMAINING BATTERY CAPACITY You can confirm the remaining battery capacity when you , in low power. The operating times listed in the table below are measured under the following cyclic conditions: TX: 6 seconds, RX: 6 seconds, ...

User Manual
Page 98
...exit. However, there is a greater chance of the transceiver. Note: You may not be able to cancel. To reduce battery consumption, this function shuts the receiver circuit OFF for the battery saver: 1 Press [MENU]. 2 Turn the Tuning control to select Menu No. 16 (SAV). 3 Press [MENU].... 0.4, 0.6, 0.8, 1.0 (default), 2.0, 3.0, 4.0, and 5.0 seconds. 5 Press [MENU] to store the setting or [PTT] to transmit at high power (" " position) if the battery remaining indicator shows low battery power. It automatically activates when the squelch is closed and no key is turned OFF. 84 : High...
...exit. However, there is a greater chance of the transceiver. Note: You may not be able to cancel. To reduce battery consumption, this function shuts the receiver circuit OFF for the battery saver: 1 Press [MENU]. 2 Turn the Tuning control to select Menu No. 16 (SAV). 3 Press [MENU].... 0.4, 0.6, 0.8, 1.0 (default), 2.0, 3.0, 4.0, and 5.0 seconds. 5 Press [MENU] to store the setting or [PTT] to transmit at high power (" " position) if the battery remaining indicator shows low battery power. It automatically activates when the squelch is closed and no key is turned OFF. 84 : High...

User Manual
Page 99
...MENU] to store the setting or [PTT] to cancel. x While the transceiver is communicating in order to detect erroneous operations and malfunctions. x Battery Saver does not function while scanning. BEAT SHIFT Since the transceiver uses a microprocessor to control various functions of the transceiver, the CPU clock oscillator's... harmonics or image may appear on some spots of the transceiver. In this function ON in PC Mode {page107}, the Battery Saver does not function. We recommend you leave this case, turn the beep function OFF: 1 Press [MENU]. 2 Turn the Tuning ...
...MENU] to store the setting or [PTT] to cancel. x While the transceiver is communicating in order to detect erroneous operations and malfunctions. x Battery Saver does not function while scanning. BEAT SHIFT Since the transceiver uses a microprocessor to control various functions of the transceiver, the CPU clock oscillator's... harmonics or image may appear on some spots of the transceiver. In this function ON in PC Mode {page107}, the Battery Saver does not function. We recommend you leave this case, turn the beep function OFF: 1 Press [MENU]. 2 Turn the Tuning ...

User Manual
Page 109
The table below shows the approximate output power when the transceiver operates with different types of battery or DC power sources. 95 Note: A warning beep sounds even if you press [F], [PTT] the icon cycles from transmitting, or to eliminate accidental transmissions ... transmission to prevent unauthorized individuals from © © , and then back to transmit while TX Inhibit is ON. The output power varies depending on the battery type and operating voltage. TX POWER To change the transmission output power, press [F], [PTT]. • Each time you select Menu No. 27 (BP) OFF {...
The table below shows the approximate output power when the transceiver operates with different types of battery or DC power sources. 95 Note: A warning beep sounds even if you press [F], [PTT] the icon cycles from transmitting, or to eliminate accidental transmissions ... transmission to prevent unauthorized individuals from © © , and then back to transmit while TX Inhibit is ON. The output power varies depending on the battery type and operating voltage. TX POWER To change the transmission output power, press [F], [PTT]. • Each time you select Menu No. 27 (BP) OFF {...

